はじめに
iOSのバージョンアップもあり、CotoGotoのアプリの最新化を図るために久しぶりにライブラリのアップデートをしたのですが、リジェクトになってしまい、その理由と対応をまとめておきます。
まずは、リジェクトをくらった内容ですね。
Guideline 4.0 - Design
We noticed that the user is taken to the default web browser to sign in or register for an account, which provides a poor user experience.
Next Steps
To resolve this issue, please revise your app to enable users to sign in or register for an account in the app.
You may also choose to implement the Safari View Controller API to display web content within your app. The Safari View Controller allows the display of a URL and inspection of the certificate from an embedded browser in an app so that customers can verify the webpage URL and SSL certificate to confirm they are entering their sign in credentials into a legitimate page.
Resources
For additional information on the Safari View Controller API, please review the What's New in Safari webpage.
Guideline 4.8 - Design - Sign in with Apple
Your app uses a third-party login service, but does not offer Sign in with Apple. Apps that use a third-party login service for account authentication need to offer Sign in with Apple to users as an equivalent option.
Next Steps
Please revise your app to offer Sign in with Apple as an equivalent option for account authentication.
Resources
- Review Sign in with Apple sample code.
- For an overview of design and formatting recommendations for Sign in with Apple, see the Human Interface Guidelines .
- Learn about the benefits of Sign in with Apple.
主には2点の指摘で、
- ユーザー登録の画面遷移の流れをWebサイト(CotoGoto)で登録するように促していたのですが、その際にブラウザ起動していた部分が、別アプリでブラウザが起動するので、UI的にダメですよ。
- ユーザー登録する際に、サードパーティのログイン連携をしているアプリはSign In with Appleの実装が必須ですよ。
が指摘されました。
以前のアプリ申請には通っていたので、最近の流れでダメになったのですね。
なので、この2点を対応していきます。
環境
アプリ側
- Monaca
- Cordova 11.0.0
サーバ側
- Tomcat 9.0
- Java 11
1. アプリ内で Web コンテンツを表示する対応
このアプリではMonacaを使って開発をしています。
Appleからの改修の提案では、Safari View Controller APIを使うとアプリに埋め込まれたブラウザーから URLを表示し、証明書を検査できるため、ユーザーはWebページのURLとSSL証明書を検証して、ユーザー登録を正当なページに入力していることを説明していますね。
ただ、CordovaでSafari View Controller APIを利用するためには、カスタムプラグインが必要で、そちらを利用して対応したいと思います。
こちらは、プラグインをインポートして、以下のような感じで呼び出しの関数を作れば、対応できました。
function openUrl(url, readerMode) {
  SafariViewController.isAvailable(function (available) {
    if (available) {
      SafariViewController.show({
            url: url,
            hidden: false, // default false. You can use this to load cookies etc in the background (see issue #1 for details).
            animated: false, // default true, note that 'hide' will reuse this preference (the 'Done' button will always animate though)
            transition: 'curl', // (this only works in iOS 9.1/9.2 and lower) unless animated is false you can choose from: curl, flip, fade, slide (default)
            enterReaderModeIfAvailable: readerMode, // default false
            tintColor: "#00ffff", // default is ios blue
            barColor: "#0000ff", // on iOS 10+ you can change the background color as well
            controlTintColor: "#ffffff" // on iOS 10+ you can override the default tintColor
          },
          // this success handler will be invoked for the lifecycle events 'opened', 'loaded' and 'closed'
          function(result) {
            if (result.event === 'opened') {
              console.log('opened');
            } else if (result.event === 'loaded') {
              console.log('loaded');
            } else if (result.event === 'closed') {
              console.log('closed');
            }
          },
          function(msg) {
            console.log("KO: " + msg);
          })
    } else {
      // potentially powered by InAppBrowser because that (currently) clobbers window.open
      window.open(url, '_blank', 'location=yes');
    }
  })
}
これで、アプリ内でブラウザが開けるようになりました。
InAppBrowserとのプラグインの差がわかりにくいですが、アプリ外のブラウザに移動しないので?、UI的にもよくなったと思います。
2. Sign in with Appleの対応
2020年4月が期限で、Sign in with Appleの対応をしないといけないのですが、前回のアップデートは緊急リリース対応したので、そういえば、何か言われていた記憶もあります。
今回は、ちゃんと対応しないといけないので、Sign in with Appleの対応をしていきます。
今回はアプリはある状態なので、ボタン追加の部分の対応の部分だけを記述していきます。
2-1. AppleDeveloperの設定
Apple の開発者サイトの Certificates, Identifiers & Profilesページで、アプリの Sign In with Apple を有効にします。
対象のアプリを選択して、その後、Capabilitiesの一覧から「Sign In with Apple」のチェックボックスにチェックを入れて保存します。

Editボタンを押して「Enable as a primary App ID(プライマリ アプリ ID として有効にする)」を設定します。

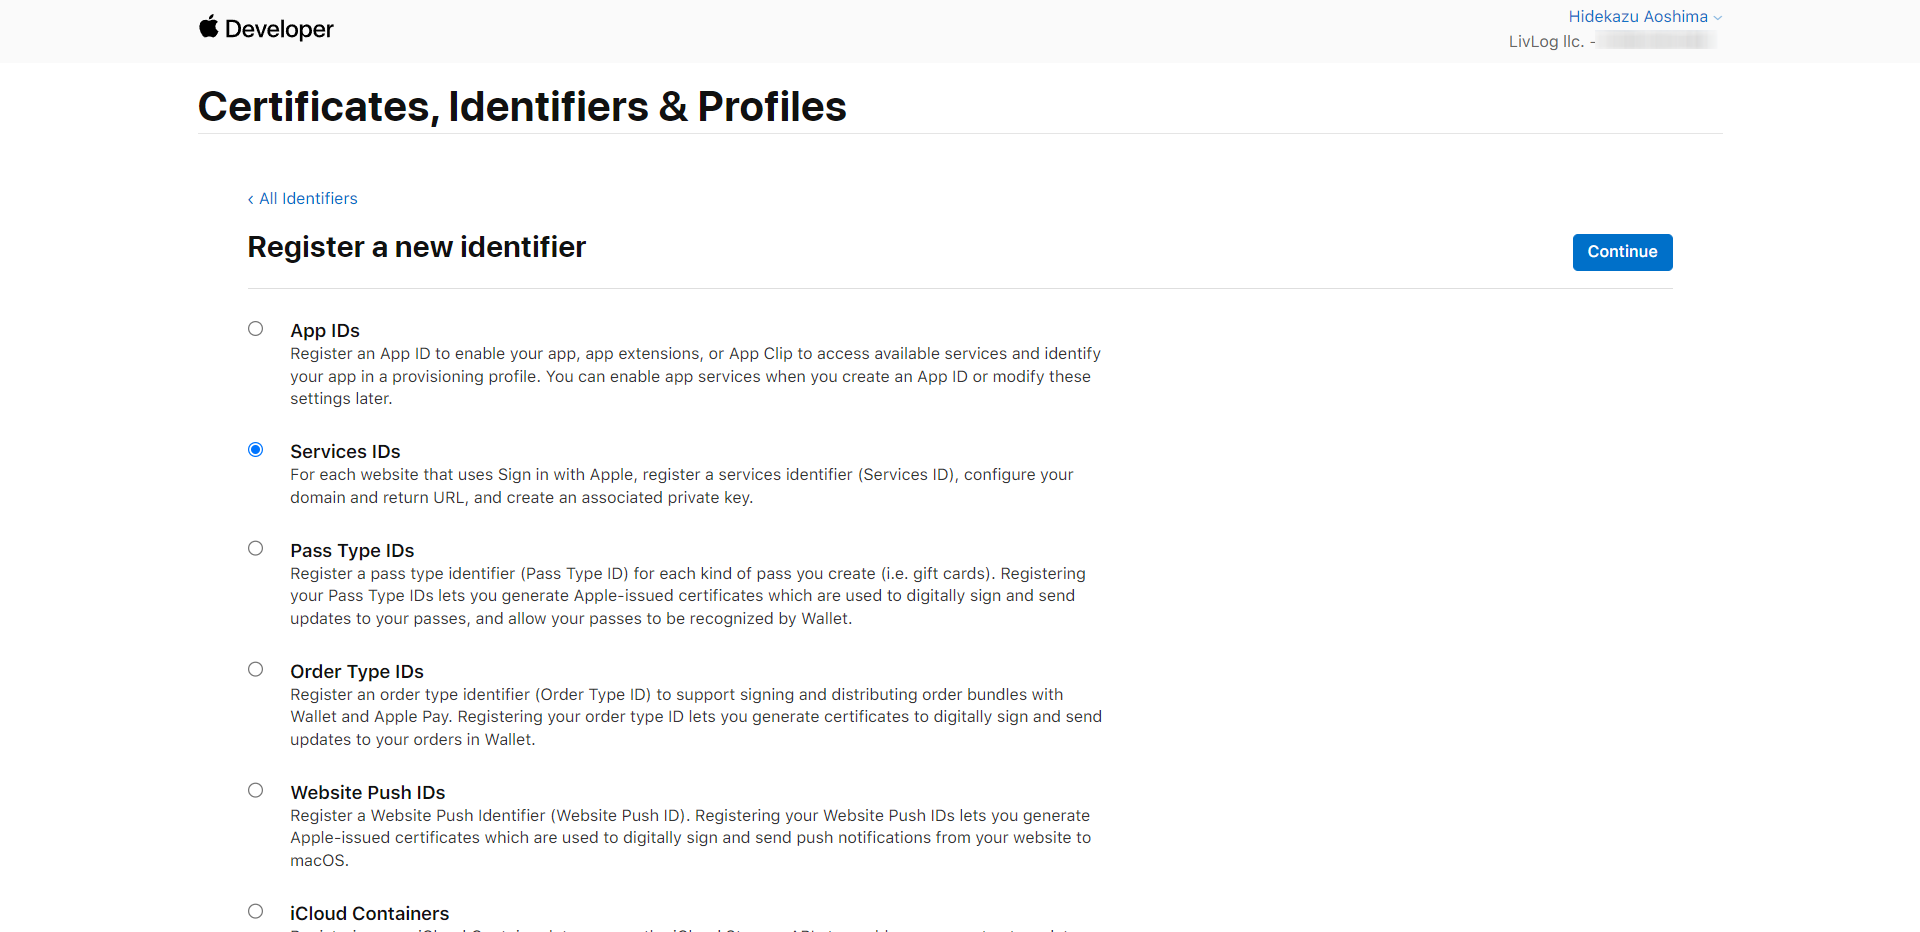
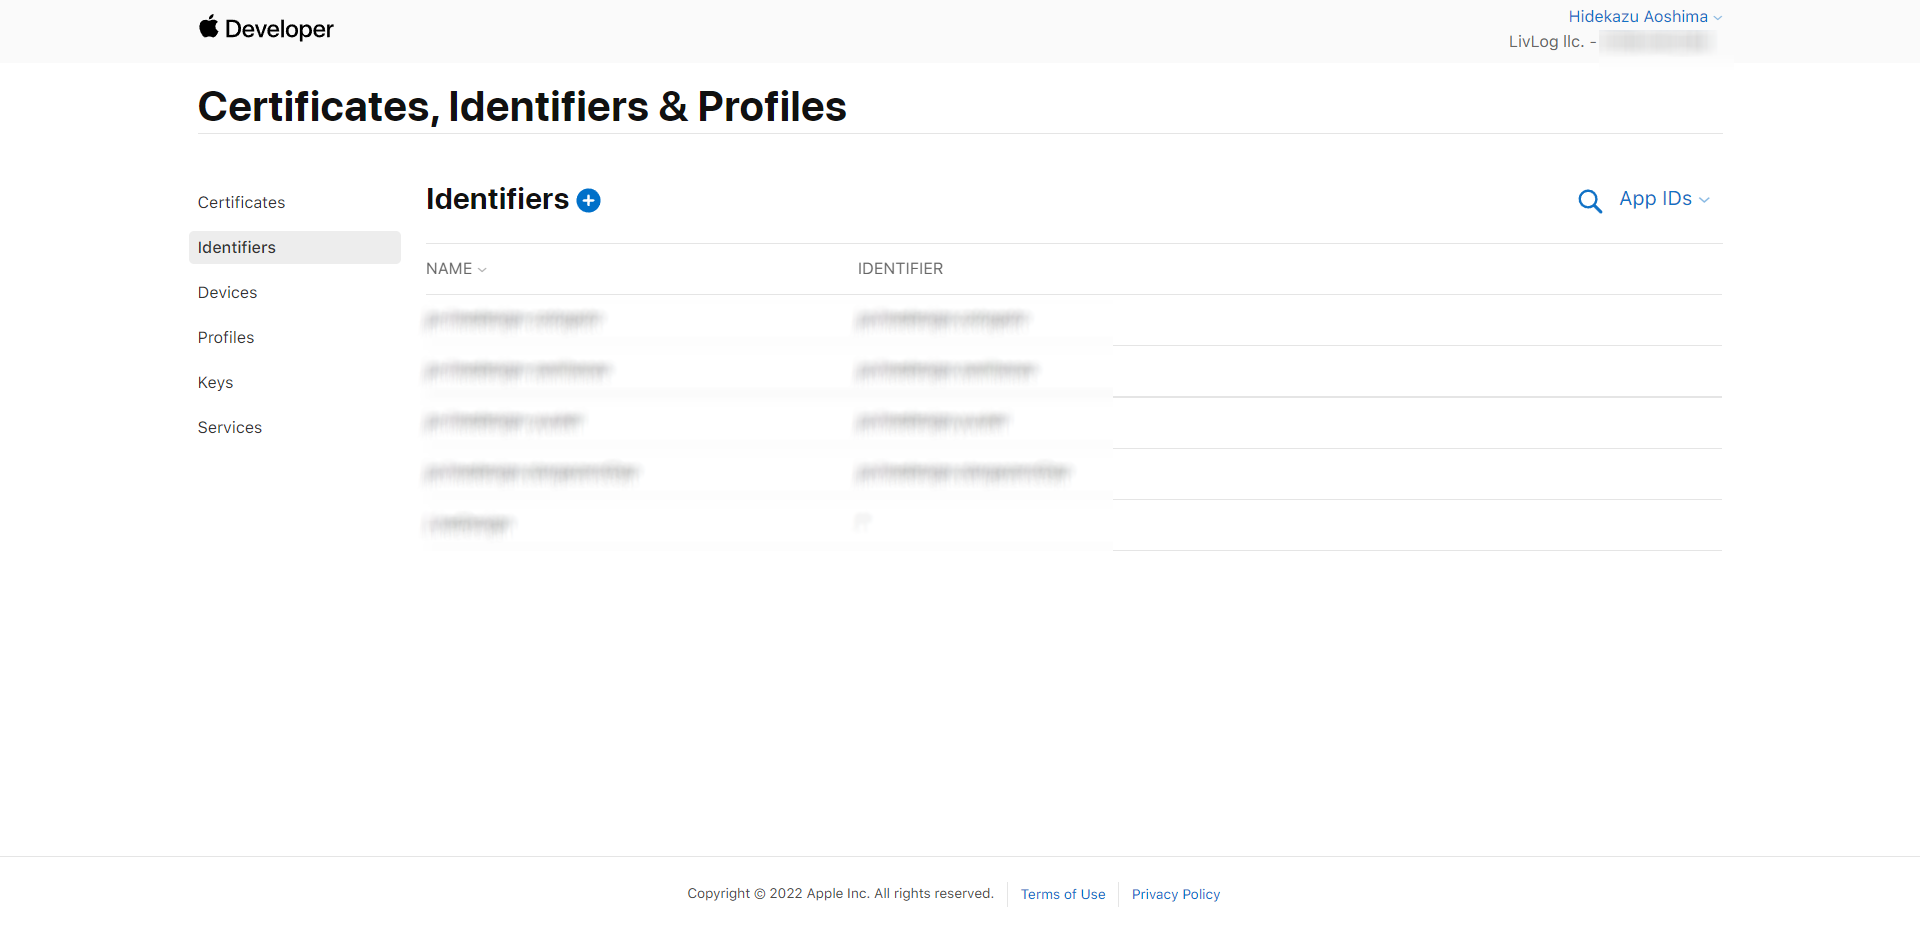
Identifiersに移動します。

新規で「Services Id」タイプの識別子を作成します。
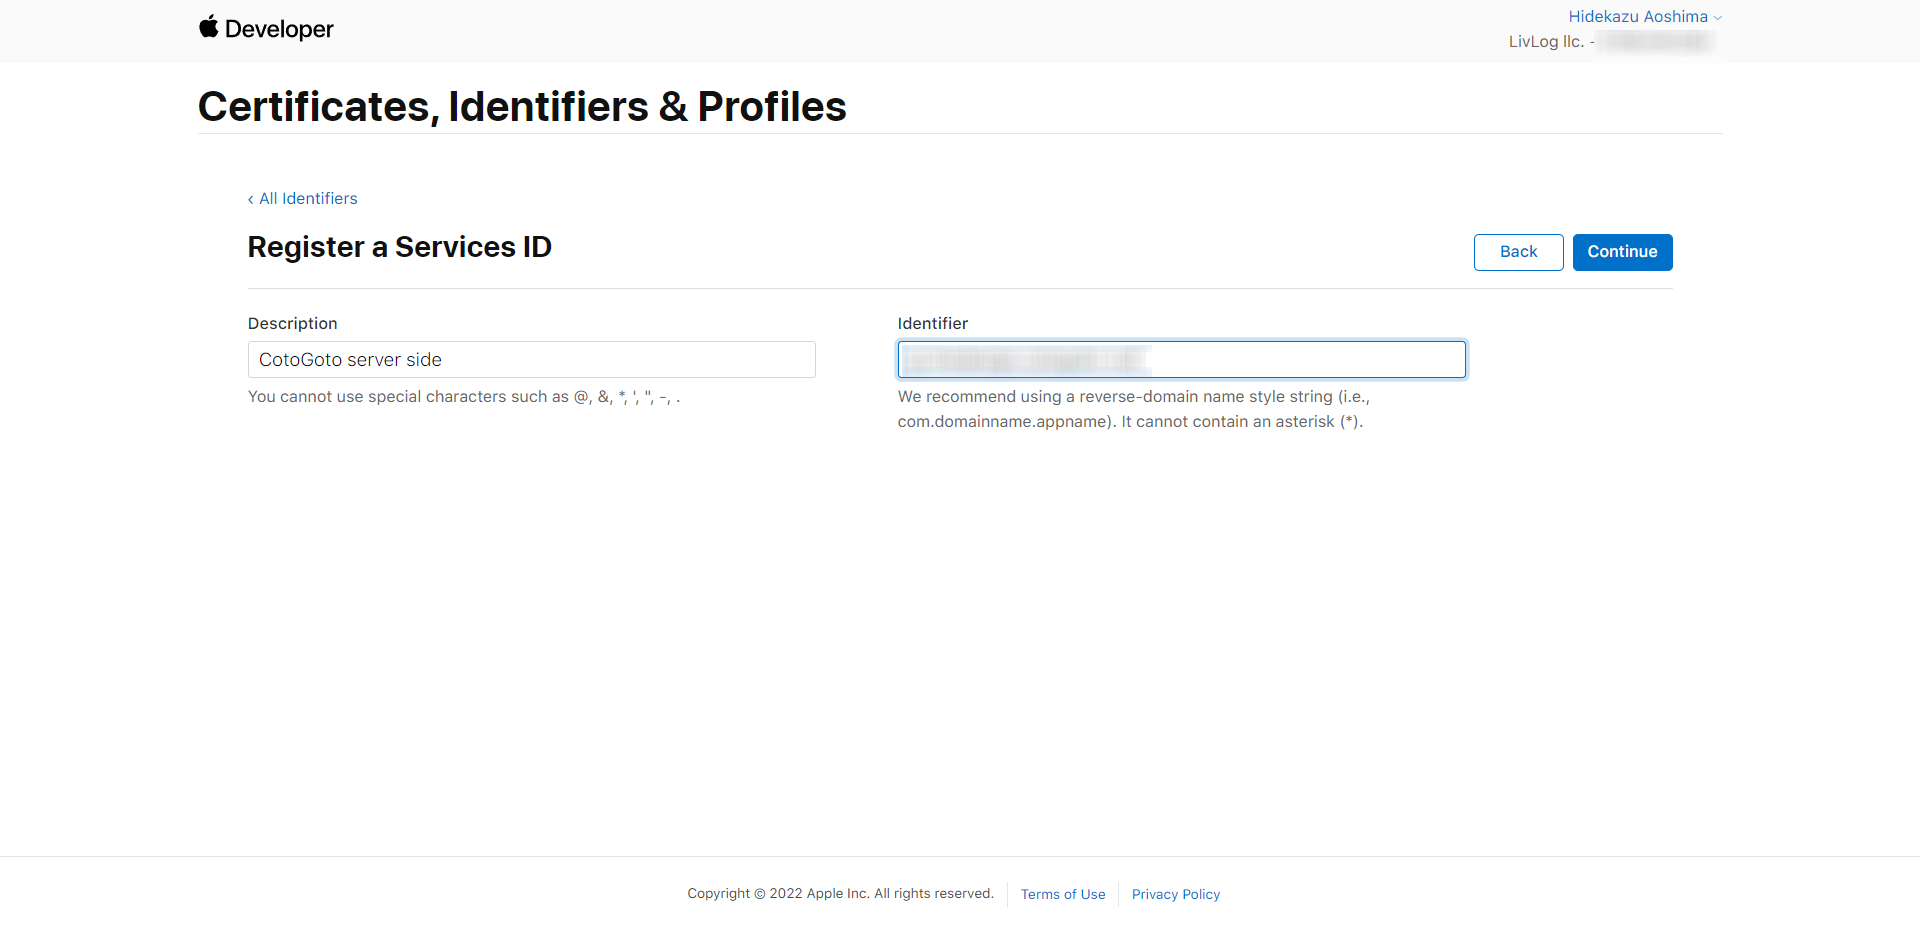
作成したら、Identifiersのページに戻り、作成した「Services Id」を選択します。
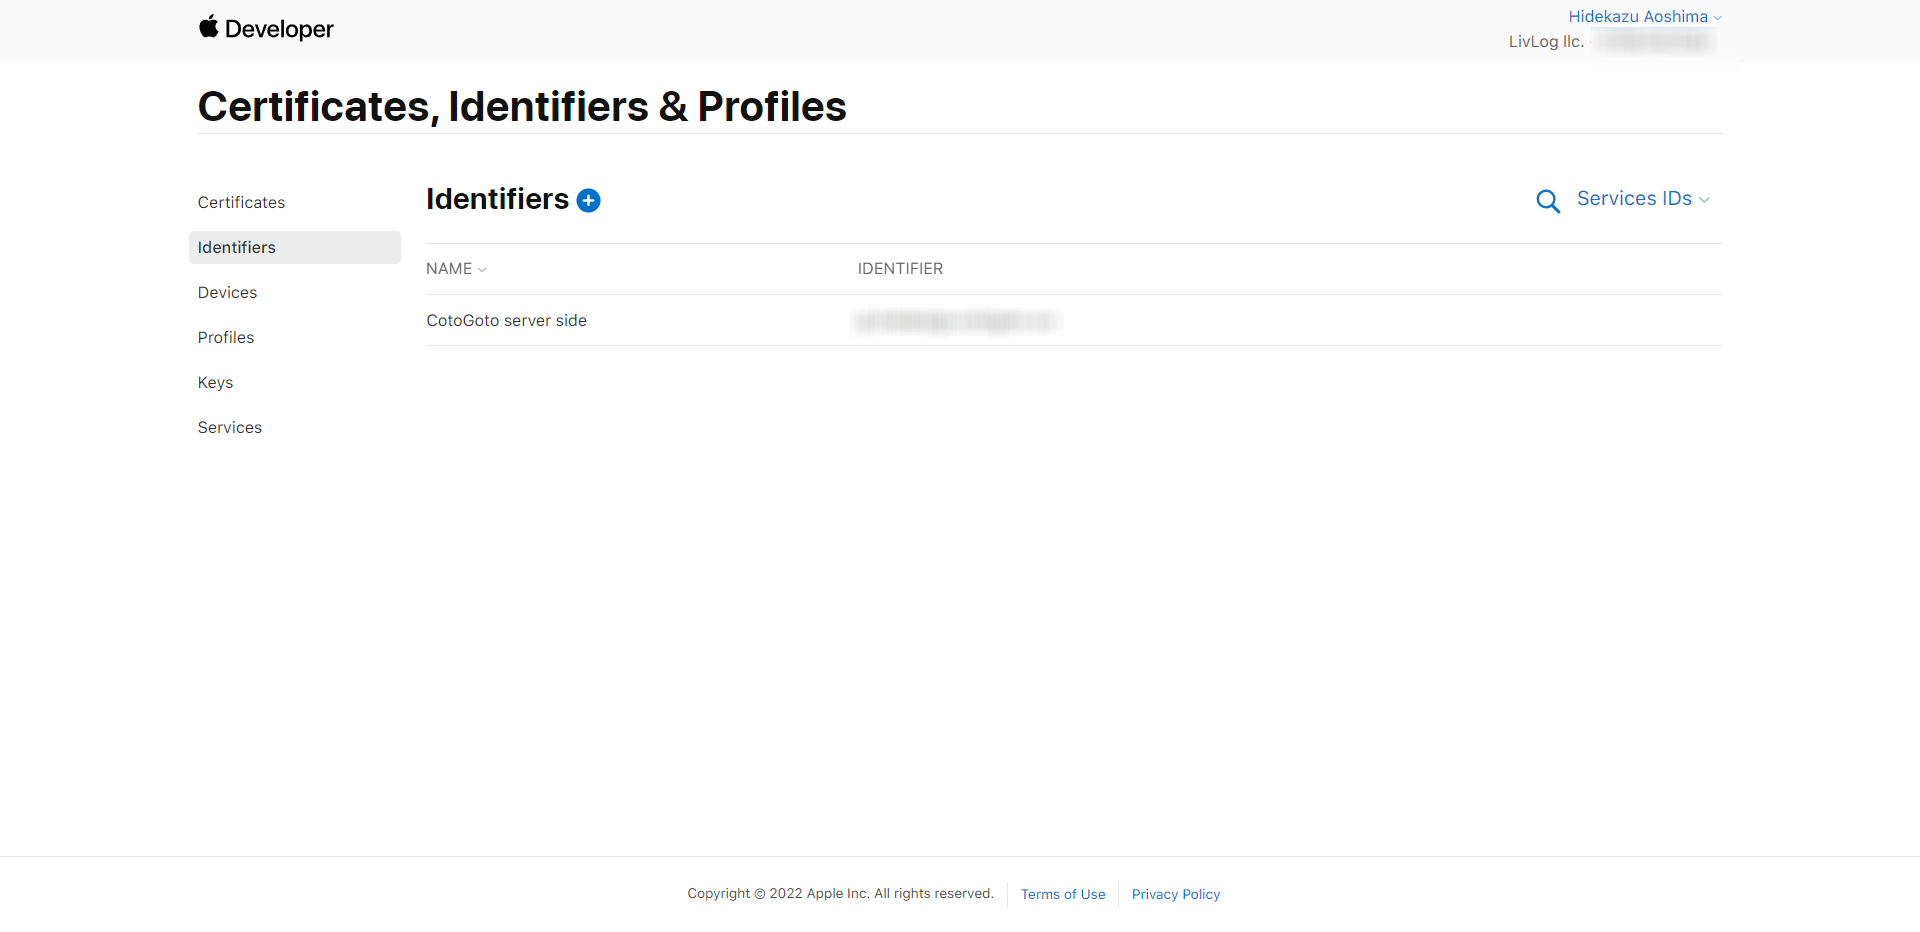
そうすると、Sign In with Appleが表示されているので、チェックを入れて、Configureボタンをクリックします。
ここで、連携させたいApp IDを選択して、WebサイトのドメインやコールバックURLを登録します。
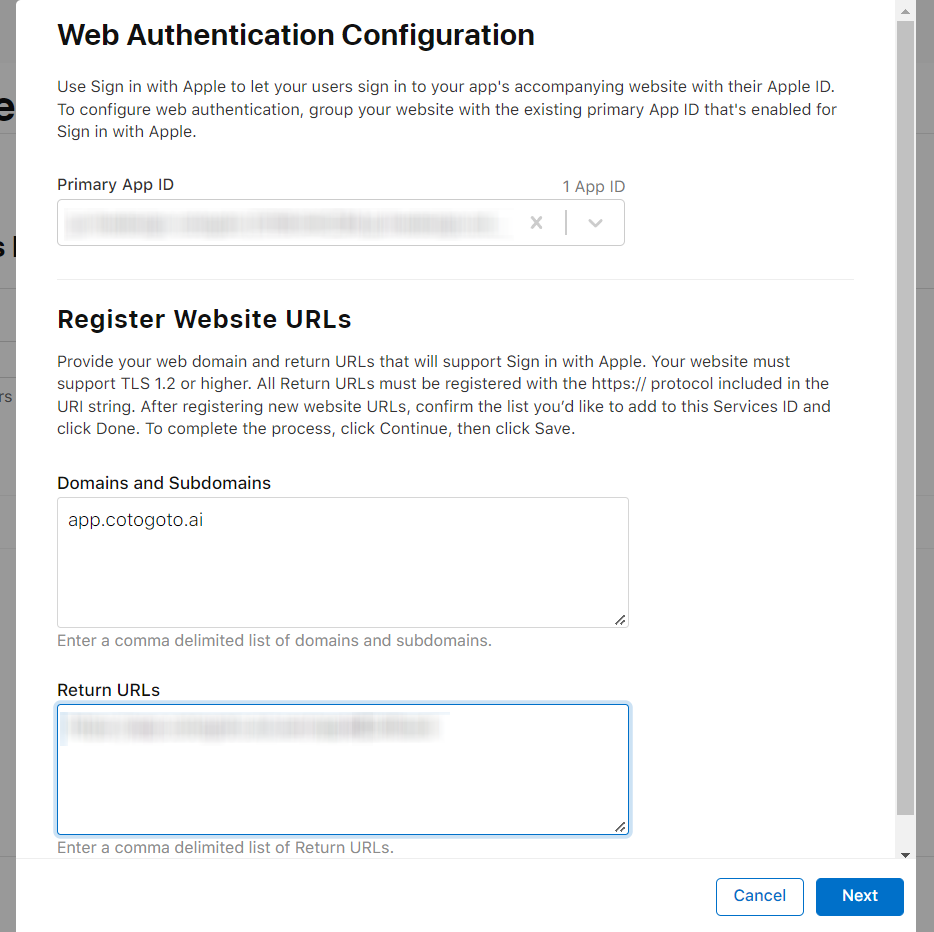

そして、登録が完了します。

2-2. Keyの作成
Appleの秘密鍵を作成し、ダウンロードします。
メニューからKeysに移動します。
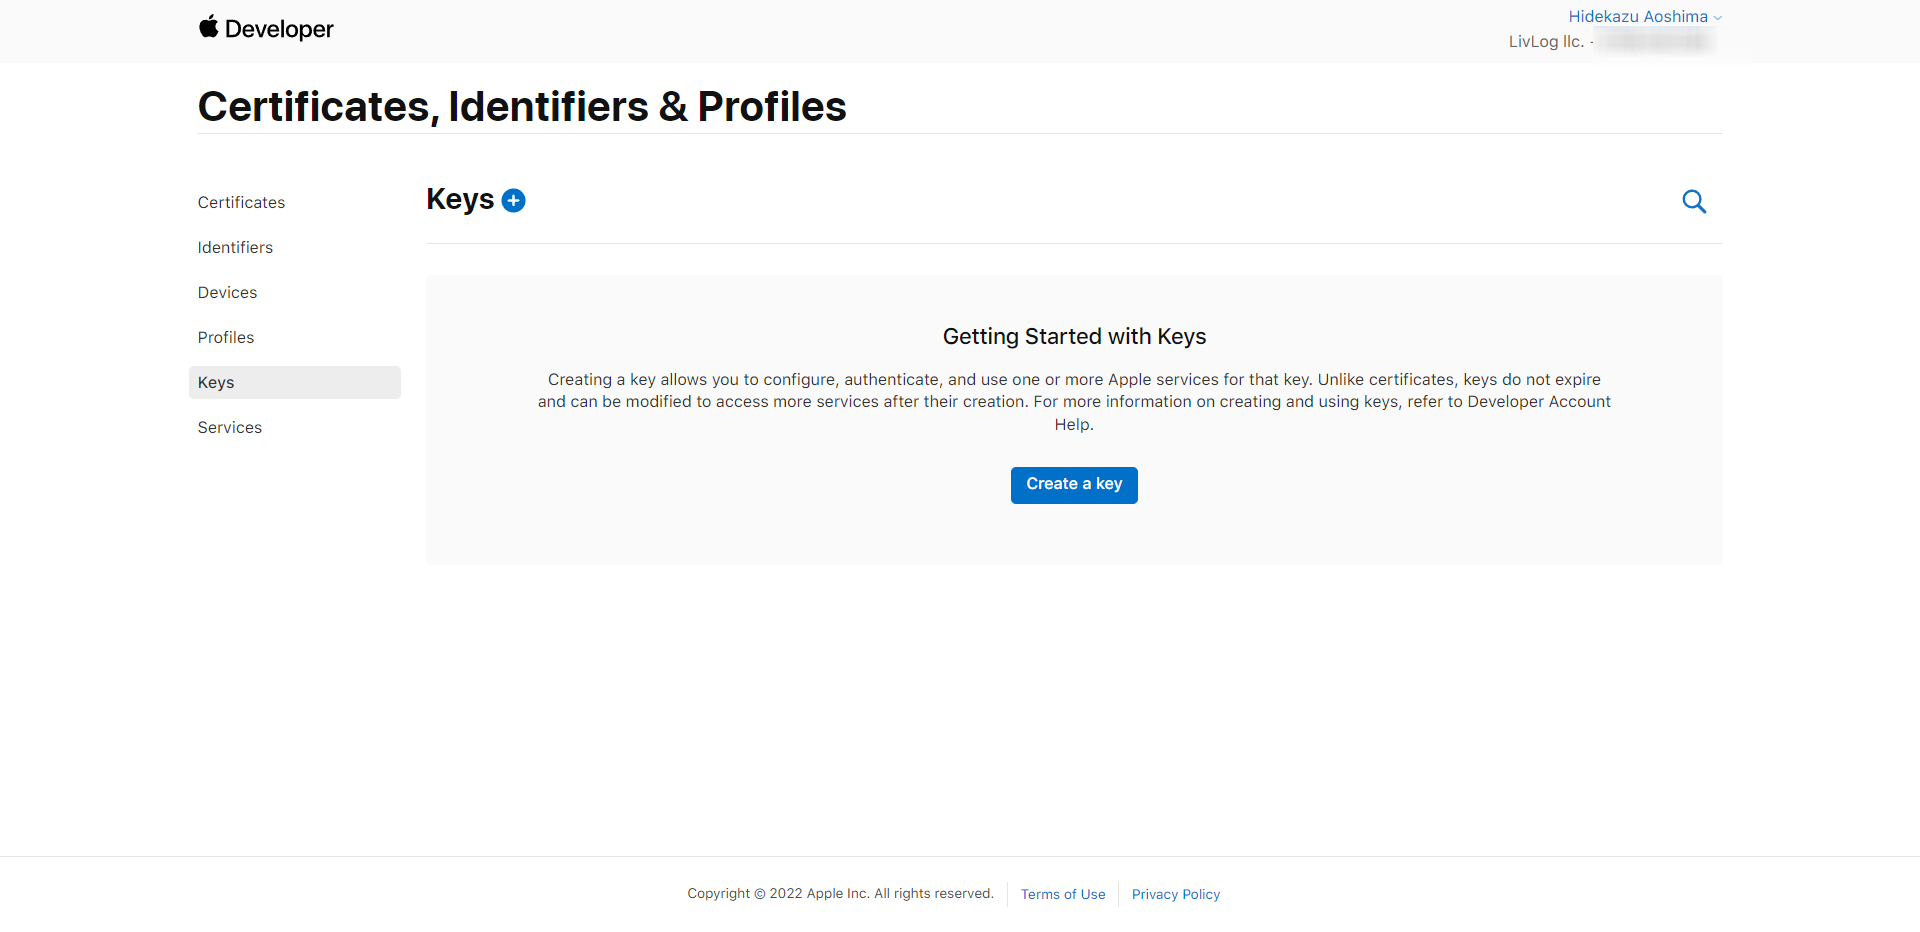
Sign In with Appleをオンにし、Configureボタンをクリックします。

画面で、作成した「Primary App Id」を選択します。Save、Continueの順にクリックします。
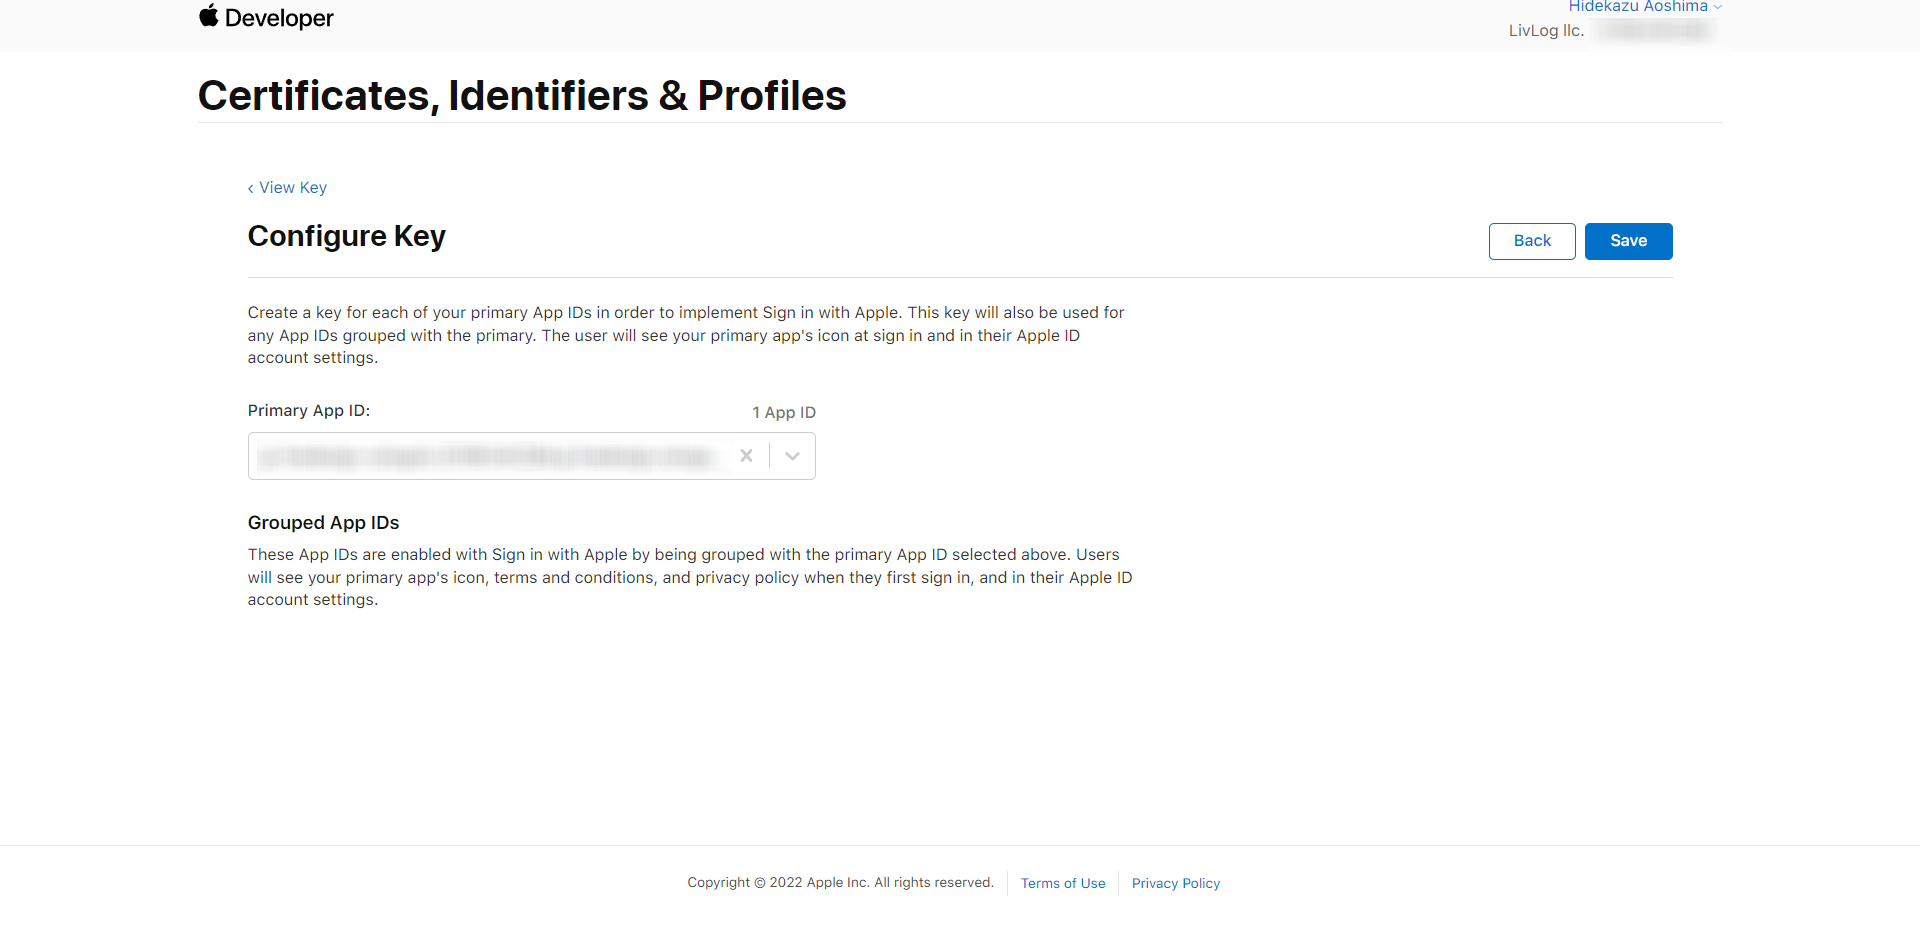
Registerをクリックします。

これで秘密鍵を 1 回限りでダウンロードできます。

2-3. Authorizeエンドポイント
Appleの認証ページURLのクエリパラメータ、レスポンスについては「Incorporating Sign in with Apple into Other Platforms」に記載があります。
このURLに対してHTTP GETでrequestを投げて、Appleのログイン画面に遷移します。
https://appleid.apple.com/auth/authorize
主には、response_type、client_id、redirect_uriの項目の指定が必要になります。
redirect_uriは、AppleDeveloperの設定で事前に登録しておく必要があります。
2-4. Tokenエンドポイント
Appleのトークン発行エンドポイントにリクエストを行い、トークンの発行を行います。
パラメータ、レスポンスについては「Generate and validate tokens」に記載があります。
パラメータはAuthorizationのものを使います。
https://appleid.apple.com/auth/token
client_secretの値のJSON Web Token(JWT)作成
Apple Developers で発行したKeyを用いて、リクエストパラメータclient_secretに付与するJWTの作成を行います。
JWTとは、headerとpayloadから成るJSON構造をエンコードし電子署名をつけたものです。
デコード&エンコードしたJWTの検証には、 https://jwt.io/ を利用します。
JavaでのJWTのエンコード&署名の例は以下です。
<dependency>
    <groupId>io.jsonwebtoken</groupId>
    <artifactId>jjwt-api</artifactId>
    <version>0.11.5</version>
</dependency>
<dependency>
    <groupId>io.jsonwebtoken</groupId>
    <artifactId>jjwt-impl</artifactId>
    <version>0.11.5</version>
    <scope>runtime</scope>
</dependency>
<dependency>
    <groupId>io.jsonwebtoken</groupId>
    <artifactId>jjwt-jackson</artifactId>
    <version>0.11.5</version>
    <scope>runtime</scope>
</dependency>
<dependency>
    <groupId>org.bouncycastle</groupId>
    <artifactId>bcpkix-jdk15on</artifactId>
    <version>1.70</version>
</dependency>
client_secretの生成部分の実装
private static String generateJWT() throws Exception {

    final var privateKey = getPrivateKey();
    final var expiration = 1000 * 60 * 5;

    // JWTを生成
    final var token = Jwts.builder()
            .setHeaderParam(JwsHeader.ALGORITHM, SignatureAlgorithm.ES256.getValue())
            .setHeaderParam(JwsHeader.KEY_ID, "Apple Developerで発行したKey ID")
            .setIssuer("Apple DeveloperでのTeam ID")
            .setAudience("https://appleid.apple.com")
            .setSubject("Apple Developerで発行したService ID")
            .setExpiration(new Date(System.currentTimeMillis() + expiration))
            .setIssuedAt(new Date(System.currentTimeMillis()))
            .signWith(privateKey, SignatureAlgorithm.ES256) // ECDSA using P-256 and SHA-256
            .compact();

    return token;
}

private static PrivateKey getPrivateKey() throws IOException {

    final Reader pemReader = new InputStreamReader(
            AuthToken.class.getResourceAsStream("作成した秘密鍵のファイルパス"));
    final var pemParser = new PEMParser(pemReader);
    final var converter = new JcaPEMKeyConverter();
    final var object = (PrivateKeyInfo) pemParser.readObject();
    final var pKey = converter.getPrivateKey(object);

    return pKey;
}
IDなどのユーザー情報
Tokenエンドポイントのresponseの中にid_tokenが含まれています。
id_tokenを以下のような形で、デコードしていくとsubからユーザーIDを取得することができます。
final var idToken = (String) map.get("id_token");
final var array = idToken.split("\\.");
final var decode = Base64.getDecoder().decode(array[1]);
final var map2 = (Map <?, ?>) JSON.decode(new String(decode));
final var appleId = (String) map2.get("sub");
2-5. Tokenの削除
iOSのアプリを開発している場合は、Appleの発行したTokenの削除機能も合わせて用意する必要があります。
パラメータ、レスポンスについては「Revoke tokens」に記載があります。
https://appleid.apple.com/auth/revoke
主には、client_id、client_secret、tokenの項目の指定が必要になります。
client_secretは、前に説明しておいたので、書きませんが、tokenについては、Tokenエンドポイントで取得したrefresh_tokenを指定する必要があります。
最後に
実際、リジェクトから始まり、アプリの最新化のためにWeb側にもAppleログインを実装して、解除処理とかも実装して、いろいろと改修の幅が、広がってしましましたが、なんとかアップデートはできました。
Web側の改修はいろいろと手を入れる部分が多いので、こういった体験は記事に残しておくと誰かの参考になればと思います。
こちらのサービスもよろしくお願いします。
参考サイト