はじめに
ハッカソンやコンテストの作品登録に Google フォームを使うと容易に作成、送信が出来ます。今回は、Google Apps Scriptを使って、その回答を素早くProtoPediaに登録して行きます。
1. 事前に必要なもの
- Googleアカウント
- ProtoPediaアカウント ※イベントを編集するための権限が必要になります。
2. 開発の流れ
- ProtoPediaのイベントページ作成
- Googleフォームの作成
- Google Apps Scriptによるプログラムの作成
以上の手順で開発して行きます。
3. ProtoPediaのイベントページ作成
※イベントページの作成方法はこちらから
4. Googleフォームの作成
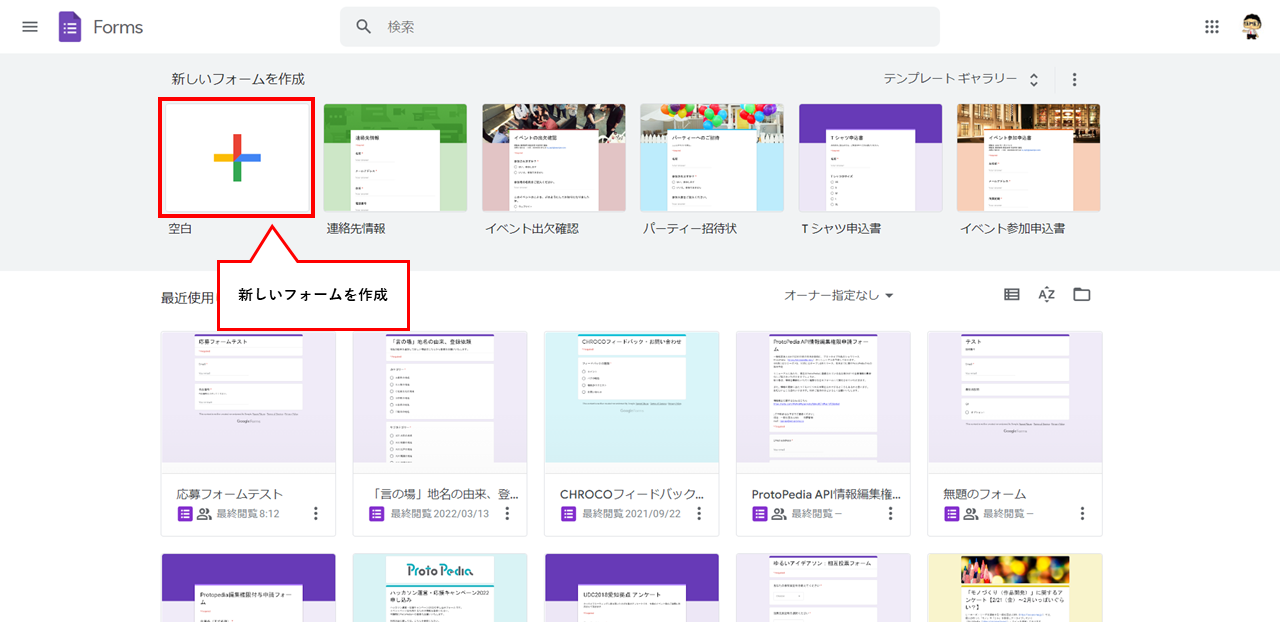
Google アカウントにログイン後、右トップメニューのGoogleアプリアイコンより、Googleフォームを選択し(または、https://docs.google.com/forms/ から直接ログイン)、「新しいフォームを作成」の「+」サインをクリックします。
Googleフォームの作成画面が表示されるので、フォームのタイトル、フォームの詳細をして行きます。
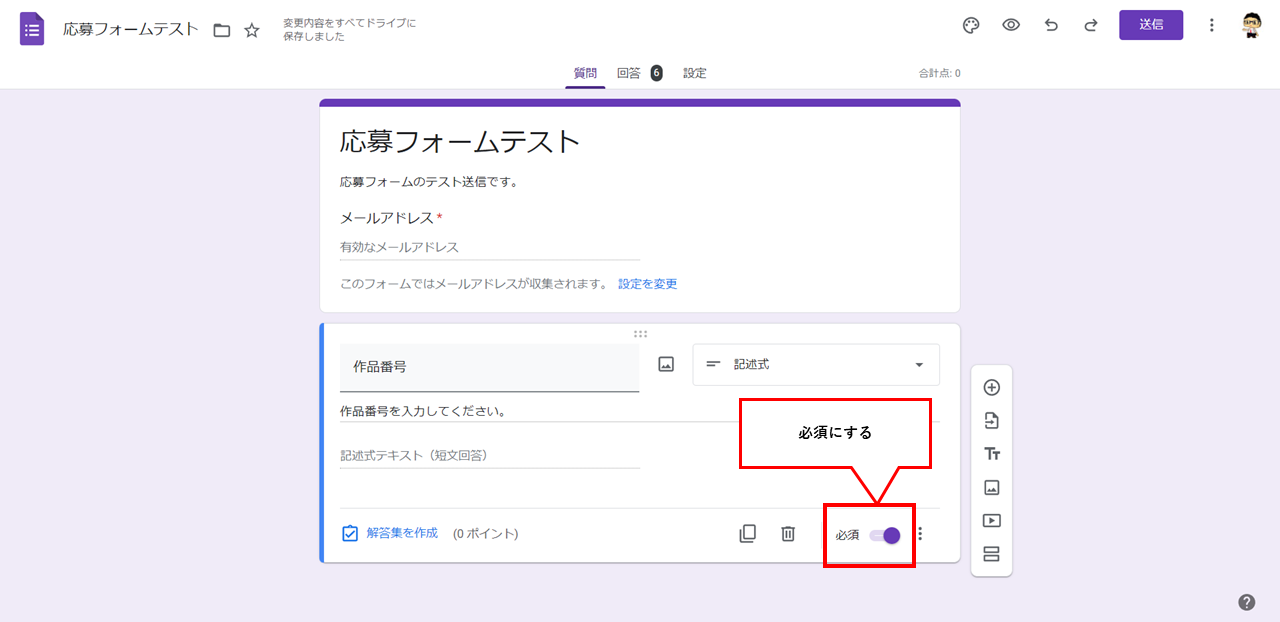
この時必ず、「作品番号」という項目を記述式で、作成してください。
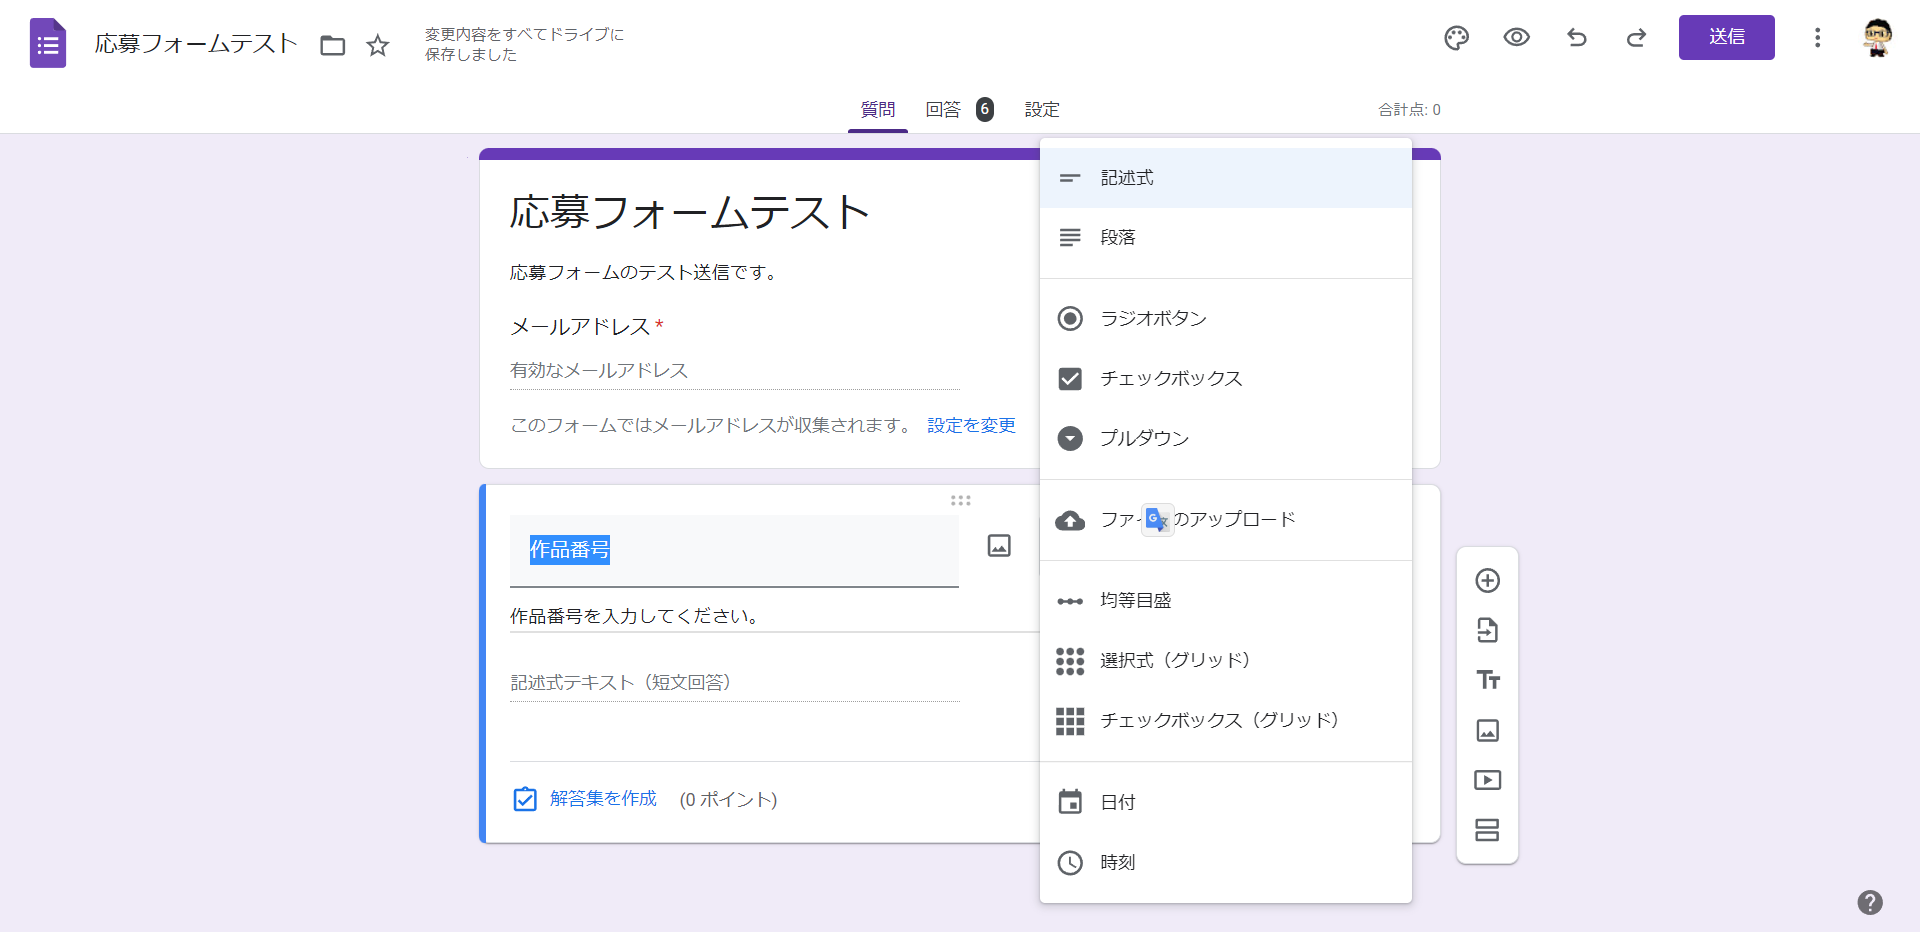
「作品番号」の項目名称から、内容を取得してPtotoPediaに送信しますので、「作品番号」の名前は必ず同じにしてください。
その他にも必要に項目がある場合は項目を追加して、Googleフォームの完成させます。
5. Google Apps Scriptによるプログラムの作成
上記で作成したGoogleフォームを再び開き、「その他」メニューから「スクリプトエディタ」をクリックします。
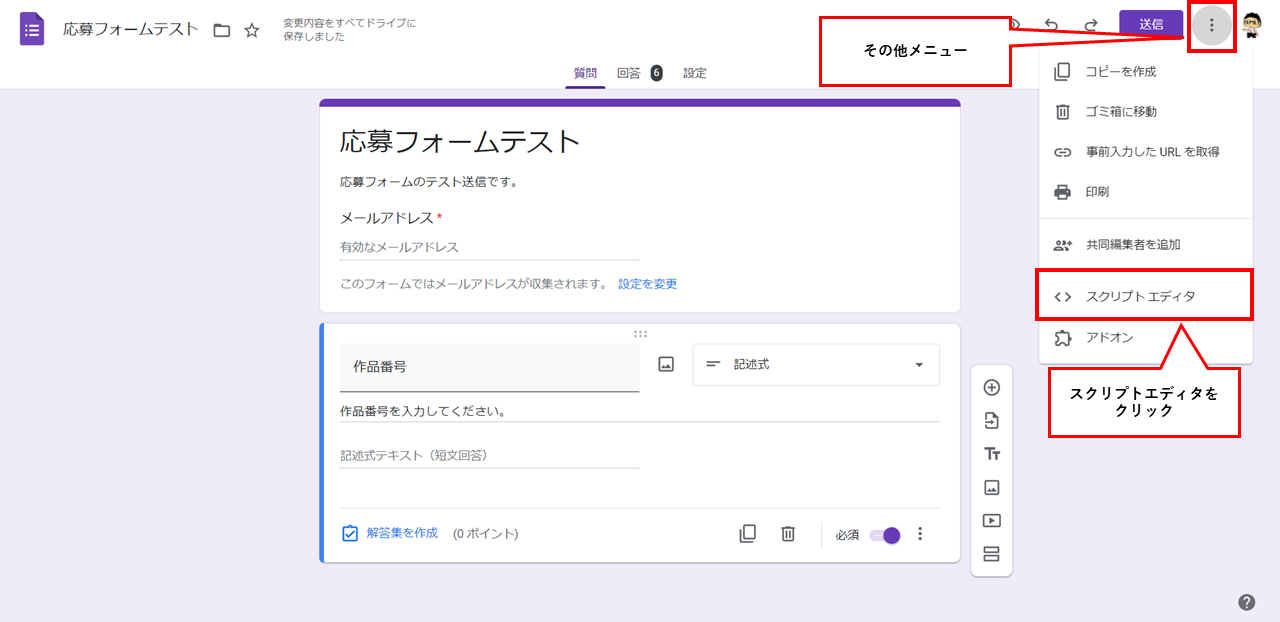
以下の画面が開くので、プロジェクト名、ファイル名を入力します。
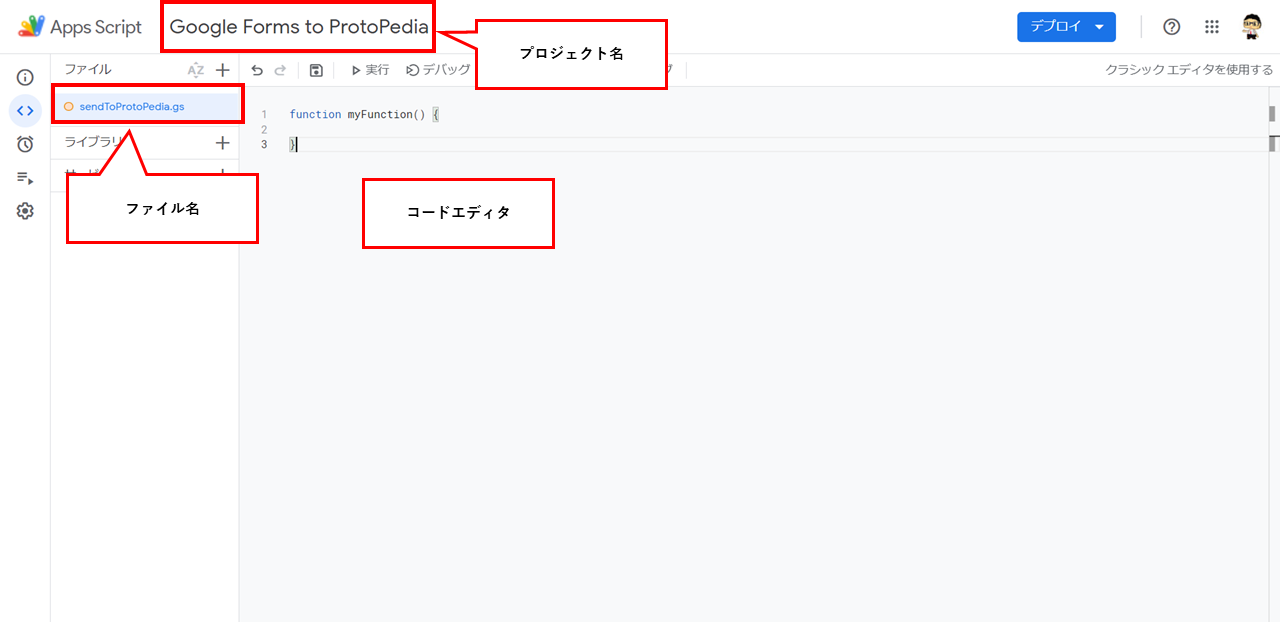
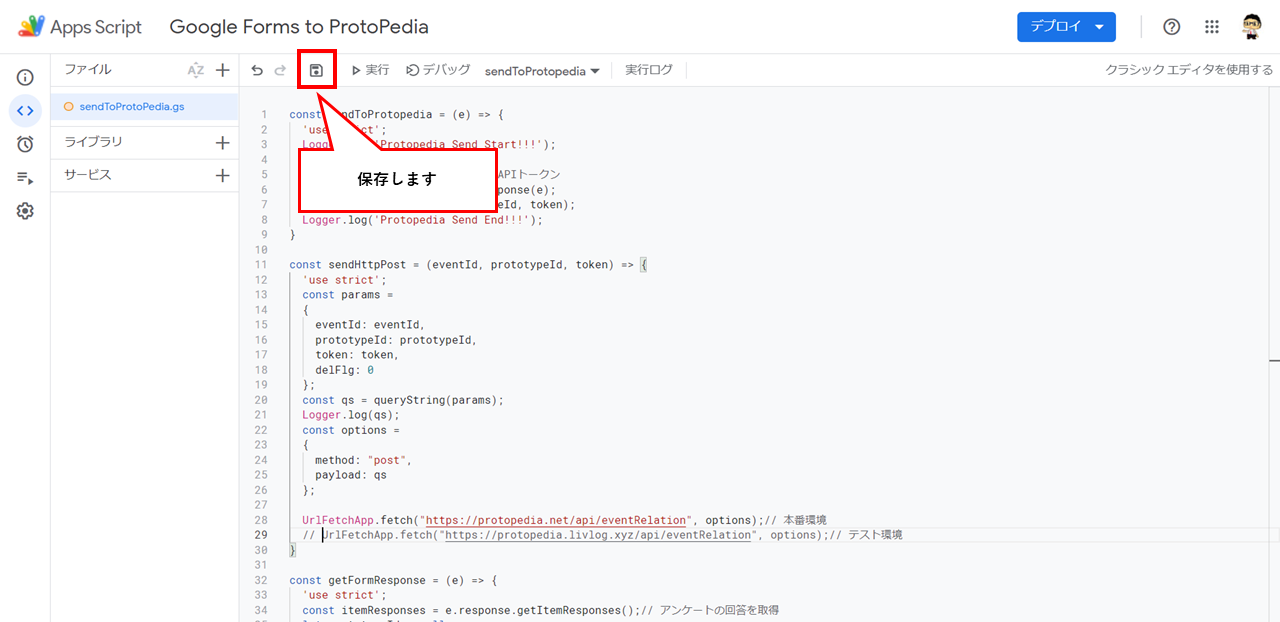
下記のソースコードをコードエディタにコピペします。
const sendToProtopedia = (e) => {
  'use strict';
  Logger.log('Protopedia Send Start!!!');
  const eventId = 0;// イベントID
  const token = "xxxxxxxxxx";// APIトークン
  const prototypeId = getFormResponse(e);
  sendHttpPost(eventId, prototypeId, token);
  Logger.log('Protopedia Send End!!!');
}

const sendHttpPost = (eventId, prototypeId, token) => {
  'use strict';
  const params =
  {
    eventId: eventId,
    prototypeId: prototypeId,
    token: token,
    delFlg: 0
  };
  const qs = queryString(params);
  Logger.log(qs);
  const options =
  {
    method: "post",
    payload: qs
  };

  UrlFetchApp.fetch("https://protopedia.net/api/eventRelation", options);// 本番環境
  // UrlFetchApp.fetch("https://protopedia.livlog.xyz/api/eventRelation", options);// テスト環境
}

const getFormResponse = (e) => {
  'use strict';
  const itemResponses = e.response.getItemResponses();// アンケートの回答を取得
  let prototypeId = null;
  for (let i = 0; i < itemResponses.length; i++) {
    const itemResponse = itemResponses[i];
    switch (itemResponse.getItem().getTitle()) {
      case '作品番号':
        prototypeId = itemResponse.getResponse();// 作品番号を取得
        break;
    }
  }
  return prototypeId;
}

const queryString = (obj, encode) => {
  // :param encode use encodeURIComponent defalut:false
  return Object.keys(obj).map(function(key) {
    if (encode) {
      return key + '=' + encodeURIComponent(obj[key]);
    }else {
      return key + '=' + obj[key];
    }
  }).join('&');
}
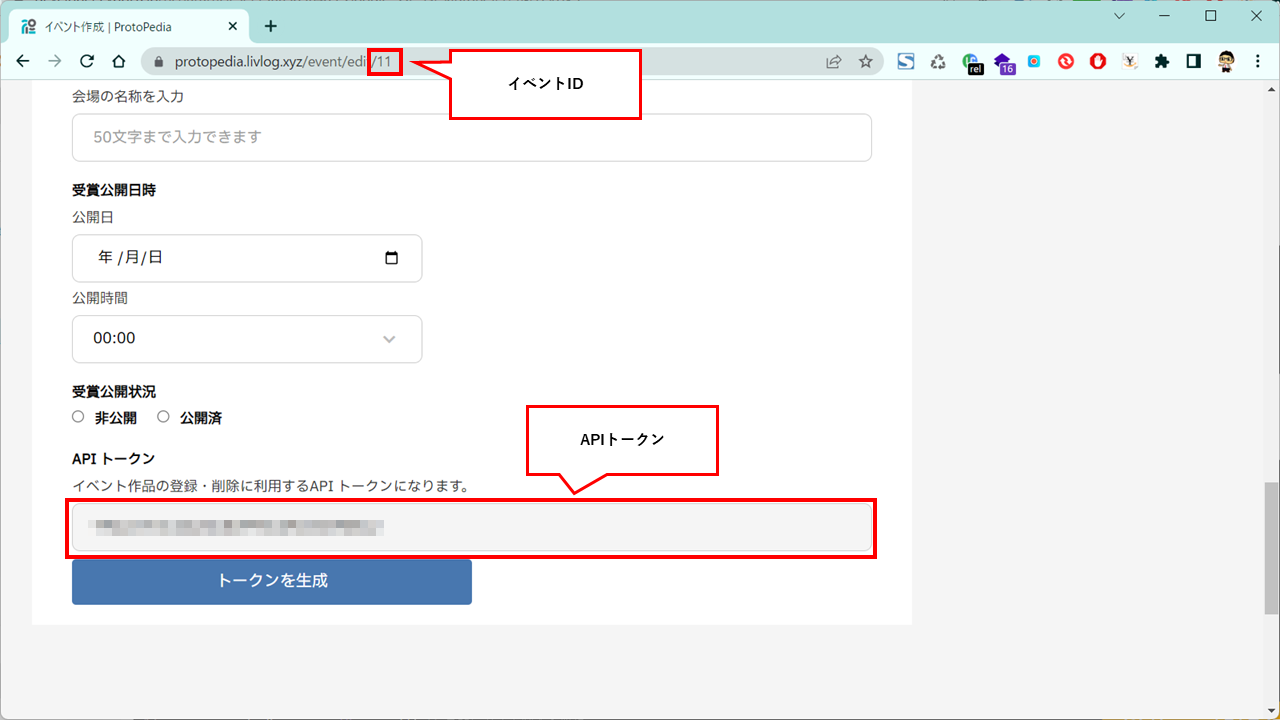
以下の部分の「イベントID」と「APIトークン」はPtotoPediaのイベント編集ページから取得します。
const sendToProtopedia = (e) => {
  'use strict';
  Logger.log('Protopedia Send Start!!!');
  const eventId = 0;// イベントID
  const token = "xxxxxxxxxx";// APIトークン
  const prototypeId = getFormResponse(e);
  sendHttpPost(eventId, prototypeId, token);
  Logger.log('Protopedia Send End!!!');
}
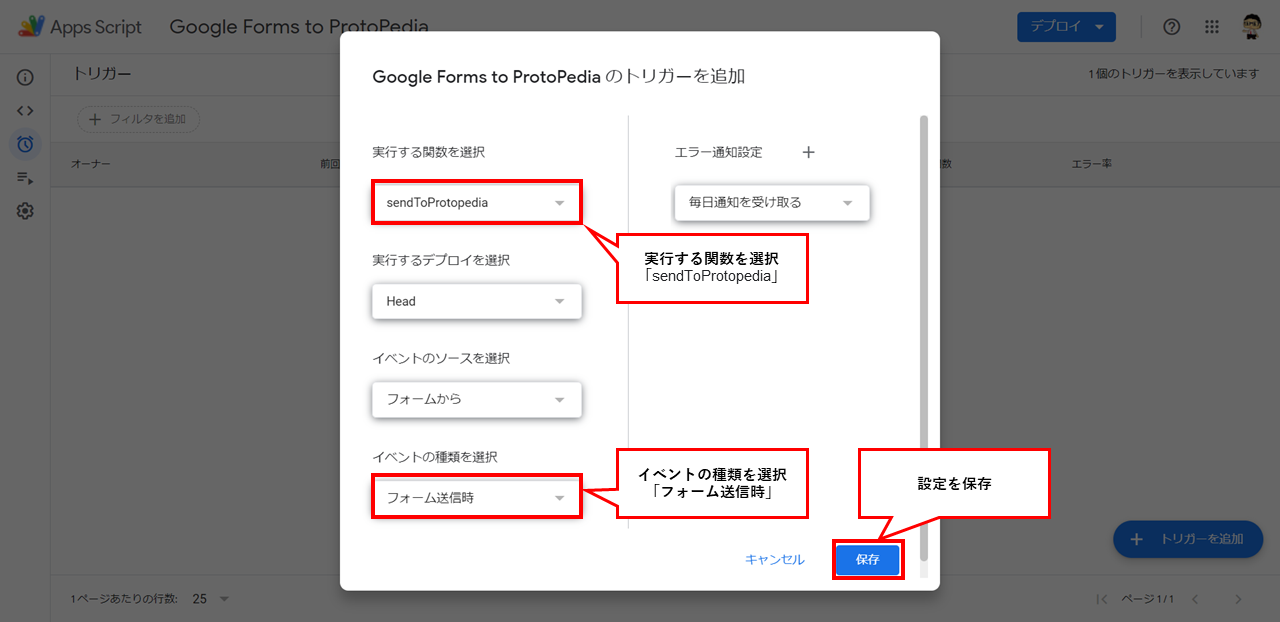
トリガーの設定画面を表示し、「トリガーを追加」からトリガーを追加します。
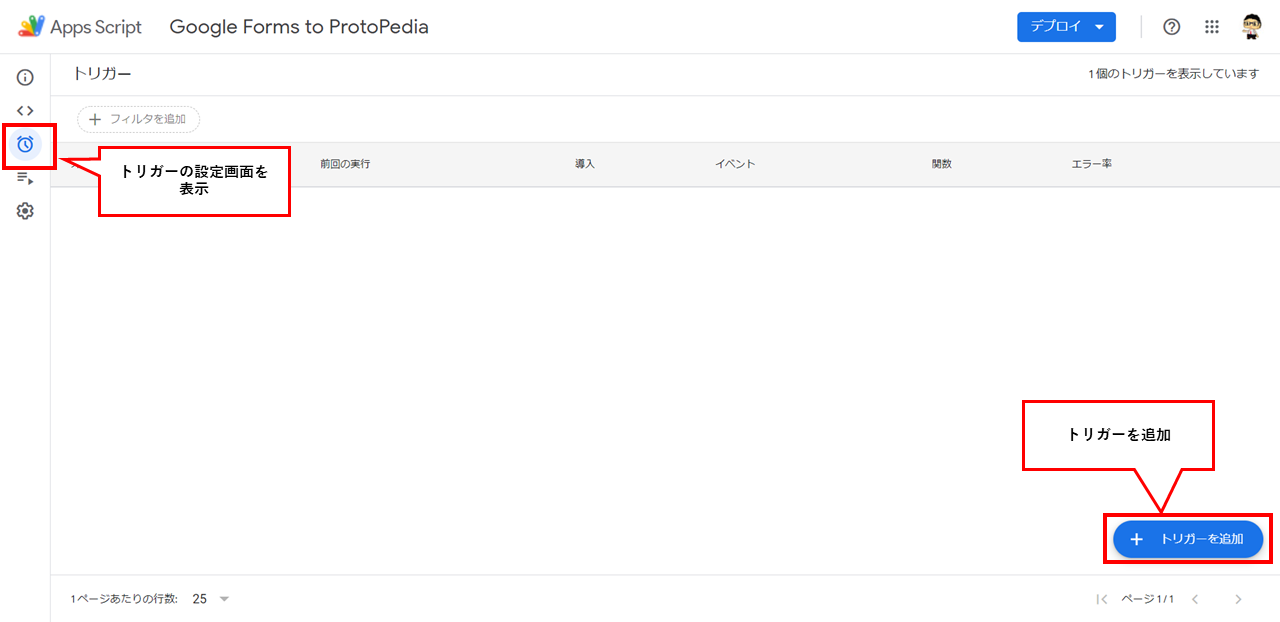
イベント発生時に実行する関数、トリガーとなるイベントを設定し、保存します。
6. 動作の確認
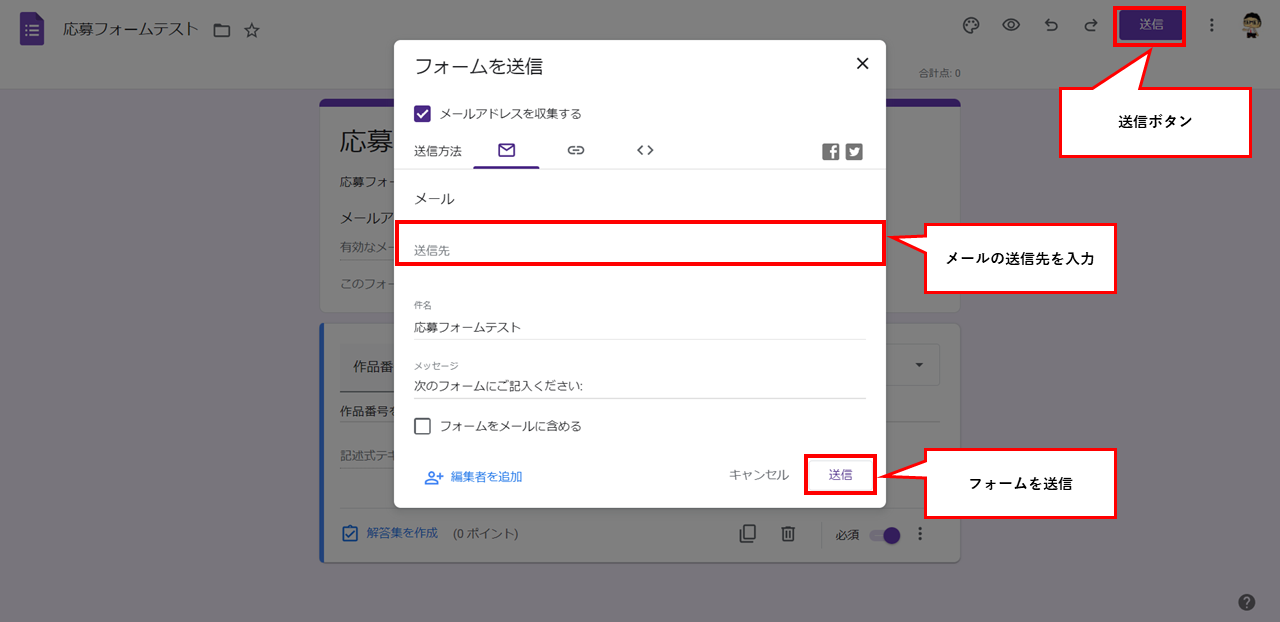
作成したGoogle フォームの右上の送信ボタンをクリックし、「フォームを送信」画面にて送信先のメールアドレス、件名、メッセージを入力し、送信ボタンでフォームを送信します。
メールに届いたGoogleフォームへのリンクより、回答を入力し送信します。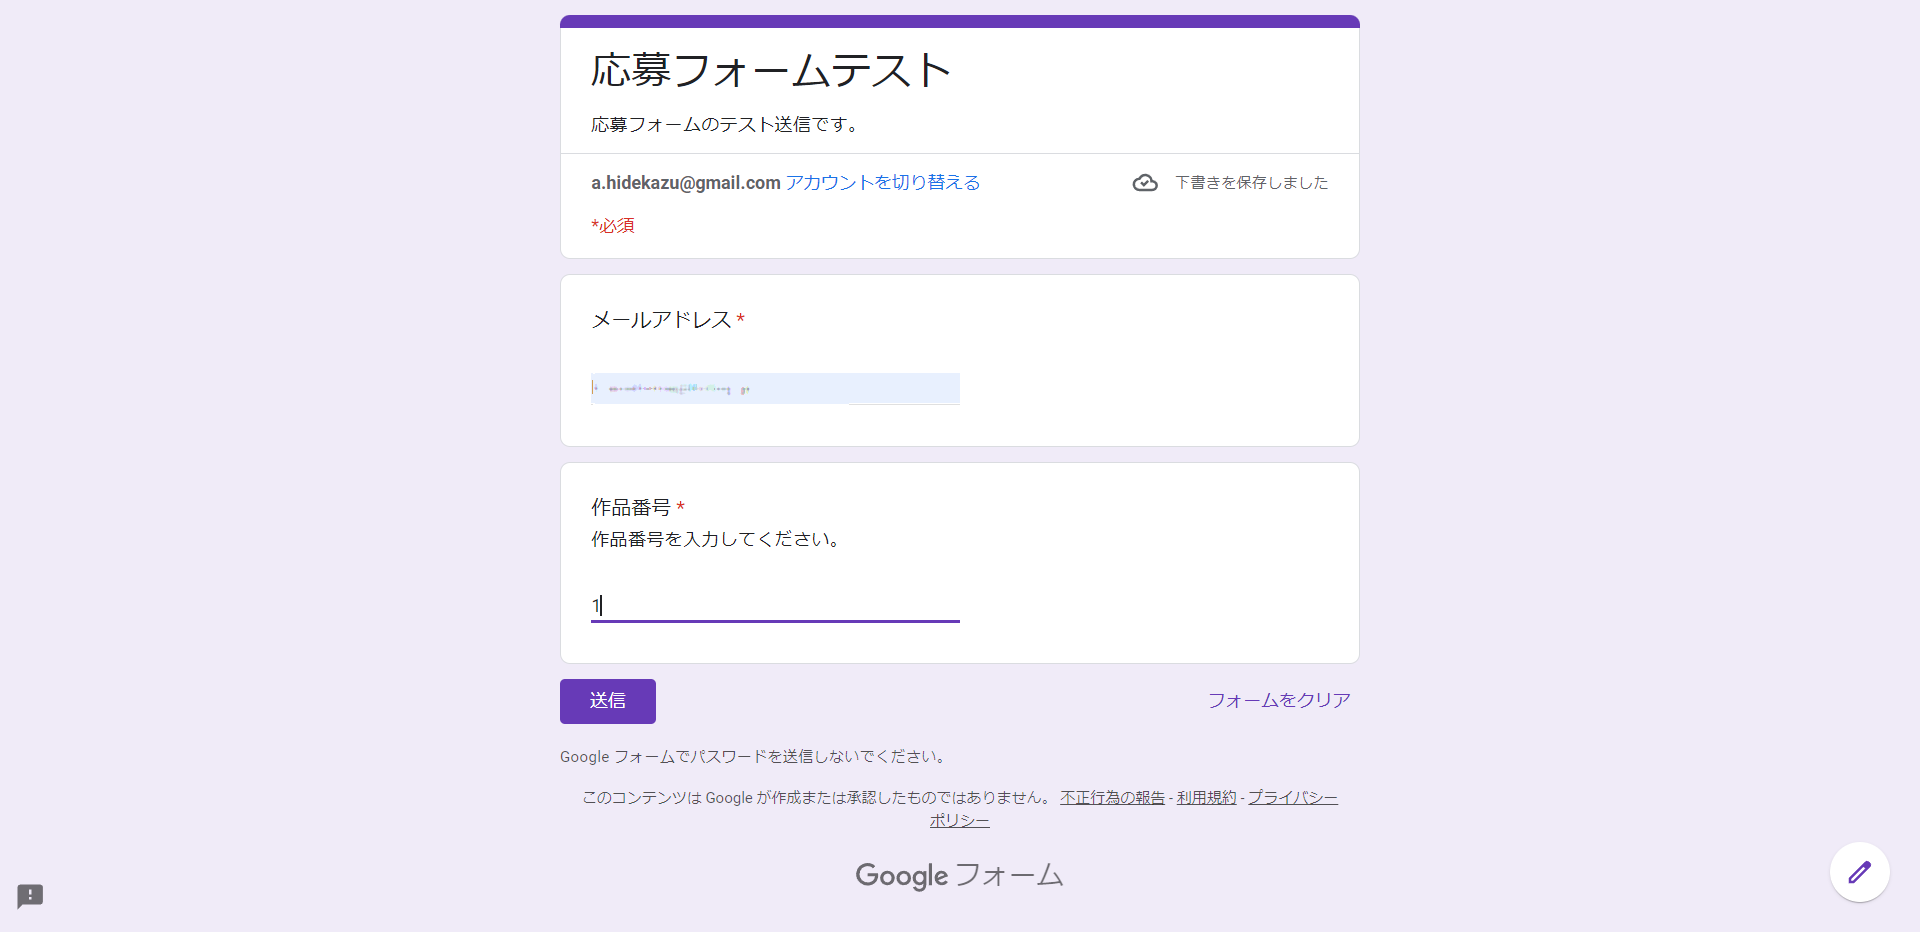
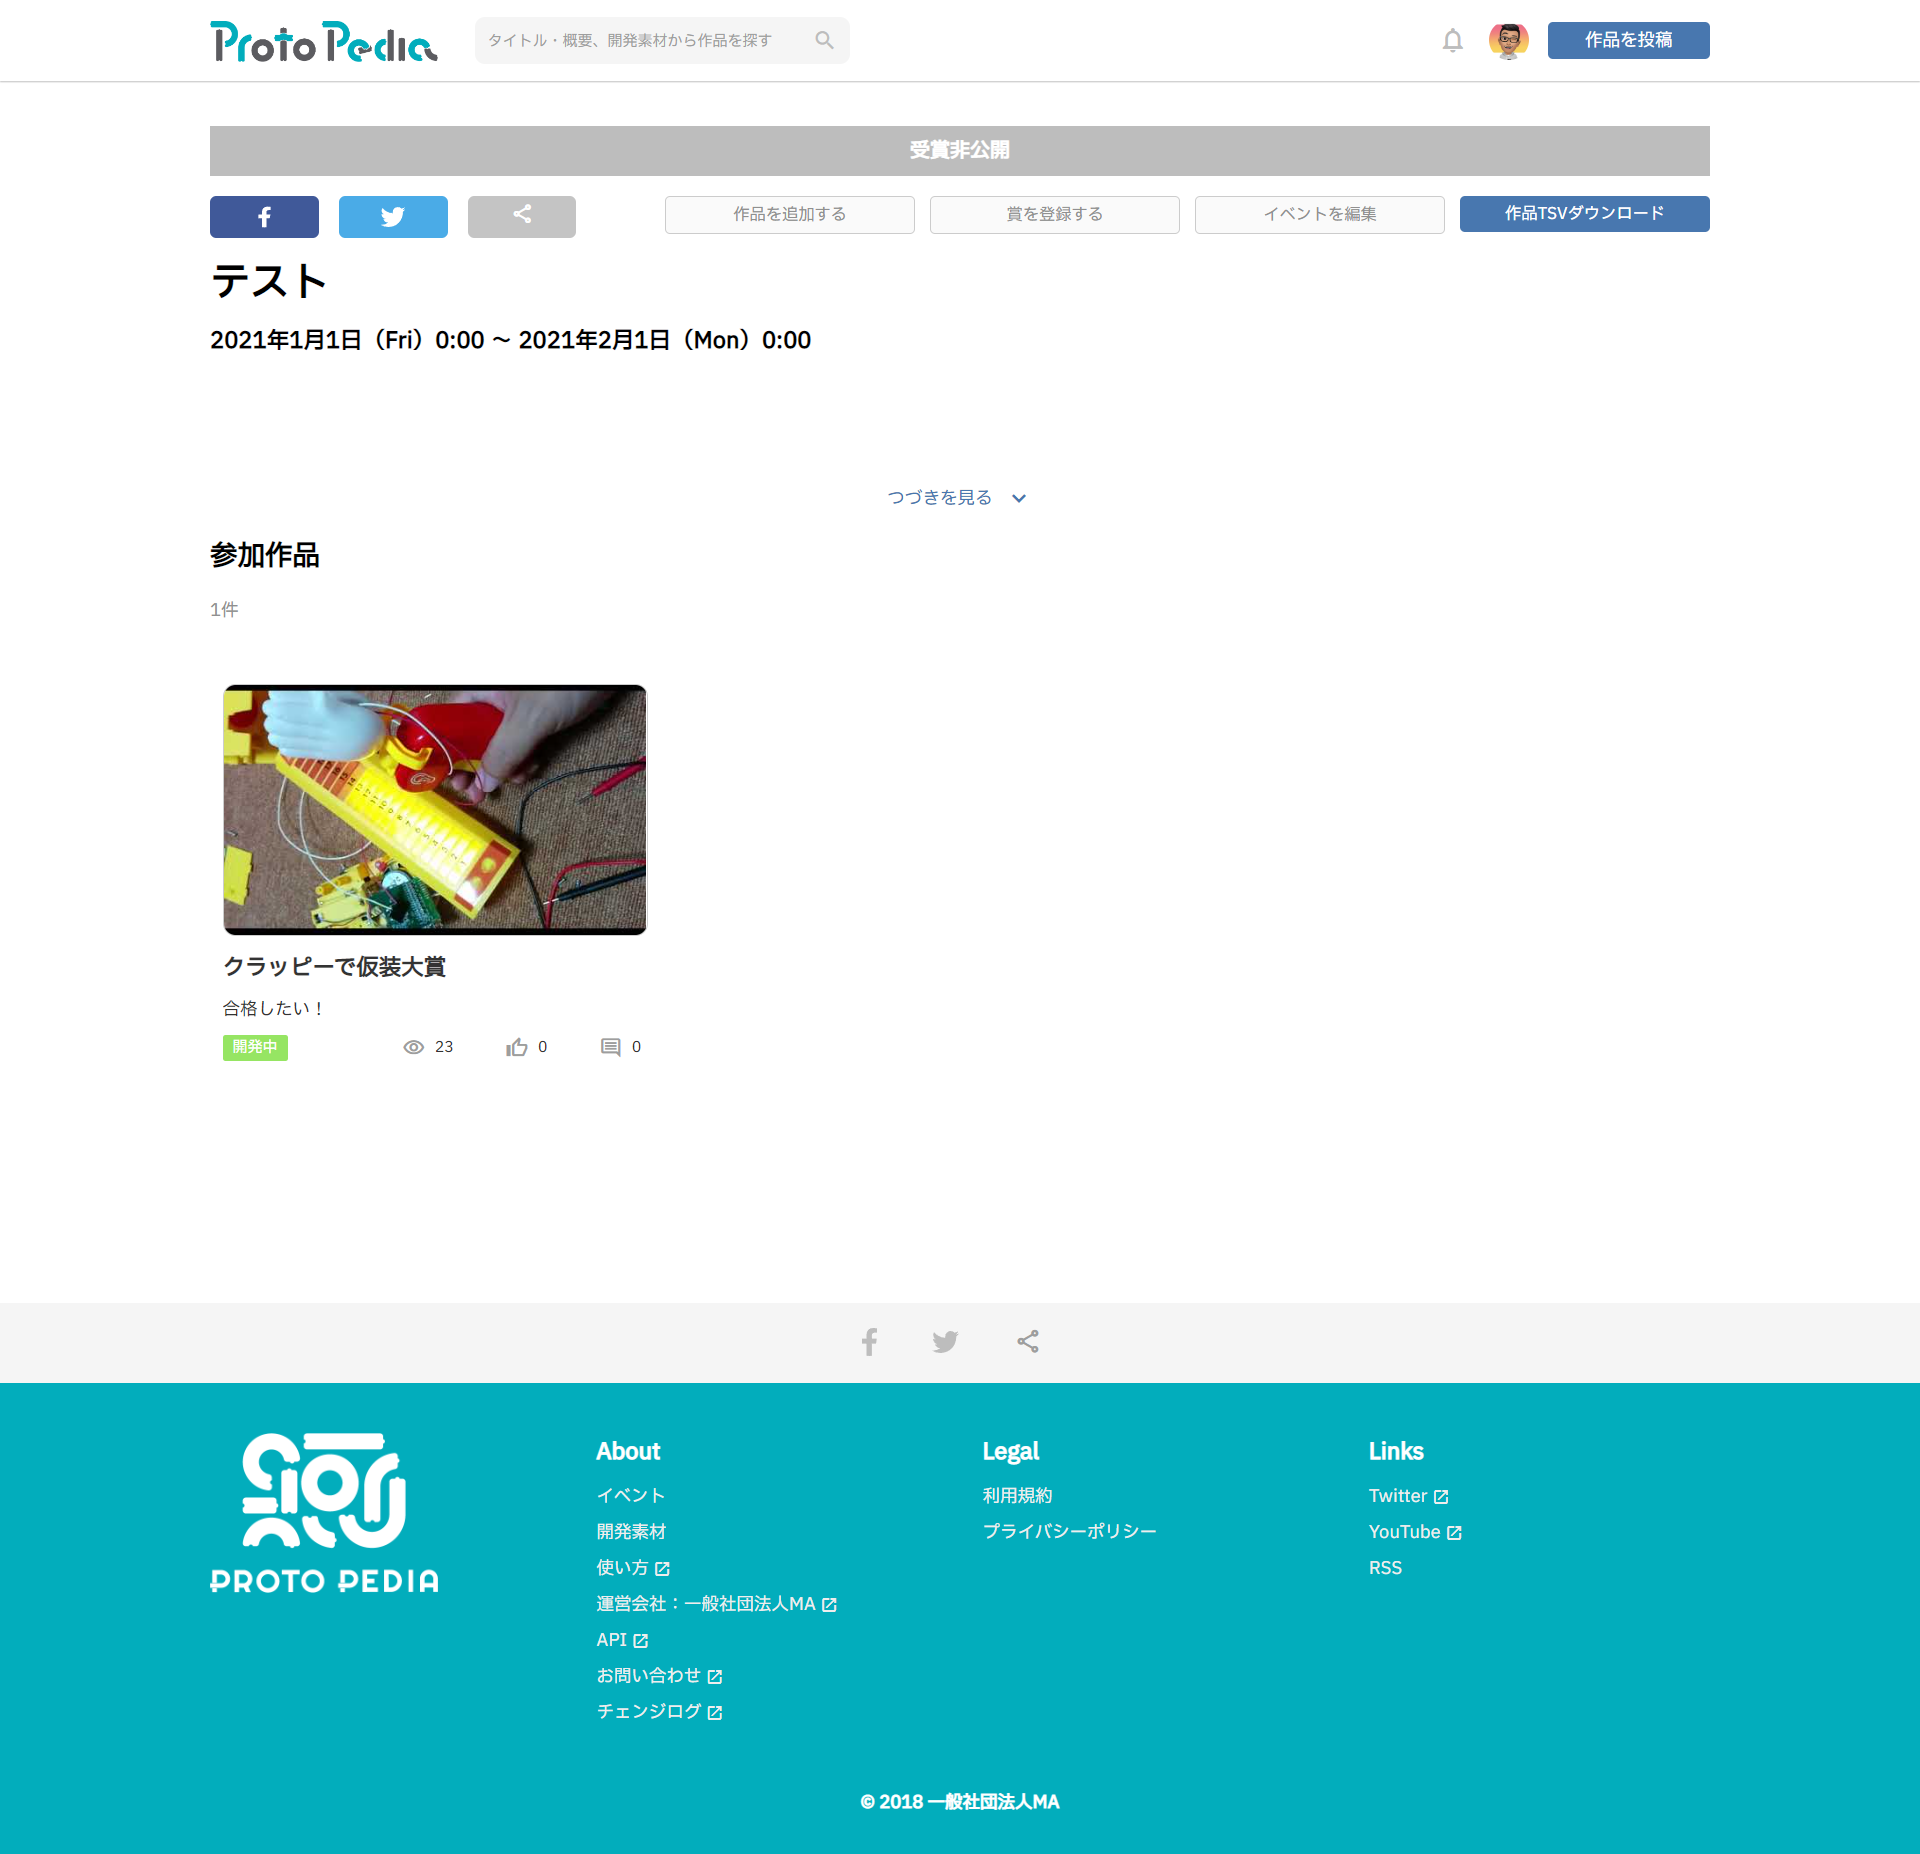
送信後、回答したデータがProtoPediaのイベントページに追加されました。
7. まとめ
Googleフォームを使うとのコンテストやハッカソンの応募フォームを簡単に作成できる上、応募と同時にProtoPediaのイベントページに作品追加が同時に行えるようになります。
コンテストのサイトにフォームを埋め込む事も可能ですので、作品の応募促進を図ることができるのではないでしょうか。
