GitHub Actionsでは、actions/github-script という公式アクションがあります。
このアクションは octokit/rest.js が使えるため、GitHub API実行をJavaScriptで書くことができます。
「curlでGitHub API呼んで...」に抵抗がある人や、JavaScriptになれている人は参考になるかもしれないです。
完成形
作成したActionsこちらになります。
Actionsを手動実行すると v{現在日}-{同日のリリース数} でタグ作成されるようになっています。
Action解説
actions/github-script を使用している箇所について記載します。
タグ作成
  - name: Generate release tag
    uses: actions/github-script@v7
    id: release-tag
    with:
      script: |
        const currentDatatime = process.env.CURRENT_DATETIME

        let releaseCount = 1
        let releaseTag

        while (true) {
          releaseTag = `v${currentDatatime}-${String(releaseCount).padStart(3, '0')}`
          try {
            await github.rest.git.getRef({
              owner: context.repo.owner,
              repo: context.repo.repo,
              ref: `tags/${releaseTag}`
            })
            releaseCount += 1
          } catch (error) {
            if (error.status === 404) {
              break
            } else {
              throw error
            }
          }
        }

        return releaseTag
      result-encoding: string
    env:
      CURRENT_DATETIME: ${{ env.CURRENT_DATETIME }}
-
同日のリリース数=001として、v{現在日}-001を仮タグ名とします -
github.rest.git.getRefでリモートのタグを取得します-
ref: 仮タグ名を設定します
-
- 取得できた場合、すでに同日リリースされているため
同日のリリース数にカウントして、再度リモートタグ取得します - 取得できない場合、例外がthrowされ、今回作成するタグが決定されます
直前のタグ取得
  - name: Get previous tag
    uses: actions/github-script@v7
    id: get-previous
    with:
      script: |
        const previousTags = await github.rest.repos.listTags({
          owner: context.repo.owner,
          repo: context.repo.repo,
          per_page: 1
        })
        const previousTag = previousTags.data.length > 0 ? previousTags.data[0].name : '';

        return previousTag
      result-encoding: string

  - name: Push release tag
    run: |
      git tag ${{ steps.release-tag.outputs.result }}
      git push origin ${{ steps.release-tag.outputs.result }}
-
github.rest.repos.listTagsでリモードのタグ一覧を取得します-
per_page:「1」を設定しているため、直前のタグのみが取得されます
-
- タグが取得されない場合は、空文字として返却します
リリースノート生成
  - name: Generate release notes
    uses: actions/github-script@v7
    with:
      script: |
        const previousTag = process.env.PREVIOUS_TAG
        const releaseTag = process.env.RELEASE_TAG

        const releaseNotesParams = {
          owner: context.repo.owner,
          repo: context.repo.repo,
          tag_name: releaseTag,
        };

        if (previousTag) {
          releaseNotesParams.previous_tag_name = previousTag;
        }

        const releaseNotes = await github.rest.repos.generateReleaseNotes(releaseNotesParams);
        console.log(releaseNotes);

        await github.rest.repos.createRelease({
          owner: context.repo.owner,
          repo: context.repo.repo,
          tag_name: releaseTag,
          name: releaseTag,
          body: releaseNotes.data.body,
        });
    env:
      PREVIOUS_TAG: ${{ steps.get-previous.outputs.result }}
      RELEASE_TAG: ${{ steps.release-tag.outputs.result }}
-
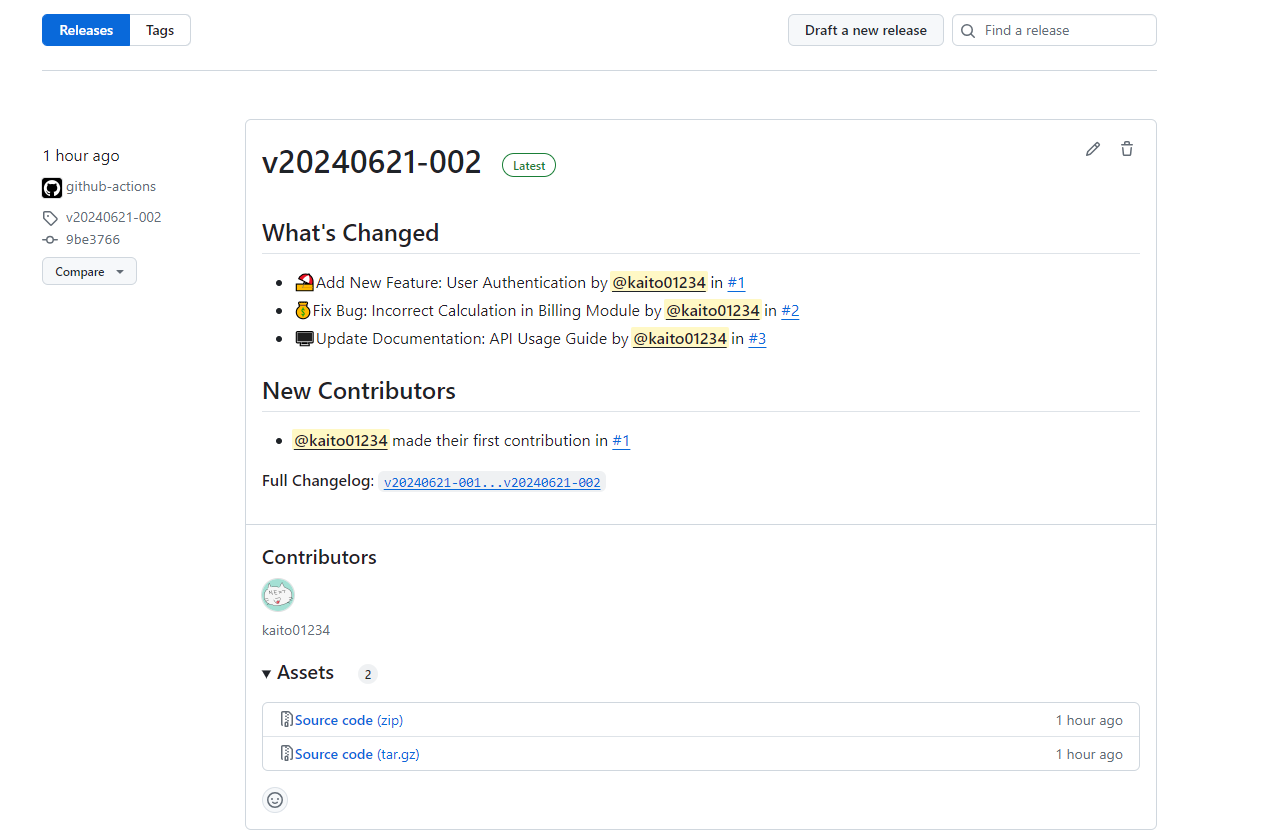
github.rest.repos.generateReleaseNotesでリリースノートの内容を作成します-
tag_name: 今回作成したタグ名を設定します -
previous_tag_name: 直前のタグがある場合設定します。存在しない場合は設定しません
-
-
github.rest.repos.createReleaseでリリースノートを作成します-
tag_name: 今回作成したタグ名を設定します -
name: リリースノートのタイトルはタグ名と同じにしています -
body: 生成した
-
これで自動生成されるリリースノート
- ブラウザから「Generate release notes」で作れるリリースノートと同じ内容が作れます
(補足)actions/github-script について軽く解説
octokit の実行権限
jobs:
  tag:
    runs-on: ubuntu-latest
    permissions:
      contents: write // 書き込み権限
    steps:
-
octokitの実行権限は job のpermissionsが許可されます - また、
actions/github-script@v7に PATを設定して権限付与 することもできます
パラメータ受け渡し
  - uses: actions/github-script@v7
    id: get-previous
    with:
      script: |
        const previousTags = await github.rest.repos.listTags({
          owner: context.repo.owner,
          repo: context.repo.repo,
          per_page: 1
        })                                  // octokitでGitHub API実行
        return previousTags.data[0].name    // 以降のステップで利用可能
      result-encoding: string               // 文字列として返却
-
returnした値が以降のステップで利用でき、steps.{ステップのID}.outputs.resultで参照することができます-
result-encodingで返却する値の型が指定できますが、「文字列」か「JSONオブジェクト」のみ指定できるようです - JSONオブジェクトの場合、
"(ダブルクオート) がついてしまうため、今回はresult-encoding: stringを指定しています
-
