ExpressやHapiと比べて、Fastifyはベンチマークがものすごいという情報があったので、試しにFastifyでAPIサーバーを作成してみようと思います。
https://www.fastify.io/benchmarks/
併せて、やはりNode.jsでも型やinterfaceなどを用いてきっちりとしたAPIサーバーを作成したいので、FastifyをTypeScriptで利用しようと思います。
1.プロジェクトのベースを作る。
まずはプロジェクトのベースを作ります。
touchしたファイルの中身は後ほど記述します。
npm init
mkdir src

touch src/server.ts
touch tsconfig.json
touch gulpfile.js
2.各種ライブラリをインストールする
fastifyとcorsをインストールします。
gulpを用いてtypescriptをコンパイルするので、併せてgulp関連ライブラリもインストールします。
npm install --save fastify cors
npm install --save-dev gulp gulp-typescript rimraf typescript
3.JSONを返却する処理を作成する。
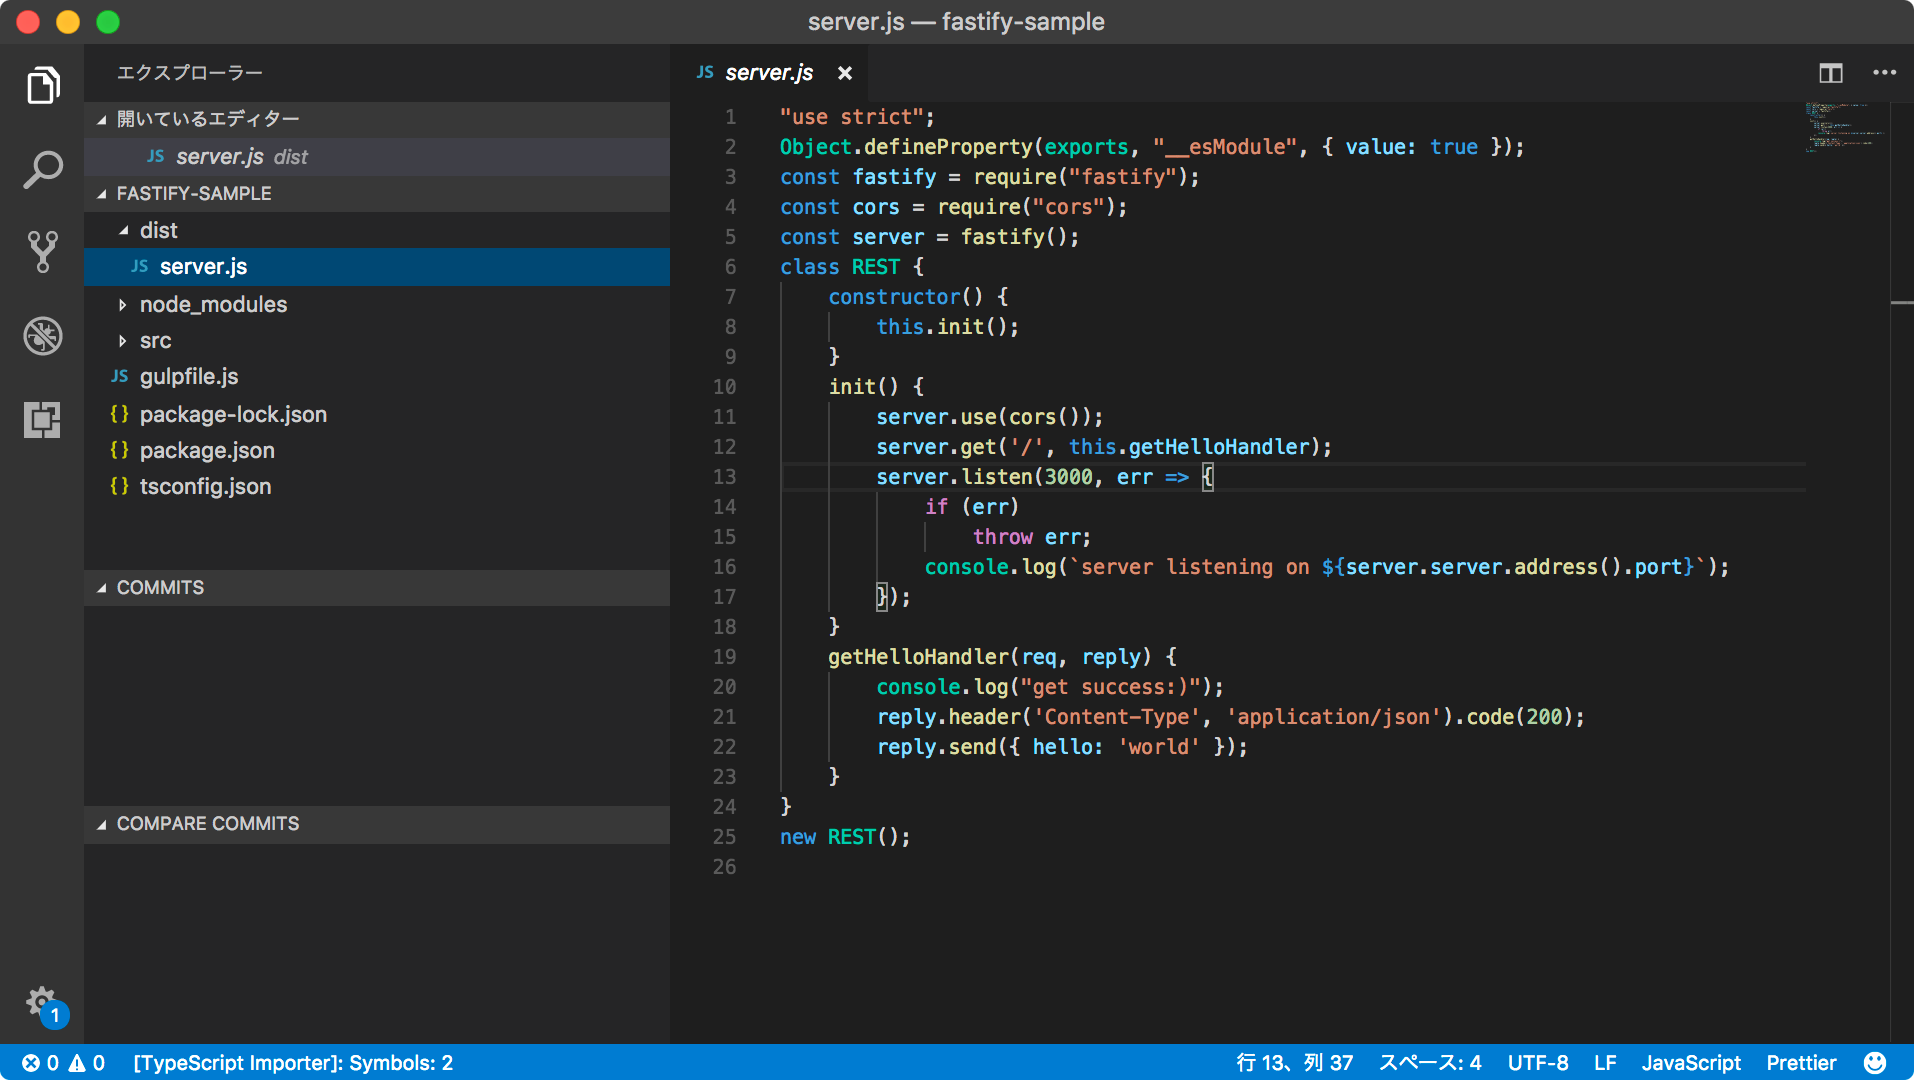
jsonを返却するだけのシンプルな処理をserver.tsに記述します。
import * as fastify from 'fastify'
import * as cors from 'cors'

const server = fastify();

class REST {
  constructor() {
    this.init();
  }

  init() {
    server.use(cors());
    server.get('/', this.getHelloHandler);

    server.listen(3000, err => {
      if (err) throw err;
      console.log(`server listening on ${server.server.address().port}`);
    });
  }

  getHelloHandler (req: any, reply: any) {
    console.log("get success:)");
    reply.header('Content-Type', 'application/json').code(200);
    reply.send({ hello: 'world' });
  }
}

new REST();
4.TypeScriptをコンパイルする準備をする。
tsconfig.jsonとgulpfile.jsを修正し、それぞれコンパイルの設定をします。
{
  "compilerOptions": {
    "target": "es6",
    "module": "commonjs",
    "outDir": "dist"
  },
  "include": [
    "src/**/*.ts"
  ],
  "exclude": [
    "node_modules"
  ]
}
const gulp = require('gulp');
const ts = require('gulp-typescript');
const rimraf = require('rimraf');

const tsProject = ts.createProject('tsconfig.json');
const JSON_FILES = ['src/*.json', 'src/**/*.json'];

gulp.task('clean', function (cb) {
  rimraf('./dist', cb);
});

gulp.task('scripts', ['clean'], () => {
  const tsResult = tsProject.src()
  .pipe(tsProject());
  return tsResult.js.pipe(gulp.dest('dist'));
});

gulp.task('watch', ['scripts'], () => {
  gulp.watch('src/**/*.ts', ['scripts']);
});

gulp.task('assets', function() {
  return gulp.src(JSON_FILES)
  .pipe(gulp.dest('dist'));
});

gulp.task('serve', ['watch', 'assets']);
gulp.task('build', ['scripts']);
5.TypeScriptをコンパイルする。
まずはpackage.jsonのscriptsを更新します。
単発でコンパイルする場合はnpm run build、tsファイルを監視し、tsファイルが更新される度にコンパイルするに場合にはnpm run serveを実行する形式にます。
{
    :
  "scripts": {
    "start": "node ./dist/server.js",
    "serve": "gulp serve",
    "build": "gulp build"
  },
    :
}
では、コンパイルします。
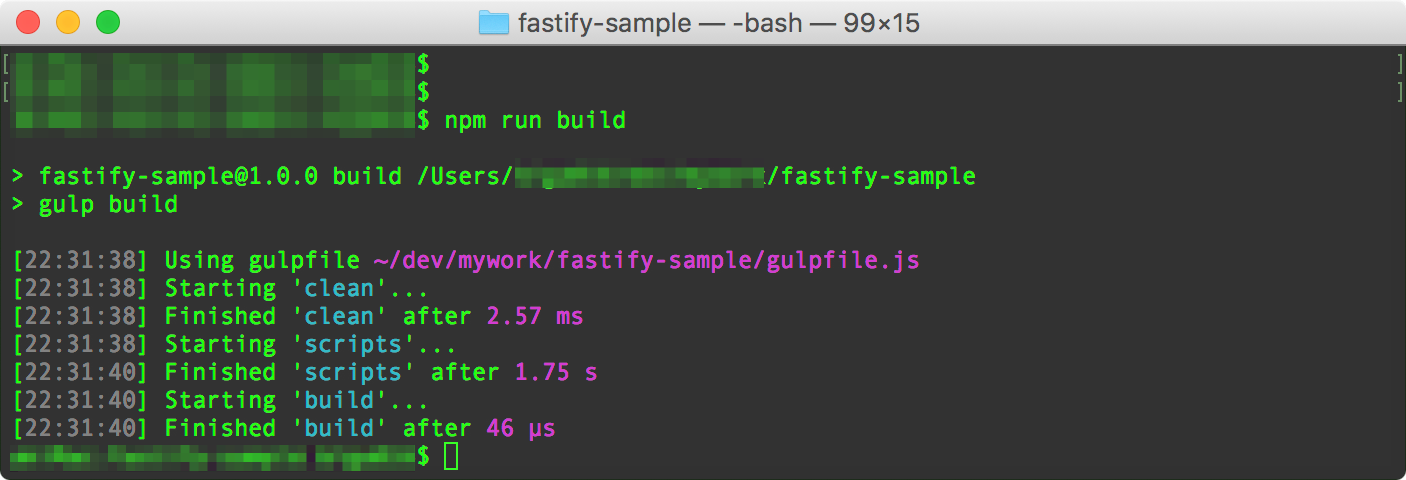
dist配下にserver.jsが出力されていれば成功です。
6.サーバーを起動する。
npm run startでサーバーを起動します。
ブラウザからhttp://localhost:3000にアクセスし、hello worldが表示されていればAPIサーバー作成完了です。


7.おまけ:Visual Studio Codeでデバッグする
このままだとコンパイル後のjsファイルをデバッグすることになってしまうので、tsファイルに対してデバッグできるようにします。
1) gulpの設定の変更。
npm install --save-dev gulp-sourcemapsを実行し、gulpfile.jsのscriptsタスクを以下のように修正します。
const sourcemaps = require('gulp-sourcemaps');

   :

gulp.task('scripts', ['clean'], () => {
  return tsProject.src()
    .pipe(sourcemaps.init())
    .pipe(tsProject())
    .js
    .pipe(sourcemaps.write())
    .pipe(gulp.dest('dist'));
});
2) Visual Studio Codeのデバッグ設定の追加
Visual Studio Codeで作成中のプロジェクトを開き、F5を押下し、「環境の選択」でNode.jsを選択します。
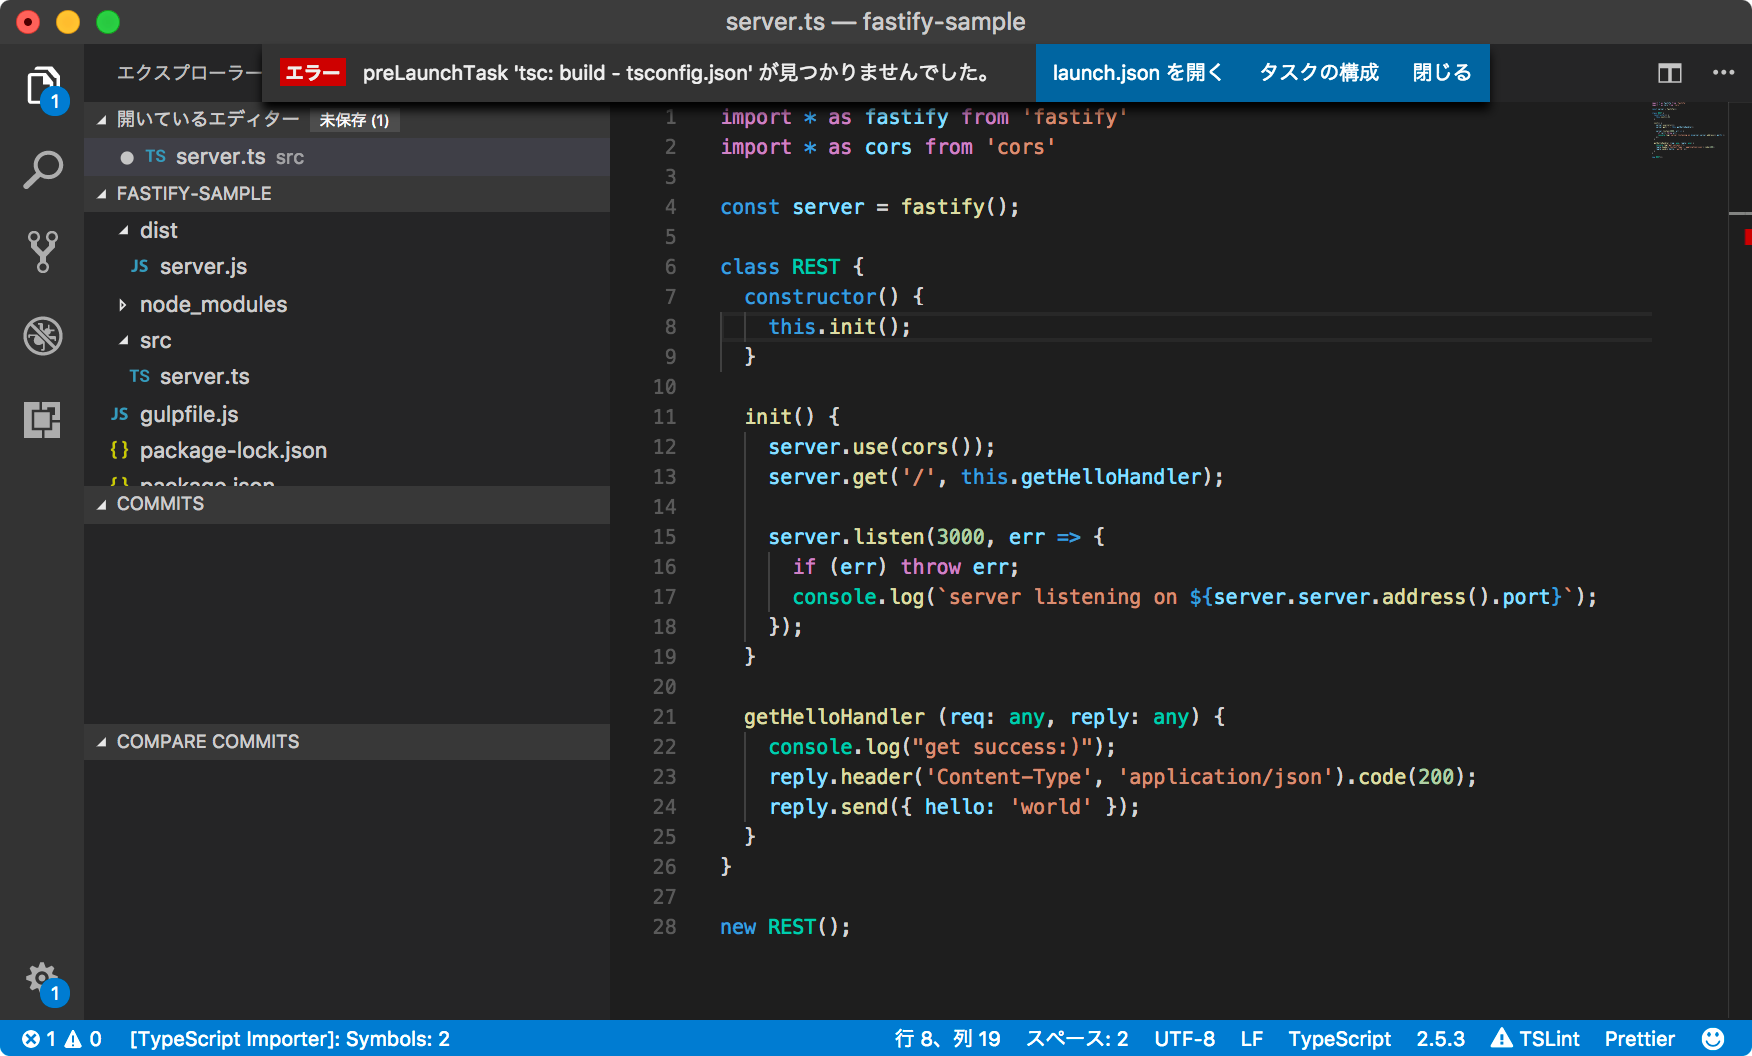
Node.jsを選択すると、エラーが表示されるので、「launch.jsonを開く」を押下し、もう一度「環境の選択」でNode.jsを選択します。

launch.jsonが開かれるので、もう一度F5を押下します。
するとまたエラーが表示されるので今度は「タスクの構成」を押下します。

「構成するタスクを選択」でnpm: buildを選択します。

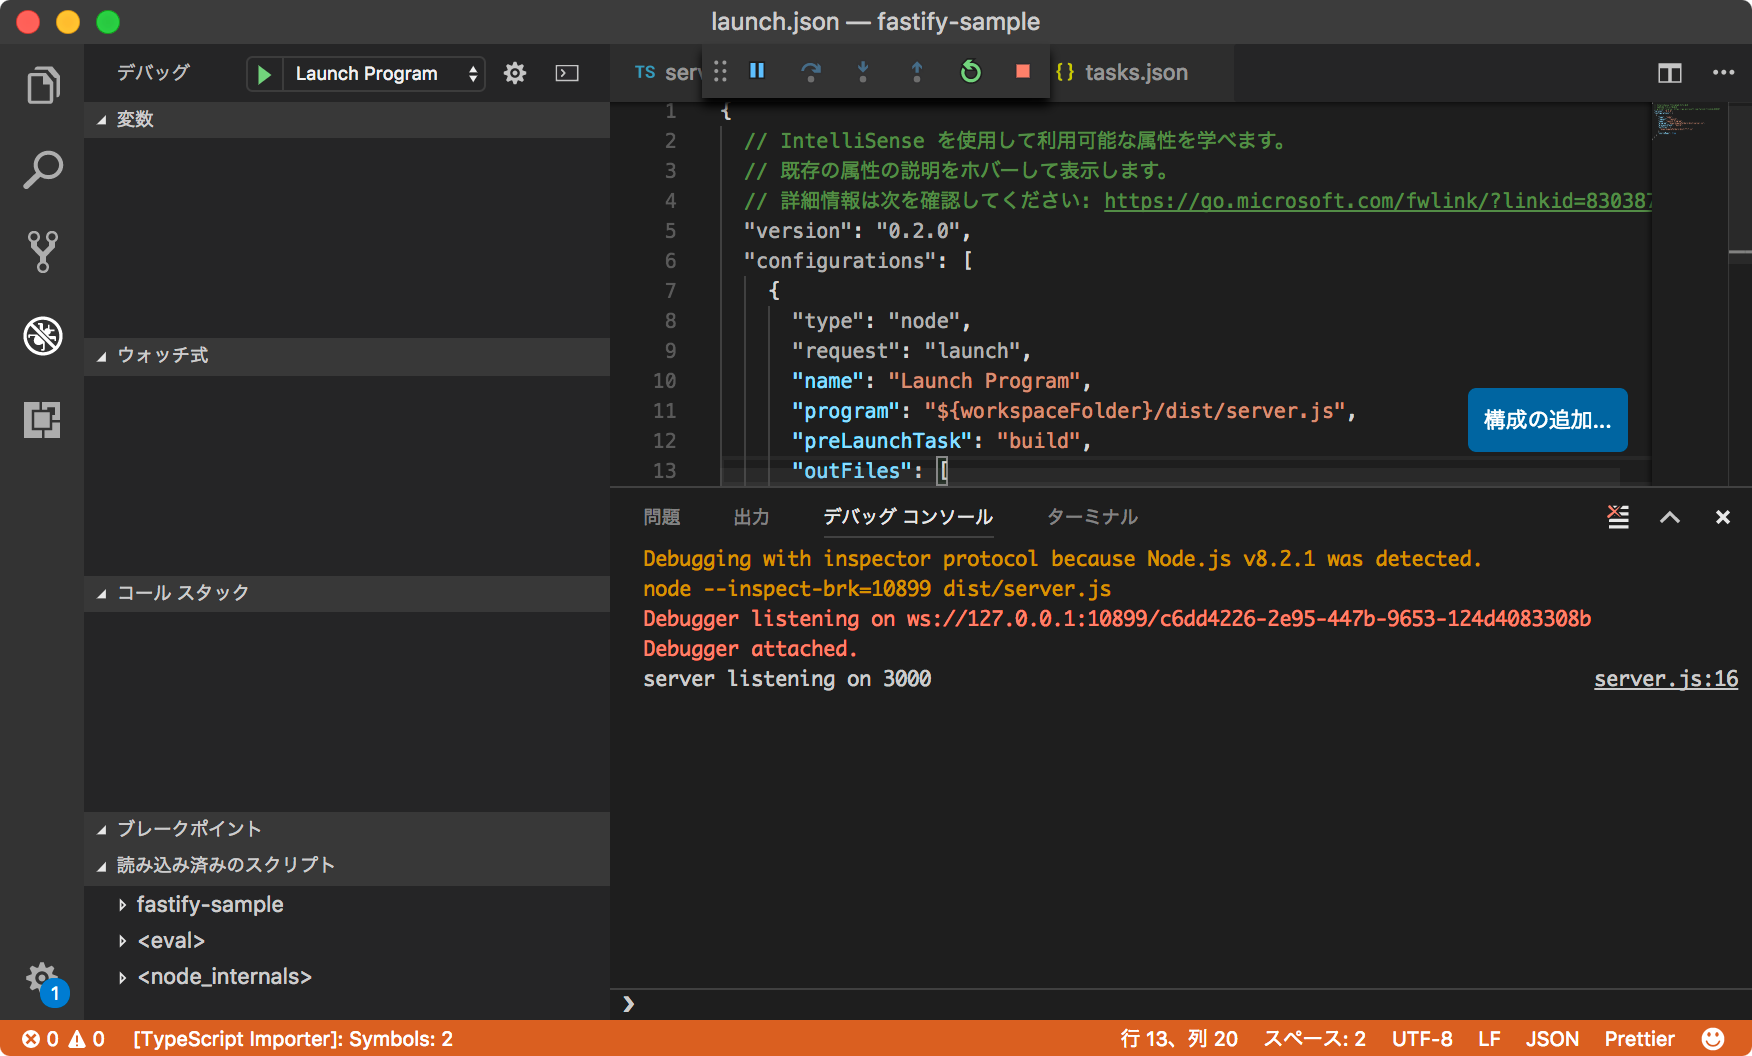
デバッグに必要なlaunch.jsonとtasks.jsonのベースができたので、以下のようにそれぞれ更新していきます。
{
  "version": "0.2.0",
  "configurations": [
    {
      "type": "node",
      "request": "launch",
      "name": "Launch Program",
      "program": "${workspaceFolder}/dist/server.js", // <- ここを修正
      "preLaunchTask": "build", // <- ここを修正
      "sourceMaps": true // <- ここを追加
    }
  ]
}
{
  "version": "2.0.0",
  "tasks": [
    {
      "label": "build", // <- ここを追加
      "type": "npm",
      "script": "build",
      "problemMatcher": []
    }
  ]
}
以上でデバッグの設定は終了です。
F5を押してみてください。
コンパイルが実行され、サーバーが起動すれば成功です。
<参考リンク>
https://qiita.com/yonboroid/items/242ba4f4f23d8f33a472
https://github.com/fastify/fastify/tree/master/examples