このブログのコピーです。
概要
AWS Cognitoで機器情報を取得するには、クライアント側でのパスワード設定が必要なのですが、サンプルのCognitoYourUserPools-Sample/Swiftに何故かAWSCognitoIdentityInteractiveAuthenticationDelegate#startNewPasswordRequiredの実装がなかったため、実装してみました。
環境
- macOS Sierra 10.12.3
- Xcode 8.2.1
- iOS 8.4
- CocoaPods 1.2.0
- AWSCore 2.5.0
- AWSCognitoIdentityProvider 2.5.0
AWS Cognito 側設定
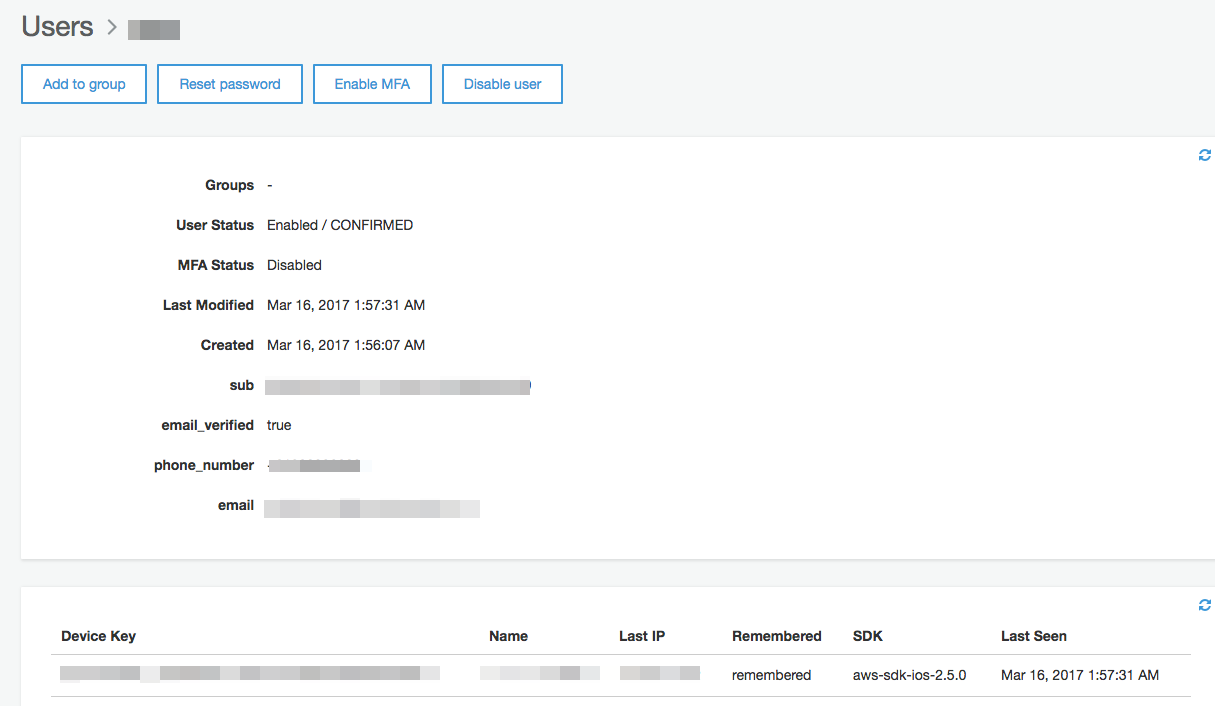
機器情報を取得したいため、devicesの設定を「Always」にします(「User Opt-in」は試していません)。また、この設定をするとMulti-Factor Authentication (MFA)の設定が必要と言われますが、ユーザー単位にMFSを無効にしても動作しました。

コード
AWS_COGNITO_USER_POOL_ID、AWS_COGNITO_CLIENT_IDとAWS_COGNITO_CLIENT_SECRETにはCognitoで払い出された値を使用します。
import Foundation
import AWSCore
import AWSCognitoIdentityProvider

class AwsCognitoManager {
    static let instance = AwsCognitoManager()
    static let AWS_COGNITO_REGION = AWSRegionType.APNortheast1
    static let AWS_COGNITO_USER_POOL_ID = "ap-northeast-1_XXXXXXXX"
    static let AWS_COGNITO_CLIENT_ID = "XXXX"
    static let AWS_COGNITO_CLIENT_SECRET = "XXXX"
    static let AWS_COGNITO_USER_POOL_KEY = "AmazonCognitoIdentityProvider"

    var cognitoUserPool: AWSCognitoIdentityUserPool?
    var currentUser: AWSCognitoIdentityUser? {
        get {
            return self.cognitoUserPool?.currentUser()
        }
    }

    func initialize(appDelegate: AWSCognitoIdentityInteractiveAuthenticationDelegate) {
        let configuration:AWSServiceConfiguration = AWSServiceConfiguration(region: AwsCognitoManager.AWS_COGNITO_REGION, credentialsProvider: nil)
        AWSServiceManager.default().defaultServiceConfiguration = configuration
        let userPoolConfigration:AWSCognitoIdentityUserPoolConfiguration = AWSCognitoIdentityUserPoolConfiguration(clientId: AwsCognitoManager.AWS_COGNITO_CLIENT_ID, clientSecret: AwsCognitoManager.AWS_COGNITO_CLIENT_SECRET, poolId: AwsCognitoManager.AWS_COGNITO_USER_POOL_ID)
        // AWSCognitoIdentityUserPool.registerCognitoIdentityUserPool(with: userPoolConfigration, forKey: AwsCognitoManager.AWS_COGNITO_USER_POOL_KEY)
        AWSCognitoIdentityUserPool.register(with: configuration, userPoolConfiguration: userPoolConfigration, forKey: AwsCognitoManager.AWS_COGNITO_USER_POOL_KEY)

        self.cognitoUserPool = AWSCognitoIdentityUserPool(forKey: AwsCognitoManager.AWS_COGNITO_USER_POOL_KEY)
        self.cognitoUserPool?.currentUser()?.signOut()
        self.cognitoUserPool?.delegate = appDelegate


    }
}
必要なdelegate処理をextensionで分けて実装します。
extension AppDelegate: AWSCognitoIdentityInteractiveAuthenticationDelegate {

    /// AWSCognitoIdentityInteractiveAuthenticationDelegate
    func startPasswordAuthentication() -> AWSCognitoIdentityPasswordAuthentication {
        if (self.loginViewContller == nil) {
            let mainStoryboard: UIStoryboard = UIStoryboard(name: "Main", bundle: nil)
            self.loginViewContller = mainStoryboard.instantiateViewController(withIdentifier: "LoginViewController") as? LoginViewContlloer
        }
        DispatchQueue.main.async {
            self.window?.rootViewController?.present(self.loginViewContller!, animated: true, completion: nil)
        }
        return self.loginViewContller!
    }

    /// AWSCognitoIdentityInteractiveAuthenticationDelegate
    func startNewPasswordRequired() -> AWSCognitoIdentityNewPasswordRequired {
        if(self.passwordRequiredViewController == nil){
            self.passwordRequiredViewController = NewPasswordRequiredViewController()
        }
        DispatchQueue.main.async {
            //if new password required view isn't already visible, display it
            if (!(self.passwordRequiredViewController!.isViewLoaded && (self.passwordRequiredViewController!.view.window != nil))) {
                self.window!.rootViewController!.present(self.passwordRequiredViewController!, animated: true, completion: nil)

            }
        }

        return self.passwordRequiredViewController!
    }

}
import Foundation
import UIKit
import AWSCore
import AWSCognitoIdentityProvider

class LoginViewContlloer: UIViewController {
    @IBOutlet weak var textUsername: UITextField!
    @IBOutlet weak var textPassword: UITextField!

    var lastKnownUsername: String?
    var passwordAuthenticationCompletion: AWSTaskCompletionSource<AWSCognitoIdentityPasswordAuthenticationDetails>?

    /// viewDidLoad
    override func viewDidLoad() {
        super.viewDidLoad()
        if(self.textUsername != nil && self.lastKnownUsername != nil) { self.textUsername.text = self.lastKnownUsername }
    }
    /// didReceiveMemoryWarning
    override func didReceiveMemoryWarning() {
        super.didReceiveMemoryWarning()
        // Dispose of any resources that can be recreated.
    }

    func login(username: String, password: String) {
        let result = AWSCognitoIdentityPasswordAuthenticationDetails(username: username, password: password)
        self.passwordAuthenticationCompletion?.set(result: result)
    }

    func showAlert(title: String, message: String, action: UIAlertAction = UIAlertAction(title: "確認", style: UIAlertActionStyle.default, handler: nil)) {
        DispatchQueue.main.async(execute: {
            let alertController = UIAlertController(title: "ログイン失敗", message: "ログインに失敗しました。", preferredStyle: UIAlertControllerStyle.alert)
            alertController.addAction(action)
            self.present(alertController, animated: true, completion: nil)
        })
    }
    @IBAction func loginButtonClicked() {
        self.login(username: self.textUsername.text!, password: self.textPassword.text!)
    }

}
extension LoginViewContlloer : AWSCognitoIdentityPasswordAuthentication {
    /// AWSCognitoIdentityPasswordAuthentication
    func getDetails(_ authenticationInput: AWSCognitoIdentityPasswordAuthenticationInput, passwordAuthenticationCompletionSource: AWSTaskCompletionSource<AWSCognitoIdentityPasswordAuthenticationDetails>) {
        self.passwordAuthenticationCompletion = passwordAuthenticationCompletionSource
        DispatchQueue.main.async(execute: {
            if(self.lastKnownUsername == nil) {
                self.lastKnownUsername = authenticationInput.lastKnownUsername
            }
        })
    }

    /// AWSCognitoIdentityPasswordAuthentication
    func didCompleteStepWithError(_ error: Error?) {
        if let nsError = error as? NSError {
            self.showAlert(title: nsError.userInfo["__type"] as! String, message: nsError.userInfo["message"] as! String)
        } else {
            self.textUsername.text = nil
            self.dismiss(animated: true, completion: nil)
        }
    }
}
import Foundation
import UIKit
import AWSCognitoIdentityProvider

class NewPasswordRequiredViewController : UIViewController, UITextFieldDelegate, AWSCognitoIdentityNewPasswordRequired {

    @IBOutlet weak var password: UITextField!
    @IBOutlet weak var phone: UITextField!
    @IBOutlet weak var email: UITextField!

    var passwordRequiredCompletionSource: AWSTaskCompletionSource<AWSCognitoIdentityNewPasswordRequiredDetails>? = nil

    // UIViewController
    override func viewDidLoad() {
        super.viewDidLoad()
        self.phone.delegate = self
    }

    func textFieldShouldEndEditing(_ textField: UITextField) -> Bool {
        if(textField == self.phone) {
            do {
                let regex:NSRegularExpression = try NSRegularExpression(pattern: "^\\+(|\\d)*$", options: NSRegularExpression.Options());
                let nsString:NSString? = self.phone.text as NSString?
                if(nsString?.length != 0) {
                    return regex.numberOfMatches(in: nsString as! String, options: NSRegularExpression.MatchingOptions(), range: NSRange(location: 0, length: (nsString?.length)!)) == 1;
                }
            } catch _ as NSError {
                // TODO
                return false
            }
        }
        return true;
    }

    func getNewPasswordDetails(_ newPasswordRequiredInput: AWSCognitoIdentityNewPasswordRequiredInput, newPasswordRequiredCompletionSource: AWSTaskCompletionSource<AWSCognitoIdentityNewPasswordRequiredDetails>) {
        self.passwordRequiredCompletionSource = newPasswordRequiredCompletionSource
        DispatchQueue.main.async {
            if(self.phone != nil) { self.phone.text = newPasswordRequiredInput.userAttributes["phone_number"] }
            if(self.email != nil) { self.email.text = newPasswordRequiredInput.userAttributes["email"] }
        }
    }

    func didCompleteNewPasswordStepWithError(_ error: Error?) {
        DispatchQueue.main.async {
            if((error) != nil) {
                let nsError: NSError = error as! NSError
                let alert: UIAlertController = UIAlertController(title: nsError.userInfo["__type"] as! String?, message: nsError.userInfo["message"] as! String?, preferredStyle: UIAlertControllerStyle.alert)
                alert.addAction(UIAlertAction(title: "Retry", style: UIAlertActionStyle.default, handler: {
                    (action: UIAlertAction!) -> Void in
                    // TODO
                }))
                self.present(alert, animated: true, completion: nil)
            }else{
                self.dismiss(animated: true, completion: nil)
            }
        }
    }

    @IBAction func completeProfile(_ sender: UIButton) {
        let userAttributes: Dictionary = [ "email": self.email.text, "phone_number": self.phone.text ] as [String : String?]
        let details: AWSCognitoIdentityNewPasswordRequiredDetails = AWSCognitoIdentityNewPasswordRequiredDetails(proposedPassword: self.password.text!, userAttributes: userAttributes as! [String : String])
        self.passwordRequiredCompletionSource?.set(result: details);
    }
}
結果
ハマったこと・課題など
- コードとは無関係だけど電話番号がITU-T E.164(+81で始まる形式)でないとCognito側のバリデーションエラーになってた…
github
(サンプルを直接実装した版ですが)
https://github.com/bhind/aws-sdk-ios-samples
