はじめに
この記事は terraform Advent Calendar 2019 の10日目です。
既存の GCP リソースを管理するために Terraform Cloud を使ってみたので設定方法を紹介したいと思います。
作る環境
-
.tfファイルを GitHub で管理する - 既存の GCP のリソースを
.tfファイルに自動変換する - branch を切って commit & push すると自動で
terraform planする - master branch に merge すると自動で
terraform applyする - ローカル環境でも
terraform planが叩ける
管理するもの
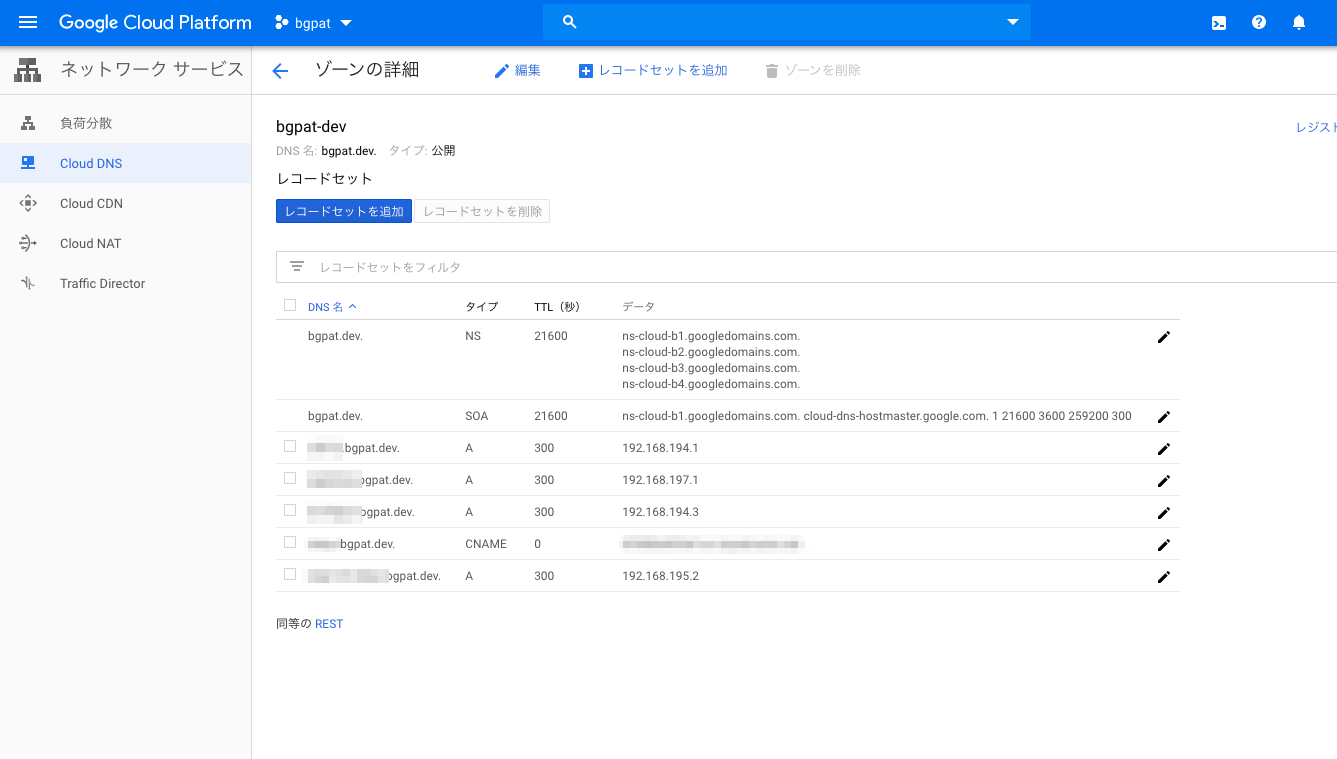
今回は下記の Cloud DNS の zone を terraform で管理します。
あらかじめ準備しておくもの
- Terraform Cloud のアカウントと organization の登録
- Terraform Cloud を terraform の remote として利用するための設定
- 例:
~/.terraformrcに token を設定するなど
- 例:
gcloudコマンドの設定- terraformer のインストール
GCP でサービスアカウントを作る
まず Terraform Cloud から GCP にアクセスするためのサービスアカウントを作成します。
https://console.cloud.google.com/iam-admin/serviceaccounts/create
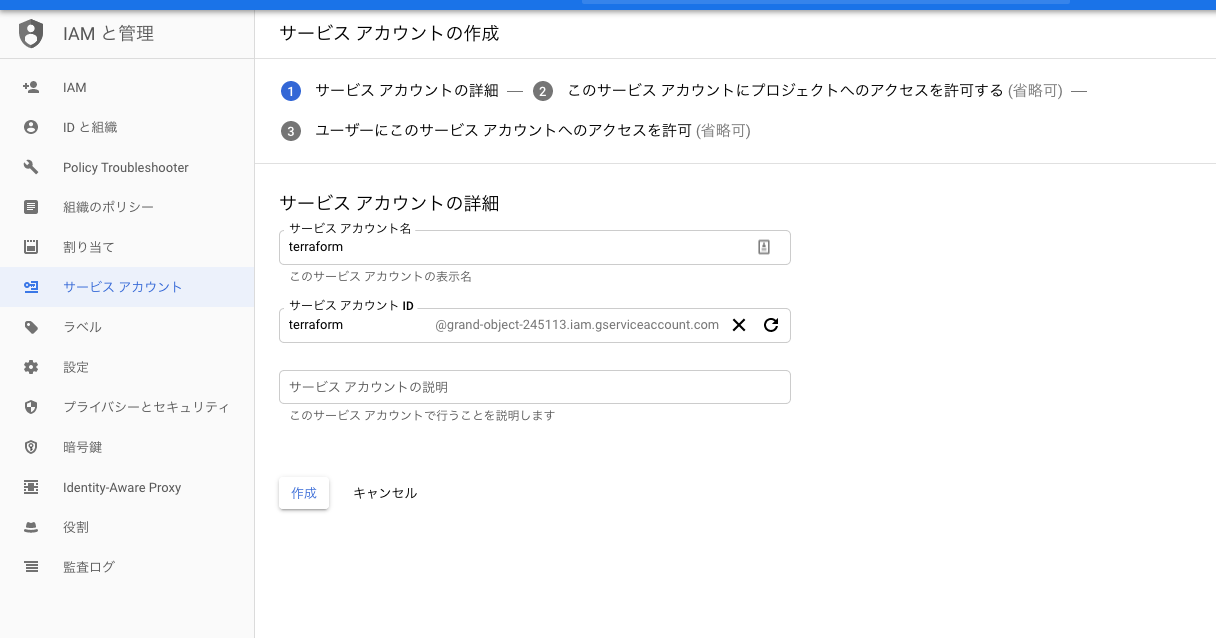
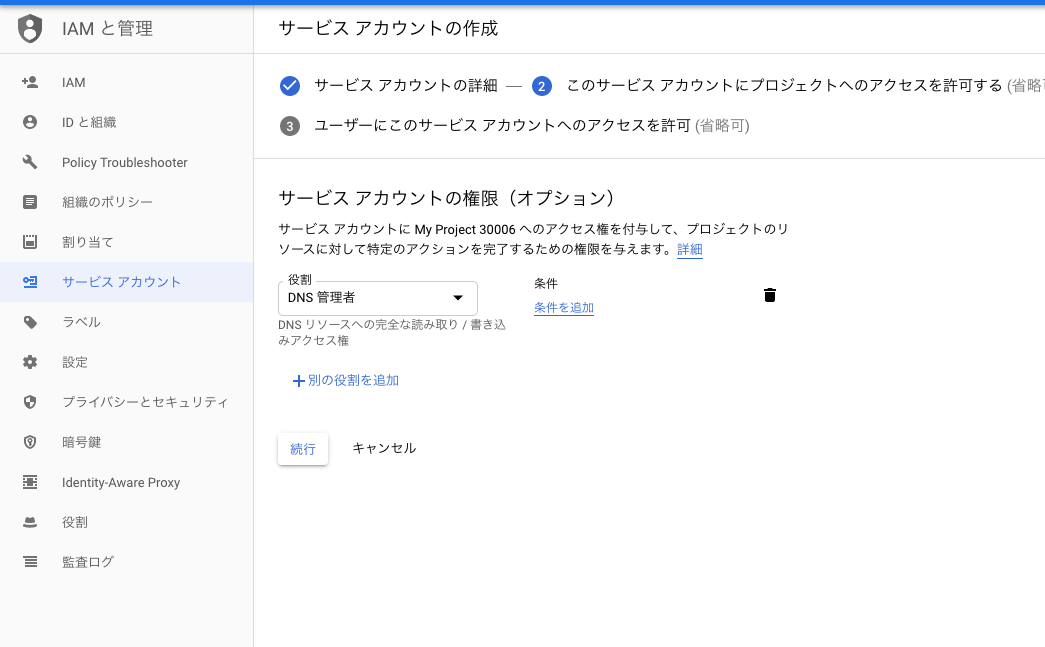
今回は権限に DNS 管理者を割り当てました。
ここは管理対象に合わせて適宜変更してください。
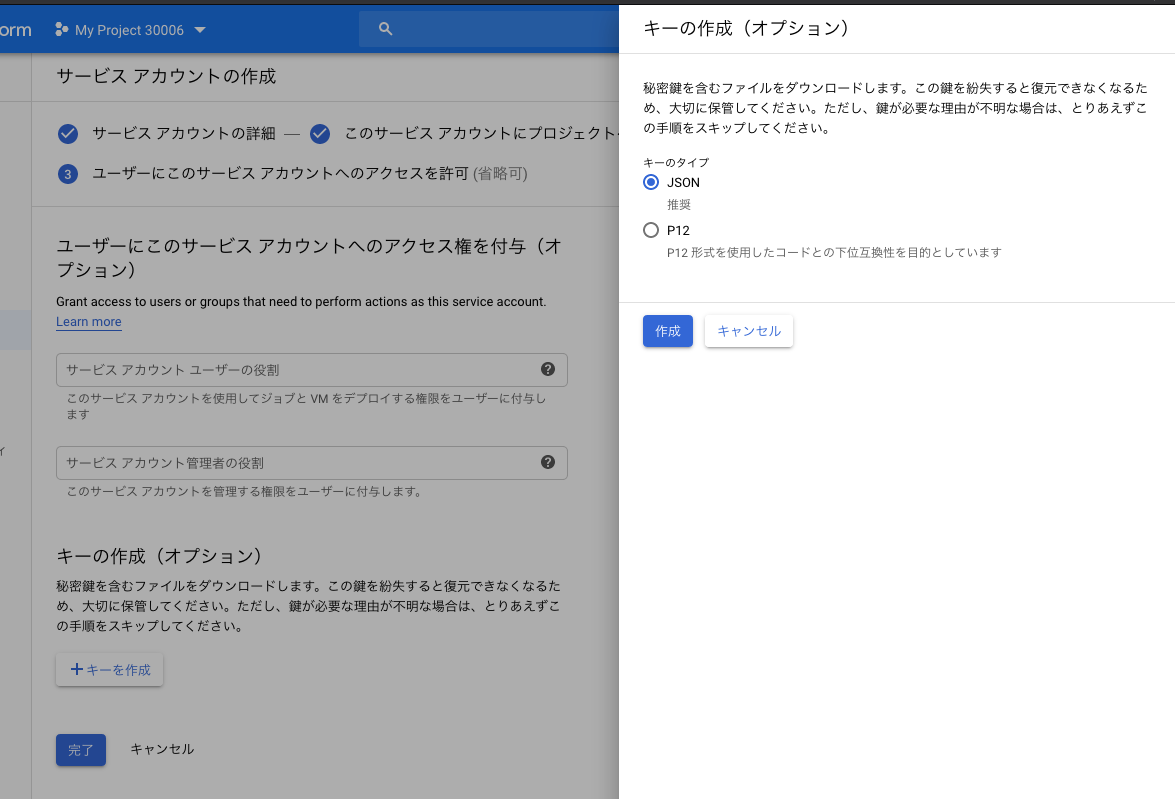
サービスアカウントの鍵も作成して保存しておきます。(あとで使います)
GitHub でリポジトリを作る
.tf ファイルを管理する git リポジトリを作ります。
https://github.com/new
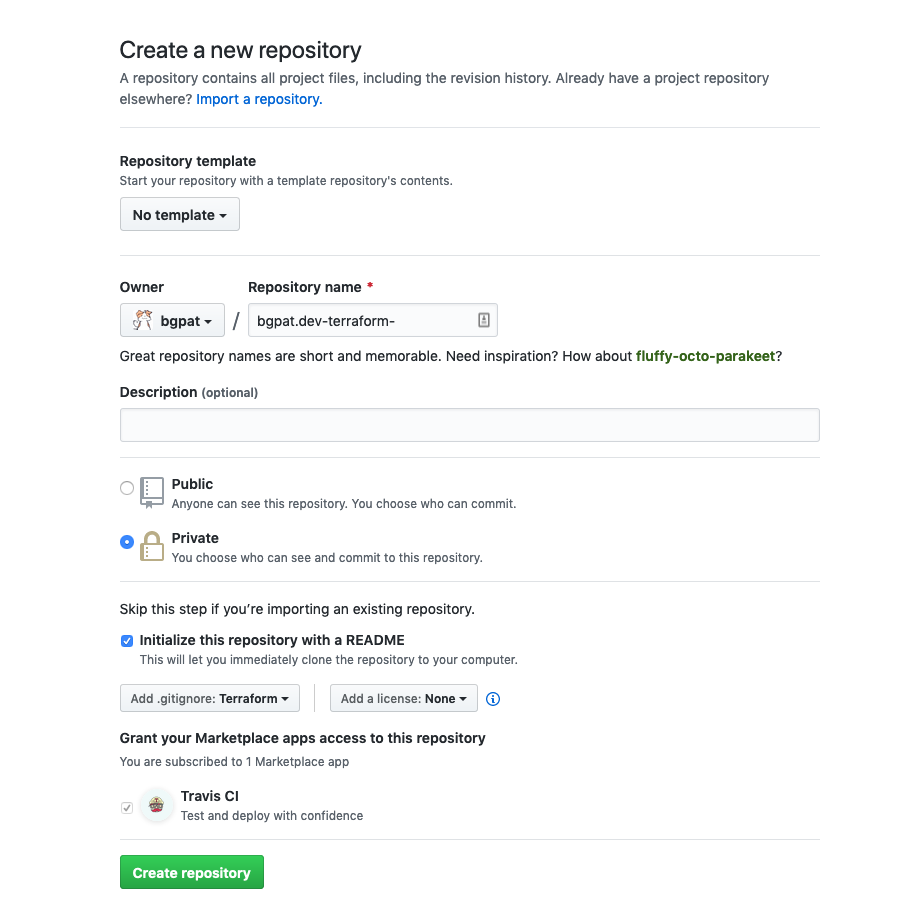
作成したらローカルに clone しておきます。
Terraform Cloud で workspace を作る
次に Terraform Cloud の設定を行います。
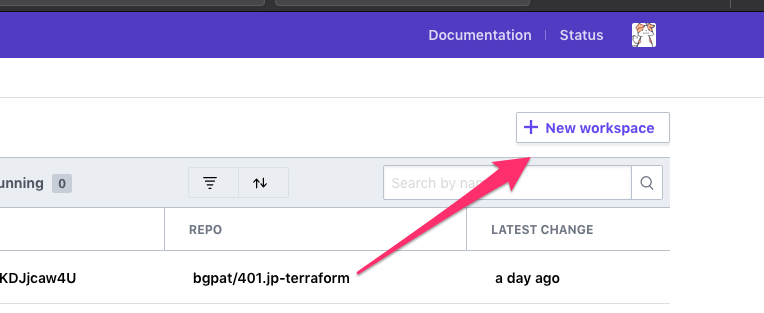
Terraform Cloud の右上のボタンから新しく workspace を作ります。
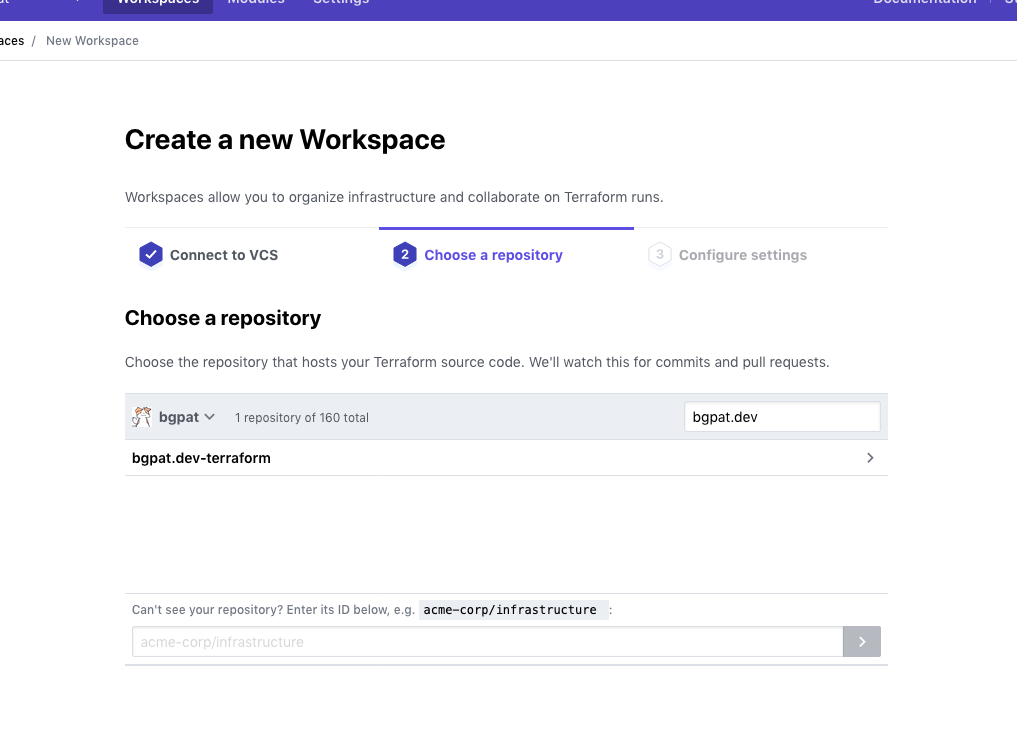
GitHub でリポジトリを作る で作ったリポジトリと連携させます。
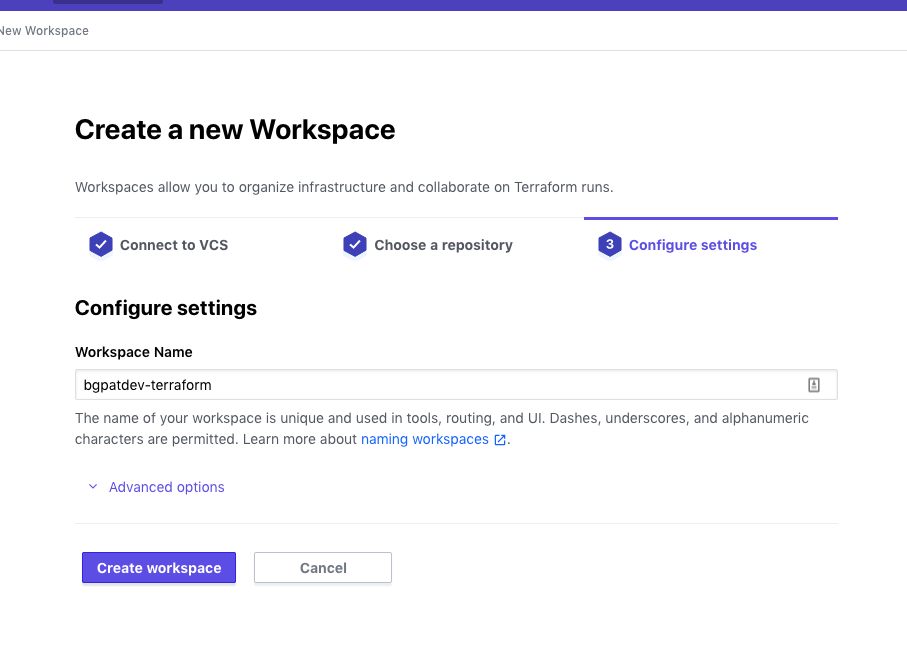
次のページに進んでそのまま Create workspace をクリックします。
Terraform Cloud に GCP の認証情報を登録
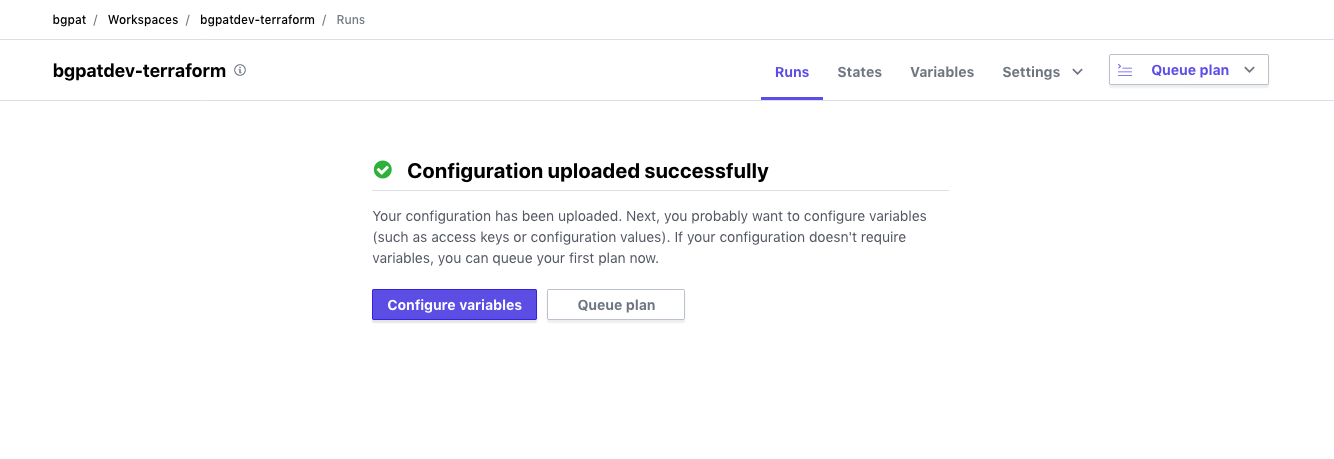
workspace を作成したら Configure variables から環境変数を登録します。
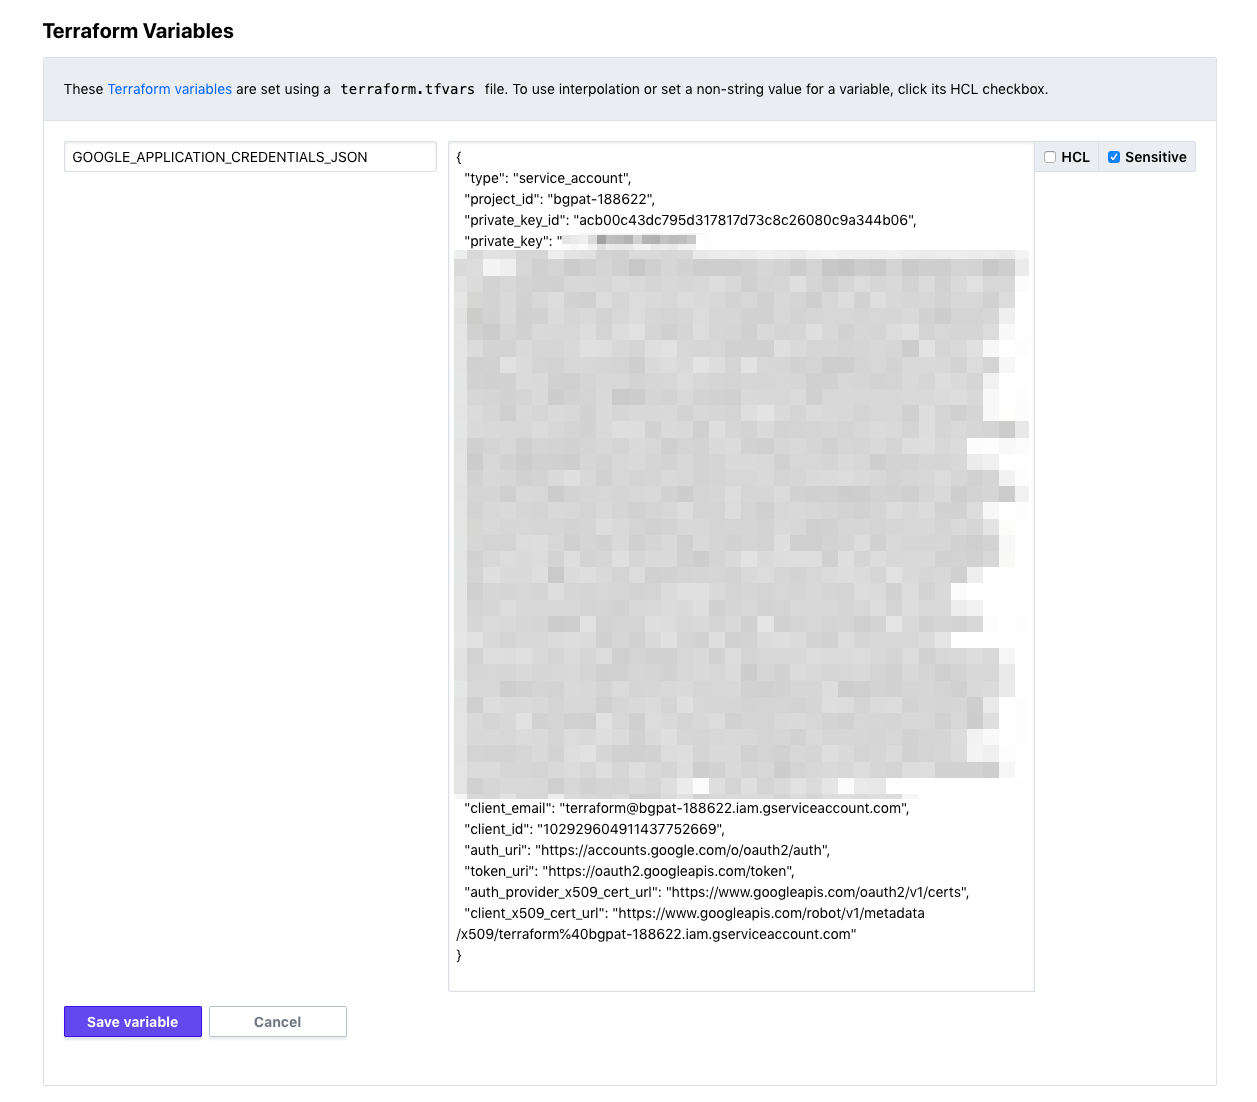
ここで GCP にアクセスするための認証情報を設定します。
GCP でサービスアカウントを作る で作ったサービスアカウントの鍵をコピペして GOOGLE_APPLICATION_CREDENTIALS_JSON という名前で登録します。
Sensitive のチェックも忘れず付けておきます。
Terraform Cloud の Auto apply 機能を有効化
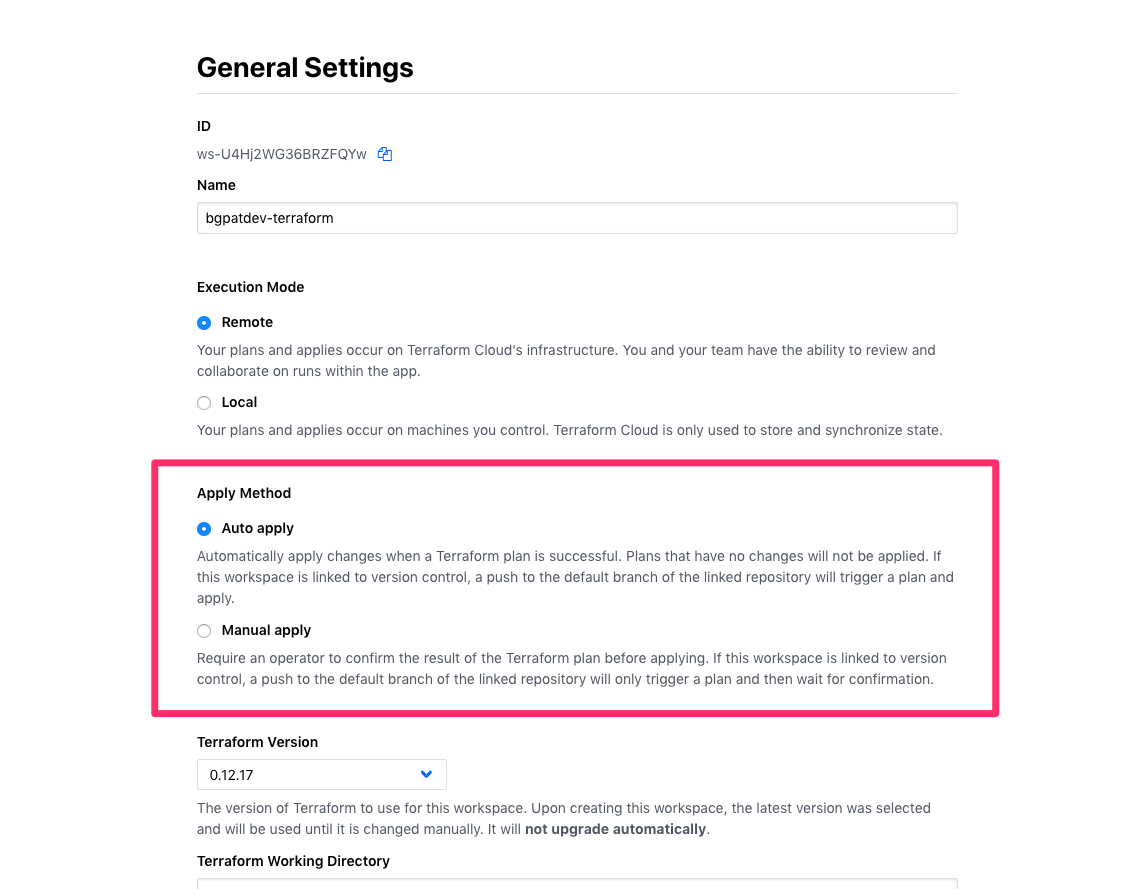
GitHub に push したときに自動で terraform plan と terraform apply が実行されるように設定を変更します。
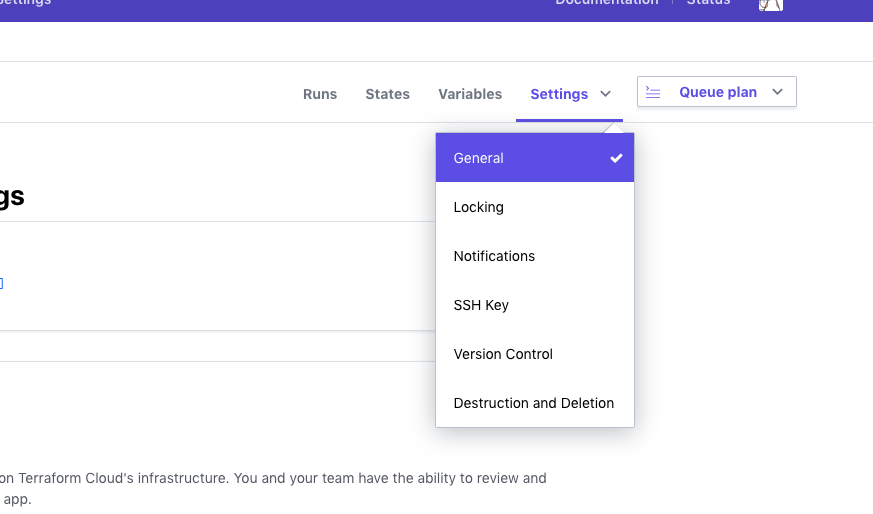
Settings → General から Apply Method を Auto apply に変更します
設定したら Queue plan をクリックして CI を実行しておきます。

terraformer で既存の GCP リソースをインポート
terraformer を使って GCP リソースをインポートします。
terraformer を使うためには terraform provider が必要になるので google provider の設定を書きます。
variable "GOOGLE_APPLICATION_CREDENTIALS_JSON" {
  type    = string
  default = ""
}

provider "google" {
  version     = "v3.1.0"
  project     = "bgpat-188622"
  credentials = var.GOOGLE_APPLICATION_CREDENTIALS_JSON
}
var.GOOGLE_APPLICATION_CREDENTIALS_JSON には Terraform Cloud に GCP の認証情報を登録 で設定した GCP の認証情報が入ります。
デフォルト値が空文字なのでローカルで動かすときは gcloud コマンドの認証情報が利用されます。
ファイルを配置したら terraform init して google plugin をキャッシュに置きます。
$ terraform init

Initializing the backend...

Initializing provider plugins...
- Checking for available provider plugins...
- Downloading plugin for provider "google" (hashicorp/google) 3.1.0...

Terraform has been successfully initialized!

You may now begin working with Terraform. Try running "terraform plan" to see
any changes that are required for your infrastructure. All Terraform commands
should now work.

If you ever set or change modules or backend configuration for Terraform,
rerun this command to reinitialize your working directory. If you forget, other
commands will detect it and remind you to do so if necessary.
terraformer import で GCP のリソースを .tf ファイルに変換します。
$ terraformer import google --projects=bgpat-188622 --resources=dns
2019/12/10 07:55:53 google importing project bgpat-188622 region global
2019/12/10 07:55:54 google importing... dns
2019/12/10 07:55:59 Refreshing state... google_dns_record_set.tfer--bgpat-002D-dev_bgpat-002E-dev-002E--002D-NS
︙
2019/12/10 07:56:01 google Connecting....
2019/12/10 07:56:01 google save dns
2019/12/10 07:56:01 google save tfstate for dns
ちゃんと import できているか確認
$ tree generated/
generated/
└── google
    └── bgpat-188622
        └── dns
            └── global
                ├── dns_managed_zone.tf
                ├── dns_record_set.tf
                ├── outputs.tf
                ├── provider.tf
                └── terraform.tfstate

4 directories, 5 files
terraformer で生成したファイルは v0.12 の文法に対応していないので terraform 0.12upgrade で変換します。
$ terraform 0.12upgrade generated/google/bgpat-188622/dns/global/

This command will rewrite the configuration files in the given directory so
that they use the new syntax features from Terraform v0.12, and will identify
any constructs that may need to be adjusted for correct operation with
Terraform v0.12.

We recommend using this command in a clean version control work tree, so that
you can easily see the proposed changes as a diff against the latest commit.
If you have uncommited changes already present, we recommend aborting this
command and dealing with them before running this command again.

Would you like to upgrade the module in generated/google/bgpat-188622/dns/global?
  Only 'yes' will be accepted to confirm.

  Enter a value: yes

-----------------------------------------------------------------------------

Upgrade complete!

The configuration files were upgraded successfully. Use your version control
system to review the proposed changes, make any necessary adjustments, and
then commit.
generated ディレクトリから欲しい情報を抜き出します。
$ cp generated/google/bgpat-188622/dns/global/{dns_managed_zone.tf,dns_record_set.tf} ./
tfsate を Terraform Cloud に同期
このままだと既存のリソースが tfstate に存在しないため、 apply 時に新しくリソースを作成しようとしてエラーが出てしまいます。
これを避けるために terraformer で生成した tfstate を Terraform Cloud にもアップロードします。
terraform remote の設定ファイルを書きます。
organization と workspace.name は環境に合わせて変更します。
terraform {
  backend "remote" {
    hostname     = "app.terraform.io"
    organization = "bgpat"

    workspaces {
      name = "bgpatdev-terraform"
    }
  }
}
もう一度 terraform init を実行して terraform state push で Terraform Cloud に tfstate をアップロードします。
$ terraform init

Initializing the backend...

Successfully configured the backend "remote"! Terraform will automatically
use this backend unless the backend configuration changes.

Initializing provider plugins...

Terraform has been successfully initialized!

You may now begin working with Terraform. Try running "terraform plan" to see
any changes that are required for your infrastructure. All Terraform commands
should now work.

If you ever set or change modules or backend configuration for Terraform,
rerun this command to reinitialize your working directory. If you forget, other
commands will detect it and remind you to do so if necessary.
$ terraform state push generated/google/bgpat-188622/dns/global/terraform.tfstate
Releasing state lock. This may take a few moments...
動作確認
動作確認のために生成したファイルを git commit & git push します。
$ git checkout -b import
Switched to a new branch 'import'
$ git add dns_managed_zone.tf dns_record_set.tf provider.tf remote.tf
$ git commit -m 'Import by terraformer'
[import b0ffec7] Import by terraformer
 4 files changed, 109 insertions(+)
 create mode 100755 dns_managed_zone.tf
 create mode 100755 dns_record_set.tf
 create mode 100644 provider.tf
 create mode 100644 remote.tf
$ git push -u origin HEAD
Enumerating objects: 7, done.
Counting objects: 100% (7/7), done.
Delta compression using up to 8 threads
Compressing objects: 100% (6/6), done.
Writing objects: 100% (6/6), 1.37 KiB | 1.37 MiB/s, done.
Total 6 (delta 0), reused 0 (delta 0)
remote:
remote: Create a pull request for 'import' on GitHub by visiting:
remote:      https://github.com/bgpat/bgpat.dev-terraform/pull/new/import
remote:
To https://github.com/bgpat/bgpat.dev-terraform
 * [new branch]      HEAD -> import
Branch 'import' set up to track remote branch 'import' from 'origin'.
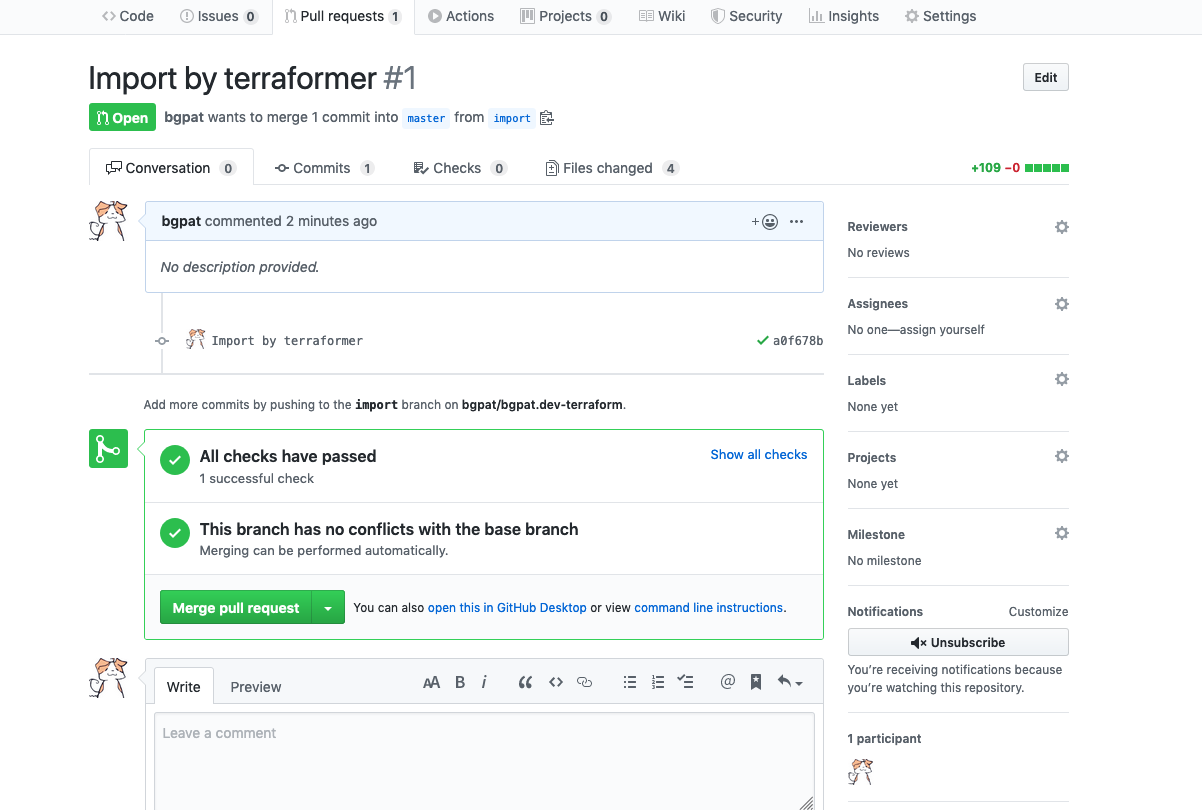
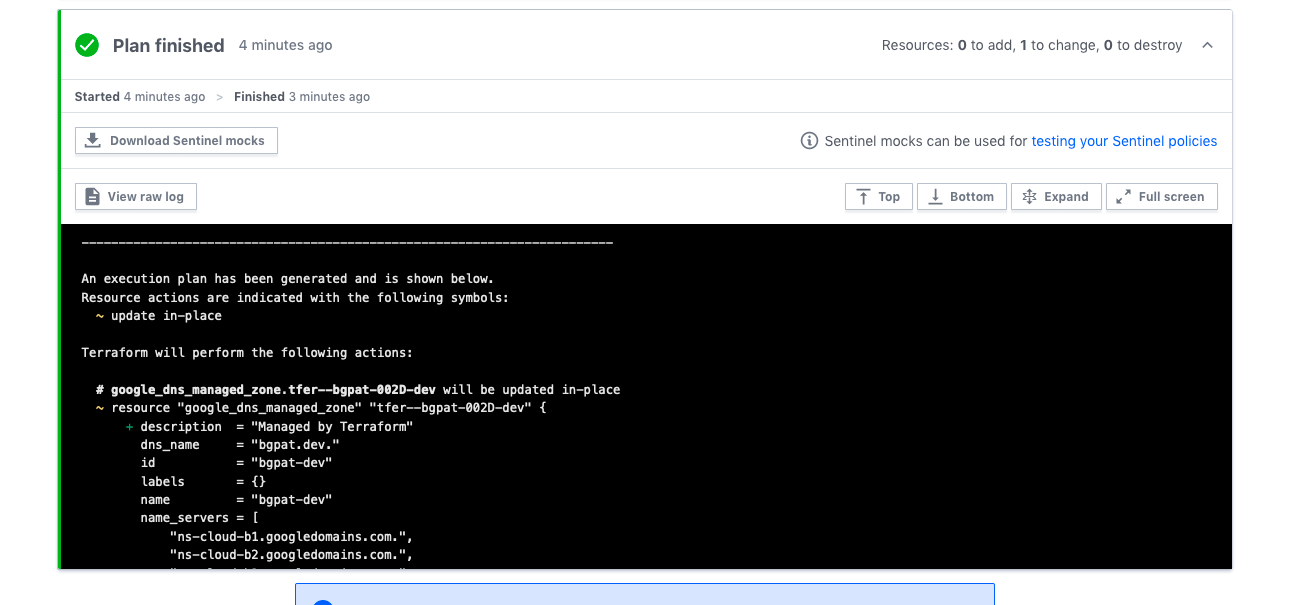
GitHub を開いて Pull Request を作ると Terraform Cloud の CI が実行されます。
