Mattermost
2022年9月1日から Slack のフリープランにおけるメッセージ履歴の制約が「1万件」から「過去90日間」に変更になるとアナウンスされました。1
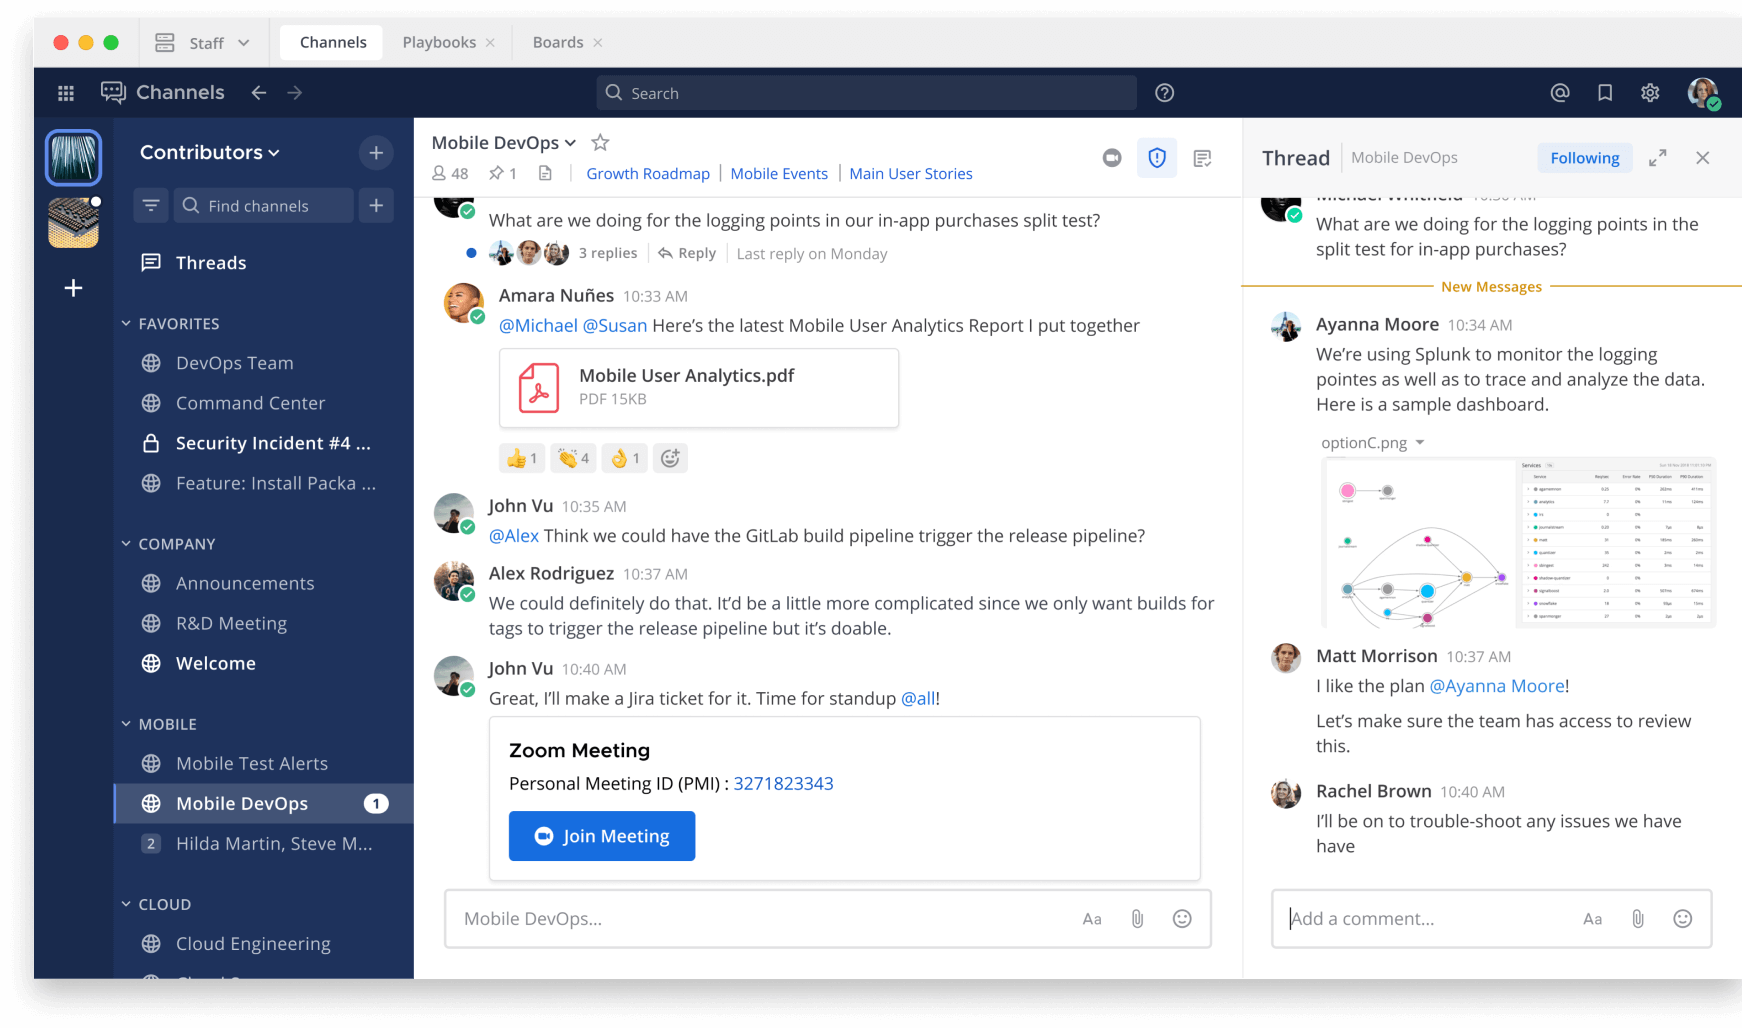
Slack クローンの Mattermost はセルフホストが可能で、これを利用すれば制約を気にする必要がなくなります。
そこで、公式ドキュメントに基づいて Mattermost を RHEL クローンの Rocky Linux 8.6 にインストールする手順をまとめました。Slack からのデータ移行も記載しています。
RHEL 8.x や CentOS 8 Stream、 AlmaLinux 8.x 等でも手順に大きな違いはないかと思います。
Docker 版のインストールは Install Mattermost via Docker を参照してください。 Docker での運用に慣れていればこちらの方が早いでしょう。
環境
- VirtualBox 6.1.34 (2022-03-22) 2
- Rocky Linux 8.6 (minimal) (2022-05-16) 3
- MySQL Community Server 8.0.29 (2022-04-26) 4
- Mattermost Server 7.1.1 (2022-07-15) 5
インストール
Rocky Linux 8
「Rocky Linux 8 を VirtualBox に最小インストールする - Qiita」を参考に。
MySQL Server 8
MySQL Yum Repository の追加
dnf install https://repo.mysql.com/mysql80-community-release-el8.rpm
dnf module disable mysql
最新バージョンの MySQL Server を利用したい場合、デフォルトの mysql モジュールを無効にして MySQL Yum Repository を導入します。
この作業は必須ではありません。
インストールと起動
dnf install mysql-server
systemctl --now enable mysqld
--now オプションで自動起動設定と同時に起動します。 6
エラーが出る場合は rpm --import https://repo.mysql.com/RPM-GPG-KEY-mysql-2022 を実行します。
root パスワードの変更
 DB_ROOT_PASSWORD=$(< /dev/urandom tr -dc 'A-HJ-NP-Za-km-z2-9!$%&()*+,-.:;<=>?[]^_{}~' | head -c 16; echo)
 echo ${DB_ROOT_PASSWORD}
awk '/password/ {print $13}' /var/log/mysqld.log
mysql_secure_installation
ログに出力された初期パスワードを確認し、 mysql_secure_installation コマンドで root パスワードの変更等のセキュリティ強化を行います。
コマンドの先頭にスペースがあると history に記録されません。
この挙動は環境変数 HISTCONTROL に ignorespace または ignoreboth が指定されていると機能します。
パスワード生成には文字種指定のために tr コマンドを応用していますが、 pwmake コマンドがデフォルトでインストールされているので pwmake 80 などと実行しても良いでしょう。他に expect パッケージに含まれる mkpasswd コマンド等もあります。
データベースと DB ユーザーの作成
 DB_USER_USERNAME='mmuser'
 DB_USER_PASSWORD=$(< /dev/urandom tr -dc 'A-HJ-NP-Za-km-z2-9!$%&()*+,-.:;<=>?[]^_{}~' | head -c 16; echo)
 echo ${DB_USER_PASSWORD}
mysqladmin --user=root --password create mattermost
mysql --user=root --password --execute="CREATE USER '${DB_USER_USERNAME}'@'localhost' IDENTIFIED BY '${DB_USER_PASSWORD}';"
mysql --user=root --password --execute="GRANT ALL ON mattermost.* TO '${DB_USER_USERNAME}'@'localhost';"
mysql --user=mmuser --password mattermost
mysql にログインして実行する場合は以下の通り。
mysql --user=root --password
CREATE DATABASE mattermost;
CREATE USER 'mmuser'@'localhost' IDENTIFIED BY '<DB_USER_PASSWORD>';
GRANT SELECT, INSERT, UPDATE, DELETE, CREATE, DROP, EXECUTE, REFERENCES, INDEX, ALTER ON mattermost.* TO 'mmuser'@'localhost';
SELECT Host, User, plugin FROM mysql.user;
SHOW GRANTS FOR 'mmuser'@'localhost';
\q
Mattermost Server
ダウンロード
RELEASE_NAME=$(curl -sL https://api.github.com/repos/mattermost/mattermost-server/releases/latest | awk '/"name"/ {print $2}')
VERSION=${RELEASE_NAME:2:-2}
curl --location --remote-name https://releases.mattermost.com/${VERSION}/mattermost-${VERSION}-linux-amd64.tar.gz
dnf install tar
tar --extract --directory=/opt/ --file=mattermost-${VERSION}-linux-amd64.tar.gz
mkdir --verbose /opt/mattermost/data
useradd --system --user-group mattermost --comment 'Mattermost' --shell /sbin/nologin
chown --recursive mattermost:mattermost /opt/mattermost
chmod --recursive g+w /opt/mattermost
restorecon -Rv /opt/mattermost
Mattermost Server のバイナリをダウンロードするために、Deploy Your Self-Hosted Mattermost Server ページでバイナリの URL を確認するか、 GitHub の REST API の Get the latest release から Mattermost リポジトリの最新リリース名で最新バージョンを取得し、ダウンロード URL を生成します。
最小構成では tar パッケージがインストールされていません。
設定の変更
cp --archive --verbose /opt/mattermost/config/config.json{,.org}
FQDN='192.168.56.100'
SITE_URL="http://${FQDN}/"
sed --in-place \
 --expression='/DriverName/ s/postgres/mysql/' \
 --expression='/"DataSource"/ s|postgres://||' \
 --expression="/\"DataSource\"/ s/mostest/${DB_USER_PASSWORD}/" \
 --expression='/"DataSource"/ s/localhost/tcp(localhost:3306)/' \
 --expression='/"DataSource"/ s/mattermost_test/mattermost/' \
 --expression='/"DataSource"/ s/sslmode=.*yes//' \
 --expression='/"DataSource"/ s/\?"/\?charset=utf8mb4,utf8\&writeTimeout=30s"/' \
 --expression="/\"SiteURL\"/ s|\"\"|\"${SITE_URL}\"|" \
 /opt/mattermost/config/config.json
diff /opt/mattermost/config/config.json{.org,}
config/config.json ファイルの DriverName DataSource SiteURL の値を変更します。
サービスの追加
systemctl edit --force --full mattermost.service
[Unit]
Description=Mattermost
After=syslog.target network.target mysqld.service

[Service]
Type=notify
WorkingDirectory=/opt/mattermost
User=mattermost
ExecStart=
ExecStart=/opt/mattermost/bin/mattermost
PIDFile=/var/spool/mattermost/pid/master.pid
TimeoutStartSec=3600
KillMode=mixed
LimitNOFILE=49152

[Install]
WantedBy=multi-user.target
systemctl edit コマンドに --force オプションを付けることで新しいユニットファイルを作成できます。 7
Mattermost の起動
systemctl --now enable mattermost
FirewallD
firewall-cmd --permanent --new-service=mattermost
firewall-cmd --permanent --service=mattermost --set-short='Mattermost Server'
firewall-cmd --permanent --service=mattermost --set-description='Mattermost is a Slack-like chat collaboration tool.'
firewall-cmd --permanent --service=mattermost --add-port=8065/tcp
firewall-cmd --permanent --add-service=mattermost
firewall-cmd --reload
firewall-cmd --list-services
firewall-cmd コマンドの --new-service オプションで新しいサービスを追加できます。 8
ポートを開放したらブラウザからアクセスします。
firewall-cmd --permanent --add-port=8065/tcp && firewall-cmd --reload で直接ポート番号を指定することもできます。
Slack から Mattermost へのデータの移行
Slack データのエクスポート
- デスクトップの画面左上にあるワークスペース名をクリックします。
- メニューから「設定とその他管理項目」を選択し、「ワークスペースの設定」をクリックします。
- 「データのインポート/エクスポート」をクリックします。
- 「エクスポート」タブを選択します。
- 「日付範囲をエクスポートする」のドロップダウンメニューを開き、オプションを選択します。
- 「エクスポート開始」をクリックします。エクスポートファイルの準備ができるとメールが送付されます。
- 届いたメールに記載されている「ワークスペースのエクスポートページにアクセスする」をクリックします。
- 「ダウンロードを開始する」をクリックして zip ファイルにアクセスします。
<ワークスペース名> Slack export <開始年月日> - <終了年月日>.zipというファイルがダウンロードされます。 - ファイル名にマルチバイトやスペースが含まれていてコンソールでの処理が面倒になるので、ファイル名を
slack-bulk-export.zipなどに変更しておきます。
データファイルの転送
scp slack-bulk-export.zip username@192.168.56.100:./
ローカル PC からサーバーにエクスポートデータを転送します。
Slack アプリの登録
- https://api.slack.com/apps にアクセスします。
- 「Create New App」ボタンを押下します。
- 「From scratch」を選択します。
- 「App Name」に「Slack Advanced Exporter」など任意の名前を入力し、「Pick a workspace to develop your app in:」でワークスペースを選択したら「Create App」ボタンを押下します。
- サイドバーから「OAuth & Permissions」を選択し、「Scopes」の「Bot Token Scopes」で「Add an OAuth Scope」ボタンを押下して
users:readとusers:read.emailを追加します。 - 同じ「OAuth & Permissions」ページの「OAuth Tokens for Your Workspace」にある「Install to Workspace」ボタンを押下します。
- 「許可する」ボタンを押下します。
- 「OAuth Tokens for Your Workspace」の「Bot User OAuth Token」欄の値をコピーします。
Slack Advanced Exporter
 SLACK_TOKEN=''
curl --location --remote-name https://github.com/grundleborg/slack-advanced-exporter/releases/download/v0.4.0/slack-advanced-exporter.linux-amd64.tar.gz
tar --extract --file=slack-advanced-exporter.linux-amd64.tar.gz
mv --verbose slack-advanced-exporter /usr/local/bin/
slack-advanced-exporter --input-archive slack-bulk-export.zip --output-archive export-with-emails.zip fetch-emails --api-token ${SLACK_TOKEN}
slack-advanced-exporter --input-archive export-with-emails.zip --output-archive export-with-emails-and-attachments.zip fetch-attachments
前段でコピーした「Bot User OAuth Token」欄の値を、変数 $SLACK_TOKEN に代入します。
管理ユーザーとチームの作成
TEAM_NAME='mynewteam'
DISPLAY_NAME='My New Team'
MM_EMAIL='user@example.jp'
MM_USERNAME='userexample'
 MM_PASSWORD=$(< /dev/urandom tr -dc 'A-HJ-NP-Za-km-z2-9!$%&()*+,-.:;<=>?[]^_{}~' | head -c 16; echo)
 echo ${MM_PASSWORD}
ln --symbolic --verbose /opt/mattermost/bin/mmctl /usr/local/bin/
mmctl user create --email ${MM_EMAIL} --username ${MM_USERNAME} --password ${MM_PASSWORD} --system-admin
mmctl auth login http://${FQDN}:8065/
mmctl team create --name ${TEAM_NAME} --display-name ${DISPLAY_NAME}
管理ユーザーと、インポート先のチーム(Slackで言うワークスペース)を作成します。
Connection name: は空欄のままエンターを押下すれば大丈夫です。
Mattermost ETL (mmetl) のダウンロード
curl --location -o mmetl.linux-amd64.tar.gz https://github.com/mattermost/mmetl/releases/download/v0.1.1/linux_amd64.tar.gz
tar --extract --file=mmetl.linux-amd64.tar.gz
mv --verbose mmetl /usr/local/bin/
go get -u github.com/mattermost/mmetl でもインストールできますが、かなり時間が掛かります。何度も使うコマンドでもないためバイナリ版をダウンロードした方が早いでしょう。
変換
mmetl transform slack --team ${TEAM_NAME} --file export-with-emails-and-attachments.zip --output mattermost_import.jsonl
dnf install zip
zip --recurse-paths mattermost-bulk-import.zip data mattermost_import.jsonl
最小構成では zip パッケージがインストールされていません。
インポート
mmctl import upload ./mattermost-bulk-import.zip
mmctl import list available
mmctl import process <IMPORT FILE NAME>
mmctl import job show <JOB ID> --json
mmctl import upload コマンド実行時に Error: failed to create upload session: : Unable to upload file. File is too large., というエラーが表示された場合は、 config/config.json ファイルの MaxFileSize の値を増やして systemctl restart mattermost で再起動して再実行すると回避できます。 9
ちなみに今回仮想環境で一度試した限りでは、以下の点が期待と異なりうまくいきませんでした。
- チャンネル名がランダムな文字列になってしまった(チャンネルの説明文などは正しく取り込まれている)
- 画像をインポートしたはずなのに表示されない
- 各ユーザーのメールアドレスが反映されない
-
今回、フリープランの内容も変更し、ユーザーの皆さまが Slack のさまざまな新機能を試しやすくなります。いずれの変更も、2022 年 9 月 1 日から適用予定です。
これまでフリープランでは、メッセージ数 10,000 件、ストレージ容量 5 GB という制限がありましたが、今後は過去 90 日間のメッセージ履歴とファイルストレージを無制限に利用できるため、チームはいつ上限に達するのか心配する必要はありません。
- Slack 初の料金改定とフリープランの内容変更のお知らせ | Slack ↩ -
VirtualBox 6.1.34 (released March 22 2022)
- https://www.virtualbox.org/wiki/Changelog ↩ -
MAY 16, 2022 Rocky Linux 8.6 Available Now
- Rocky Linux 8.6 Available Now | Rocky Linux ↩ -
MySQL :: MySQL 8.0 Release Notes :: Changes in MySQL 8.0.29 (2022-04-26, General Availability) ↩
-
v7.1.1, released 2022-07-15
- Mattermost self-hosted changelog — Mattermost documentation ↩ -
enable で使用した場合、ユニットの有効化だけでなく起動も行われます。disable や mask で使用した場合、ユニットは停止されます。有効化・無効化の操作が成功したときのみ起動・停止操作も行われます。
---now- オプション - systemctl(1) — Arch Linux マニュアルページ ↩ -
--force を指定して既存のユニットが存在しない場合、新しいユニットファイルが開かれます。
-edit UNIT...- ユニットコマンド - コマンド - systemctl(1) — Arch Linux マニュアルページ ↩ -
7.3.4. 新しいサービスの追加 Red Hat Enterprise Linux 8 | Red Hat Customer Portal ↩
-
As you have probably noticed the config setting
- mmctl import upload fails with "Error: failed to create upload session: : Unable to upload file. File is too large." · Issue #19042 · mattermost/mattermost-server ↩FileSettings.MaxFileSizestill applies. You could temporarily bump it to allow for the import upload to succeed.