2015年10月5日にリリースされた eZ Publish 6 の最初のベータ版である eZ Platform 15.09 を CentOS 7 にインストールする手順をまとめた。
VirtualBoxにセットアップされた CentOS 7 での作業を記録している。

環境のアップデート
yum clean all;
yum -y update;
reboot;
package-cleanup -y --oldkernels;
MySQL Server
MySQL Server のインストールとセットアップ
yum -y install http://dev.mysql.com/get/mysql-community-release-el7-5.noarch.rpm;
yum -y install mysql-community-server;
sed -i 's/\[mysqld\]/\[mysqld\]\ncharacter-set-server=utf8/' /etc/my.cnf;
systemctl enable mysqld;
systemctl start mysqld;
openssl rand -base64 12;
mysql_secure_installation;
openssl rand -base64 12;
mysql -u root -p;
データベースとDBユーザーの作成
mysql> CREATE DATABASE `ezplatform` CHARACTER SET 'utf8';
mysql> GRANT ALL PRIVILEGES ON `ezplatform`.* TO `ezplatform`@`localhost` IDENTIFIED BY 'password' WITH GRANT OPTION;
mysql> EXIT
Apache HTTP Server & PHP
yum -y install http://rpms.famillecollet.com/enterprise/remi-release-7.rpm;
yum-config-manager --enable remi remi-php56;
yum -y install httpd php php-gd php-intl php-mbstring php-mysqlnd php-opcache php-pecl-apcu php-pecl-xdebug php-xml;
sed -i '/#AddHandler cgi-script/s/#//' /etc/httpd/conf/httpd.conf;
sed -i 's/;date\.timezone =/date.timezone = Asia\/Tokyo/' /etc/php.ini;
sed -i 's/memory_limit = 128M/memory_limit = 512M/' /etc/php.ini;
systemctl enable httpd;
systemctl start httpd;
firewall-cmd --permanent --add-service=http;
firewall-cmd --reload;
マニュアルではコマンドを実行する前に256MBに設定するように記載があるが、画面生成時にメモリが不足するのでもう少し大きめにした方が良いだろう。
eZ Platform
インストール
Composer経由でダウンロード
yum -y install git;
cd /var/www/html;
curl -sS https://getcomposer.org/installer | php;
php -d memory_limit=-1 composer.phar create-project --no-dev ezsystems/ezplatform /var/www/html;
GitHub OAuth token が要求される場合
- Installing symfony/assetic-bundle (v2.7.0)
Downloading: Connecting...
Could not fetch https://api.github.com/repos/symfony/AsseticBundle/zipball/3ae5c8ca3079b6e0033cc9fbfb6500e2bc964da5, please create a GitHub OAuth token to go over the API rate limit
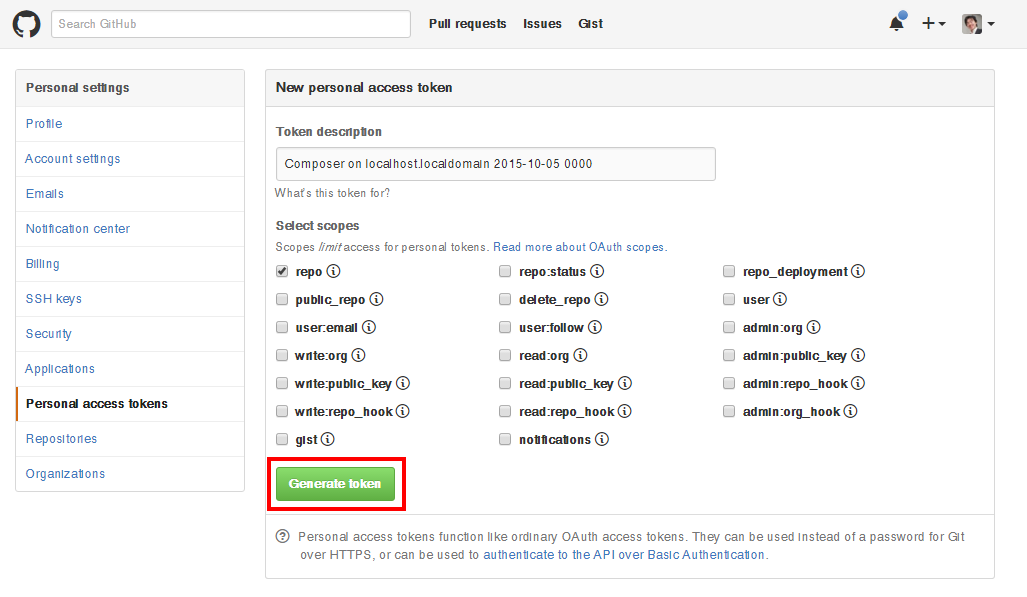
Head to https://github.com/settings/tokens/new?scopes=repo&description=Composer+on+localhost.localdomain+2015-10-05+0000
to retrieve a token. It will be stored in "/root/.composer/auth.json" for future use by Composer.
Token (hidden):
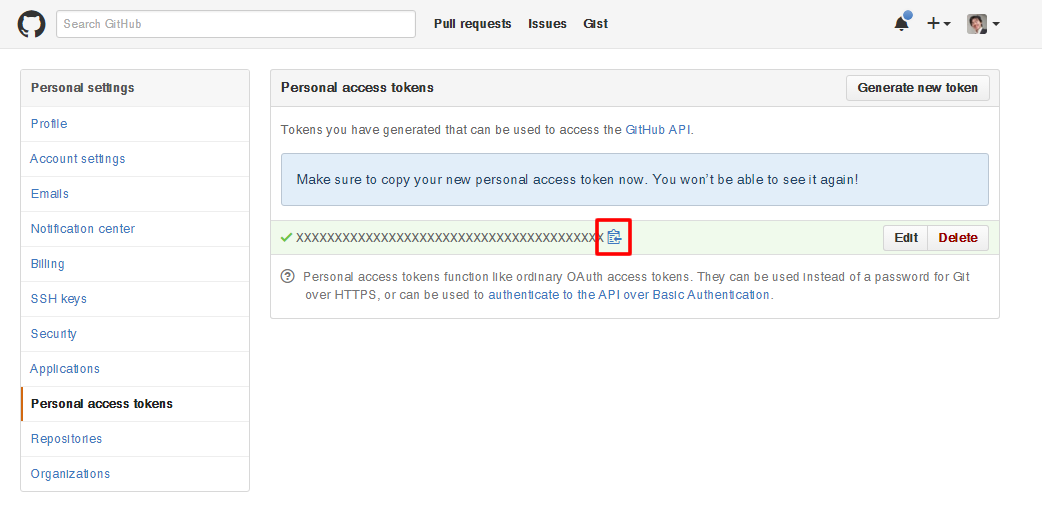
途中で上記メッセージが出て中断された場合、自身のGitHubアカウントで指定のURLへアクセスすると以下の画面が表示されるので、personal access token を作成し、生成された英数字40桁のtokenを Token (hidden): の後に入力する。直後に Token stored successfully. と表示されれば成功。
Creating the "ezpublish/config/parameters.yml" file
Some parameters are missing. Please provide them.
secret (ThisTokenIsNotSoSecretChangeIt):
locale_fallback (en):
mailer_transport (smtp):
mailer_host (127.0.0.1):
mailer_user (null):
mailer_password (null):
database_driver (pdo_mysql):
database_host (localhost):
database_port (null):
database_name (ezplatform):
database_user (root): ezplatform
database_password (null): password
search_engine (legacy):
solr_dsn ('http://localhost:8983/solr'):
secret (ThisTokenIsNotSoSecretChangeIt): は以下のサイトなどでランダムな40桁の文字列を生成して入力する。
Which environment would you like to dump production assets for? (Default: 'prod', type 'none' to skip)
空でエンターを押すと Dumping all prod assets. Debug mode is off. と表示されデバッグモードはオフになる。
php ezpublish/console ezplatform:install --env prod demo
圧縮ファイルをダウンロードして展開
yum -y install wget;
wget http://share.ez.no/content/download/170227/1012040/version/1/file/ezplatform-dist-2015.09.1.tar.gz;
tar vzxf ezplatform-dist-2015.09.1.tar.gz -C /var/www/html --strip=1;
chown apache:apache -R /var/www/html/*;
cd /var/www/html;
curl -sS https://getcomposer.org/installer | php;
php -d memory_limit=-1 composer.phar run-script post-install-cmd;
次のURLから最新のダウンロードURLを確認する。
VirtualHostの設定
cp -a /var/www/html/doc/apache2/vhost.template /etc/httpd/conf.d/ezpublish.conf;
sed -i /etc/httpd/conf.d/ezpublish.conf \
-e 's/%IP_ADDRESS%:%PORT%>/*:80>/' \
-e 's/ServerName %HOST%/ServerName www.example.com/' \
-e 's/ServerAlias %HOST_ALIAS%/ServerAlias localhost/' \
-e 's/%BASEDIR%\/web/\/var\/www\/html\/web/' \
-e 's/=%ENV%/=dev/';
httpd -t;
systemctl restart httpd;
パーミッションの設定
chown -R apache:apache ezpublish/{cache,logs,config,sessions} web;
find {ezpublish/{cache,logs,config,sessions},web} -type d | xargs sudo chmod -R 775;
find {ezpublish/{cache,logs,config},web} -type f | xargs sudo chmod -R 664;
setenforce 0;
sed -i "s/\(^SELINUX=\).*/\1disabled/" /etc/selinux/config;
インストール
php -d memory_limit=-1 ezpublish/console ezplatform:install --env prod demo;
php ezpublish/console cache:clear
うまく表示されない場合はパーミッションの設定を再度実行してキャッシュをクリアすると改善するかもしれない。
管理画面(eZ Platform)へログインする
初期インストール時のユーザー名は admin 、パスワードは publish に設定されている。