VirtualBox に CentOS 7 をインストール
Vagrant を利用した方が自動化できますが、慣れるまでは手間取ることもあるため、手動で VirtualBox に CentOS 7 をセットアップする手順を解説します。
環境整備
CentOS 7 ISO
https://buildlogs.centos.org/rolling/7/isos/x86_64/ から最新の Minimal.iso をダウンロードします。
パッケージ管理ツール
Windows
Windows PowerShell または cmd.exe を管理者として実行して起動し、以下のいずれかのコマンドを実行して Chocolatey をインストールします。
PowerShell
Set-ExecutionPolicy AllSigned; iex ((New-Object System.Net.WebClient).DownloadString('https://chocolatey.org/install.ps1'))
cmd.exe
@"%SystemRoot%\System32\WindowsPowerShell\v1.0\powershell.exe" -NoProfile -InputFormat None -ExecutionPolicy Bypass -Command "iex ((New-Object System.Net.WebClient).DownloadString('https://chocolatey.org/install.ps1'))" && SET "PATH=%PATH%;%ALLUSERSPROFILE%\chocolatey\bin"
macOS
/usr/bin/ruby -e "$(curl -fsSL https://raw.githubusercontent.com/Homebrew/install/master/install)"
brew tap caskroom/cask
ターミナルや iTerm2 などから上記コマンドを実行して Homebrew および Homebrew-Cask をインストールします。
VirtualBox
VirtualBox がインストールされていない場合、コマンドラインからは以下の手順でインストールすることができます。
Windows
cinst -y virtualbox
C:"\Program Files\Oracle\VirtualBox\VirtualBox.exe"
Chocolatey でインストールする手順です。
macOS
brew cask install virtualbox
open /Applications/VirtualBox.app
Homebrew-Cask で VirtualBox をインストールする手順です。
仮想マシンの用意
新規仮想マシンの作成
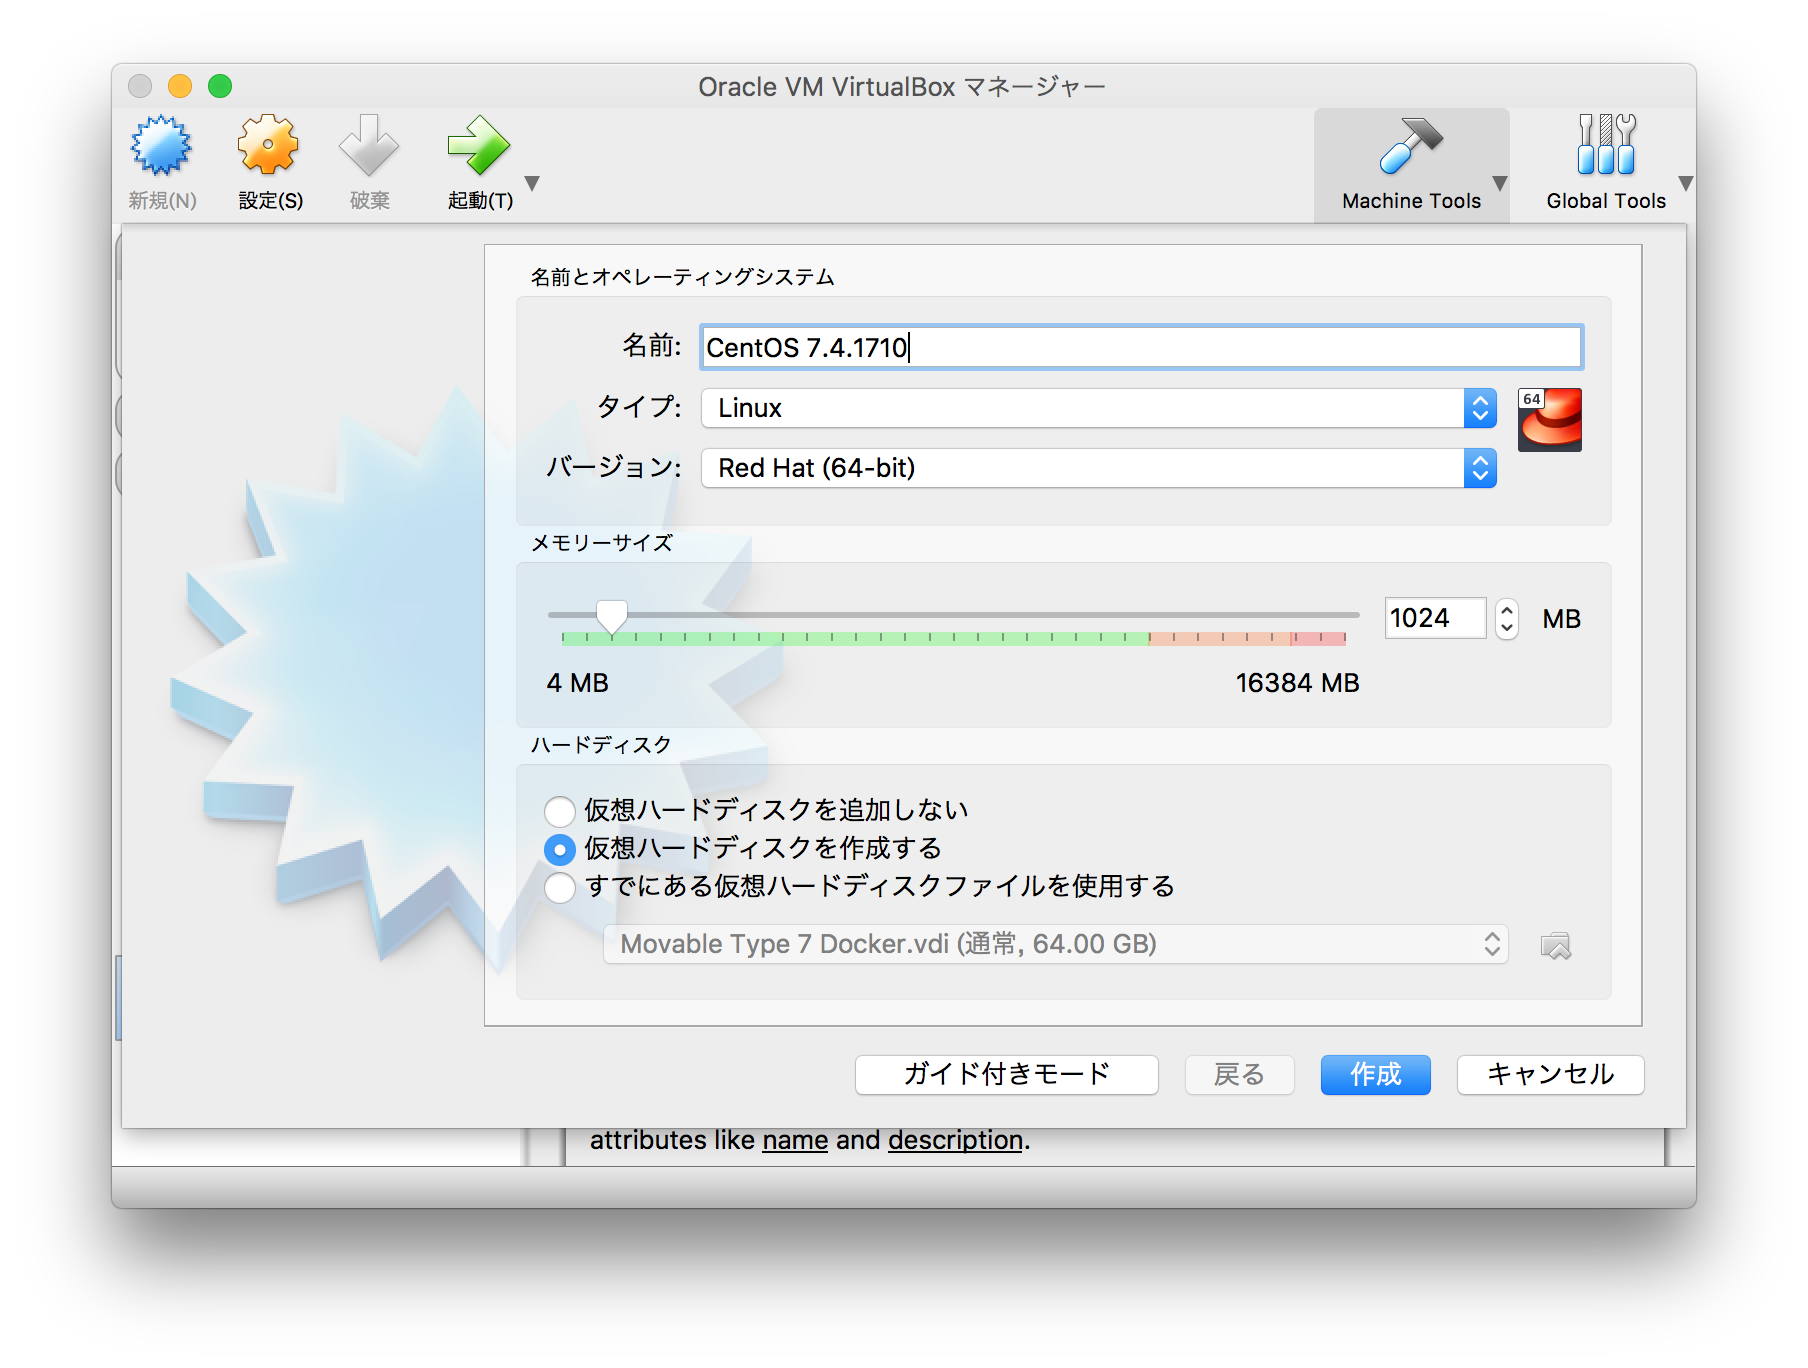
⌘ + n で「新規仮想マシンの作成」を行います。

「ガイド付きモード」でも「エキスパートモード」でも設定は変わりません。
「名前:」欄に CentOS と入力すると「バージョン:」欄とアイコンが自動的に Red Hat (64-bit) に変更されます。
仮想マシンの設定
⌘ + s で「仮想マシン設定ウィンドウを表示」します。
「一般」タブ
特に変更の必要はありません。
OS にはターミナル経由でアクセスするので、「高度」タブの「クリップボードの共有」や「ドラッグ&ドロップ」も無効のままで構いません。
「システム」タブ
「マザーボード」タブ
「起動順序」欄の「フロッピー」は不要なのでチェックを外します。
「チップセット」欄はデフォルトの古い「PIIX3」ではなく新しい「ICH9」を選択します。
「ストレージ」タブ
「コントローラー: IDE」の下の「空」を選択して、「属性」エリアの「光学ドライブ」欄の右端にある CD アイコンをクリックし、「仮想光学ディスクファイルを選択...」を選択して iso ファイルを指定します。
「IDE」コントローラーの「タイプ」には PIIX3, PIIX4, ICH6 が選択できますが、パフォーマンスに違いはない 1 らしいので変更する必要はありません。
「オーディオ」タブ
「オーディオを有効化」のチェックを外します。
「ネットワーク」タブ
「アダプター 2」タブ内の「ネットワークアダプターを有効化」のチェックをオンにし、「割り当て」欄で「ホストオンリーアダプター」を選択します。
「ポート」タブ
「USB コントローラーを有効化」のチェックを外します。
CentOS のインストール
起動画面
言語選択
左下の検索欄に japanese と入力すると日本語が絞り込み表示される。
インストールの概要
インストール先(D)
ネットワークとホスト名(N)
「設定(O)」ボタンを押下し、「全般」タブの「この接続が利用可能になったときは自動的に接続する(A)」にチェックを入れて「保存(S)」ボタンを押下します。
「イーサネット (enp0s3)」と「イーサネット (enp0s8)」のいずれも同様です。
ユーザーの設定
「ROOT パスワード(R)」を押下してパスワードを設定します。
仮想マシンのクローン
バニラ状態の仮想マシンを保存しておき、必要なときにクローンして利用すると、 OS から再インストールする必要がなく効率的です。
SSD であれば数秒でクローンできます。
共有フォルダー
Guest Additions
フォルダ共有機能を利用したい場合は Guest Additions のインストールが必要になります。
Guest Additions CD イメージの挿入
mount /dev/cdrom /media
「デバイス」メニューの「Guest Additions CD イメージの挿入...」を選択して、上記コマンドを実行します。
必要ライブラリーのインストール
yum -y install gcc bzip2 kernel-devel
Guest Additions のインストール
sh /media/VBoxLinuxAdditions.run
VBoxLinuxAdditions.run スクリプトを実行して Guest Additions をインストールします。
失敗するケース
Building the VirtualBox Guest Additions kernel modules
The headers for the current running kernel were not found. If the following
module compilation fails then this could be the reason.
The missing package can be probably installed with
yum install kernel-devel-3.10.0-693.5.2.el7.x86_64

Building the main Guest Additions module[失敗]
kernel と kernel-devel のバージョンが一致していないと上記のようなエラーを吐いて失敗するので、事前に kernel をアップデートしておく必要があります。
ディスクの除去
仮想ドライブらかディスクを除去しておくとよいでしょう。
共有フォルダーの設定
共有フォルダーの追加
「フォルダーのパス」は共有したいホスト OS 側のフォルダーを指定します。
「フォルダー名」はゲスト OS 側で指定する際に使うラベル名なので任意に指定できますが、ここでは webroot とします。
「自動マウント(A)」「永続化する(M)」にチェックを入れます。
自動マウントの設定
echo -e "\nmount -t vboxsf -o uid=\$(id apache -u),gid=\$(id apache -g) webroot /var/www/html" >> /etc/rc.local
シンボリックリンクの作成許可
以下のコマンドをホスト OS 側で実行します。
vboxmanage setextradata VBoxInternal2/SharedFoldersEnableSymlinksCreate/webroot 1
Apache の設定
Apache を利用する場合、DocumentRoot を共有フォルダとしてマウントするとファイルを更新しても反映されなかったり文字化けしたりすることがあるので、メモリマッピングと sendfile サポートを無効化します。
echo -e "EnableMMAP off\nEnableSendfile off" >> /etc/httpd/conf.d/guestadditions.conf
参考文献
-
Chapter 5. Virtual storage - 5.1. Hard disk controllers: IDE, SATA (AHCI), SCSI, SAS, USB MSD, NVMe
This makes no difference in terms of performance, but if you import a virtual machine from another virtualization product, the operating system in that machine may expect a particular controller type and crash if it isn't found.
↩