はじめに
Android で端末やカメラアプリなどから画像を取得する方法を、アプリを作りながら模索していこうと思います。
機能仕様
- カメラアプリから新規に撮影した画像を取得することができる。
- 端末から画像コンテンツを取得することができる。
- カメラが使えない場合にはカメラを利用する機能だけを使えないようにする。
- 取得した画像を表示する。
画面仕様
- GET CONTENT ボタン
- 端末から画像コンテンツを選択する。
- CAMERA ボタン
- カメラを立ち上げる。
- カメラが使えない場合は disabled になる。
- BOTH ボタン
- 上記2ボタンと同様の機能を持ったアプリを選択する chooser が表示される。
- カメラが使えない場合は disabled になる。
前提
◆ fragment は 1.3.0-alpha06 以降
androidx.fragment:fragment:1.3.0-alpha06 以降を利用します。
これより前のバージョンだと registerForActivityResult(後述) を利用した際に java.lang.IllegalArgumentException: Can only use lower 16 bits for requestCode というエラーで落ちることがあります。
implementation "androidx.activity:activity:1.2.0-alpha06"
implementation "androidx.fragment:fragment:1.3.0-alpha06"
◆ startActivityForResult() は使わない
startActivityForResult() や onActivityResult() は利用せず、Activity 1.2.0-alpha02 及び Fragment 1.3.0-alpha02 で導入された registerForActivityResult() を利用します。
registerForActivityResult() を利用すると、今まで startActivityForResult() や onActivityResult() を用いていた処理を簡潔に記述することができます。
例えば、端末内部の画像をピックアップする場合は、以下のように記述できます:
// 実機に保存されている content を mimeType 指定で取得するアプリの launcher
val launcher = registerForActivityResult(ActivityResultContracts.GetContent()) { uri ->
    // activity result を受け取った後に実行される処理
    imageView.setImageURI(uri)
}
// launcher を起動する(実機に保存されている content を mimeType 指定で取得するアプリを立ち上げる)
launcher.launch("image/*")
実装
◆ activity_main.xml
<?xml version="1.0" encoding="utf-8"?>
<androidx.constraintlayout.widget.ConstraintLayout
    xmlns:android="http://schemas.android.com/apk/res/android"
    xmlns:app="http://schemas.android.com/apk/res-auto"
    android:layout_width="match_parent"
    android:layout_height="match_parent"
    android:layout_marginBottom="16dp">
    <ImageView
        android:id="@+id/image_view"
        android:layout_width="match_parent"
        android:layout_height="0dp"
        android:gravity="center"
        android:src="@mipmap/ic_launcher"
        app:layout_constraintBottom_toTopOf="@id/camera_button"
        app:layout_constraintEnd_toEndOf="parent"
        app:layout_constraintStart_toStartOf="parent"
        app:layout_constraintTop_toTopOf="parent" />
    <Button
        android:id="@+id/get_content_button"
        android:layout_width="0dp"
        android:layout_height="wrap_content"
        android:text="get content"
        app:layout_constraintBottom_toBottomOf="parent"
        app:layout_constraintEnd_toStartOf="@id/camera_button"
        app:layout_constraintStart_toStartOf="parent" />
    <Button
        android:id="@+id/camera_button"
        android:layout_width="0dp"
        android:layout_height="wrap_content"
        android:text="camera"
        app:layout_constraintBottom_toBottomOf="parent"
        app:layout_constraintEnd_toStartOf="@id/both_button"
        app:layout_constraintStart_toEndOf="@id/get_content_button" />
    <Button
        android:id="@+id/both_button"
        android:layout_width="0dp"
        android:layout_height="wrap_content"
        android:text="both"
        app:layout_constraintBottom_toBottomOf="parent"
        app:layout_constraintEnd_toEndOf="parent"
        app:layout_constraintStart_toEndOf="@id/camera_button" />
</androidx.constraintlayout.widget.ConstraintLayout>
◆ MainActivity
package com.objectfanatics.ex_camera

import android.content.pm.PackageManager
import android.graphics.Bitmap
import android.net.Uri
import android.os.Bundle
import android.view.View
import android.widget.ImageView
import androidx.activity.result.contract.ActivityResultContracts
import androidx.appcompat.app.AppCompatActivity

class MainActivity : AppCompatActivity(R.layout.activity_main) {
    private val imageView: ImageView by lazy { findViewById<ImageView>(R.id.image_view) }
    private val imageCaptureButton: View by lazy { findViewById<View>(R.id.camera_button) }
    private val getContentButton: View by lazy { findViewById<View>(R.id.get_content_button) }
    private val bothButton: View by lazy { findViewById<View>(R.id.both_button) }

    private val hasCameraFeature get() = packageManager.hasSystemFeature(PackageManager.FEATURE_CAMERA_ANY)

    override fun onCreate(savedInstanceState: Bundle?) {
        super.onCreate(savedInstanceState)

        enableNormalFunction()
        when {
            hasCameraFeature -> enableCameraFunction()
            else             -> disableCameraFunction()
        }
    }

    private fun enableNormalFunction() {
        // 実機に保存されている content を mimeType 指定で取得する。
        val getContent = registerForActivityResult(ActivityResultContracts.GetContent(), this::onContent)
        getContentButton.setOnClickListener { getContent.launch("image/*") }

        // GetContent と TakePicturePreview と同等の機能を chooser で選択可能にした版。
        val both = registerForActivityResult(GetContentOrTakePicturePreviewChooser(this, "画像を選択"), this::onPicture)
        bothButton.setOnClickListener { both.launch(null) }
    }

    private fun enableCameraFunction() {
        // 小さな画像をカメラから取得する。実機で試したところ 260*195 の画像だった。
        val takePicturePreview = registerForActivityResult(ActivityResultContracts.TakePicturePreview(), this::onPicture)
        imageCaptureButton.setOnClickListener { takePicturePreview.launch(null) }
    }

    private fun disableCameraFunction() {
        imageCaptureButton.isEnabled = false
    }

    private fun onContent(uri: Uri?) {
        imageView.setImageURI(uri ?: return)
    }

    private fun onPicture(bitmap: Bitmap?) {
        imageView.setImageBitmap(bitmap ?: return)
    }
}
◆ ActivityResultContract の独自実装
GetContent と TakePicturePreview 双方の対象アプリを chooser で選択させる機能を持つ ActivityResultContract です。
ただし、カメラが利用不可能な場合はカメラ機能は候補から外すようになっています。
package com.objectfanatics.ex_camera

import android.app.Activity
import android.content.Context
import android.content.Intent
import android.content.pm.PackageManager
import android.graphics.Bitmap
import android.net.Uri
import android.provider.MediaStore
import androidx.activity.result.contract.ActivityResultContract
import androidx.activity.result.contract.ActivityResultContracts

class GetContentOrTakePicturePreviewChooser(private val context: Context, private val chooserTitle: String) : ActivityResultContract<Void?, Bitmap>() {
    private val getContentIntent get() = ActivityResultContracts.GetContent().createIntent(context, "image/*")
    private val takePicturePreviewIntent get() = ActivityResultContracts.TakePicturePreview().createIntent(context, null)
    private val hasCameraFeature get() = context.packageManager.hasSystemFeature(PackageManager.FEATURE_CAMERA_ANY)

    override fun createIntent(context: Context, input: Void?): Intent {
        return Intent.createChooser(getContentIntent, chooserTitle).apply {
            if (hasCameraFeature) {
                putExtra(Intent.EXTRA_INITIAL_INTENTS, arrayOf(takePicturePreviewIntent))
            }
        }
    }

    override fun getSynchronousResult(context: Context, input: Void?): SynchronousResult<Bitmap?>? = null

    override fun parseResult(resultCode: Int, intent: Intent?): Bitmap? {
        if (intent == null || resultCode != Activity.RESULT_OK) return null

        val bitmap: Bitmap? = intent.getParcelableExtra<Bitmap>("data")
        val data: Uri? = intent.data

        return when {
            bitmap != null -> bitmap
            data != null   -> MediaStore.Images.Media.getBitmap(context.contentResolver, data)
            else           -> null
        }
    }
}
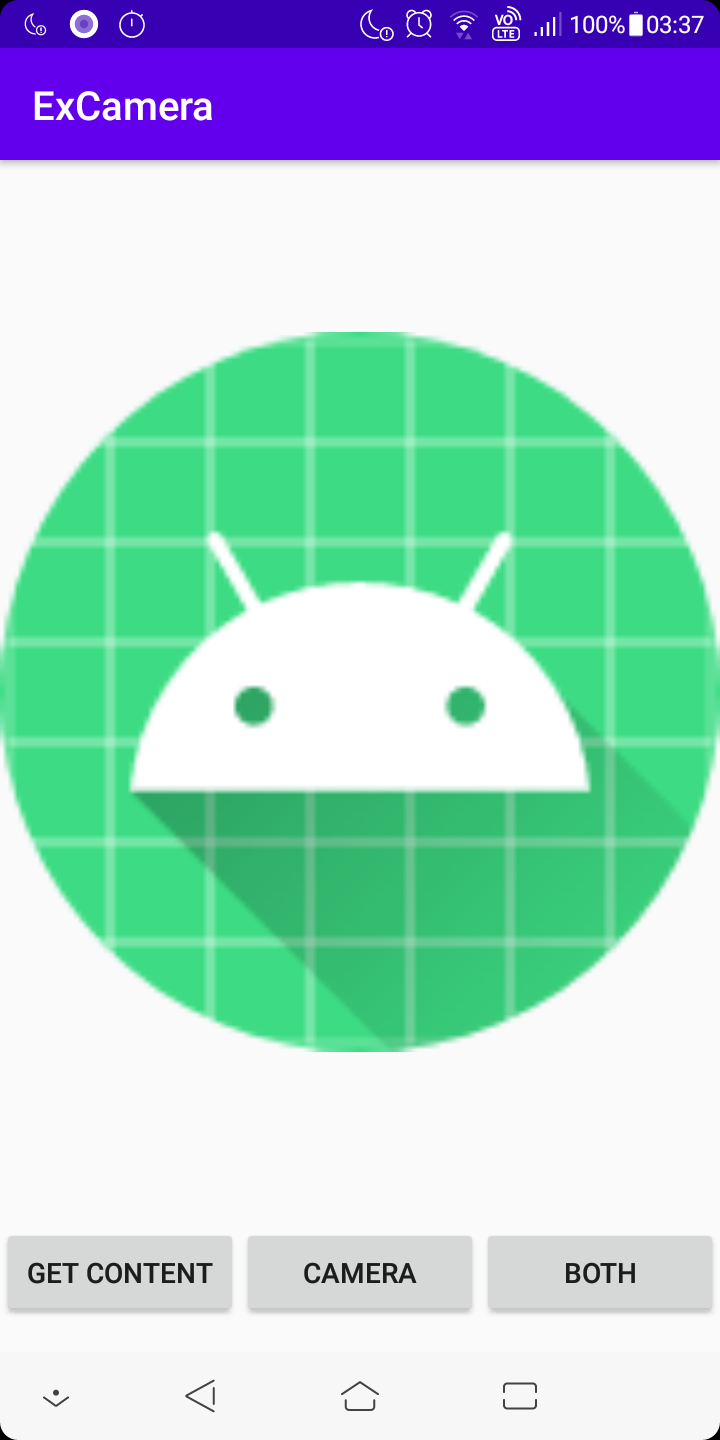
実行
◆ 初期状態

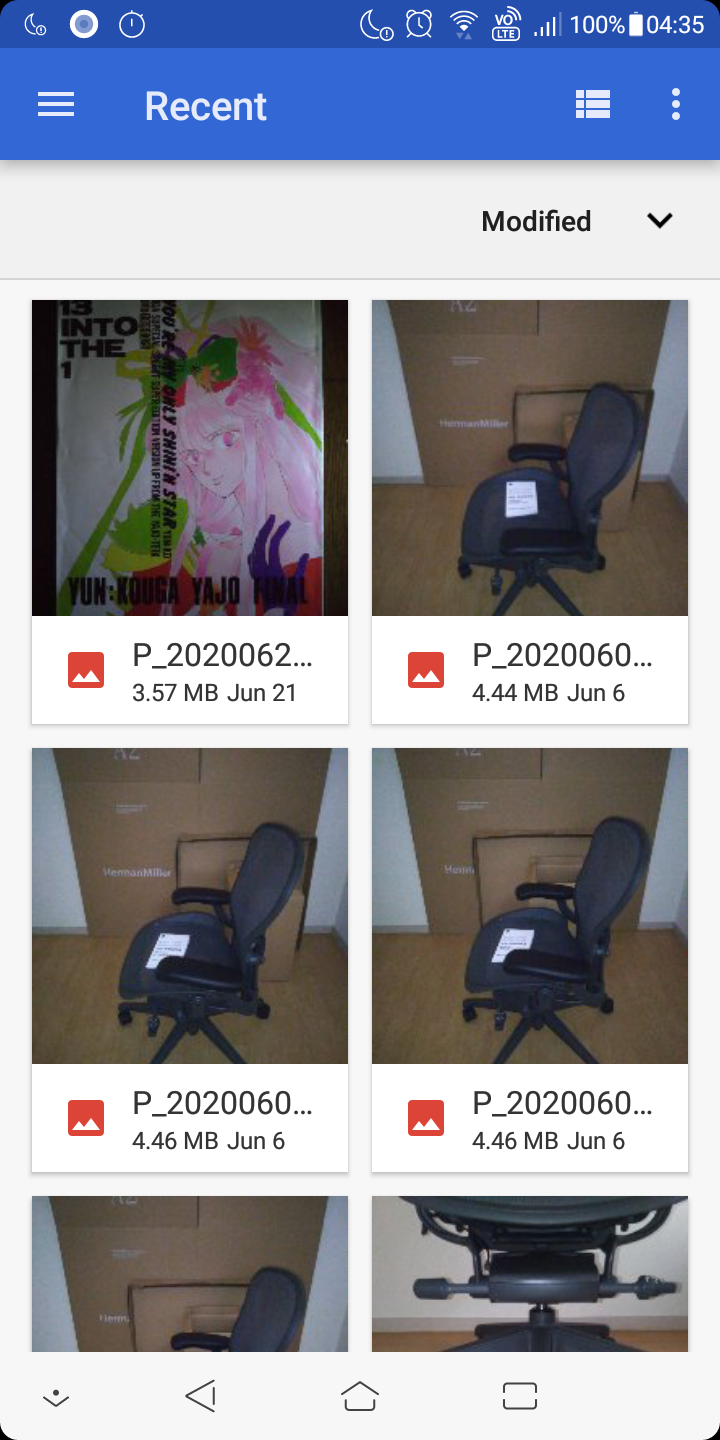
◆ コンテンツ選択
GET CONTENT ボタン押下により起動
◆ カメラアプリ起動
CAMERA ボタン押下により起動

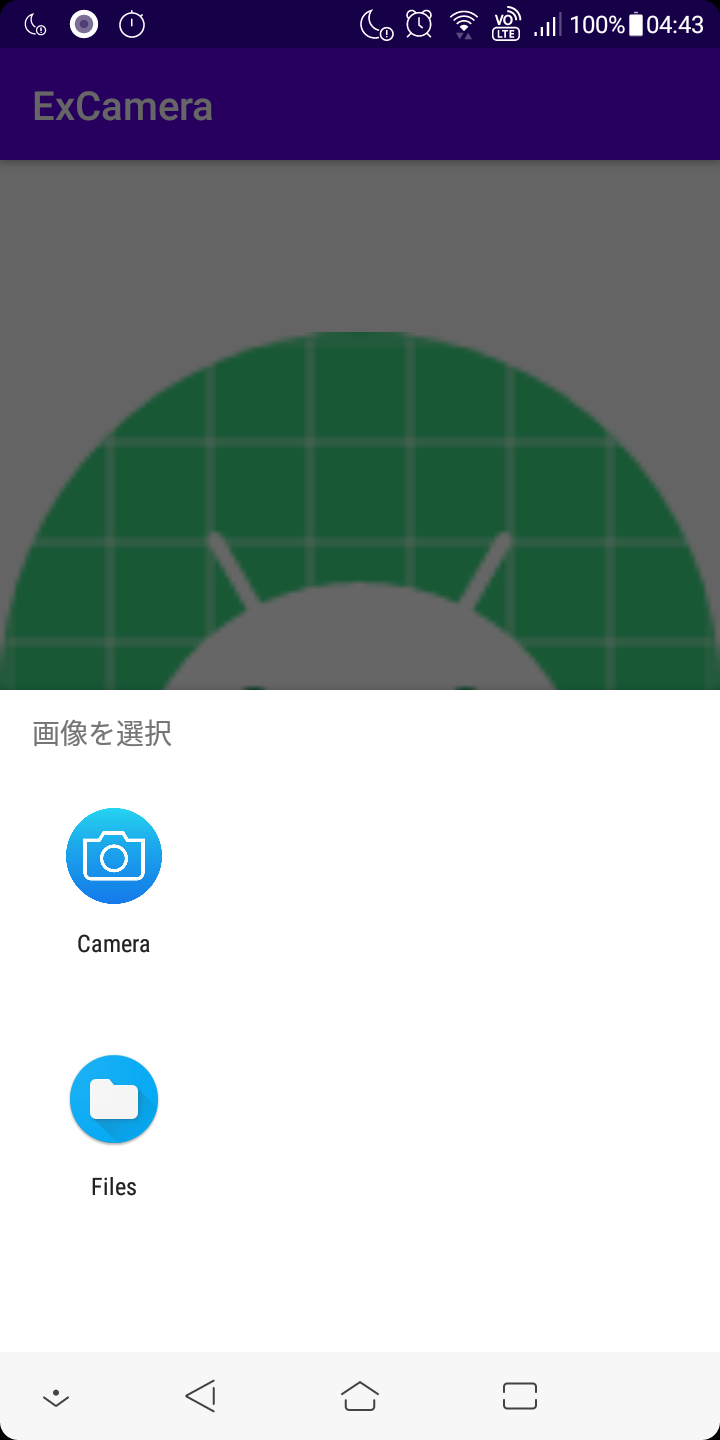
◆ chooser 起動
BOTH ボタン押下により起動
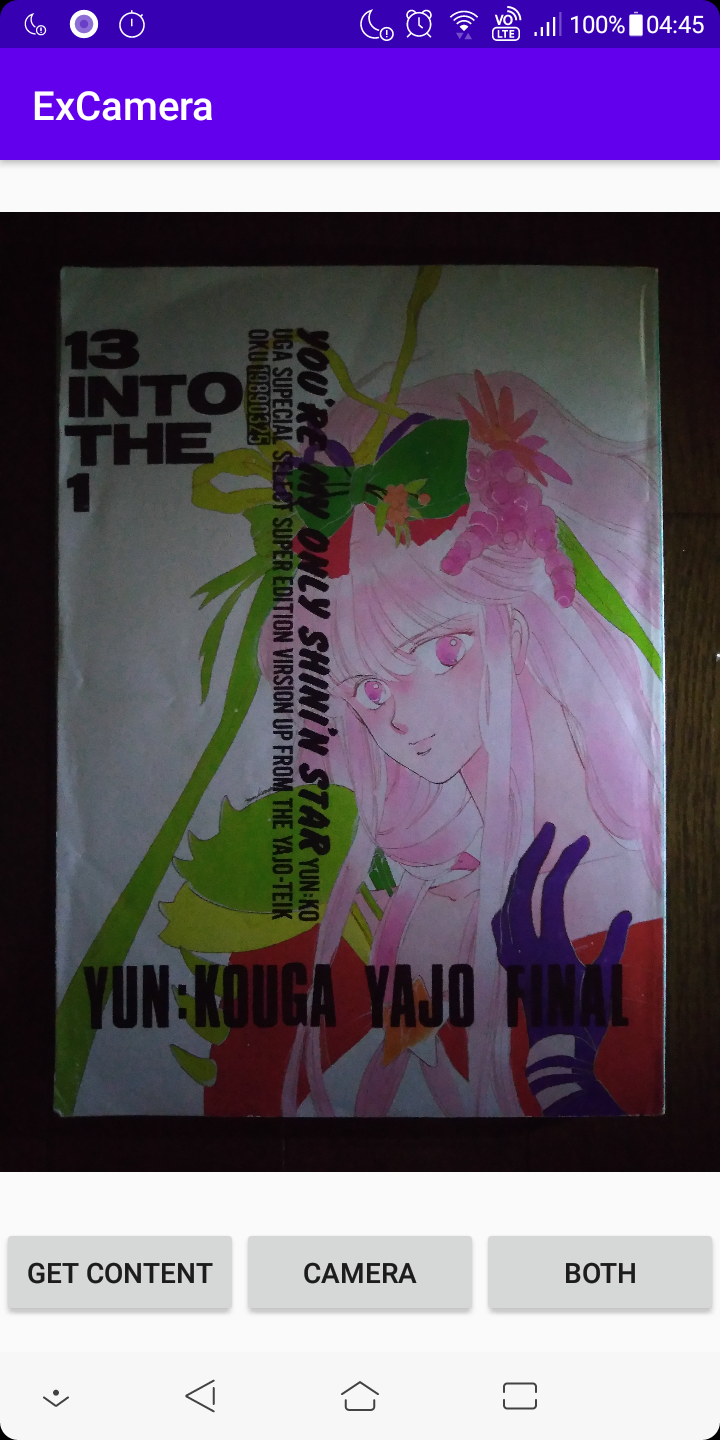
◆ 画像選択後
今回やったこと
- 端末やカメラアプリから画像を取得して表示する簡単なアプリを作成しました。
- registerForActivityResult() を使用しました。
- ActivityResultContract を使用しました。
- GetContent と TakePicturePreview 双方の対象アプリを Intent#createChooser で選択させる機能を持つ ActivityResultContract を作成しました。
考察
◆ registerForActivityResult について
いや~、めっちゃ便利ですね。早く stable 版が出てほしいところです。
バージョンを fragment:1.3.0-alpha06 に上げる前のバグはちょっとハマりました、、、。
◆ カメラアプリ側のバグ対策
手元の実機では動くのに、エミュレータ(Android10 / API level 29)でカメラアプリが落ちるという問題がありました。
動作としては、カメラアプリの起動を試みると、カメラアプリ側が以下のエラーを吐いて落ち、元の画面に戻るという流れになります。
java.lang.RuntimeException: Unable to start activity ComponentInfo{com.android.camera2/com.android.camera.CaptureActivity}: java.lang.NullPointerException: Attempt to get length of null array
どうやら Android 10 付属のカメラアプリのバグらしく、以下のように何でもいいのでダミーのパーミッションを入れてあげれば回避できるようです1。(※実際に回避できました)
<manifest ...
    <!-- https://stackoverflow.com/questions/62296554/camera-intent-permissions-in-android-10#comment110177675_62296554 -->
    <uses-permission android:name="WORKAROUND_FOR_EMULATOR_CAMERA_APP_BUG" />
</manifest>
◆ TakePicturePreview の解像度
今回は TakePicturePreview を利用してカメラで撮影した画像を取得しています。
内部的には MediaStore.ACTION_IMAGE_CAPTURE を指定しているのですが、画像は非常に粗いです。
The caller may pass an extra EXTRA_OUTPUT to control where this image will be written. If the EXTRA_OUTPUT is not present, then a small sized image is returned as a Bitmap object in the extra field.
ドキュメントには EXTRA_OUTPUT 無しでは small sized image が返ると書かれており、実際に実機で試してみたところ、画像のサイズは 260 * 195 でした。
EXTRA_OUTPUT を使えばいい感じの解像度が得られそうな気がしますね。
ということで、次回は、写真の解像度向上を模索してみようと思います。