毎日の生活を送っていると、外部ディスプレイにViewを表示したくなる事ってよくありますよね。
それができるんです!
そう、iPhoneならね。
手続き
公式に完結にまとまってました。
外部ディスプレイを接続した時の通知を受け取れ、
更にそこから接続された UIScreen が取得できるので、その UIScreen の情報を元に
UIWindow を構築して、その UIWindow の view にお好きな View を乗せるだけの簡単なお仕事。
Displaying Content on a Connected Screen | Apple Developer Documentation
https://developer.apple.com/documentation/uikit/windows_and_screens/displaying_content_on_a_connected_screen
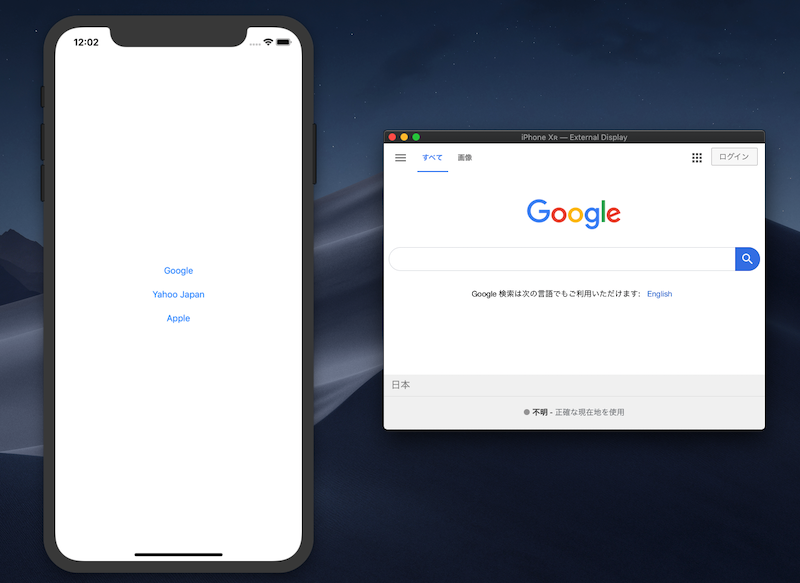
実行結果
今回は、 WKWebView を外部ディスプレイに表示してみました。
各サイトのボタンを押すと、そのサイトを外部ディスプレイに表示する簡単なサンプルです。
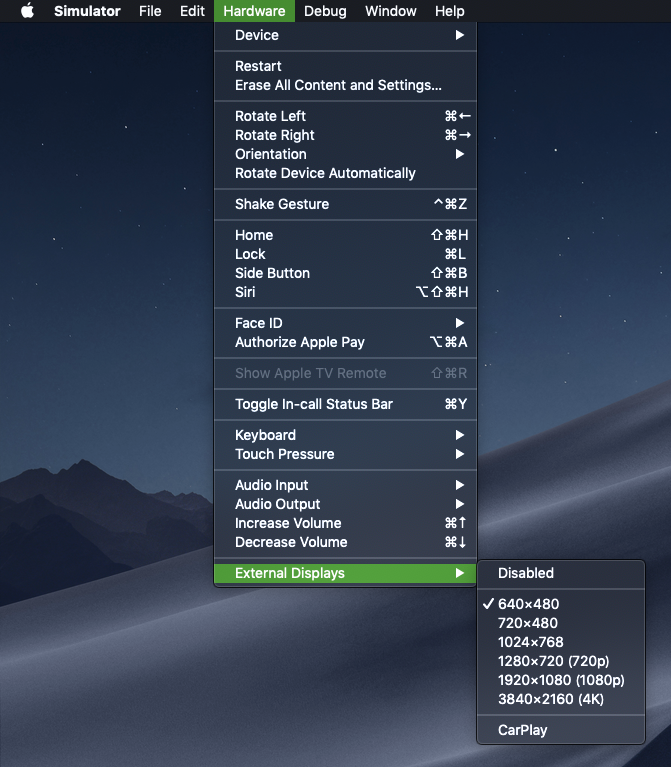
ちなみに、外部ディスプレイは simulator の 以下メニューから表示することができます。
Hardware > External Display
コード
そんなにたいした手続きではないので、
コード全部乗っけます。
setupNotificationCenter() で外部ディスプレイが接続された時と、切断された時の通知を登録しています。
import UIKit
import WebKit

class ViewController: UIViewController {

    private let webView = WKWebView()
    private var externalWindow : UIWindow?

    override func viewDidLoad() {
        super.viewDidLoad()
        setupNotificationCenter()
    }

    private func setupNotificationCenter() {
        NotificationCenter.default.addObserver(
            self,
            selector: #selector(addExternalDisplay(notification:)),
            name: UIScreen.didConnectNotification,
            object: nil
        )
        NotificationCenter.default.addObserver(
            self,
            selector: #selector(removeExternalDisplay(notification:)),
            name: UIScreen.didDisconnectNotification,
            object: nil
        )
    }

    @objc func addExternalDisplay(notification : Notification) {

        guard let newScreen = notification.object as? UIScreen else {
            return
        }

        let screenDimensions = newScreen.bounds
        let newWindow = UIWindow(frame: screenDimensions)

        newWindow.screen = newScreen
        webView.frame = newWindow.frame
        newWindow.addSubview(webView)
        newWindow.isHidden = false

        // window を破棄させないため プロパティに保持
        externalWindow = newWindow
    }

    @objc func removeExternalDisplay(notification : Notification) {
        externalWindow = nil
    }


    @IBAction func didTapButton0(_ sender: Any) {
        load(urlString: "https://www.google.com")
    }
    @IBAction func didTapButton1(_ sender: Any) {
        load(urlString: "https://www.yahoo.co.jp")
    }
    @IBAction func didTapButton2(_ sender: Any) {
        load(urlString: "https://www.apple.com/jp")
    }

    private func load(urlString : String) {
        guard let url = URL(string: urlString) else {
            return
        }
        let urlRequest = URLRequest(url: url)
        webView.load(urlRequest)
    }

}
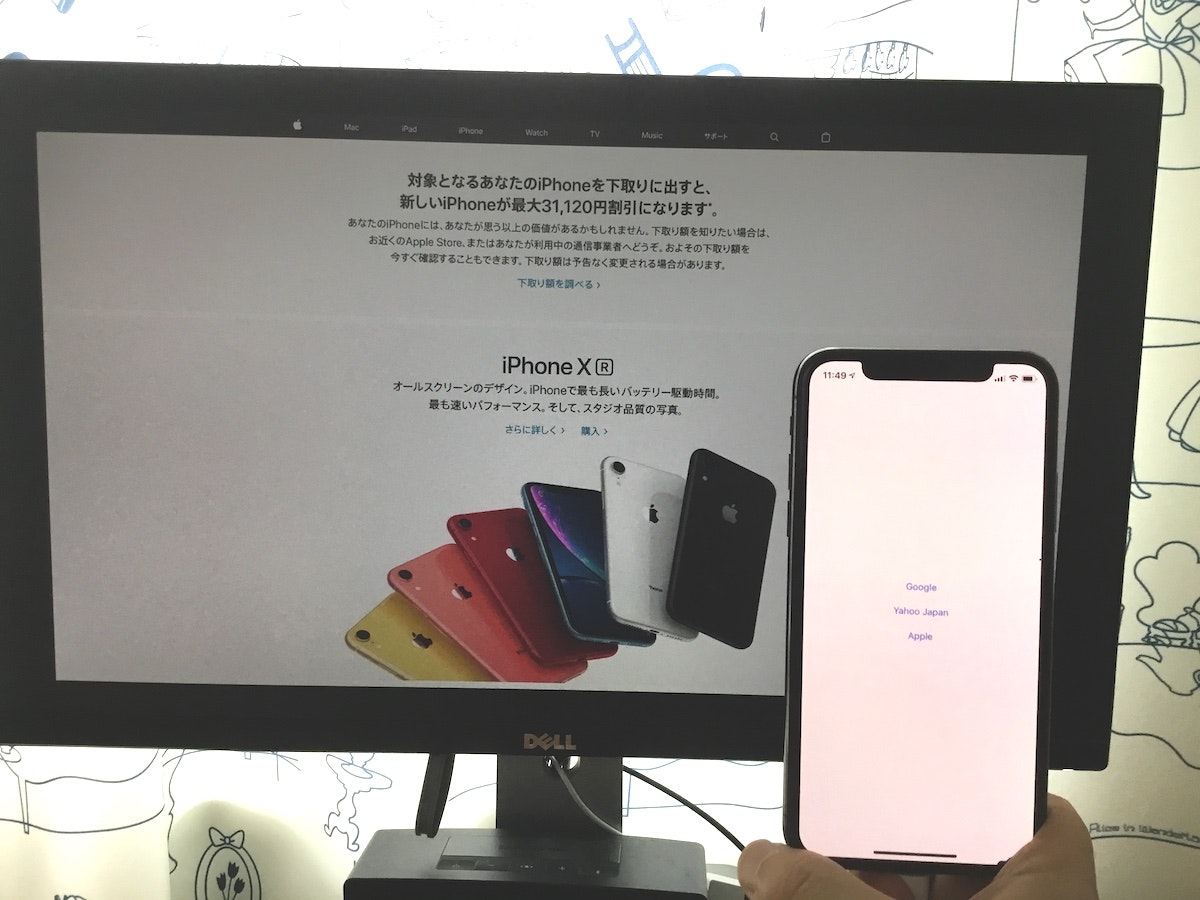
実機動作
Lightning → HDMIの変換アダプタが必要になります。
非正規版も試してみたのですが、画面のミラーリング表示はできるものの
外部ディスプレイ検出はできないようです。
なので、おとなしく純正品を使いましょう。(高いけど・・・
Amazon | Apple Lightning - Digital AVアダプタ | コネクタ・変換ケーブル 通販
https://amzn.to/2jWLCwz
実機動作の様子
デバッグ方法
HDMI変換ケーブルにLightningのケーブル接続口はあるのですが、
ここからmacにつないでも端末認識をしてくれないようです。
そのため、デバック接続ができずに困ると思います。
しかし、Xcodeにはワイヤレスデバッグ機能があり、iPhoneをmacに接続してなくても
デバックが出来るので、デバッグを行いたい際はこの手続を取りましょう。
Xcode 9 & iOS 11 からできるワイヤレスデバッグの手順
https://qiita.com/basi/items/2e3faa928d6018f312b7
github
githubにプロジェクトまるごとアップしてます
https://github.com/becky3/external_display_test