1. はじめに
WSL2環境下で構築したOpen-RMFで複数ロボットとエレベータの連携をシミュレーションできる環境で遊んでみる 簡単な配送シミュレーションと得られた知見編の記事(以下参考サイト[1])では、簡単な配送シミュレーションができことを確認しました。しかし使用したロボットがtinyRobotだけであり、あんまりおもしろくない、、見た目だけでも変えられないかなと取り組んだのがこの記事になります。
2. 実行環境
- CPU: CORE i7 7th Gen
- メモリ: 32GB
- GPU: GeForce RTX 2070
- OSと構築した環境: Window11でWSL2にUbuntu22.04をインストールした環境
- ROS2: Humble
- Open-RMFの構築環境:WSL2の環境下において、Traffic-Editorを使って複数ロボットとエレベータの連携をシミュレーションできる環境を構築してみたの記事で構築した環境
3. 方針
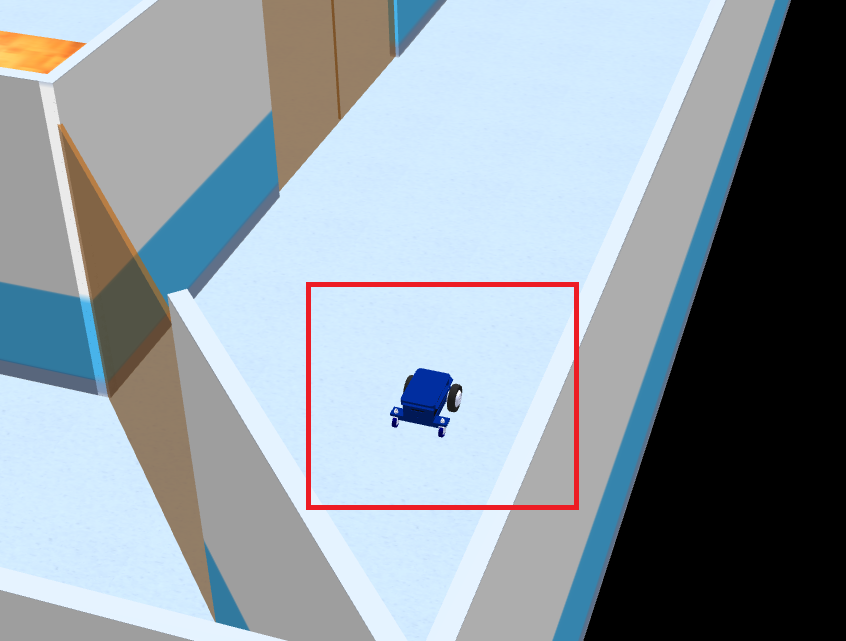
今回は見た目を変えるだけですので、以下の図の赤枠内で示したtinyRobotの見た目を人間とテレプレゼンスロボットとしてよく見かけるtemiに変えてみます。
なお、OpenRMFには、人間の動きをシミュレーション空間で再現する機能があるようです。人の動きをシミュレーション空間に再現するのであればそれで十分ではあります。しかし私は将来的に、ロボットが物を運んだり巡回するのと同様のタスクを人間にも担わせ、そのシミュレーションを行って分析したいと考えています。そのため、今回人間のモデルも使ってみました。
4. tinyRobotのモデルを変える
4.1 人間のモデルの準備
かなり我流のやり方ですが、私は以下の手順でモデルを入れ替えました。
-
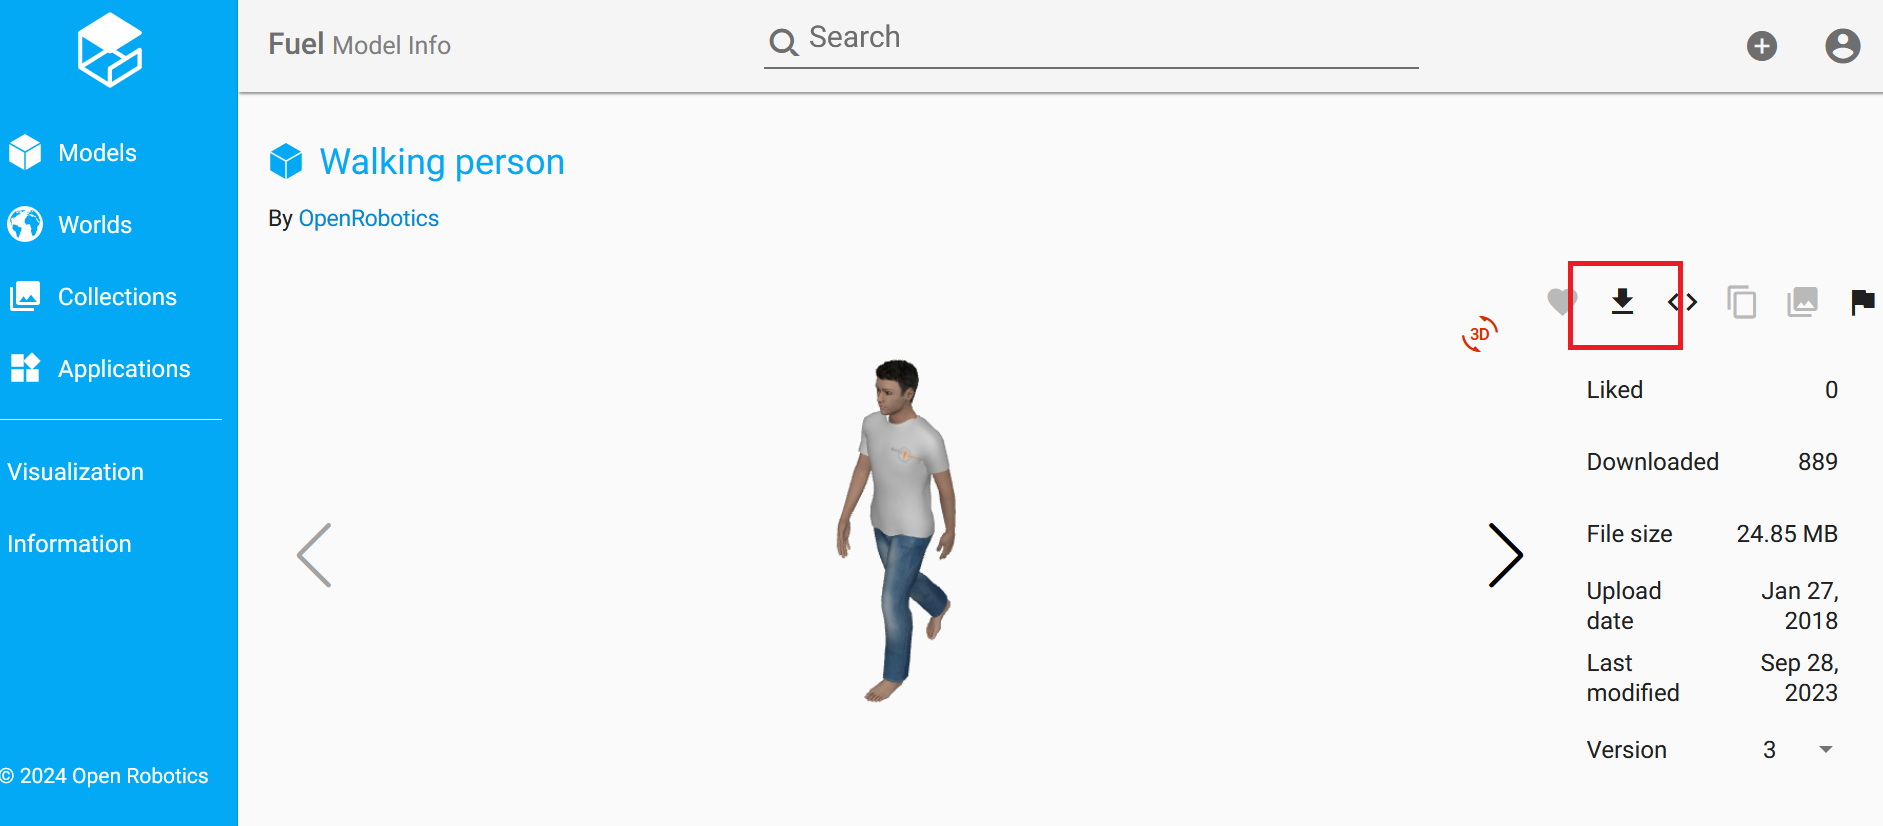
以下のサイトで公開されているWalking personというモデルを以下の図の赤枠で囲んだアイコンをクリックしてダウンロードします。
Walking personのモデルのリンク
-
rmf_ws\src\demonstrations\rmf_demos\rmf_demos_assets\modelsの中にあるTinyRobotというフォルダーをコピーして、同じディレクトリにTinyRobotHumanという名前のフォルダーとしてそのままコピーしました。
-
rmf_ws\src\demonstrations\rmf_demos\rmf_demos_assets\models\TinyRobotHumanの中にあるmeshesのフォルダーに先ほどダウンロードした人間のモデルの「walking.dae」を保存しました。
-
rmf_ws\src\demonstrations\rmf_demos\rmf_demos_assets\models\TinyRobotHumanの中にあるmodel.sdfの以下の部分を次のように修正しました。単にモデル名を変えてtinyRobotのメインボディをwalking.daeにし、ほかの余計な部分を消したというだけです。(その他poseのところも若干変えています)
修正前のmodel.sdf<sdf version='1.6'> <model name='TinyRobot'> <--その他の部分--> <visual name='base_footprint_fixed_joint_lump__base_link_visual'> <pose frame=''>-0.11 0 0.071 0 -0 0</pose> <geometry> <mesh> <scale>1 1 1</scale> <uri>model://TinyRobot/meshes/tinyRobot_body.dae</uri> </mesh> </geometry> </visual> <visual name='base_footprint_fixed_joint_lump__base_link_visual_1'> <pose frame=''>-0.279 0.17 0.09 0 -0 -3.14159</pose> <geometry> <mesh> <scale>1 1 1</scale> <uri>model://TinyRobot/meshes/caster_wheel.dae</uri> </mesh> </geometry> </visual> <visual name='base_footprint_fixed_joint_lump__base_link_visual_2'> <pose frame=''>-0.279 -0.17 0.09 0 -0 -3.14159</pose> <geometry> <mesh> <scale>1 1 1</scale> <uri>model://TinyRobot/meshes/caster_wheel.dae</uri> </mesh> </geometry> </visual> <--その他の部分--> <visual name='left_wheel_visual'> <pose frame=''>-0.071 0 0 0 -0 0</pose> <geometry> <mesh> <scale>1 1 1</scale> <uri>model://TinyRobot/meshes/front_wheel.dae</uri> </mesh> </geometry> </visual> <--その他の部分--> <visual name='right_wheel_visual'> <pose frame=''>0.071 0 0 -3.14159 0 -3.14159</pose> <geometry> <mesh> <scale>1 1 1</scale> <uri>model://TinyRobot/meshes/front_wheel.dae</uri> </mesh> </geometry> </visual>修正後のmodel.sdf<sdf version='1.6'> <model name='TinyRobotHuman'> <--その他の部分--> <visual name='base_footprint_fixed_joint_lump__base_link_visual'> <pose frame=''>-0.11 0 0.071 0 -0 -1.570795</pose> <geometry> <mesh> <scale>1 1 1</scale> <uri>model://TinyRobotHuman/meshes/walking.dae</uri> </mesh> </geometry> </visual>
補足:これだけでもtinyRobotの形は人型になるのですが、このままだとgazebo上では真っ白な人になってしまいます。服や肌の色をgazeboで表示させるには、ダウンロードしたモデルのファイルの中にある「materials」というファイルをsdfファイルと同じディレクトリに保存します。
4.2 temiのモデルの準備
これもかなり我流のやり方ですが、私は以下の手順でモデルを入れ替えました。
-
以下のサイトで販売されているモデルをまず購入しました。おそらく最新のtemi V3ではなくV2かV1あたりの形かと思います。
temiのモデルの購入先のリンク -
販売されているモデルはobjファイルなのでdaeファイルに変換して、崩れてないかどうかをblenderで確認しました。ファイル名はtemi.daeとしました。
-
rmf_ws\src\demonstrations\rmf_demos\rmf_demos_assets\modelsの中にあるTinyRobotというフォルダーをコピーして、同じディレクトリにTinyRobotTemiという名前のフォルダーとしてそのままコピーしました。
-
rmf_ws\src\demonstrations\rmf_demos\rmf_demos_assets\models\TinyRobotTemiの中にあるmeshesのフォルダーの中に先ほどdaeファイルに変換したtemiのモデルの「temi.dae」を保存します。
-
rmf_demos_assets\models\TinyRobotTemiの中にあるmodel.sdfの以下の部分を次のように修正しました。修正点は、モデル名を変更し、tinyRobotのメインボディをtemi.daeに変更しました。また元のままではtemiのサイズが大きすぎたので、scaleを0.5に変更しました。さらに、poseの設定も上側に若干調整しました。
修正前のmodel.sdf<sdf version='1.6'> <model name='TinyRobot'> <--その他の部分--> <visual name='base_footprint_fixed_joint_lump__base_link_visual'> <pose frame=''>-0.11 0 0.071 0 -0 0</pose> <geometry> <mesh> <scale>1 1 1</scale> <uri>model://TinyRobot/meshes/tinyRobot_body.dae</uri> </mesh> </geometry> </visual> <visual name='base_footprint_fixed_joint_lump__base_link_visual_1'> <pose frame=''>-0.279 0.17 0.09 0 -0 -3.14159</pose> <geometry> <mesh> <scale>1 1 1</scale> <uri>model://TinyRobot/meshes/caster_wheel.dae</uri> </mesh> </geometry> </visual> <visual name='base_footprint_fixed_joint_lump__base_link_visual_2'> <pose frame=''>-0.279 -0.17 0.09 0 -0 -3.14159</pose> <geometry> <mesh> <scale>1 1 1</scale> <uri>model://TinyRobot/meshes/caster_wheel.dae</uri> </mesh> </geometry> </visual> <--その他の部分--> <visual name='left_wheel_visual'> <pose frame=''>-0.071 0 0 0 -0 0</pose> <geometry> <mesh> <scale>1 1 1</scale> <uri>model://TinyRobot/meshes/front_wheel.dae</uri> </mesh> </geometry> </visual> <--その他の部分--> <visual name='right_wheel_visual'> <pose frame=''>0.071 0 0 -3.14159 0 -3.14159</pose> <geometry> <mesh> <scale>1 1 1</scale> <uri>model://TinyRobot/meshes/front_wheel.dae</uri> </mesh> </geometry> </visual>修正後のmodel.sdf<sdf version='1.6'> <model name='TinyRobotTemi'> <--その他の部分--> <visual name='base_footprint_fixed_joint_lump__base_link_visual'> <pose frame=''>-0.11 0 0.5 0 -0 -1.570795</pose> <geometry> <mesh> <scale>0.5 0.5 0.5</scale> <uri>model://TinyRobotTemi/meshes/temi.dae</uri> </mesh> </geometry> </visual>
4.3 traffic-editorにおける修正
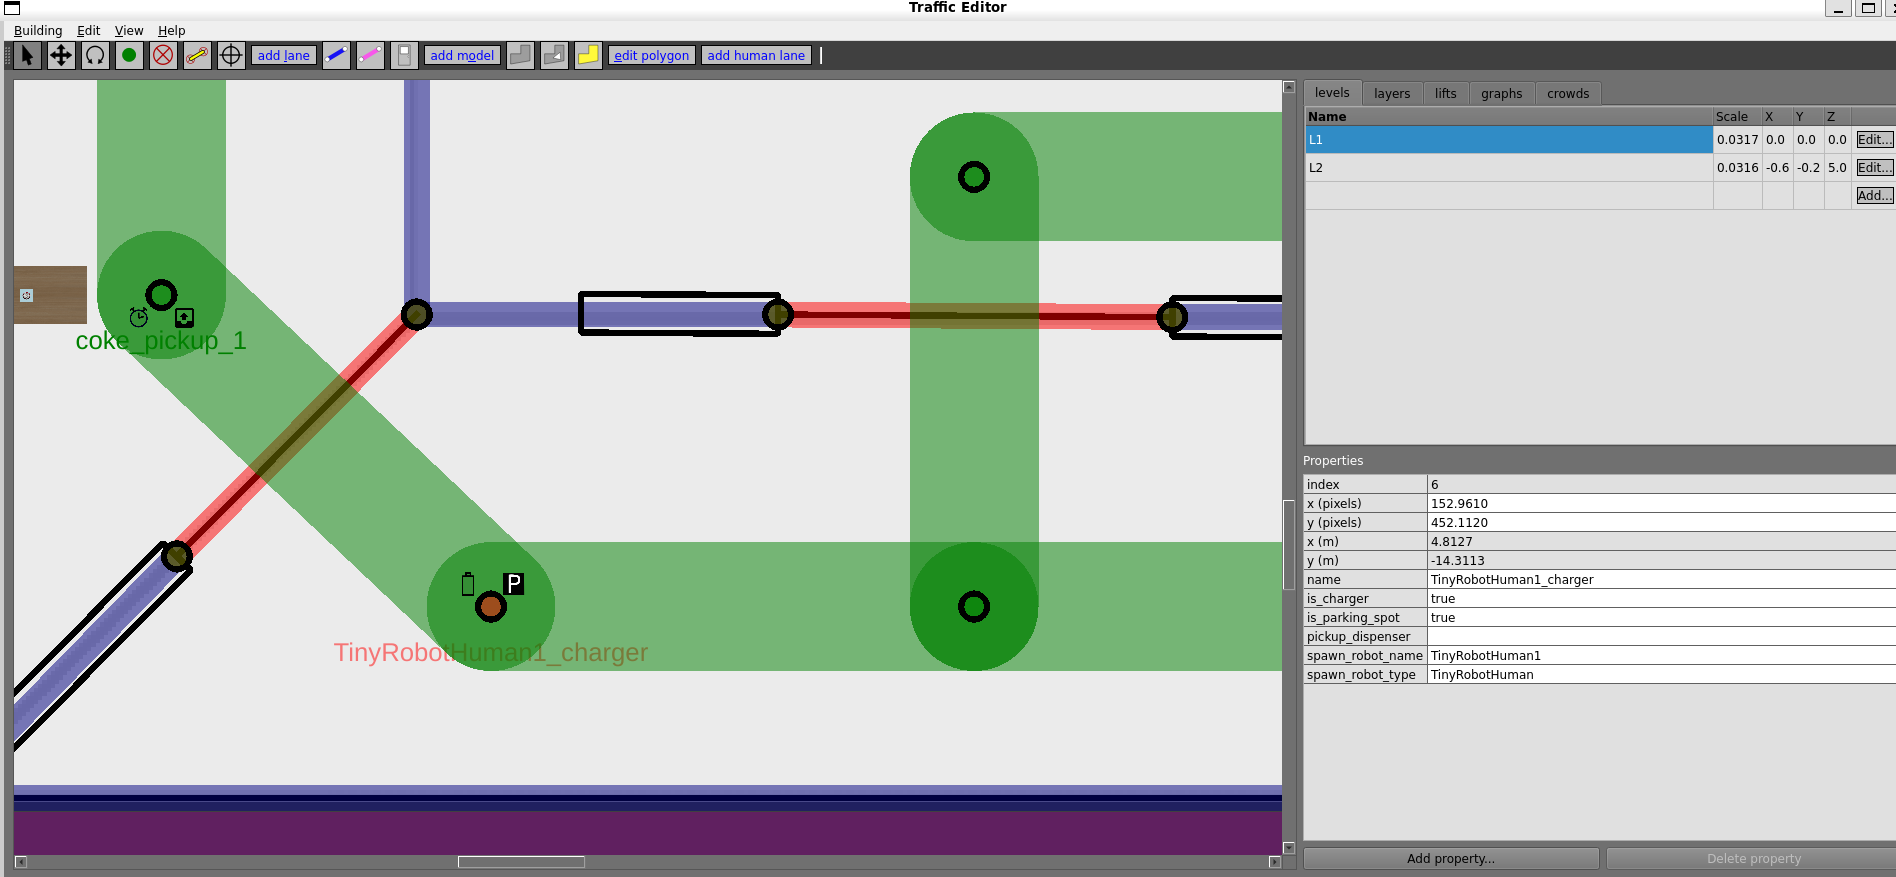
[1]で設定したtinyRobotの初期位置の設定を以下の図のように修正しました。
-
人間のモデルを設定したところ
経路点の名前、ロボット名、ロボットタイプ名を以下の図のように修正しました。
-
temiのモデルを設定したところ
経路点の名前、ロボット名、ロボットタイプ名を以下の図のように修正しました。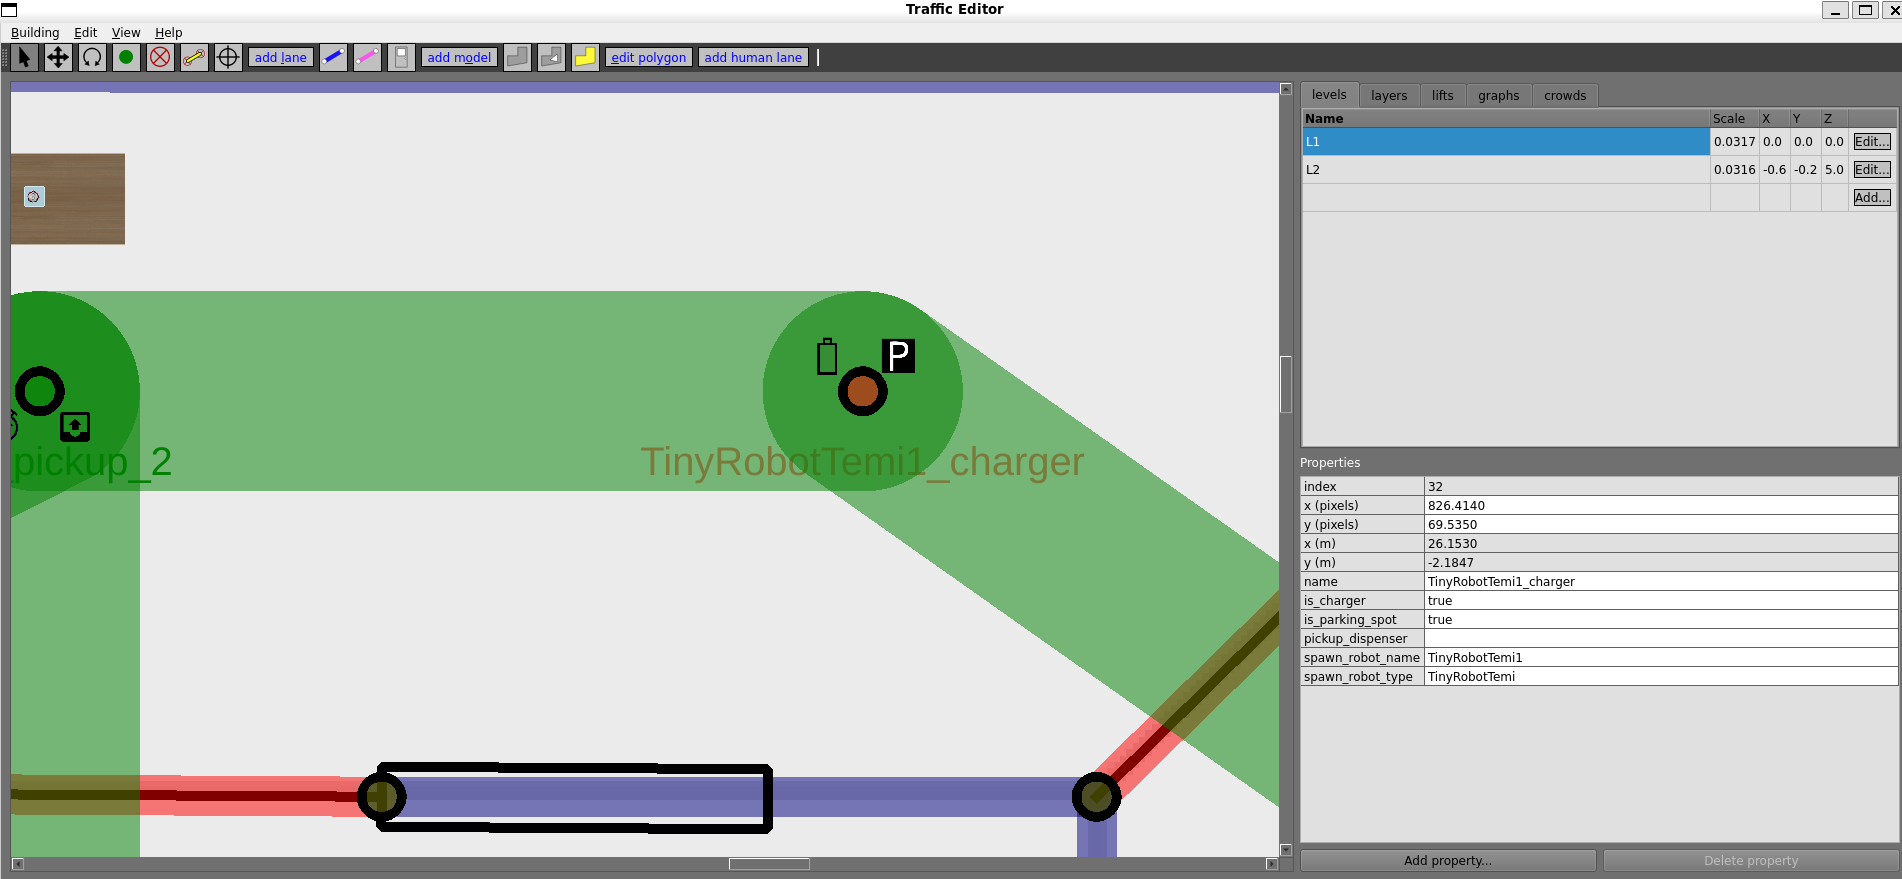
4.4 launchファイルの修正
[1]で用いた、rmf_ws\src\demonstrations\rmf_demos\rmf_demos\launch\evtest.launchをコピーしてevtest_human.launchとして同じディレクトに保存し、以下のように修正します。
<?xml version='1.0' ?>

<launch>
  <arg name="use_sim_time" default="false"/>

  <!-- Common launch -->
  <include file="$(find-pkg-share rmf_demos)/common.launch.xml">
    <arg name="use_sim_time" value="true"/>
    <arg name="viz_config_file" value ="$(find-pkg-share rmf_demos)/include/evtest/evtest.rviz"/>
    <arg name="config_file" value="$(find-pkg-share rmf_demos_maps)/evtest/evtest.building.yaml"/>
    <arg name="dashboard_config_file" value="$(find-pkg-share rmf_demos_dashboard_resources)/evtest/dashboard_config.json"/>
  </include>

  <!-- TinyRobot fleet adapter -->
  <group>
    <include file="$(find-pkg-share rmf_demos_fleet_adapter)/launch/fleet_adapter.launch.xml">
      <arg name="use_sim_time" value="$(var use_sim_time)"/>
      <arg name="nav_graph_file" value="$(find-pkg-share rmf_demos_maps)/maps/evtest/nav_graphs/0.yaml" />
      <arg name="config_file" value="$(find-pkg-share rmf_demos)/config/evtest/tinyRobot_config.yaml"/>
    </include>
  </group>

</launch>
<?xml version='1.0' ?>

<launch>
  <arg name="use_sim_time" default="false"/>

  <!-- Common launch -->
  <include file="$(find-pkg-share rmf_demos)/common.launch.xml">
    <arg name="use_sim_time" value="true"/>
    <arg name="viz_config_file" value ="$(find-pkg-share rmf_demos)/include/evtest_human/evtest_human.rviz"/>
    <arg name="config_file" value="$(find-pkg-share rmf_demos_maps)/evtest_human/evtest_human.building.yaml"/>
    <arg name="dashboard_config_file" value="$(find-pkg-share rmf_demos_dashboard_resources)/evtest/dashboard_config.json"/>
  </include>

  <!-- Walkingactor_config fleet adapter -->
  <group>
    <include file="$(find-pkg-share rmf_demos_fleet_adapter)/launch/fleet_adapter.launch.xml">
      <arg name="use_sim_time" value="$(var use_sim_time)"/>
      <arg name="nav_graph_file" value="$(find-pkg-share rmf_demos_maps)/maps/evtest_human/nav_graphs/0.yaml" />
      <arg name="config_file" value="$(find-pkg-share rmf_demos)/config/evtest_human/TinyRobotHuman_config.yaml"/>
    </include>
  </group>

  <!-- temi_config fleet adapter -->
  <group>
    <include file="$(find-pkg-share rmf_demos_fleet_adapter)/launch/fleet_adapter.launch.xml">
      <arg name="use_sim_time" value="$(var use_sim_time)"/>
      <arg name="nav_graph_file" value="$(find-pkg-share rmf_demos_maps)/maps/evtest_human/nav_graphs/0.yaml" />
      <arg name="config_file" value="$(find-pkg-share rmf_demos)/config/evtest_human/TinyRobotTemi_config.yaml"/>
    </include>
  </group>

</launch>
4.5 configファイルの追加
4.4節で読み込んでいるそれぞれのモデルのconfigファイルは、rmf_ws\src\demonstrations\rmf_demos\rmf_demos\configの中にevtest_humanという名前のフォルダを作り、その中に以下のTinyRobotHuman_config.yamlとTinyRobotTemi_config.yamlを作成・保存しました。
注:ここで一番気を付けないといけないところはモデル名やロボット名を変えるところもそうなのですが、fleet_manager:の下にあるportをモデル毎に変える必要があるということです。私は最初そこを同じ番号にしてしまい、ロボットの状態が取得できないというエラーが起こりました。
# FLEET CONFIG =================================================================
# RMF Fleet parameters

rmf_fleet:
  name: "TinyRobotHuman"
  limits:
    linear: [0.5, 0.75] # velocity, acceleration
    angular: [0.6, 2.0] # velocity, acceleration
  profile: # Robot profile is modelled as a circle
    footprint: 0.3 # radius in m
    vicinity: 0.5 # radius in m
  reversible: True # whether robots in this fleet can reverse
  battery_system:
    voltage: 12.0 # V
    capacity: 24.0 # Ahr
    charging_current: 5.0 # A
  mechanical_system:
    mass: 20.0 # kg
    moment_of_inertia: 10.0 #kgm^2
    friction_coefficient: 0.22
  ambient_system:
    power: 20.0 # W
  tool_system:
    power: 0.0 # W
  recharge_threshold: 0.10 # Battery level below which robots in this fleet will not operate
  recharge_soc: 1.0 # Battery level to which robots in this fleet should be charged up to during recharging tasks
  publish_fleet_state: 10.0 # Publish frequency for fleet state, ensure that it is same as robot_state_update_frequency
  account_for_battery_drain: True
  task_capabilities: # Specify the types of RMF Tasks that robots in this fleet are capable of performing
    loop: True
    delivery: True
  actions: ["teleop"]
  finishing_request: "park" # [park, charge, nothing]
  responsive_wait: True # Should responsive wait be on/off for the whole fleet by default? False if not specified.
  robots:
    TinyRobotHuman1:
        charger: "TinyRobotHuman1_charger"
        responsive_wait: False # Should responsive wait be on/off for this specific robot? Overrides the fleet-wide setting.

fleet_manager:
  ip: "127.0.0.1"
  port: 22012
  user: "some_user"
  password: "some_password"
# FLEET CONFIG =================================================================
# RMF Fleet parameters

rmf_fleet:
  name: "TinyRobotTemi"
  limits:
    linear: [0.5, 0.75] # velocity, acceleration
    angular: [0.6, 2.0] # velocity, acceleration
  profile: # Robot profile is modelled as a circle
    footprint: 0.3 # radius in m
    vicinity: 0.5 # radius in m
  reversible: True # whether robots in this fleet can reverse
  battery_system:
    voltage: 12.0 # V
    capacity: 24.0 # Ahr
    charging_current: 5.0 # A
  mechanical_system:
    mass: 20.0 # kg
    moment_of_inertia: 10.0 #kgm^2
    friction_coefficient: 0.22
  ambient_system:
    power: 20.0 # W
  tool_system:
    power: 0.0 # W
  recharge_threshold: 0.10 # Battery level below which robots in this fleet will not operate
  recharge_soc: 1.0 # Battery level to which robots in this fleet should be charged up to during recharging tasks
  publish_fleet_state: 10.0 # Publish frequency for fleet state, ensure that it is same as robot_state_update_frequency
  account_for_battery_drain: True
  task_capabilities: # Specify the types of RMF Tasks that robots in this fleet are capable of performing
    loop: True
    delivery: True
  actions: ["teleop"]
  finishing_request: "park" # [park, charge, nothing]
  responsive_wait: True # Should responsive wait be on/off for the whole fleet by default? False if not specified.
  robots:
    TinyRobotTemi1:
        charger: "TinyRobotTemi1_charger"
        responsive_wait: False # Should responsive wait be on/off for this specific robot? Overrides the fleet-wide setting.

fleet_manager:
  ip: "127.0.0.1"
  port: 22011
  user: "some_user"
  password: "some_password"
4.6 ビルド
上記の手順が終わったら、以下のコマンドでビルドしました。
cd ~/rmf_ws
source /opt/ros/humble/setup.bash # replace humble with ROS 2 distro of choice.

export CXX=clang++
export CC=clang
colcon build --mixin release lld
5. 結果
以下のコマンドでシミュレーション環境を起動しました。
cd ~/rmf_ws
source ~/rmf_ws/install/setup.bash
ros2 launch rmf_demos_gz_classic evtest_human.launch.xml server_uri:="ws://localhost:7878"
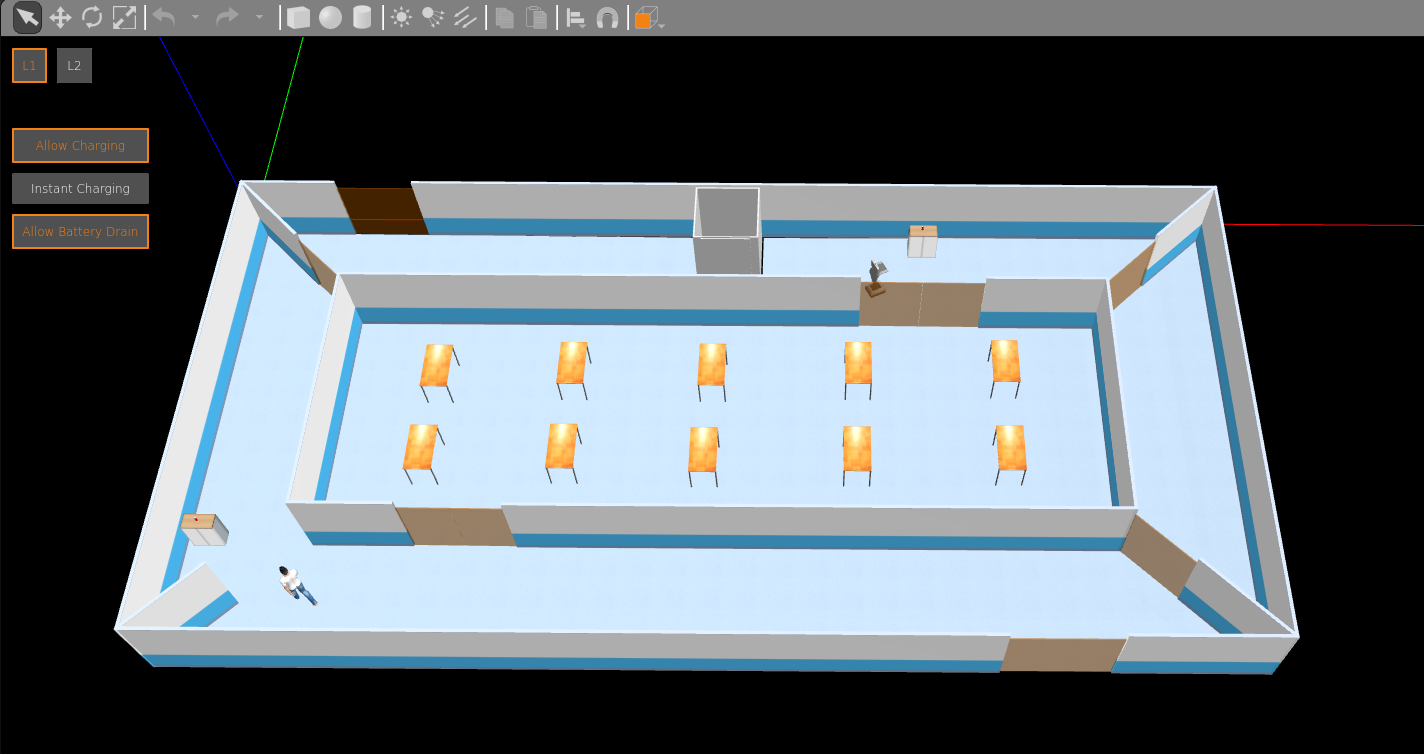
起動したときの俯瞰図は以下になります。
それぞれのモデルの様子は以下
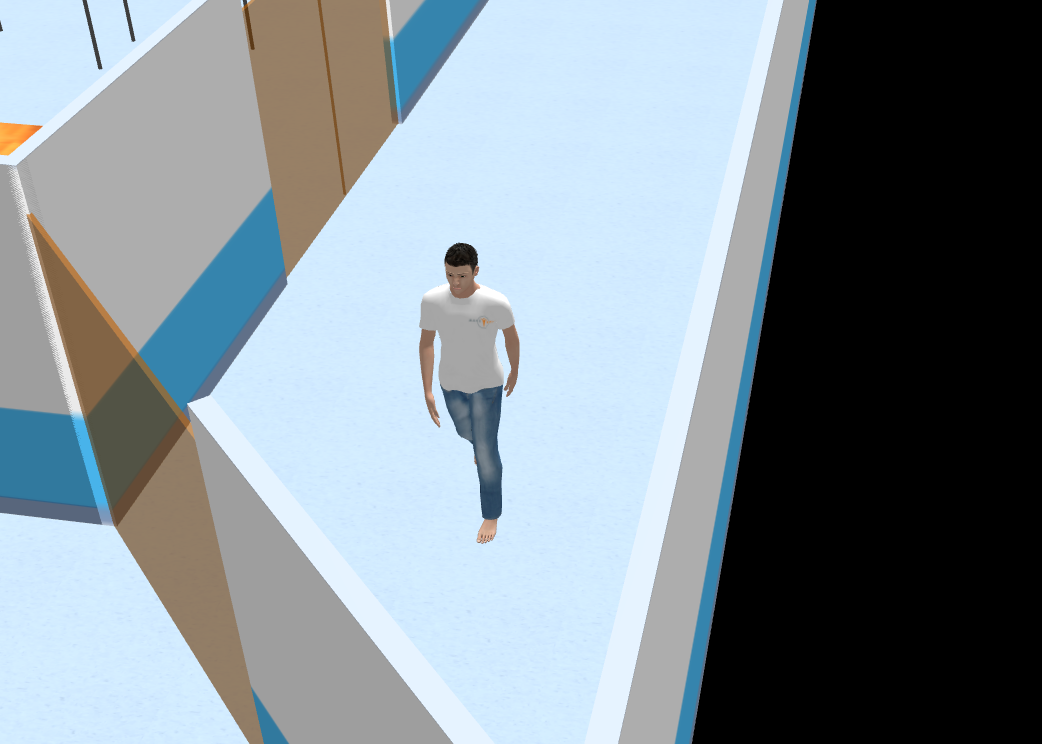
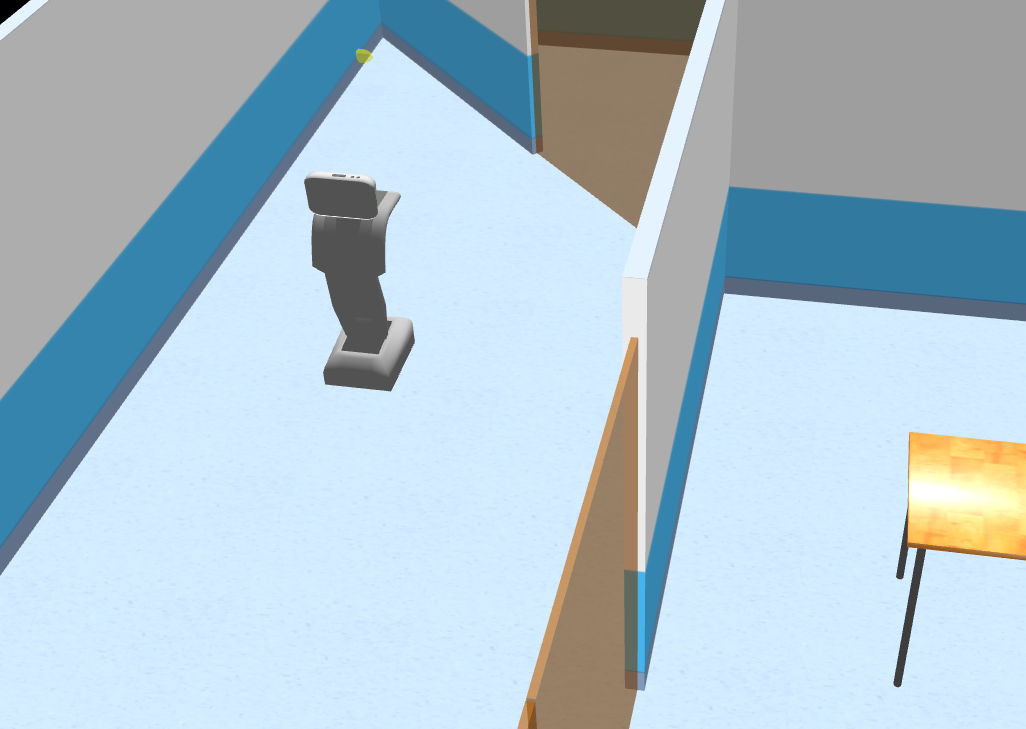
これでそれぞれのモデルに巡回の指示を与えて動かした様子が以下の動画です。
中身がOpenRMFのdemosにてデフォルトで用意されているtinyRobotなので、temiが後ろ向きで動いたりと不自然なところがまだ残っています。それでもtinyRobotと同じような動きはできています。
6. まとめ
上記の手順にて今回の主目的であった、tinyRobotの見た目を変え人間とtemiをgazebo上に出現させシミュレーションをすることに成功したと考えられます。今後は、これを使って配送シミュレーションなどをしていきたいと思います。
参考記事やサイト
[1]WSL2環境下で構築したOpen-RMFで複数ロボットとエレベータの連携をシミュレーションできる環境で遊んでみる 簡単な配送シミュレーションと得られた知見編