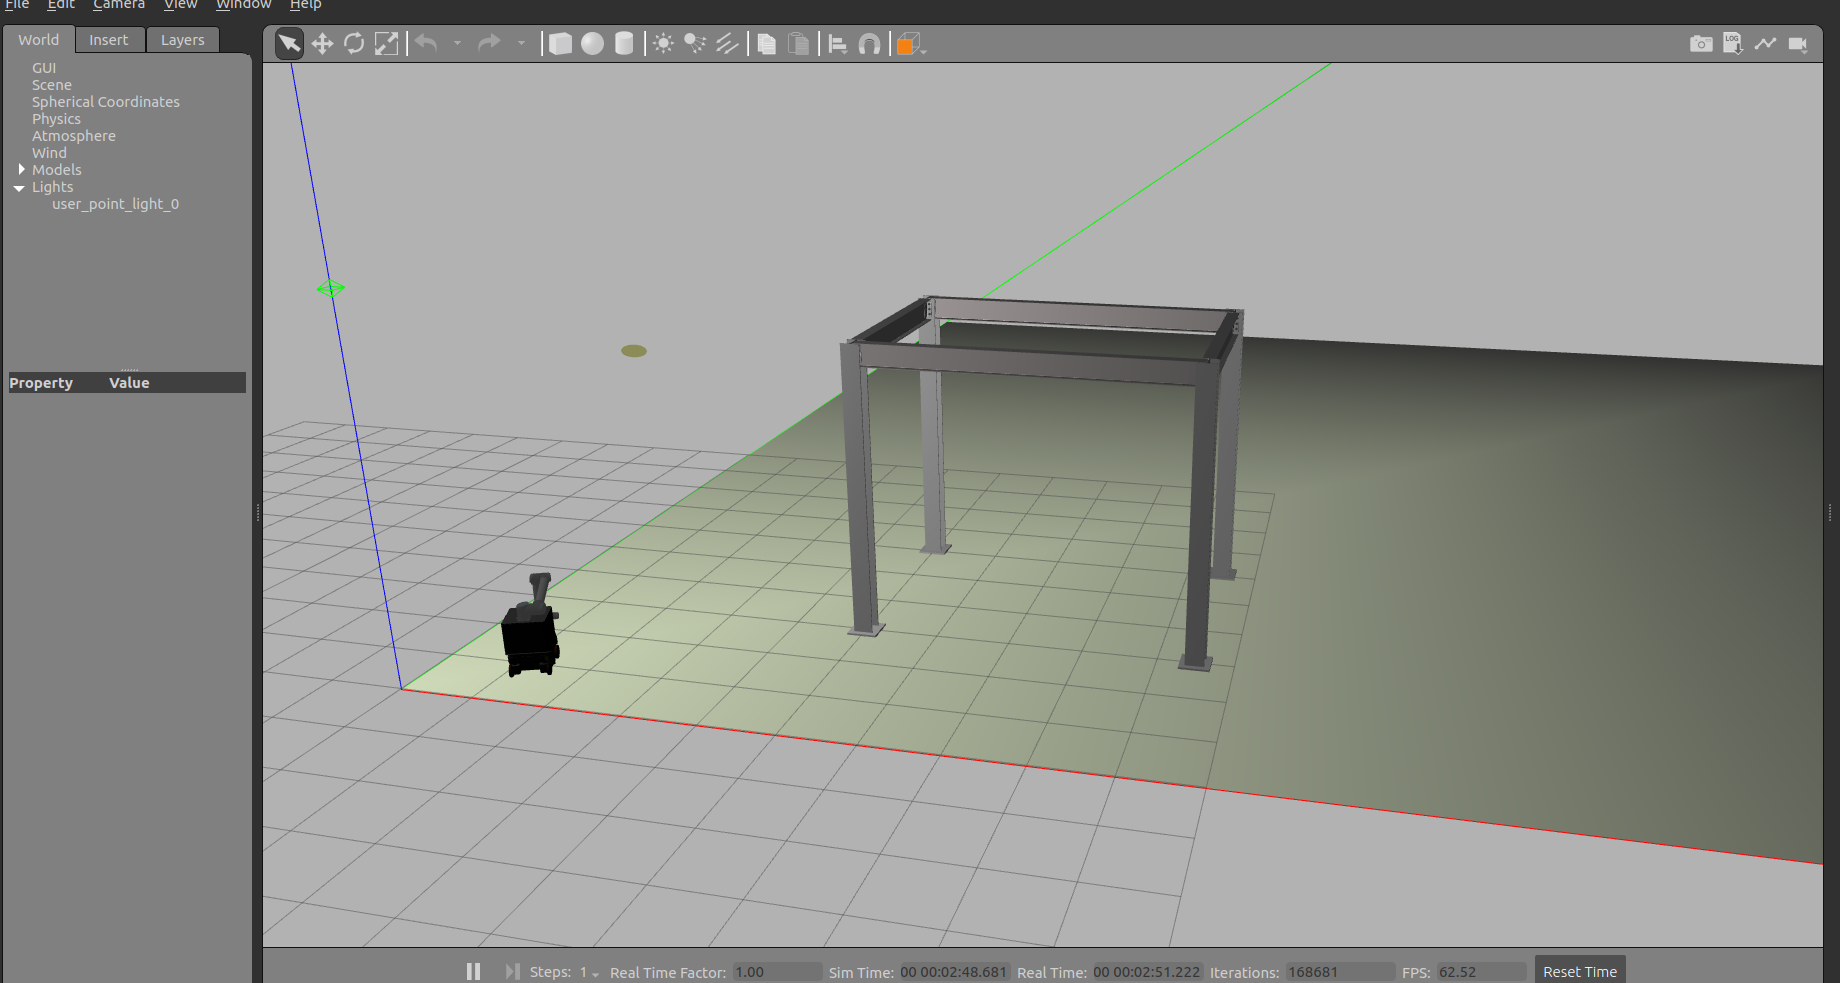
1. はじめに
前回の記事[1]ではBIM(Building Information Modeling)データの中でも形状を表すデータであるIFCファイルをROS2のシミュレーション空間に取り込むことに成功しました。そしてその記事の中で「この環境でロボット走行用地図を作成して自律走行するということもできていません」と述べましたので、それに取り組んでみたのが、この記事の内容になります。
なお、この記事のシミュレーション環境は前回の記事[1]で構築した内容となりますの。このことを前提に記事を記載していきます(つまり細かいことは省きます)。
2. 実行環境
- CPU: CORE i7 7th Gen
- メモリ: 32GB
- GPU: GeForce RTX 2070
- OS: Ubuntu22.04(WSL2ではなくPCに直接インストール)
- ROS2: Humble
- Nvidia Driver: 535
- 対象ロボット: Neobotix社 MPO-700(マニピュレーター搭載)[1]で構築した環境
3. ロボ走行用地図の作成
3.1 mapping用のlaunchファイルの作成
今まで利用してきた、以下のリポジトリのlaunchファイルには、他のブランチにはあるmapping.launch.pyがなぜかありませんでした。
そこで以下のブランチからmapping.launch.pyからコピーしてきて、ros2_mmo500\src\neo_simulation2\launchの中に保存します。
本来であれば、mapping.launch.pyの中の「with open('robot_name.txt', 'r') as file my_neo_robot = file.read()」の部分に適合できるようにrobot_name.txtを作るべきなんですが、今回はそこをコメントアウトして「my_neo_robot = 'mpo_700'」という記載を追加して対応しました。
# Neobotix GmbH
# Author: Pradheep Padmanabhan

import os
from ament_index_python.packages import get_package_share_directory
import launch
from launch.actions import DeclareLaunchArgument, IncludeLaunchDescription
from launch import LaunchDescription
from launch.substitutions import LaunchConfiguration
from launch.launch_description_sources import PythonLaunchDescriptionSource

def generate_launch_description():
    ld = LaunchDescription()

    param_file_arg = LaunchConfiguration('param_file')

    # Check for the robot with which mapping needs to be done
    #with open('robot_name.txt', 'r') as file:
    my_neo_robot = 'mpo_700'

    # Declare launch argument for parameter file
    declare_param_file_arg = DeclareLaunchArgument(
        'param_file',
        default_value = os.path.join(
                get_package_share_directory('neo_simulation2'),
                'configs/' + my_neo_robot,
                'mapping2.yaml'),
        description='Param file that needs to be used for navigation, sets according to robot by default'
    )

    ld.add_action(declare_param_file_arg)
    nav2_launch_file_dir = os.path.join(get_package_share_directory('neo_nav2_bringup'), 'launch')

    mapping = IncludeLaunchDescription(
        PythonLaunchDescriptionSource([nav2_launch_file_dir, '/mapping.launch.py']),
        launch_arguments={
            'use_sim_time': 'true',
            'params_file': param_file_arg,
        }.items(),
    )

    ld.add_action(mapping)

    return ld
3.2 ビルド
以下のコマンドでビルドしました。
cd ~/ros2_mmo500
rosdep update
rosdep install --from-paths src --ignore-src -r -y
source /opt/ros/humble/setup.bash
colcon build
4. ロボ走行用地図作成と編集
4.1 ロボ走行用地図作成
ビルド完了後、以下のコマンドでシミュレーション環境(Gazebo)とrviz2を起動しました。
source ~/ros2_mmo500/install/setup.bash
ros2 launch neo_simulation2 simulation_ifc.launch.py
source ~/ros2_mmo500/install/setup.bash
ros2 launch neo_simulation2 mapping.launch.py
source ~/ros2_mmo500/install/setup.bash
ros2 launch neo_nav2_bringup rviz_launch.py
simulation_ifc.launch.pyを起動するとteleopでロボットを遠隔操作する画面が自動で起動します。そしてteleopでロボットを遠隔操作しつつ、先ほど立ち上げたrviz2上で地図作成の進行状況を確認します。
そして地図作成がある程度進んだことがrviz2上で確認できたら、以下のコマンドで地図を保存します。
source ~/ros2_mmo500/install/setup.bash
ros2 run nav2_map_server map_saver_cli -f ~/ros2_mmo500/src/neo_simulation2/maps/ifcunit
そうするとros2_mmo500\src\neo_simulation2\mapsの下に以下のファイルが保存されます。
- ifcunit.pgm: マップ画像
- ifcunit.yaml: マップのメタデータ
4.2 ロボ走行用地図の編集
作成されたifcunit.pgmは以下のようなものになっています。

白いところが何も障害物がないところになりますが、地図を作成した環境は以下ですから、しっかりと再現できていないことが分かります。
そこでUbuntu PCにGIMPをインストールして、先ほどのifcunit.pgmを以下のように修正しました(単に灰色の部分を白く塗りつぶしただけです)。

5. Gazeboでのシミュレーションを行う際の準備
5.1 navigation.launchの調整
~/ros2_mmo500/src/neo_simulation2/launch/navigation.launch.pyをコピーして、navigation_ifc.launch.pyとして同じディレクトリ内にペーストします。そしてその中のmapパラメータを先ほど保存した地図の名前に更新して、「MY_NEO_ENVIRONMENT = os.environ.get('MAP_NAME', "ifcunit")」とします。
# Neobotix GmbH
# Author: Pradheep Padmanabhan

import os
from ament_index_python.packages import get_package_share_directory
from launch import LaunchDescription
from launch.actions import DeclareLaunchArgument
from launch.actions import IncludeLaunchDescription, GroupAction
from launch.launch_description_sources import PythonLaunchDescriptionSource
from launch.substitutions import LaunchConfiguration, PythonExpression
from launch_ros.actions import Node, PushRosNamespace
from launch.conditions import IfCondition

MY_NEO_ROBOT = os.environ.get('MY_ROBOT', "mpo_700")
MY_NEO_ENVIRONMENT = os.environ.get('MAP_NAME', "ifcunit")

def generate_launch_description():
    use_multi_robots = LaunchConfiguration('use_multi_robots', default='False')
    use_amcl = LaunchConfiguration('use_amcl', default='False')
    use_sim_time = LaunchConfiguration('use_sim_time', default='True')
    namespace = LaunchConfiguration('namespace', default='')
    use_namespace = LaunchConfiguration('use_namespace', default='False')
    map_dir = LaunchConfiguration(
        'map',
        default=os.path.join(
            get_package_share_directory('neo_simulation2'),
            'maps',
            MY_NEO_ENVIRONMENT+'.yaml'))

    param_file_name = 'navigation.yaml'
    param_dir = LaunchConfiguration(
        'params_file',
        default=os.path.join(
            get_package_share_directory('neo_simulation2'),
            'configs/'+MY_NEO_ROBOT,
            param_file_name))

    nav2_launch_file_dir = os.path.join(get_package_share_directory('neo_nav2_bringup'), 'launch')

    return LaunchDescription([
        IncludeLaunchDescription(
            PythonLaunchDescriptionSource([nav2_launch_file_dir, '/localization_neo.launch.py']),
            condition=IfCondition(PythonExpression(['not ', use_amcl])),
            launch_arguments={
                'map': map_dir,
                'use_sim_time': use_sim_time,
                'use_multi_robots': use_multi_robots,
                'params_file': param_dir,
                'namespace': namespace}.items(),
        ),
        IncludeLaunchDescription(
            PythonLaunchDescriptionSource([nav2_launch_file_dir, '/localization_amcl.launch.py']),
            condition=IfCondition(use_amcl),
            launch_arguments={
                'map': map_dir,
                'use_sim_time': use_sim_time,
                'use_multi_robots': use_multi_robots,
                'params_file': param_dir,
                'namespace': namespace}.items(),
        ),

        IncludeLaunchDescription(
            PythonLaunchDescriptionSource([nav2_launch_file_dir, '/navigation_neo.launch.py']),
            launch_arguments={'namespace': namespace,
                              'use_sim_time': use_sim_time,
                              'params_file': param_dir}.items()),
        ])
5.2 再ビルド
以下のコマンドで再ビルドしました。
cd ~/ros2_mmo500
rosdep update
rosdep install --from-paths src --ignore-src -r -y
source /opt/ros/humble/setup.bash
colcon build
6. シミュレーション結果
ビルド完了後、以下のコマンドでシミュレーション環境(Gazebo)とrviz2を起動しました。
source ~/ros2_mmo500/install/setup.bash
ros2 launch neo_simulation2 simulation_ifc.launch.py
source ~/ros2_mmo500/install/setup.bash
ros2 launch neo_simulation2 navigation_ifc.launch.py
source ~/ros2_mmo500/install/setup.bash
ros2 launch neo_nav2_bringup rviz_launch.py
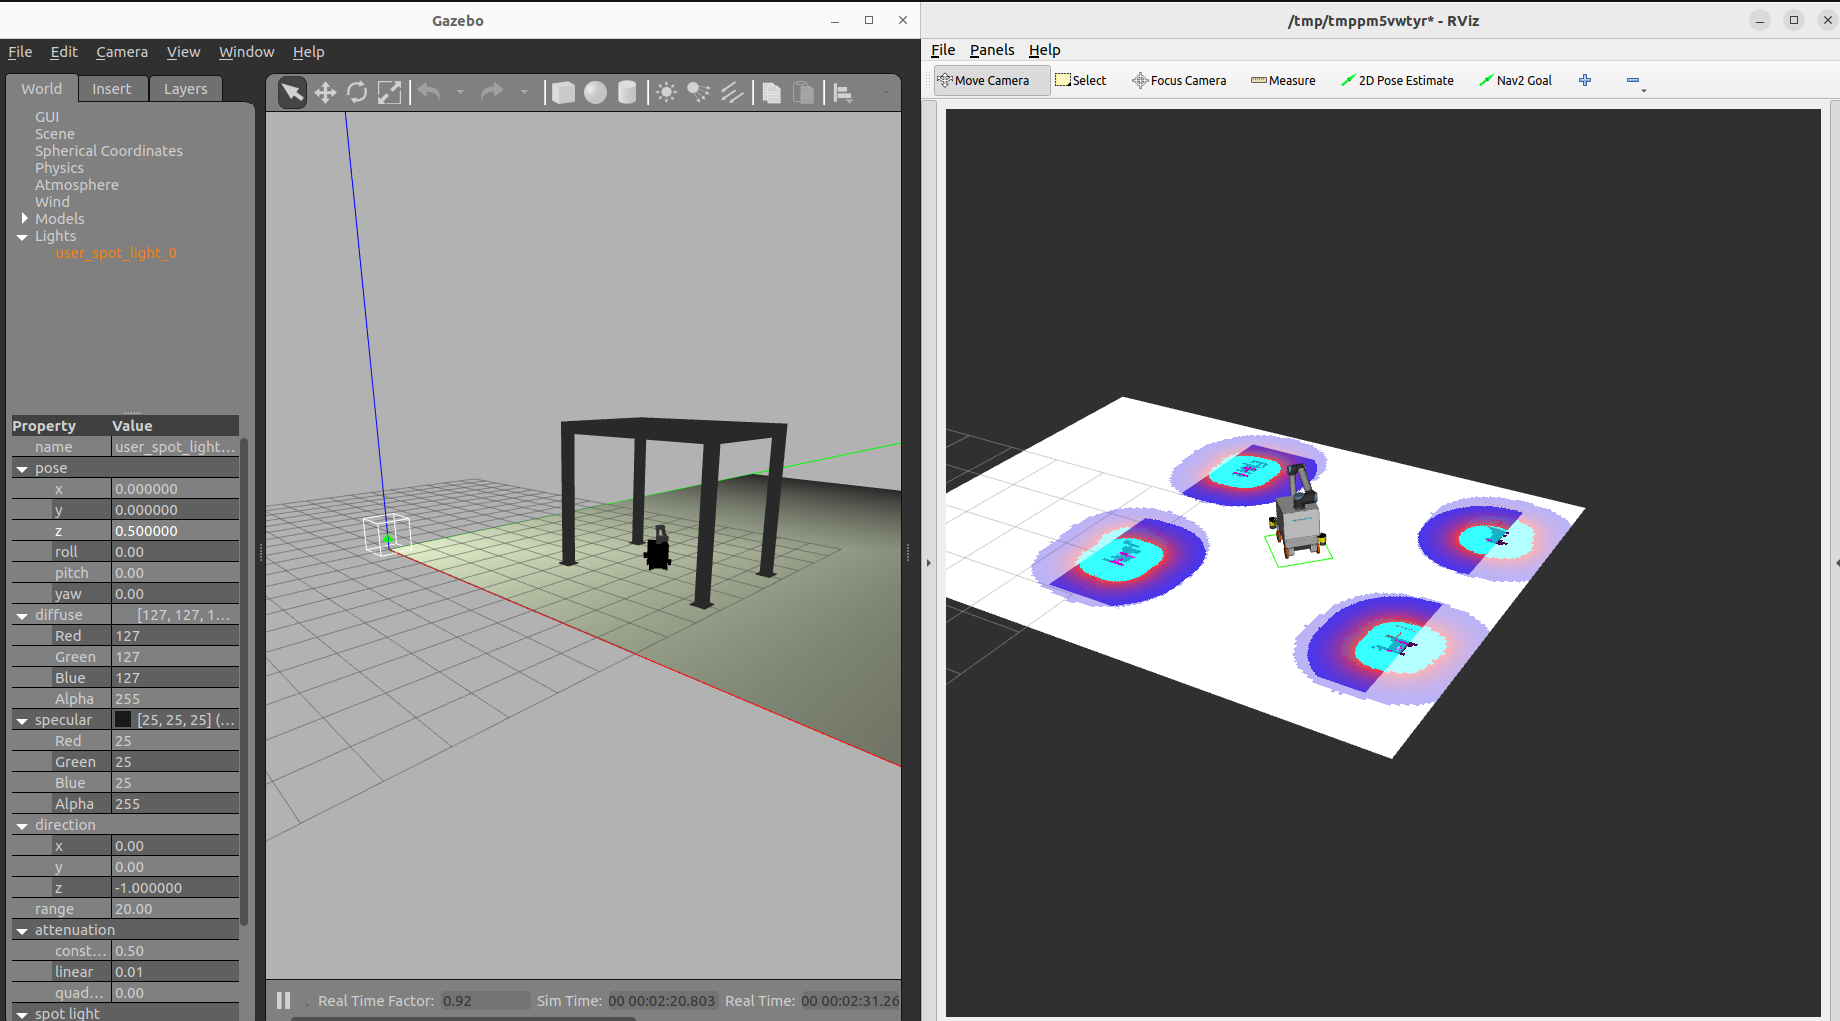
以下が👆のコマンドで起動したシミュレーション環境の画像です。左の画像がGazeboの画面、右の画面がrviz2の画面です。作成した地図を使って自己位置推定できています。

そしてこのシミュレーション環境でロボットを自律走行でさせたときの動画が以下になります。
7. まとめ
今回はBIM(Building Information Modeling)データの中でも形状を表すデータであるIFCファイルをROS2のシミュレーションに取り込み、そしてその環境でロボット走行用地図を作成してロボットを自律走行させることに成功しました。
今後取り組む課題としては、[1]の記事にも書きましたが、Kimらの論文[2]を参考に作業工程をロボットでの塗装シミュレーションに取り込むことの再現をしていきたいと思います。
参考記事やサイト
[1]IFCファイルをSDFファイルに変換してシミュレーション環境(Gazebo)に読み込んで、その中でマニピュレーター付きロボットを動かしてみた
[2]Development of BIM-integrated construction robot task planning and simulation system
