はじめに
弁護士ドットコム株式会社ではコロナ禍をきっかけとして、2020年から在宅勤務をする機会が増えました。その際、一部のサービスではアクセス元のIPアドレスをオフィスに制限しているためにアクセスできなくなるものが出てきました。
できればIP制限を外せたら良かったのですが、中にはIP制限が必須のものもあり、
VPN導入も検討しましたが、アカウントの管理、負荷などなどの考慮が手間になると考え、もっと簡単に導入する仕組みがないか考えました。
弊社ではAWSだけでなくGCPも使っているので、簡単に使えるIdentity-AwareProxyで認証を行い、GCE上のproxyサーバ(nginx)を通すことによってIPを固定化しました。
作業の流れ
- GCPのGCEにproxyサーバの構築
- GCEに外部IP付与とfirewallの設定
- Identity-AwareのTCP転送の設定
- PCからgcloudコマンドの実行(TCPport転送)
- ブラウザの設定
1. GCPのGCEにproxyサーバを構築
https対応のproxyとして利用する場合はモジュールが必要になりますので
sourceからインストールします。
※gitやコンパイラ、PCREはインストール済みの前提です
$ wget http://nginx.org/download/nginx-1.16.1.tar.gz
$ tar zxvf nginx-1.16.1.tar.gz
$ git clone https://github.com/chobits/ngx_http_proxy_connect_module.git -b v0.0.1
Nginxに対してのパッチ適用 と Nginxのインストール
prefix=/path/to/nginxはインストールpathなので適宜変更してください
※makeでエラーになる場合はPCREやgcc等の開発系のものがインストールされていない可能性があるので入れます
$ cd nginx-1.16.1
$ patch -p1 < ../ngx_http_proxy_connect_module/patch/proxy_connect_rewrite_101504.patch
$ ./configure --prefix=/path/to/nginx --add-module=../ngx_http_proxy_connect_module
$ make && make install
Nginx の 設定
confをproxy用の設定に変更します。
$ cd /path/to/nginx
$ vim conf/nginx.conf
worker_processes  1;

events {
    worker_connections  1024;
}

http {
    include       mime.types;
    default_type  application/octet-stream;

    sendfile        on;

    keepalive_timeout  65;

     server {
         listen                         3128;

         # dns resolver used by forward proxying
         resolver                       8.8.8.8;

         # forward proxy for CONNECT request
         proxy_connect;
         proxy_connect_allow            443 563;
         proxy_connect_connect_timeout  10s;
         proxy_connect_read_timeout     10s;
         proxy_connect_send_timeout     10s;

         # forward proxy for non-CONNECT request
         location / {
             proxy_pass $scheme://$http_host$request_uri;
             proxy_set_header Host $host;
         }
     }
}
nginx の起動と停止
再起動なり、再読み込みなりをして設定を反映します。
# 起動
/path/to/nginx/sbin/nginx

# 停止
/path/to/nginx/sbin/nginx -s stop

# 再読み込み
/path/to/nginx/sbin/nginx -s reload
2. GCEに外部IP付与とfirewallの設定
GCEのIPを固定化します。
外部IPアドレス→静的アドレスを予約するを選択してIPを取得します。
このIPをインスタンスに設定します。
※細かい設定は割愛します
IAPからのみ許可するfirewallの設定も行います。以下のIPからは全許可するようにします。
35.235.240.0/20
35.191.0.0/16
130.211.0.0/22
IAPで利用するIPレンジ
https://cloud.google.com/architecture/building-internet-connectivity-for-private-vms?hl=ja
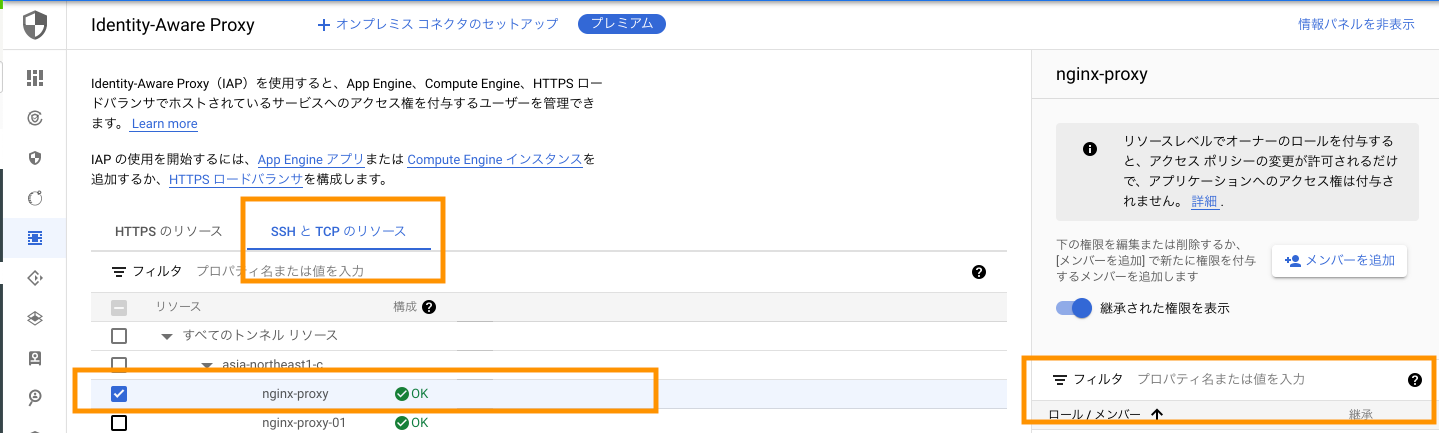
3. Identity-AwareのTCP転送の設定
GCPコンソールにログインして、Identity-Awareの管理画面を開きます。
図のようにTCPのリソースを選択、利用するインスタンスにチェックをいれます。
情報パネルが表示されていない場合は、[情報パネルを表示] をクリックします。
右下の[メンバーの追加] をクリックして、以下を構成します。
新しいメンバー: アクセスを許可するユーザーまたはグループを指定します。
[ロールを選択する] で [Cloud IAP] > [IAP で保護されたトンネル ユーザー] を選択します。
4.PCからgcloudコマンドの実行(TCPport転送)
アクセスするPCからgcloudコマンドを使って認証と、localhostのport転送を行います。
※gcloudコマンドをアクセスするPCにインストール済みなこと
nginx-proxyはインスタンス名、3128はproxyサーバ側のportです。localhost:3128はPCのlocalportです。
以下の例はlocalの3128portをサーバ側の3128に転送しています。
$ gcloud compute start-iap-tunnel nginx-proxy 3128 --local-host-port=localhost:3128
上記実行後に以下の表示になればTCPのport転送が有効になってます
Testing if tunnel connection works.
Listening on port [3128].
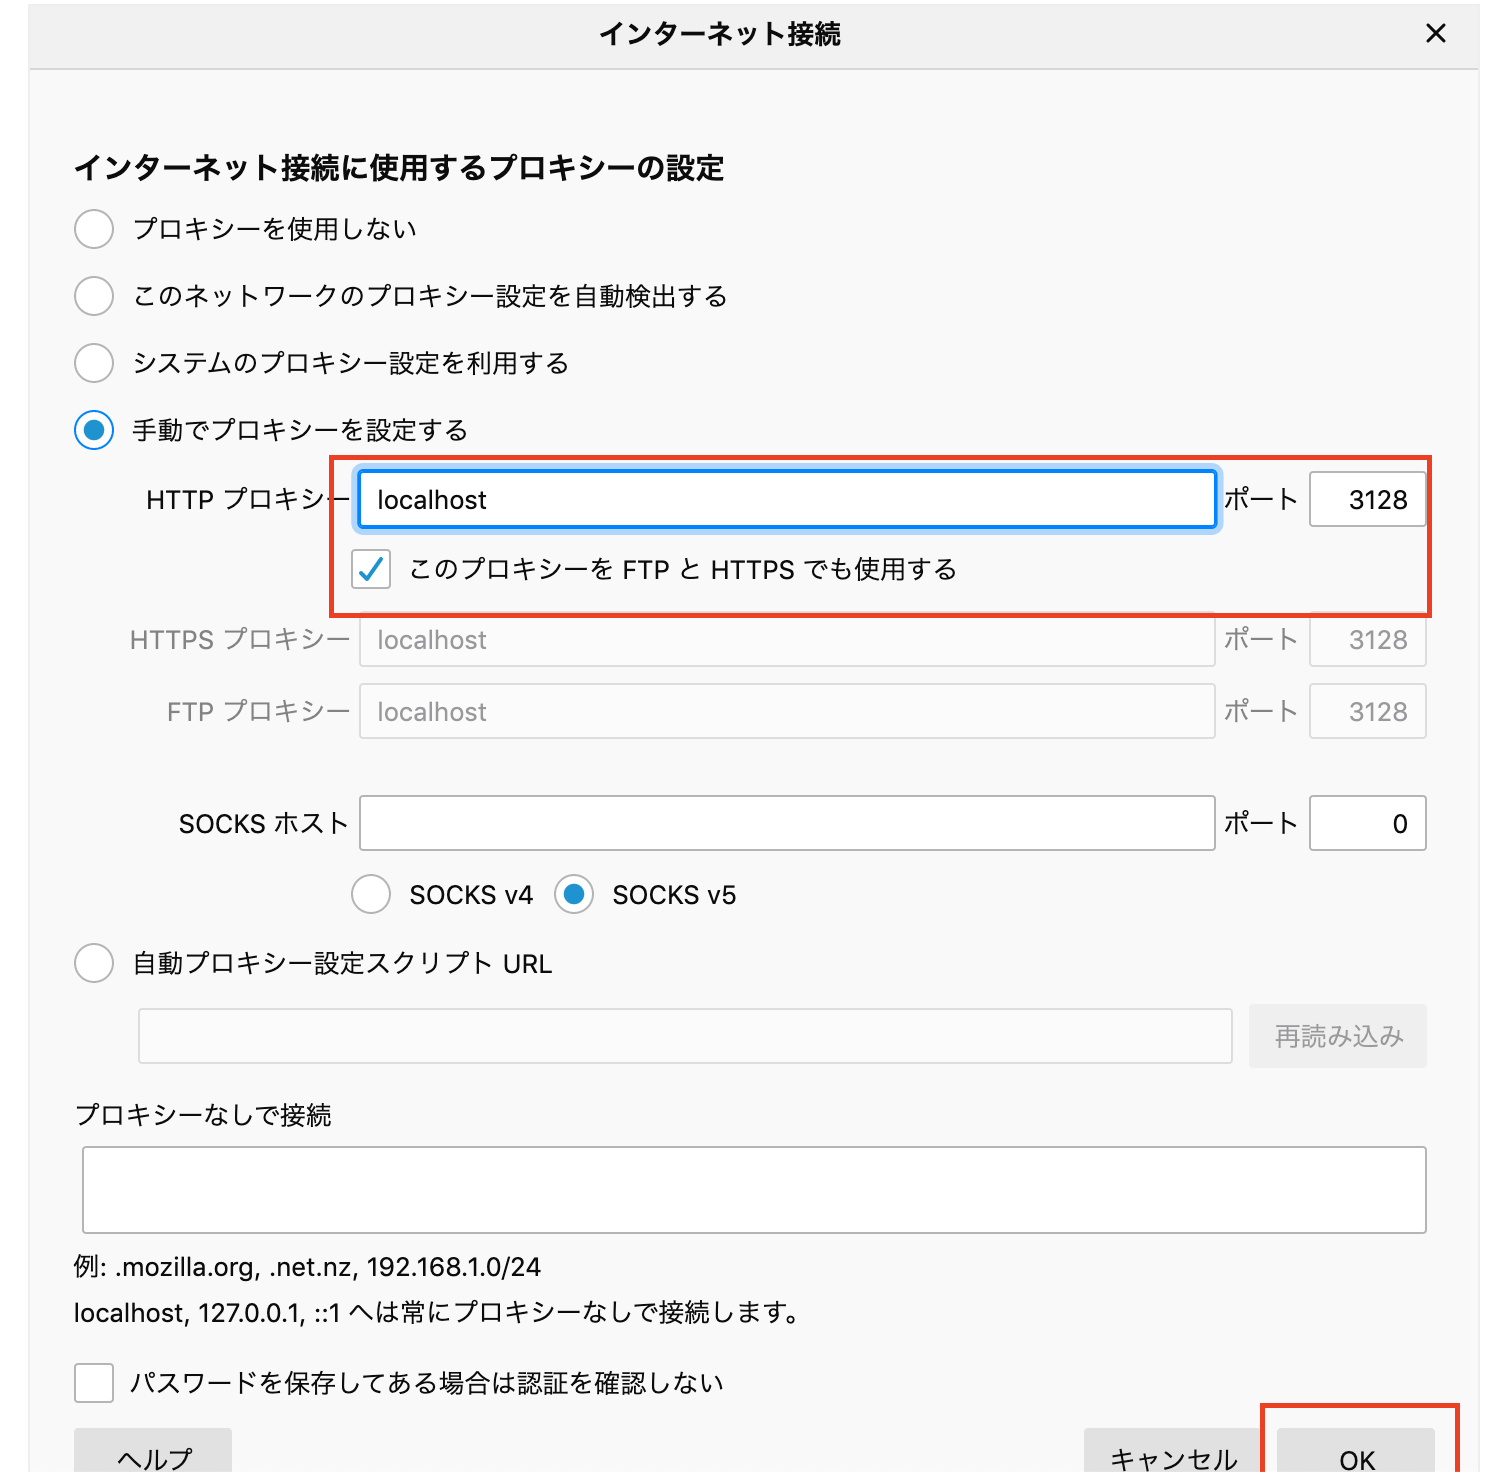
5. ブラウザの設定
ブラウザでproxyを使う設定をします。
以下はFirefoxの設定例です。
ブラウザ経由での送信元IPがGCEの外部IPになっているかを確認します。
https://rakko.tools/tools/2/
参考
TCP 転送での IAP の使用(GCP公式)
https://cloud.google.com/iap/docs/using-tcp-forwarding?hl=JA