0.初めに
私はエンジニアではないただのドシロウトです。
現在やや下火?になったマストドンのローカルタイムライン(LTL)をJavaScriptで取得する方法をQiitaで見つけてありがたく利用させていただいています。
ブラウザのみでmastodonのAPIを叩く方法
https://qiita.com/wakufactory/items/d3cc4c824079ab117e71
この記事を応用すればトゥート(投稿)できるのかもしれませんがやりかたが分からず調べてみました。
ブラウザー(Chrome)でのローカル実行で動く方法(注1)を調べました。
注1(2018.06.12追記):マストドンがv2.4.1にバージョンアップしてローカル実行できなくなりました。
サーバーでは動きますがアクセストークン丸出しなので対策が必要となります。
1.作ったもの
以下の画像の通りです。
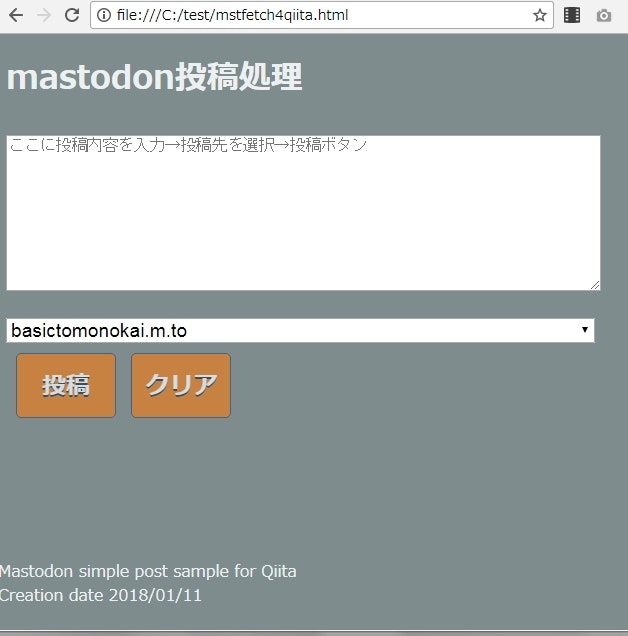
トゥート内容をテキストエリアに入力→投稿先を選択→投稿ボタンを押す→投稿される、ただそれだけです。
2.参考にしたサイト
なかなか参考にあるサイトをみつけられず出来ないのかと思いましたが以下サイトを見つけました。
Simple Mastodon Oauth
https://qfox.nl/weblog/406
ちょっとわかりづらかったですがアクセストークンがあればPOSTでトゥートできると書いてありました。
アクセストークンの取得方法は上記Qiitaの記事に書いてあったWEBサービスを利用しました。
Access Token Generator for Mastodon API
https://takahashim.github.io/mastodon-access-token/
マストドンAPIへのアクセスは以下の記事を参考にして簡単そうなFetch APIを使うことにしました。
JavaScriptのFetch APIを利用してリクエストを送信する
https://sbfl.net/blog/2017/01/29/fetch-api/
お疲れさまXMLHttpRequest、こんにちはfetch
https://qiita.com/tomoyukilabs/items/9b464c53450acc0b9574
3.コード
とても短いですが以下です。HTMLファイル一つでトゥートできます。
<!DOCTYPE html>
<html>
<head>
  <meta http-equiv="content-type" content="text/html; charset=UTF-8">
  <meta name="viewport" content="initial-scale=1.0, user-scalable=no">

  <title>投稿(マストドン)</title>

<style>

body {
   color: #ecf0f1;
   background: #7f8c8d;
}

# kkaf {
   font-size: 1.5em;
   margin: 10px;
}


.buttonx {
  width:100px;
  color:#ffffff;
  background:#e67e22;
  font-family: fantasy,sans-serif;
  font-size:24px;
  font-weight:bold;
  text-shadow:0 1px 0px #143352,0 2px 0px #143352;
  text-align:center;
  display:inline-block;
  text-decoration:none;
  border:1px solid #225588;
  padding:15px 0 12px 0;
  border-radius:5px;
  margin-bottom:20px;
  margin-left:10px;
  opacity: 0.7;
}


div#footer-fixed
{
    position: fixed;            /* フッターの固定 */
    bottom: 0px;                /* 位置(下0px) */
    left: 0px;                  /* 位置(左0px) */
    width: 100%;                /* 横幅100% */
    height: 70px;               /* 縦幅70px */
}


div#body-bk{
    padding: 0px 0 80px 0;    /* 下に80pxを余白を取る */
}

select {
  margin: 10px 0;
  width: 80%;
  font-size: 1.2em;
}

textarea {
  margin: 10px 0;
  width: 80%;
  font-size: 1.2em;
}

</style>


</head>

<body>
     <h1>mastodon投稿処理</h1>


<div id="body-bk">

<!-- 投稿内容入力エリア -->
<div>
<textarea id="textarea-id" rows="10" placeholder="ここに投稿内容を入力→投稿先を選択→投稿ボタン"></textarea>
</div>


<!-- 投稿先選択 -->
<div>
<select id="select-id" name="mastdonsite">
<option value="アクセストークンをここに貼りつけ">basictomonokai.m.to</option>
<option value="アクセストークンをここに貼りつけ">mstdn.xxxxx1</option>
<option value="アクセストークンをここに貼りつけ">mstdn.xxxxx2</option>
<option value="アクセストークンをここに貼りつけ">mstdn.xxxxx3</option>
<option value="アクセストークンをここに貼りつけ">mstdn.xxxxx4</option>

</select>
</div>

<button class="buttonx" id="button_post">投稿</button>
<button class="buttonx" id="button_clear">クリア</button>

</div>

<div id="footer-fixed">

Mastodon simple post sample for Qiita<br>
Creation date 2018/01/11
</div>


<script>

// マストドン投稿関数
function mastodonpost() {
  // 投稿先マストドンURL、アクセストークン取得
  var selectorx = document.getElementById('select-id');
  var indexx = selectorx.selectedIndex;
  var valuex = selectorx.options[indexx].value;
  var urlx= selectorx.options[indexx].innerText;
  console.log(valuex);
  console.log(urlx);

  // 投稿内容取得
  var textareax = document.getElementById('textarea-id');
  var toukoux= textareax.value;

  console.log(toukoux);

  // post用URL生成
  var posturl = 'https://'+urlx+'/api/v1/statuses';

  console.log(posturl);


  // POSTで送る(JSON形式)
  fetch(posturl, {
      method : 'POST',
      body : JSON.stringify({ access_token : valuex, status : toukoux }), // 文字列で指定する
      headers : new Headers({ "Content-type" : "application/json" })
  }).then(response => response.text())
      .then(function(text) {
             console.log(text);
             alert(urlx+'\n投稿完了')
            })
      .catch(error => alert(error));

};

// マストドン投稿エリアのクリア
function textclear() {
   document.getElementById('textarea-id').value = "";
};

// 投稿ボタン、クリック時
var el = document.getElementById("button_post");
el.addEventListener("click", mastodonpost, false);

// クリアボタン、クリック時
var el2 = document.getElementById("button_clear");
el2.addEventListener("click", textclear, false);


</script>


</body>

</html>
4.まとめ
たったこれだけでマストドンにトゥートできました。
この方法だとアクセストークン丸見えですがローカルで使うにはいいかなと思います。
以 上