cakePHPを初めて触るWeb初心者がcakePHP3を用いて掲示板作成を目指します。
ブサイクなコードなので、アドバイスをいただけると嬉しいです。
簡単な用件は以下のとおり
- XAMPPを用いる
- 2chのようなスレッド式掲示板
- jpg, png, gif画像をアップロードできる(maxsize: 10M)
- 投稿一覧閲覧・新規投稿・投稿検索ができる
- それぞれに対応するビューを作成
- 投稿一覧では、各スレッドの1番目の投稿のみを表示する
- 新規投稿では、スレッドを作成できる
- 投稿検索では、タイトル・投稿者・本文の中にキ―ワードを1つでも含む投稿を検索できる
- 各スレッドの詳細を表示できる
- 1スレッドの内容をすべて表示できる
第一回では、画像投稿機能なしでのCRUD機能と投稿検索機能を実装していきます。
目次
~第一回 CRUDの実装~
~第二回 paginate, ナビゲーションバーの実装~
~第三回 画像投稿機能の実装~
~第四回 ドラッグアンドドロップ(DnD)での画像添付 ~
はじめに
- composerを用いて、cakePHP3のプロジェクトを作成します
php composer.phar create-project --prefer-dist cakephp/app yama_cake_bbscd yama_cakebbs-
php ../composer.phar install-
vender以下にcomposerの設定に応じたファイルが設置されます- (よくわかっていないので、後で追記予定)
-
- bootstrapを用いるための設定
- このサイト様を参考(http://qiita.com/milano/items/f244f9ac5514f0e6b213)
- 既存のdefault.ctpにリンクを貼ります
cd src/Template/Layout/ln -s /Applications/XAMPP/htdocs/yama_cake_bbs/vendor/friendsofcake/bootstrap-ui/src/Template/Layout/default.ctp ./- 必要ない作業ですが、既存のdefault.ctpをごっちゃになってしまうのを防ぐためです
- config/app.php にDB接続のための設定を行う
DB定義
マイグレーションを用いて、DBにテーブルを作成します
- マイグレーションファイルを作成
php bin/cake.php bake migration Posts
- マイグレーションファイルを編集
<?php
use Migrations\AbstractMigration;

class Posts extends AbstractMigration
{
    public function change()
    {
        $table = $this->table('posts');
        $table->addColumn('postId', 'integer', [
            'default' => null,
            'null' => false,
        ]);
        $table->addColumn('resId', 'integer', [
            'default' => null,
            'null' => false,
        ]);
        $table->addColumn('title', 'string', [
            'default' => null,
            'limit' => 50,
            'null' => false,
        ]);
        $table->addColumn('name', 'string', [
            'default' => null,
            'limit' => 30,
            'null' => false,
        ]);
        $table->addColumn('content', 'text', [
            'default' => null,
            'limit' => 500,
            'null' => false,
        ]);
        $table->addColumn('img_name', 'string', [
            'default' => null,
            'null' => true,
        ]);
        $table->addColumn('img_ext', 'string', [
            'default' => null,
            'null' => true,
        ]);
        $table->addColumn('img_size', 'integer', [
            'default' => null,
            'null' => true,
        ]);
        $table->addColumn('created', 'datetime', [
            'null' => false,
        ]);

        $table->addColumn('modified', 'datetime', [
            'null' => false,
        ]);
        $table->create();
    }
}
- マイグレーションを実行
php bin/cake.php migrations migrate
DBに postsテーブルが作成されました。
投稿一覧ページを作成
-
php bin/cake.php bake all postsを実行して、model・controller・viewを作成 - controllerのindexアクションを編集
- スレッド式にするため、
resId == 0である投稿のみ取り出しています- ページネーション機能を用いています
- 編集日時が新しい順に取り出すことで、表示を最新順にすることが出来ます
- スレッド式にするため、
<?php
namespace App\Controller;

use App\Controller\AppController;

class PostsController extends AppController
{
    public function index()
    {
        $query = $this->Posts->find()
            ->where(['resId =' => 0])
            ->order(['modified' => 'desc'])
            ;
        $posts = $this->paginate($query);

        $this->set(compact('posts'));
        $this->set('_serialize', ['posts']);
    }
~~
}
- templeteを編集
- default.ctp を少しいじります
- contentを
containerタグで囲み、body部分を中央寄せにします
- contentを
- default.ctp を少しいじります
~~
<!DOCTYPE html>

<?= $this->fetch('html') ?>

    <head>

        <?= $this->Html->charset() ?>

        <title><?= $this->fetch('title') ?></title>

        <?= $this->fetch('meta') ?>
        <?= $this->fetch('css') ?>

    </head>

    <?php
    echo $this->fetch('tb_body_start');
    echo $this->fetch('tb_flash');
    echo '<div class="container">'; //add
    echo $this->fetch('content');
    echo '</div>';                  //add
    echo $this->fetch('tb_footer');
    echo $this->fetch('script');
    echo $this->fetch('tb_body_end');
    ?>

</html>
- index.ctpを編集
- Element機能を用いて、投稿表示部分をモジュール化しています
- 投稿表示部分は投稿詳細ビューでも使い回す予定です
- Element機能を用いて、投稿表示部分をモジュール化しています
<div class="posts index large-9 medium-8 columns content">
    <h1><?= __('投稿一覧') ?></h1><br>

<?php foreach ($posts as $post): ?>
    <?= $this->element('one_article', ['post' => $post]) ?>
<?php endforeach; ?>

</div>
<?php if ($post->resId === 0):?>
    <div class="panel panel-default">
<?php else: ?>
    <div class="panel panel-default" style="margin:10px 0 0 60px">
<?php endif; ?>
    <div class="panel-heading">
        <h2 class="panel-title">
        【<?= h($post->postId) ?>】
        【<?= h($post->resId) ?>】
        <a href="<?php echo $this->Url->build(['controller' => 'Posts', 'action' => 'view', $post->postId])?>">
            <font size="5" color="ff0000"><b><?= $post->title ?></b></font>
        </a>
            <br><br>
            投稿者名: <?= $post->name ?>
            投稿日時: <?= h($post->created) ?>
            編集日時: <?= h($post->modified) ?>
        <font size="3" color="1253A4"><b>
            <a href="<?php echo $this->Url->build([
                'controller' => 'Posts', 'action' => 'view', $post->postId])?>">
                スレッドを表示
            </a>
            <a href="<?php echo $this->Url->build([
                'controller' => 'Posts', 'action' => 'edit', $post->id])?>">
                編集
            </a>
            <?= $this->Form->postLink(__('削除'), [
                'action' => 'delete', $post->id], [
                'confirm' => __('ID {0}番の記事を削除しますか?', $post->id)]) ?>
        </b></font>

        </h2>
    </div>
    <div class='panel-boby'>
        <div style="padding:10px">
            <?= h($post->content) ?>
        </div>
    </div>
</div>
以上で、投稿一覧ページを作成できました。
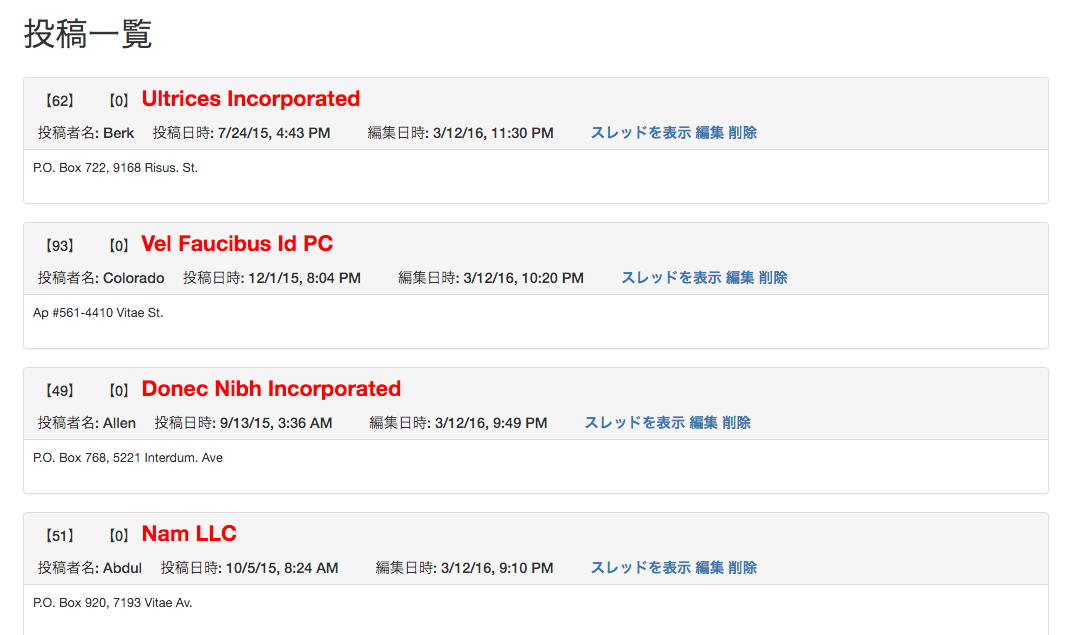
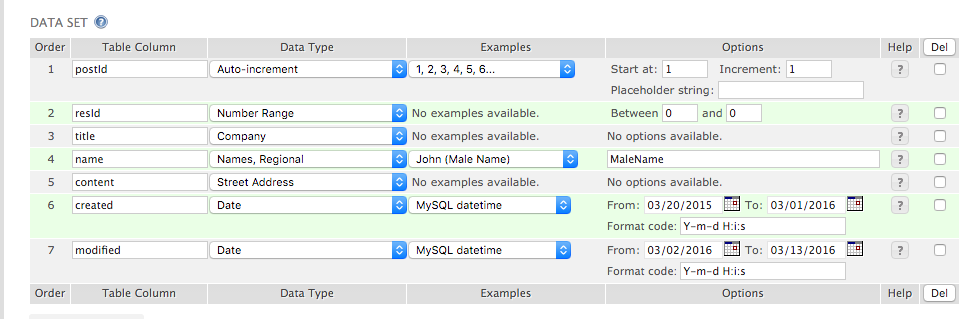
このサイト様(http://www.generatedata.com/)でダミーデータを生成しています。
以下、設定です
投稿機能の実装
投稿一覧ページを作成できたので、今度は新規投稿機能を作成していきます。
- controllerの編集
- 既存のpostIdよりも1大きい値を新規投稿された記事に設定します
- 既存のスレッドに返信ではなく新規投稿の場合、ビューからはpostIdに-1を設定して送ってもらいます
- resIdには0を設定します
- 既存のpostIdよりも1大きい値を新規投稿された記事に設定します
~~
    public function add()
    {
        $post = $this->Posts->newEntity();
        if ($this->request->is('post')) {
            $post = $this->Posts->patchEntity($post, $this->request->data);

            //いじったところ -----------------
            if ($post->postId == -1) {
                $post->postId = $this->Posts->find()
                    ->order(['postId' => 'desc'])
                    ->select(['postId'])
                    ->first()['postId'] + 1;
                $post->resId = 0;
            }
            //いじったところ おわり-----------------

            if ($this->Posts->save($post)) {
                $this->Flash->success(__('投稿されました.'));
                if ($post->resId ===0) return $this->redirect(['action' => 'index']);
                else                   return $this->redirect($this->referer());
            } else {
                $this->Flash->error(__('投稿できませんでした. 再度お試し下さい.'));
            }
        }
        $this->set(compact('post'));
        $this->set('_serialize', ['post']);
    }
~~
}
- templeteの修正
- form部分をelementにし、使いまわせるようにしています
- formには post と action を変数として渡しています
- actionを変数とする理由は、投稿編集ビューでもformを使い回すためです
- formには post と action を変数として渡しています
- formに入る前に、postIdに-1を設定しています
- form部分をelementにし、使いまわせるようにしています
<h1><?= __('新規記事作成') ?></h1><hr>
<div class="posts form large-9 medium-8 columns content">
    <?php $post->postId = -1; ?>
    <?= $this->element('form', ['post' => $post, 'action' => 'add']) ?>
</div>
<?= $this->Form->create($post, array(
    'url' => array('action' => $action),
    )) ?>
<fieldset>
<?php
        echo $this->Form->hidden('postId'); //hiddenにしています(見えなくても良いため)
        echo $this->Form->hidden('resId'); //hiddenにしています(見えなくても良いため)
        echo $this->Form->input('title');
        echo $this->Form->input('name');
        echo $this->Form->input('content');
        echo "<br>";
    ?>
</fieldset>
<?= $this->Form->button(__('投稿する')) ?>
<?= $this->Form->end() ?>
以上により、新規投稿機能を実装できました。
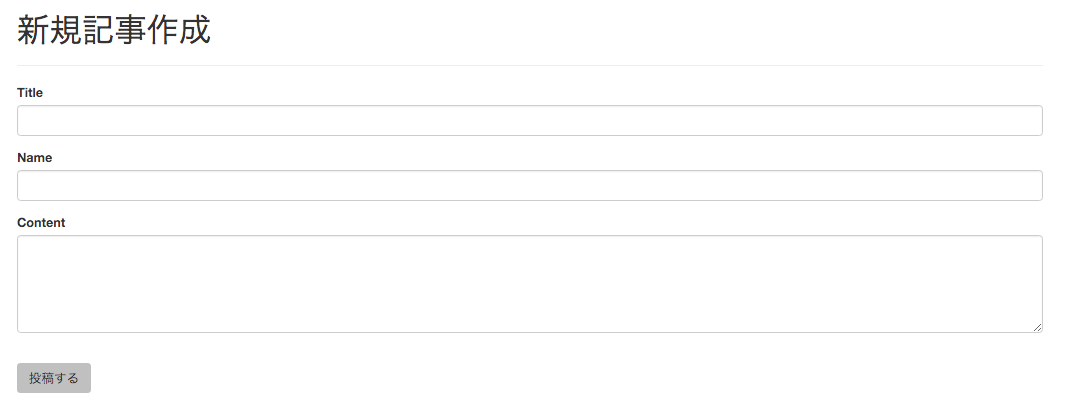
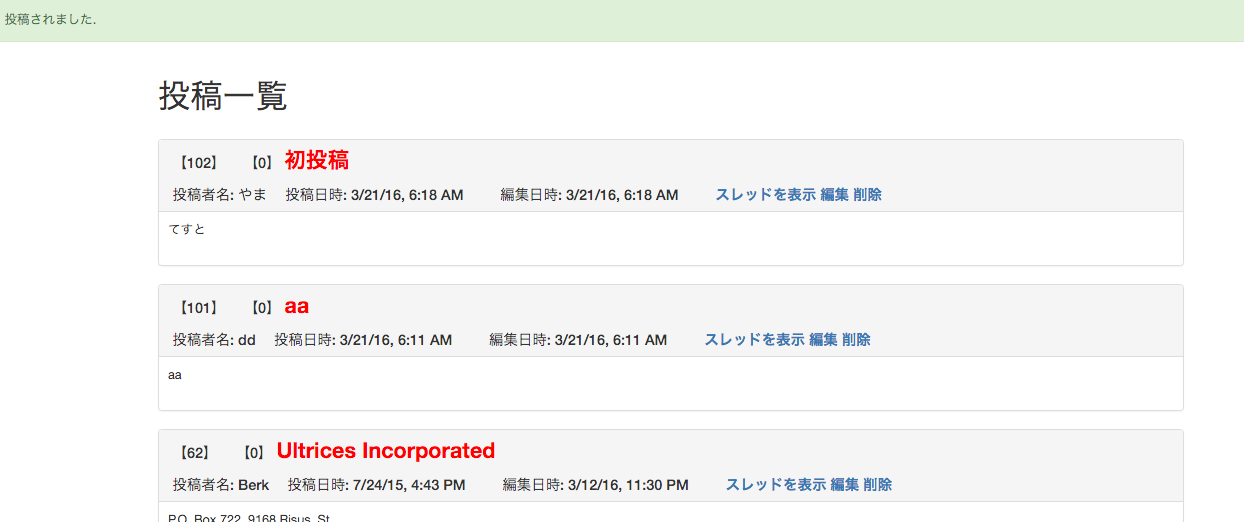
フラッシュメッセージもきちんと表示されていますね。
投稿詳細機能の実装
投稿一覧では、各スレッドのresIDが0である投稿のみが表示されています。各投稿パネル中の[タイトル]、または[スレッドを表示]リンクを踏むことで各スレッドの返信を含む詳細ビューへ飛ぶ機能を実装していきます。
- controllerの実装
- ビューから詳細を表示させたいスレッドのid(postId)を受け取り、DBからresIdが昇順になるように取り出します
- new_postエンティティは、返信用のエンティティです
~~
    public function view($postId = null)
    {
        $new_post = $this->Posts->newEntity();
        $posts = $this->Posts->find()
            ->where(['postId =' => $postId])
            ->order(['resId' => 'asc']);

        $this->set(compact('posts', 'new_post'));
        $this->set('_serialize', ['post']);
    }
~~
}
- templeteの編集
- formに行く前にコントローラからうけとったnew_postエンティティに以下の設定をします
-
postIdに詳細表示しているスレッドのidを代入 -
resIdに、既存の返信のresId + 1した値を代入 -
titleに最新の返信のタイトルに 'Re:'を追加した文字列を代入
-
- formに行く前にコントローラからうけとったnew_postエンティティに以下の設定をします
<div class="posts index large-9 medium-8 columns content">
<h1><?= __('投稿詳細') ?></h1>

<?php foreach ($posts as $post): ?>
<?= $this->element('one_article', ['post' => $post]) ?>
<?php endforeach; ?>

<hr>
<h2><?= __('返信フォーム') ?></h2>
    <?php $new_post->postId = $post->postId; ?>
    <?php $new_post->resId = $post->resId + 1; ?>
    <?php $new_post->title = "Re:".$post->title; ?>
    <?= $this->element('form', ['post' => $new_post, 'action' => 'add']) ?>
</div>
以上で、投稿詳細機能が実装できました
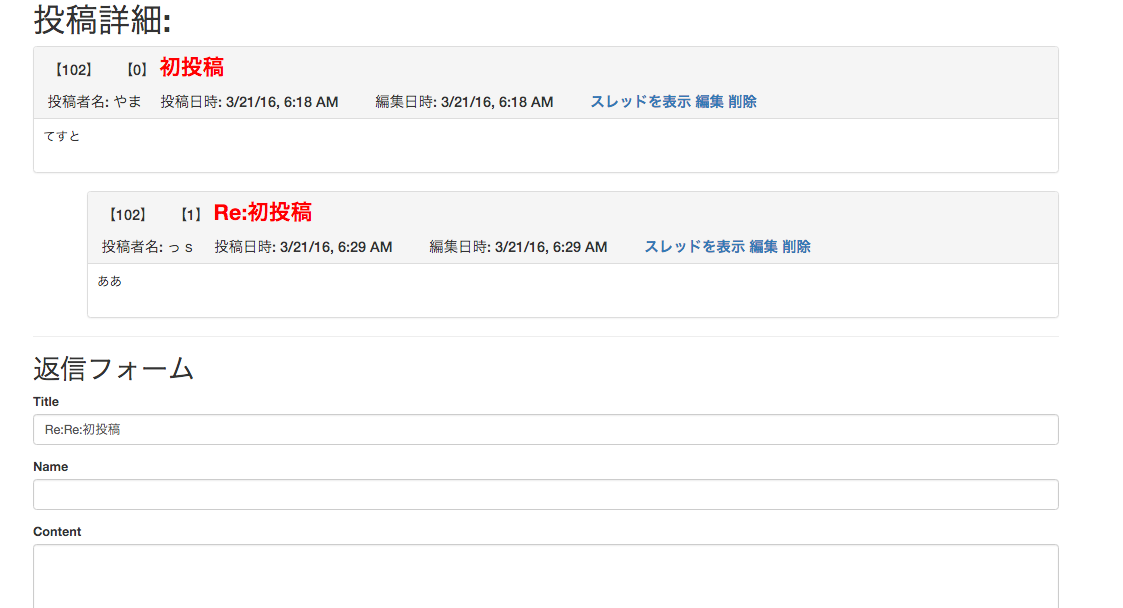
返信した投稿は、大元の投稿よりも少しずれて表示されます(one_articlesエレメントを参照)。
投稿編集機能の実装
bake allで作成した機能とほぼ同じです。
- controllerの編集
- エラーメッセージを日本語にしたくらいです
~~
    public function edit($id = null)
    {
        $post = $this->Posts->get($id);
        if ($this->request->is(['patch', 'post', 'put'])) {
            $post = $this->Posts->patchEntity($post, $this->request->data);
            if ($this->Posts->save($post)) {
                $this->Flash->success(__('投稿が編集されました.'));
                return $this->redirect(['action' => 'view', $post->postId]);
            } else {
                $this->Flash->error(__('投稿が編集出来ませんでした. 再度お試し下さい.'));
            }
        }
        $this->set(compact('post'));
        $this->set('_serialize', ['post']);
    }
~~
}
- templeteの修正
- formにはactionをeditとして渡します
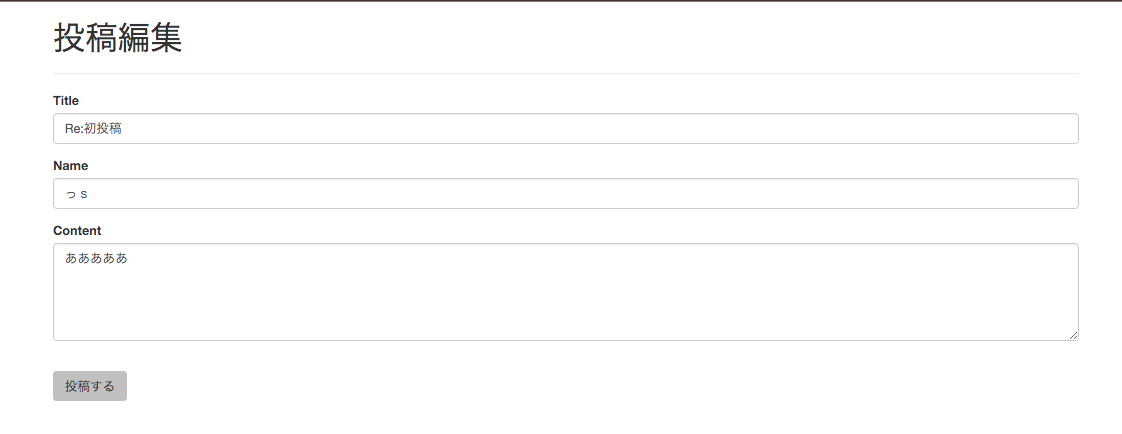
<h1><?= __('投稿編集') ?></h1><hr>
<div class="posts form large-9 medium-8 columns content">
    <?= $this->element('form', ['post' => $post, 'action' => 'edit']) ?>
</div>
以上で投稿編集機能が実装できました
投稿削除機能の実装
既存の機能のままだと、スレッドの大元(resId=0)である投稿を消しても返信投稿が削除されません。
resId=0である投稿が削除される際は、postIdが一致する投稿をすべて削除するように実装します。
- controllerの修正
- ビューから投稿の一意なIDを受け取ります
- 投稿のresIdが0でない場合、既存の削除処理を行います
- 投稿のresIdが0の場合、deleteallを使って、postIdが一致する投稿をすべて削除します
~~
    public function delete($id = null)
    {
        $this->request->allowMethod(['post', 'delete']);
        $del_post = $this->Posts->get($id);
        if($del_post->resId === 0) {
            if ($this->Posts->deleteAll(array('postId' => $del_post->postId))) {
                $this->Flash->success(__('投稿が削除されました.'));
            } else {
                $this->Flash->error(__('投稿が削除されませんでした. もう一度お試し下さい.'));
            }
            return $this->redirect(['action' => 'index']);
        }
        else if ($this->Posts->delete($del_post)) {
            $this->Flash->success(__('投稿が削除されました.'));
        } else {
            $this->Flash->error(__('投稿が削除されませんでした. もう一度お試し下さい.'));
        }
        return $this->redirect($this->referer());
    }
}
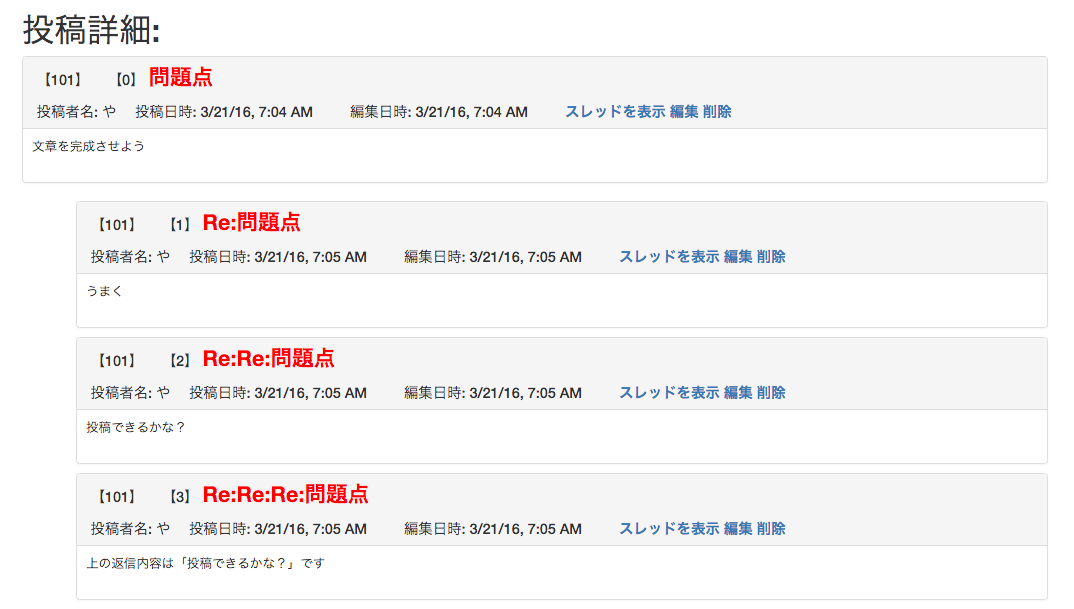
現在の実装には「返信投稿を削除した場合、resIdに抜けがでる可能性がある」問題点があります。
以下のように3つの返信があるスレッドから2番目の投稿を削除します
2番目を削除すると、resId(投稿表示パネルの2つ目の【】内の数字)に抜けが出来てしまいます
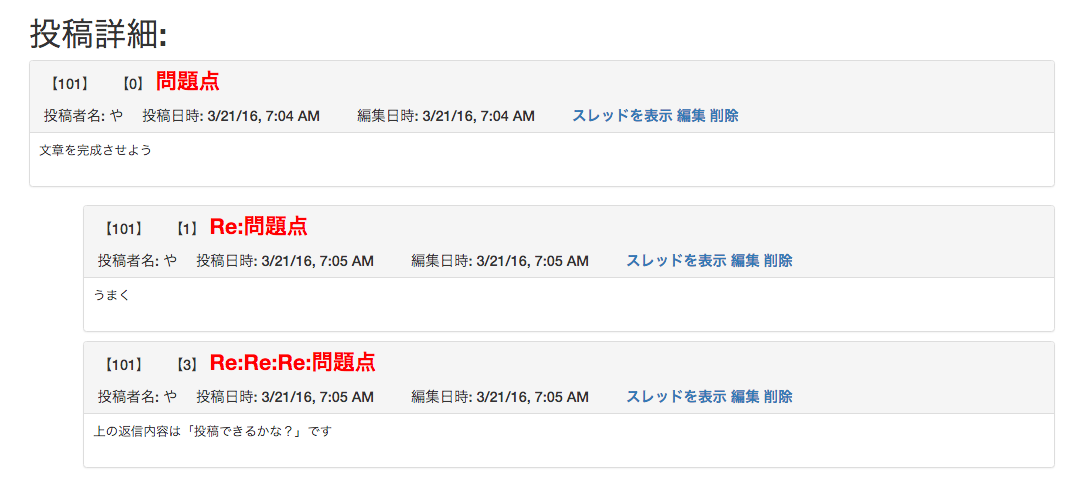
この問題点は後々修正したいと思います。何か上手い方法があればご教授下さいm(__)m
投稿検索機能
タイトル・投稿者・本文の中にキ―ワードを1つでも含む投稿を検索できる機能を実装します。
- controllerの編集
- ビューから検索したいワードを受け取り、like文でDBから検索しています
- 検索結果を$posts, 検索数を$posts_cntwに代入しています
- count($posts)で検索数が取得できなかったので、泣く泣く検索結果と検索数を取得するために2回もDBにアクセスしています
- もっとエレガントな方法があれば...
~~
    public function find() {
        $posts = [];
        $find = '検索していません.';
        $posts_cnt = 0;
        if($this->request->is('post')) {
            $find = $this->request->data['word'];
            $posts = $this->Posts->find()
                ->where(['title like ' => '%'.$find.'%'])
                ->orWhere(['name like ' => '%'.$find.'%'])
                ->orWhere(['content like ' => '%'.$find.'%']);

            //2回も検索するのは余剰なので、後で直す
            $posts_cnt = $this->Posts->find()
                ->where(['title like ' => '%'.$find.'%'])
                ->orWhere(['name like ' => '%'.$find.'%'])
                ->orWhere(['content like ' => '%'.$find.'%'])
                ->count();
        }
        $this->set(compact('posts', 'find', 'posts_cnt'));
    }
~~
- templeteの実装
- 検索後と検索数表示のためのエレメントを作成し、利用しています
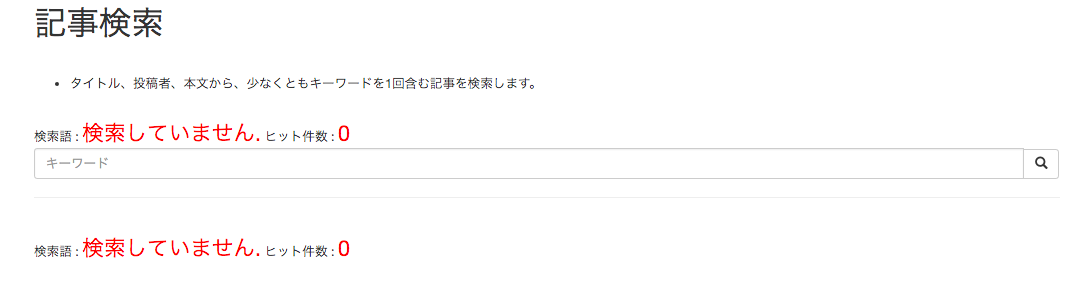
<div class="posts index large-9 medium-8 columns content">
<h1>記事検索</h1>
<br>
<p><ul type="disc">
<li>タイトル、投稿者、本文から、少なくともキーワードを1回含む記事を検索します。</li>
</ul></p>
<?= $this->element('search', ['find' => $find, 'posts_cnt' => $posts_cnt]); ?>
<!-- 検索フォーム -->
<?= $this->Form->create(null, array(
'url' => array('action' => 'find'),
)) ?>
<div class="input-group">
<input type="text" class="form-control" name="word" placeholder="キーワード">
<span class="input-group-btn">
<button class="btn btn-default" type="submit">
<i class='glyphicon glyphicon-search'></i>
</button>
</span>
</div>
<hr>
<!-- 検索フォーム おわり-->
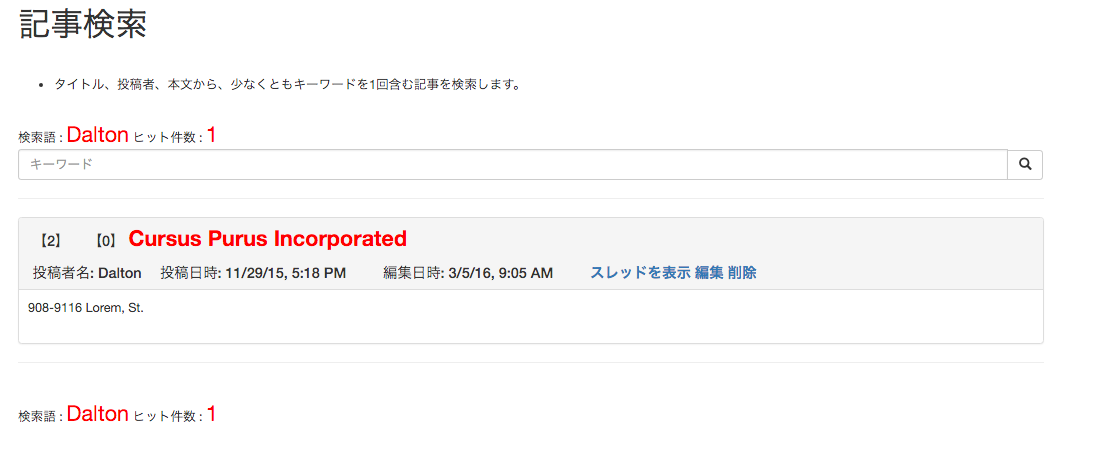
<?php foreach ($posts as $post): ?>
<?= $this->element('one_article', ['post' => $post]) ?>
<?php endforeach; ?>
<?= $this->element('search', ['find' => $find, 'posts_cnt' => $posts_cnt]); ?>
</div>
<br>
検索語     : <font size='5' color='ff0000'><?= $find ?></font>
  ヒット件数 : <font size='5' color='ff0000'><?= $posts_cnt ?></font>
以上で、検索機能が実装できました。
ある単語を検索↓
まとめ
一通りのCRUD機能を実装できた(?)と思います。
削除する際のresIdに抜けが出る問題はなんとかしないといけませんが...
次回はナビゲーションバーとページネーションを実装していきます。