この記事は CyberAgent AI Lab Advent Calendar 2024 8日目の記事です.
はじめに
CyberAgent AI Labに入ってから,Overleafを使って英語論文を執筆する機会がとても多くなりました.しかし,いつまで経っても英文を書くことに対する苦手意識は抜けないもので,書いた英文をChatGPTに校正してもらうことでなんとか投稿までこぎつけています.
これまでは手動で
- 校正したい英文をコピーする
- 英文を校正させるプロンプトとともにコピーした英文をChatGPTに投げる
ということを行っていたのですが,校正をするたびに毎回毎回Overleafから別サービス・ページに移動する必要があってそこそこの手間がかかっていました.そこで今回は,(すでに似たようなサービスが大量にあると思いますが)自分のための勉強も含めて,上記プロセスを自動化できるChrome拡張を作成しました.
使い方
Chrome拡張のインストール
今回作成したChrome拡張はChromeウェブストアでの公開はしていないため,Github リポジトリを手元にクローンして,「パッケージ化されていない拡張機能を読み込む」ことでインストールを行ってください.
Azure OpenAI Serviceの設定
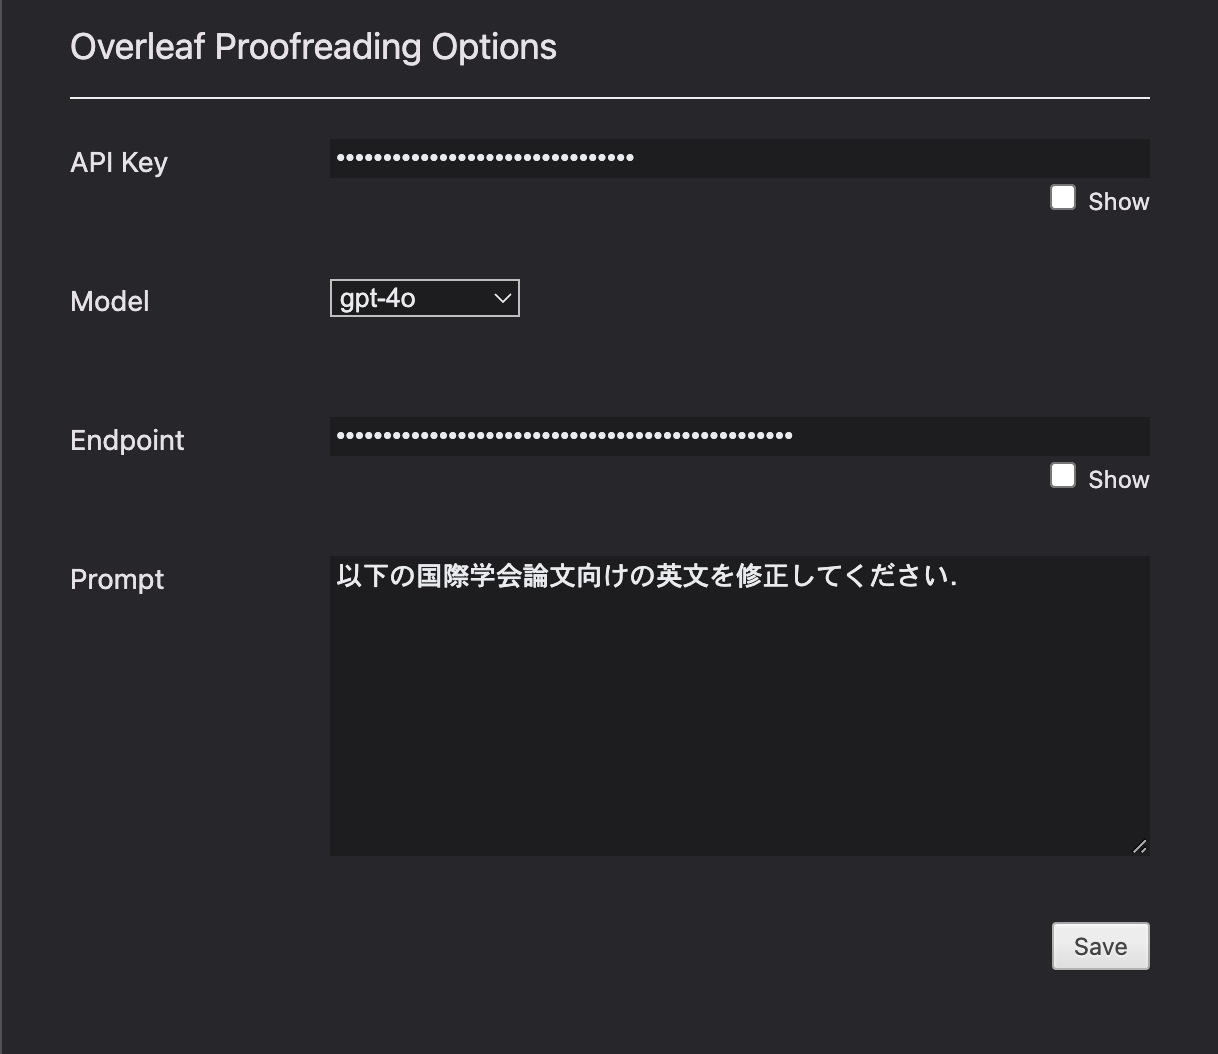
今回の拡張機能ではAzure OpenAI APIを使用しているため,API keyとエンドポイントの設定が必要になります.これらの設定は,拡張機能のoptionsページ(拡張機能のアイコンをクリックすることで開けます)から行います.
API keyとエンドポイントの他には,校正に使用するモデルを選択することもできます.現状選択できるモデルはgpt-35-turbo,gpt-4o,gpt-4o-miniの3つとしています.また,デフォルトで英文校正用のプロンプトを適当に設定していますが,自分好みのプロンプトへと書き換えることもできるようになっています.
拡張機能の使用方法
Overleafのテキストエディタ上で校正したい英文を選択し,左下の方に出てくるアイコンをクリックすることで校正が始まるようになっています.
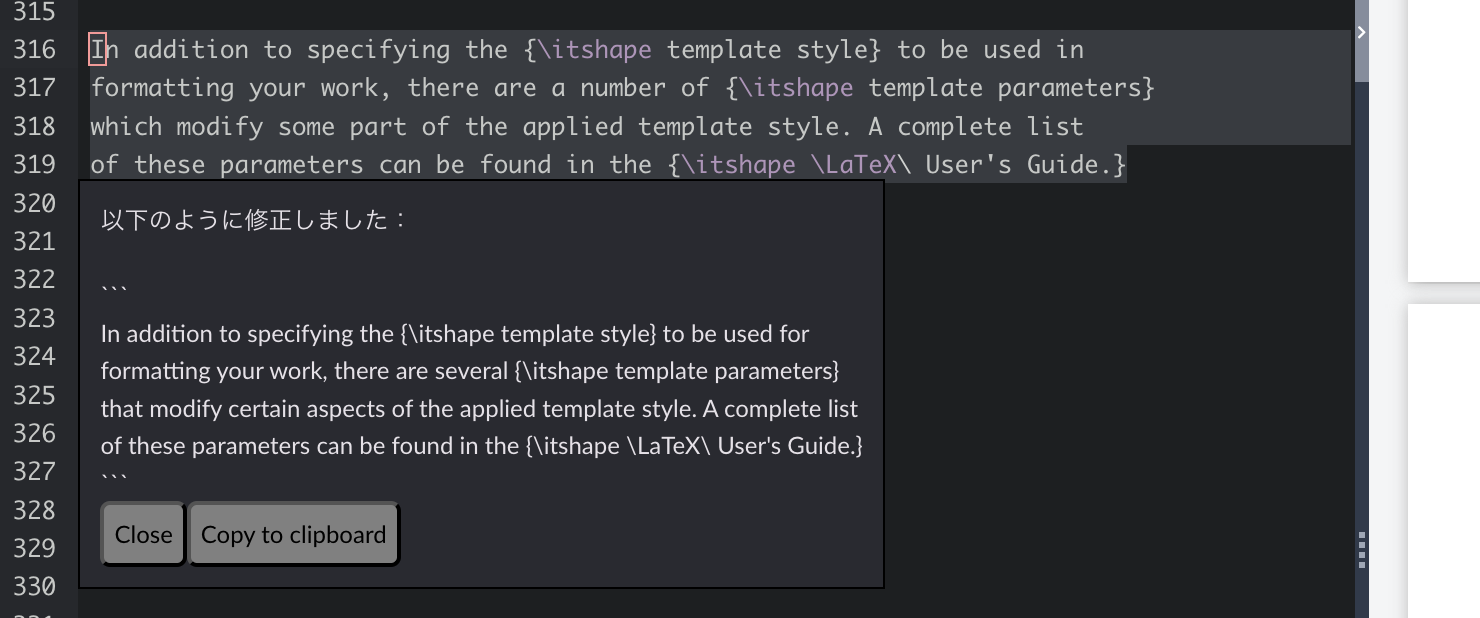
ChatGPTによる校正が終わると,その結果が以下のように出力されます.
この出力を踏まえて,テキストエディタ上の英文を編集します.
簡単な実装解説
テキスト選択 → アイコン表示
イベントリスナーを用いることで,テキストが選択されたときにアイコンが表示されるようにしました.表示する位置は選択したテキストの左下になるようにしています.
document.addEventListener('mouseup', function (event) {
  const selectedText = window.getSelection().toString().trim();
  if (selectedText.length > 0) {
    const range = window.getSelection().getRangeAt(0);
    const rect = range.getBoundingClientRect();
    showIcon(selectedText, rect.left + window.scrollX, rect.bottom + window.scrollY);
  } else {
    removeIcon();
  }
});

function showIcon(selectedText, x, y) {
  let icon = document.getElementById('selection-icon');
  if (!icon) {
    icon = document.createElement('img');
    icon.src = chrome.runtime.getURL('./images/icon32.png');
    icon.id = 'selection-icon';
    icon.style.position = 'absolute';
    icon.style.cursor = 'pointer';
    icon.style.zIndex = '1000';
    document.body.appendChild(icon);
    icon.addEventListener('click', () => {
      onIconClick(selectedText);
      removeIcon();
    });
  }
  icon.style.left = `${x}px`;
  icon.style.top = `${y}px`;
}

function removeIcon() {
  const icon = document.getElementById('selection-icon');
  if (icon) {
    icon.remove();
  }
}
Azure OpenAI Serviceによる英文校正
optionsページで設定したAPI key,エンドポイントを使用してAzure OpenAI APIを叩いているシンプルな実装です.同じくoptionsページで設定したプロンプトと校正対象として選択したテキストをくっつけたものを最終的なプロンプトとしてChatGPTに送りつけています.また,修正点の解説は日本語でしてほしいので,その旨をsystemに伝えています.
function buildMessages(prompt, selection) {
  let messages = [
    {
      role: "system",
      content: "Answer in Japanese",
    },
    {
      role: "user",
      content: prompt + "\n\n```\n" + selection + "\n```",
    }
  ];
  return messages;
}

async function completionByAzure(endpoint, apiKey, model, messages, parameters = {}) {
  const apiVersion = "2023-05-15";
  const response = await fetch(
    `${endpoint}/openai/deployments/${model}/chat/completions?api-version=${apiVersion}`,
    {
      method: "POST",
      headers: {
        "Content-Type": "application/json; utf-8",
        "api-key": apiKey,
      },
      body: JSON.stringify({
        messages: messages,
        ...parameters,
      }),
    }
  );

  if (!response.ok) {
    alert(`Error: ${response.statusText}`);
  }
  const data = await response.json();
  const content = data.choices[0].message.content;
  return content;
}

export async function completion(selection) {
  const config = await fetchConfig();
  const apiKey = config.apiKey;
  if (apiKey === "") {
    alert("Please set your OpenAI API key in the options page.");
    return;
  }

  const prompt = config.prompt;
  if (!prompt || prompt === "") {
    alert("Please set an prompt message in the options page.");
  }

  const messages = buildMessages(prompt, selection);
  let result = null;
  result = await completionByAzure(
    config.endpoint,
    apiKey,
    config.model,
    messages,
    { top_p: 0.8 }
  );
  return result;
}
Overleaf限定で動くようにする
当面はOverleaf以外で使うことがなさそうだったので,動作対象となるURLはOverleaf project限定にしました.
    "content_scripts": [
        {
            "matches": [
                "https://www.overleaf.com/project/*"
            ],
            "js": [
                "loader.js"
            ]
        }
    ]
おわりに
今回はじめてChrome拡張を作ってみたのですが,import周りでエラーが出たりといくつかつまずくポイントがあり,最終的なコード量的には少ないものの思ったより実装には時間がかかってしまいました.ただ拡張機能を自分で作れると作業効率を向上できる機会はたくさんありそうなので,これを機に勉強していけたらと思います.
最後に注意点として,LLMを執筆に用いることについては,会議や雑誌ごとに規定が定められています.英文校正にChatGPTを使いたい場合は,事前に規定を確認することを忘れないようにしましょう.


