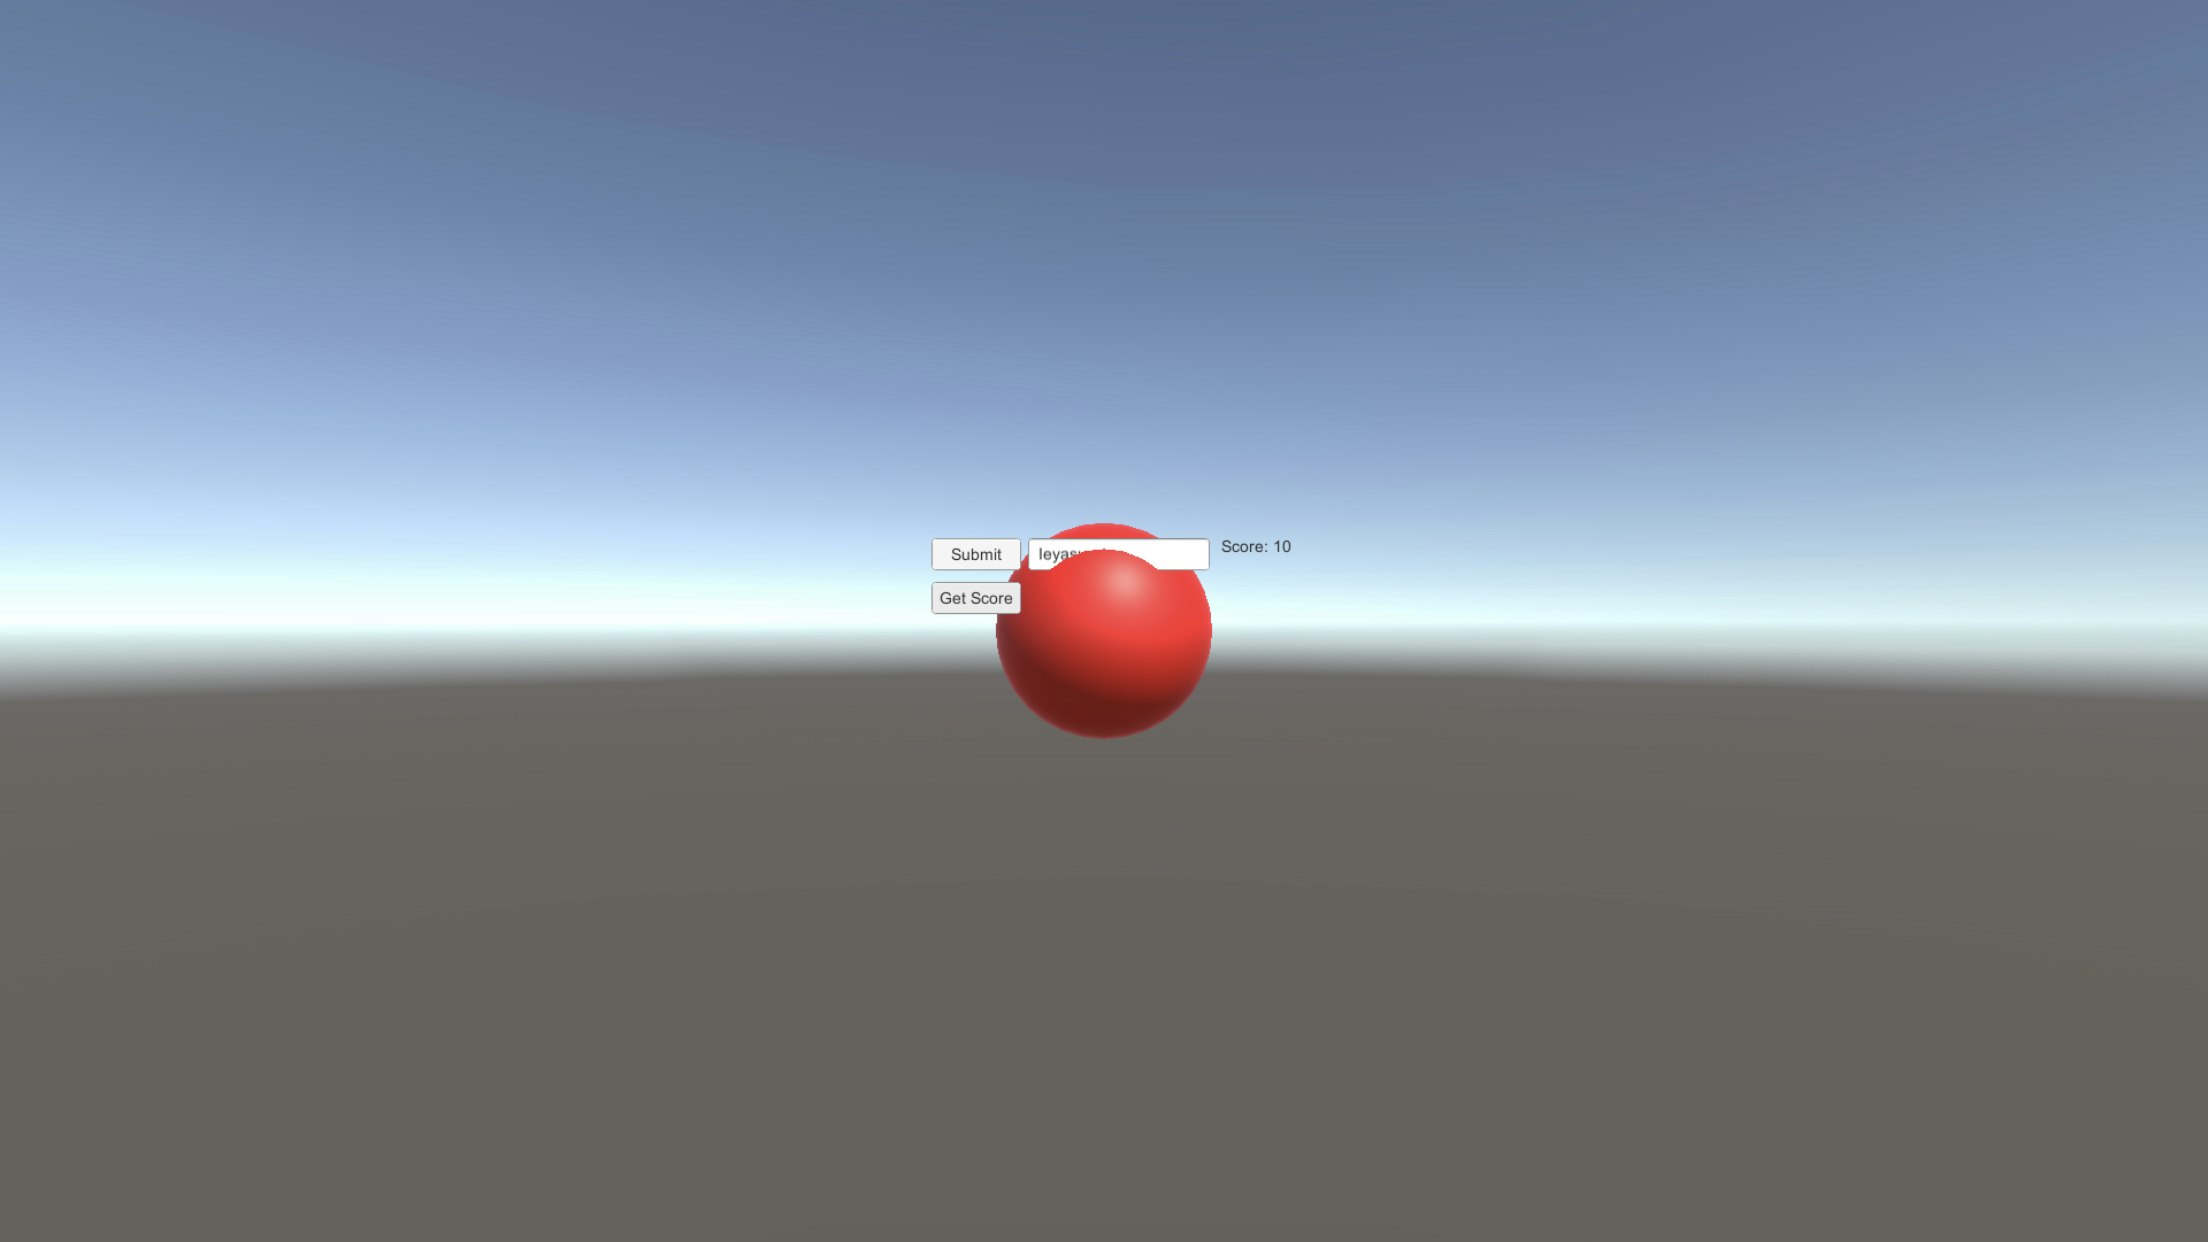
Unityをデータベースと連携させたいなと思い、とりあえずFirebaseを使用してScoreデータを取得、更新し、Scoreの値によってSphereの色が変わるサンプルコンテンツを作成しました!
環境
PC: MacBook Air
debug: iPhone8 Plus
参照記事
Unity の Firebase Realtime Database を使ってみる
How to use Firebase Database in Unity (REST API)
【Unity】スクリプトからGameObjectの色を変更する
Can't compile: BadImageFormatException
iOS10とXcode8でプロビジョニングファイルを求められた
![]() 以下作業手順
以下作業手順![]()
その1
Unityプロジェクトを作成し、バンドルID を取得
まずは適当にUnityプロジェクト(3D)を準備します
-
今回は最新正式リリースの2019.2.1f1を使用して新規プロジェクトを作成
-
iOSビルドは追加していなかったので、モジュール追加も実施
作成できたら、プロジェクトをクリックしてUnityで開き、プラットフォーム固有の ID を取得します
-
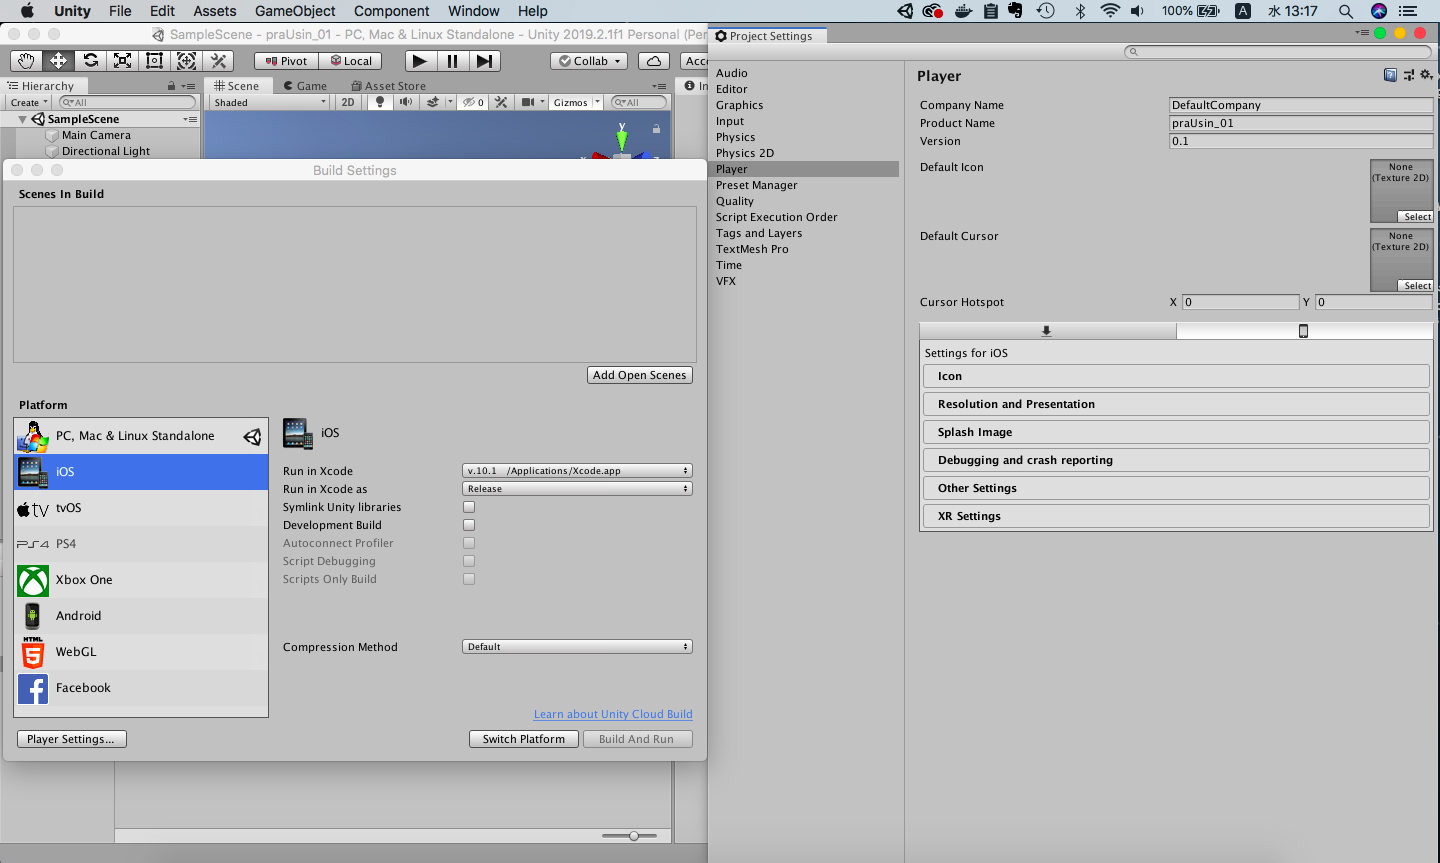
[File]->[Build Settings]でiOSプラットフォームを選択し、左下の[Player Settings...]を押下
-
[Player]タブの右下[Other Settings]をクリック
- [identification]欄の[Bundle Identifier]に記載されているバンドルID(cf:
com.DefaultCompany.sample01)をコピーしておく
その2
Firebaseにプロジェクト追加
次に、Unityのデータベースとして使うFirebaseプロジェクトを作成します
- Firebaseにプロジェクトを作成(今回は[forUnity]という名前で作成)
その3
FirebaseプロジェクトとUnityプロジェクトを連携
作成したFirebaseプロジェクトに、UnityプロジェクトのバンドルIDを登録します
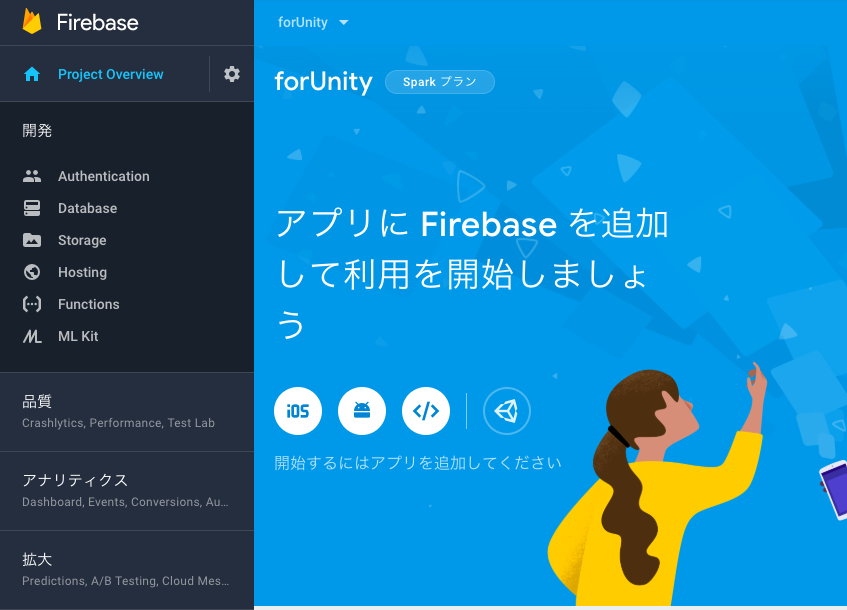
- Firebaseのコンソール画面に入り、先ほど作成したFirebaseプロジェクト[forUnity]を選択し、「開始するにはアプリを〜」の上に表示されているUnityアイコンをクリック
(もし、画面が違う場合、左上のメニューバーから[Project Overview]をクリックしてUnityアイコン表示画面に移動)
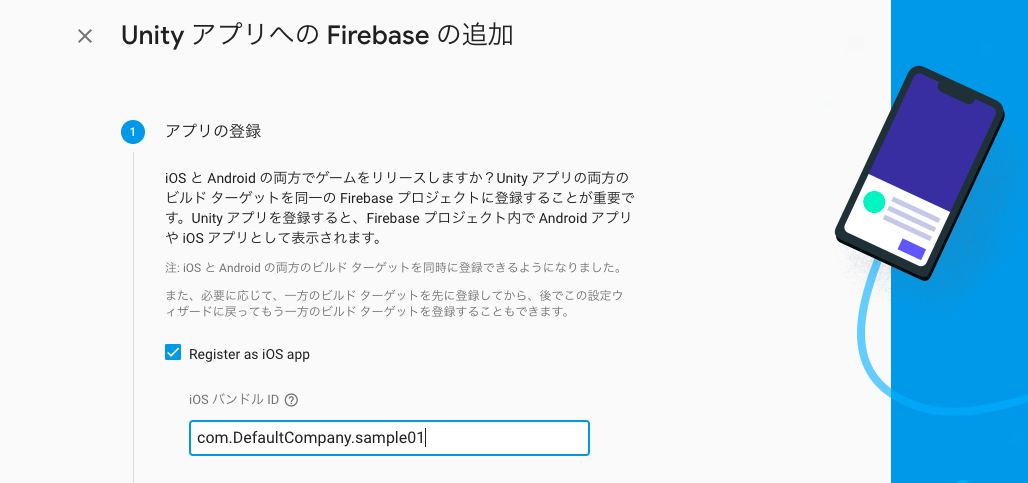
- [Register as iOS app]にチェックを入れ、先ほどUnityでコピーしておいたバンドルIDを[iOS バンドルID]の欄に貼り付け
-
適当にアプリのニックネームを入力(省略可だけど今回は[サンプルアプリ]と入力)し、 [アプリを登録]をクリック
-
[GoogleService-Info.plist をダウンロード]をクリックし、保存先を今回作成したUnityプロジェクトのAssets配下の任意の場所(今回はAssets配下にFirebaseというフォルダを作成してその中)に保存し、[次へ]をクリック
-
[Firebase Unity SDK をダウンロード] をクリックし、ダウンロードしたZIPファイルを適切な場所で解凍(プロジェクト固有のものじゃないので、今回はSSDのアセットストアのデータを保存しているディレクトリと同階層に解凍)
-
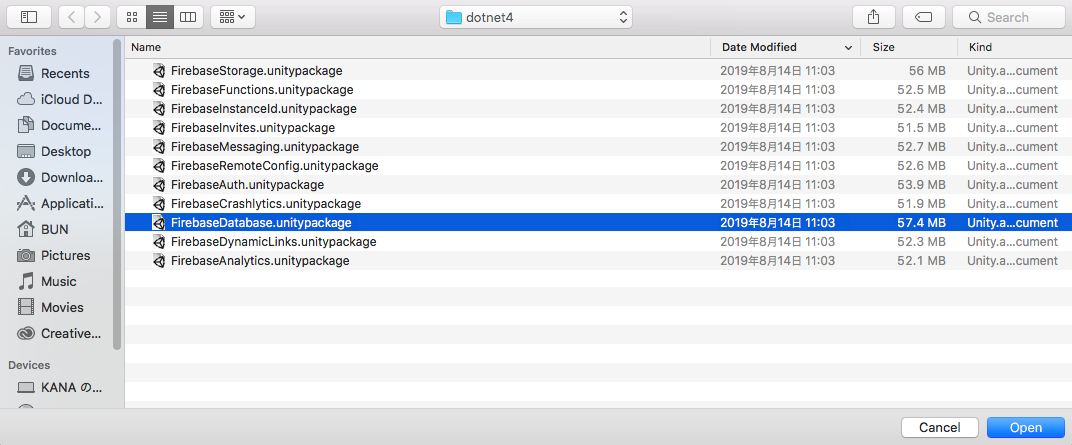
開いているUnityプロジェクトに行き、 [Assets]->[Import Package]->[Custom Package] をクリック、[dotnet4]->[FirebaseDatabase.unitypackage]を[open]
-
[Import Unity Package] ウィンドウが出てくるので[import]をクリック
-
Firebaseに戻り、[次へ]をクリックで FirebaseプロジェクトとUnityプロジェクトの連携完了なので、[Firebaseコンソールに進む]をクリック
その4
Firebaseでデータベースを準備
FirebaseでRealtime Databaseを作成します
-
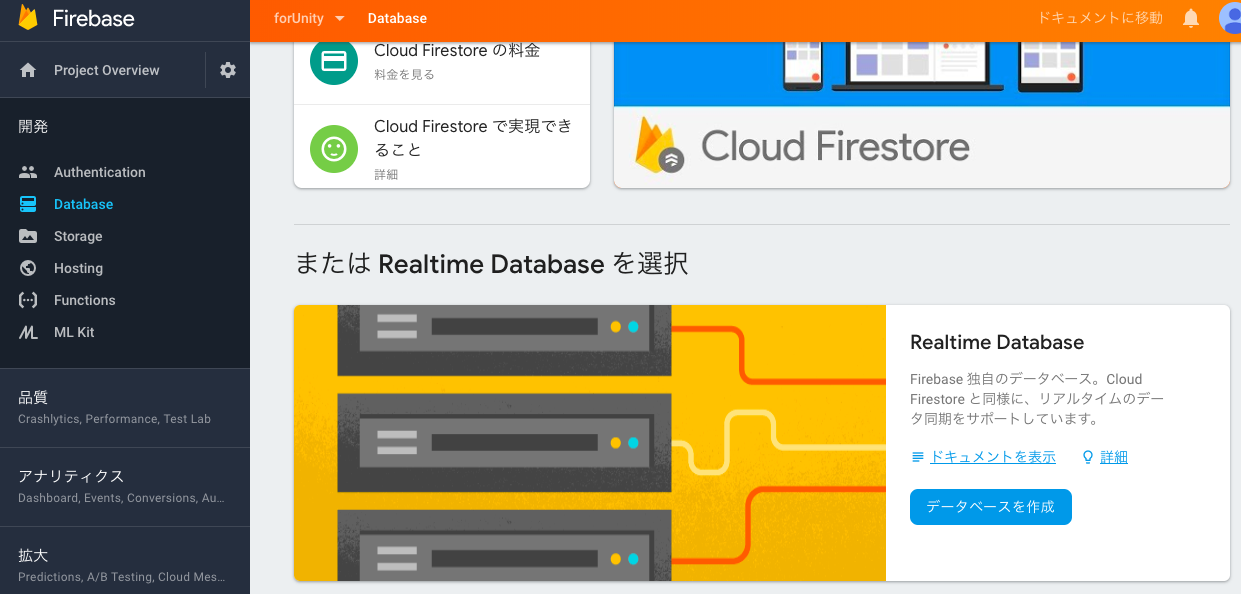
Firebaseコンソール画面左側メニューの[Database]をクリック
-
少しスクロールして、 [または Realtime Database を選択] の[データベースの作成]->[テストモードで開始](※)->[有効にする]
※今回は簡単に連携させてみたいだけなのでテストモードで作成しますprz
その5
Unity側でサンプルコンテンツを準備
UnityプロジェクトにFirebaseのデータベースと連携させるサンプルコンテンツを作成します
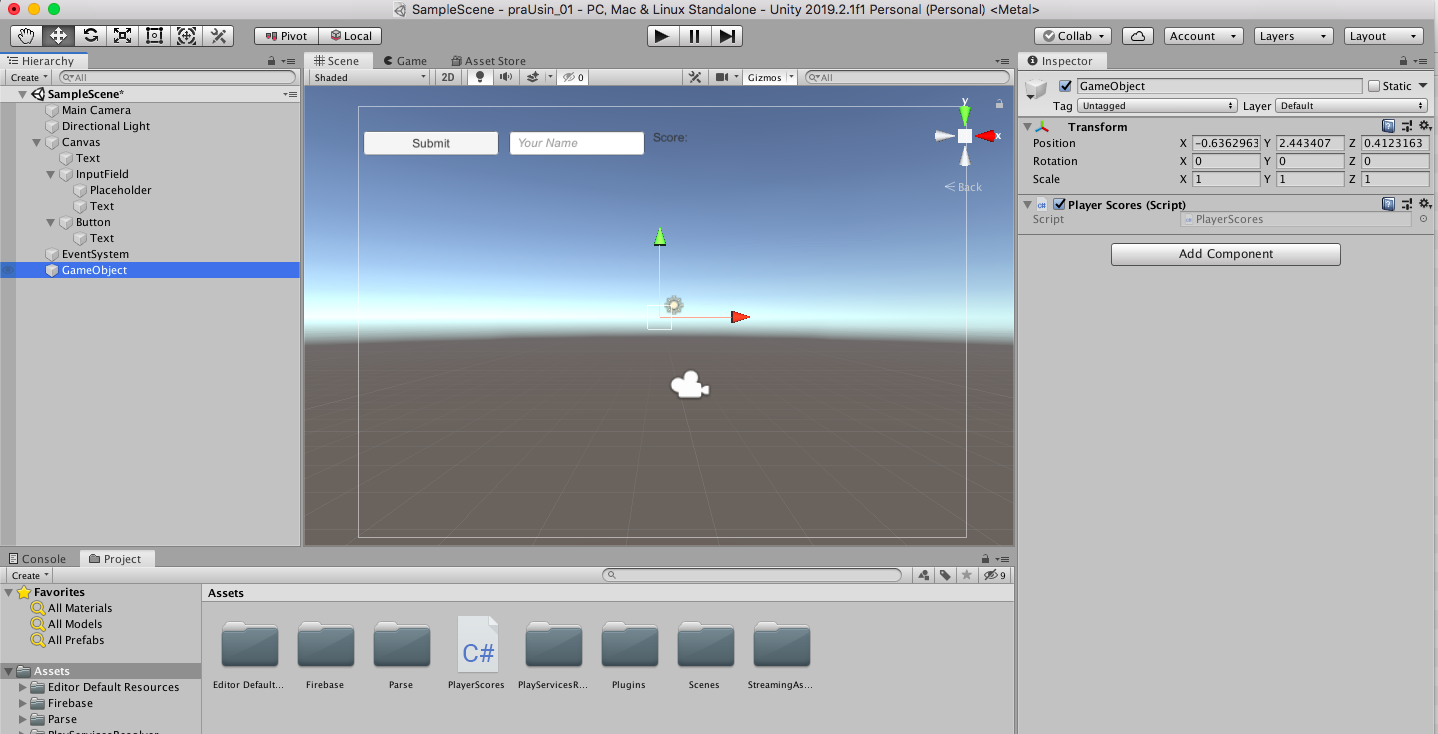
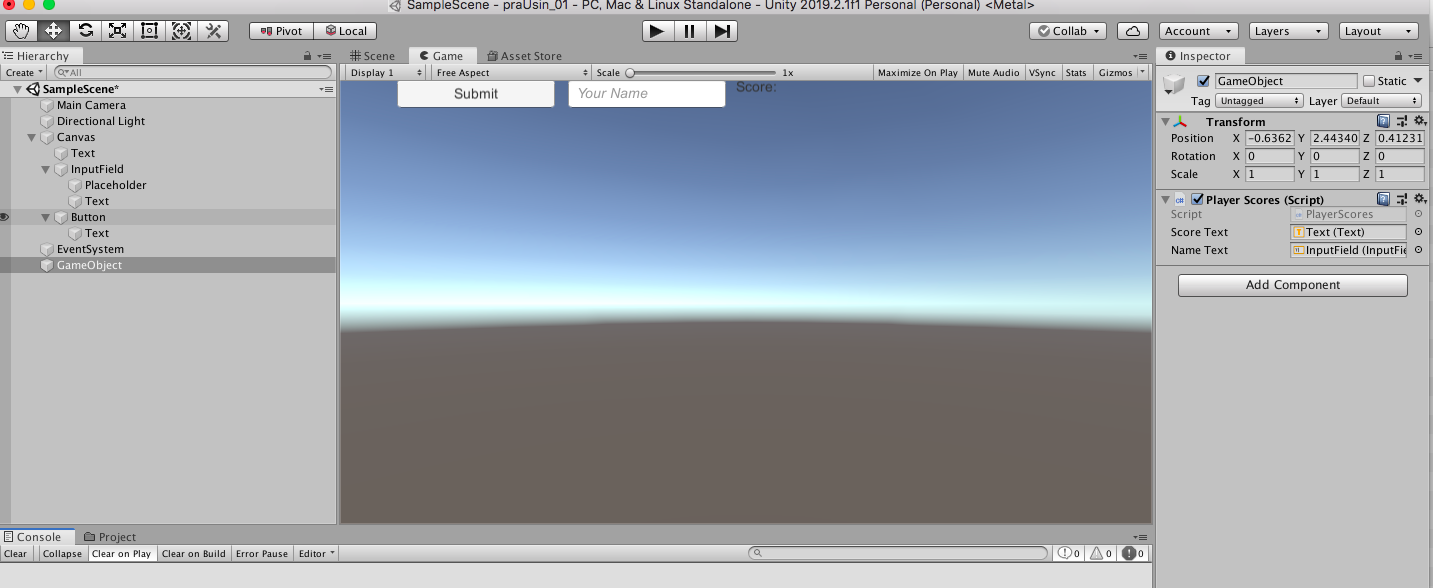
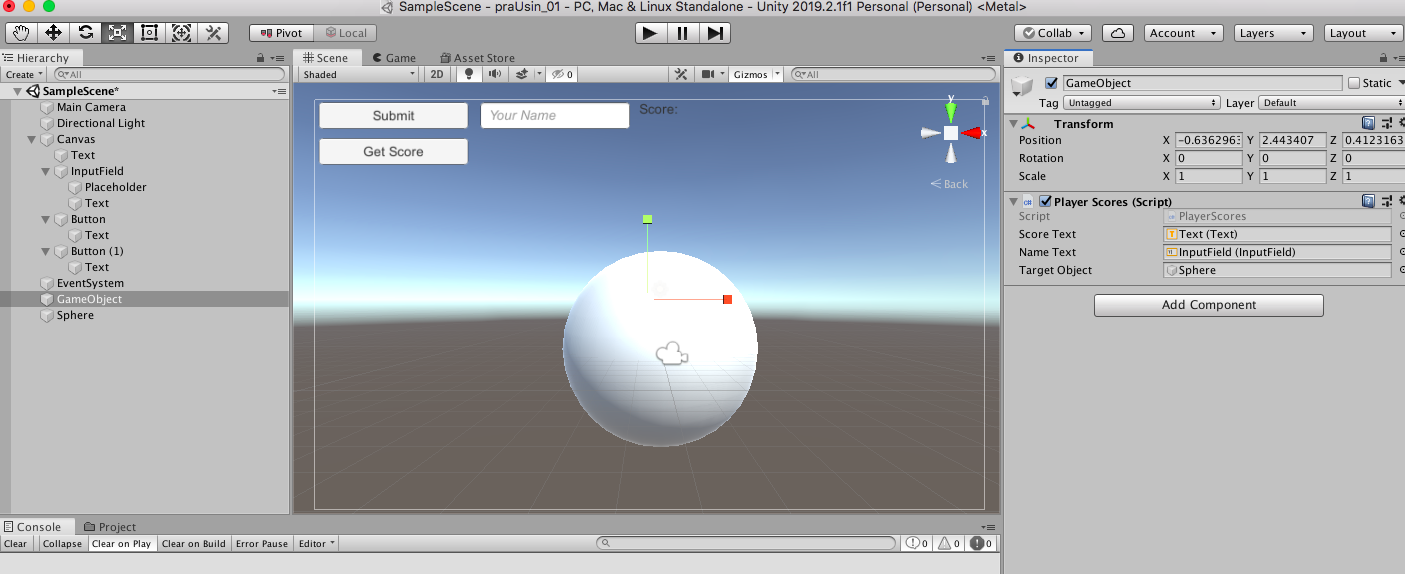
- [Create]->[UI] から、Text,Input Field,Buttonの3つを作成(w160,h30)し適当に横並びにする
- TextはTextを「Score:」,Input FieldはPlaceholderを「Your Name」,ButtonはTextを「Submit」に変更
- [Create]->[Create Empty]でGameObjectを作成し、[Add Component]から、「PlayerScores」と検索バーに入力し、[NewScript]->[Create and Add]をクリックし、PlayerScores という名前のスクリプトをGameObjectに作成&追加
- 作成した
PlayerScores.csを編集
using System.Collections;
using System.Collections.Generic;
using UnityEngine;
using UnityEngine.UI;

public class PlayerScores : MonoBehaviour
{
    public Text scoreText;
    public InputField nameText;

    private System.Random random = new System.Random();

    public static int playerScore;
    public static string playerName;

    // Start is called before the first frame update
    void Start()
    {
        playerScore = random.Next(0, 101);
        scoreText.text = "Score: " + playerScore;
    }

    public void OnSubmit(){
        playerName = nameText.text;
    }
}
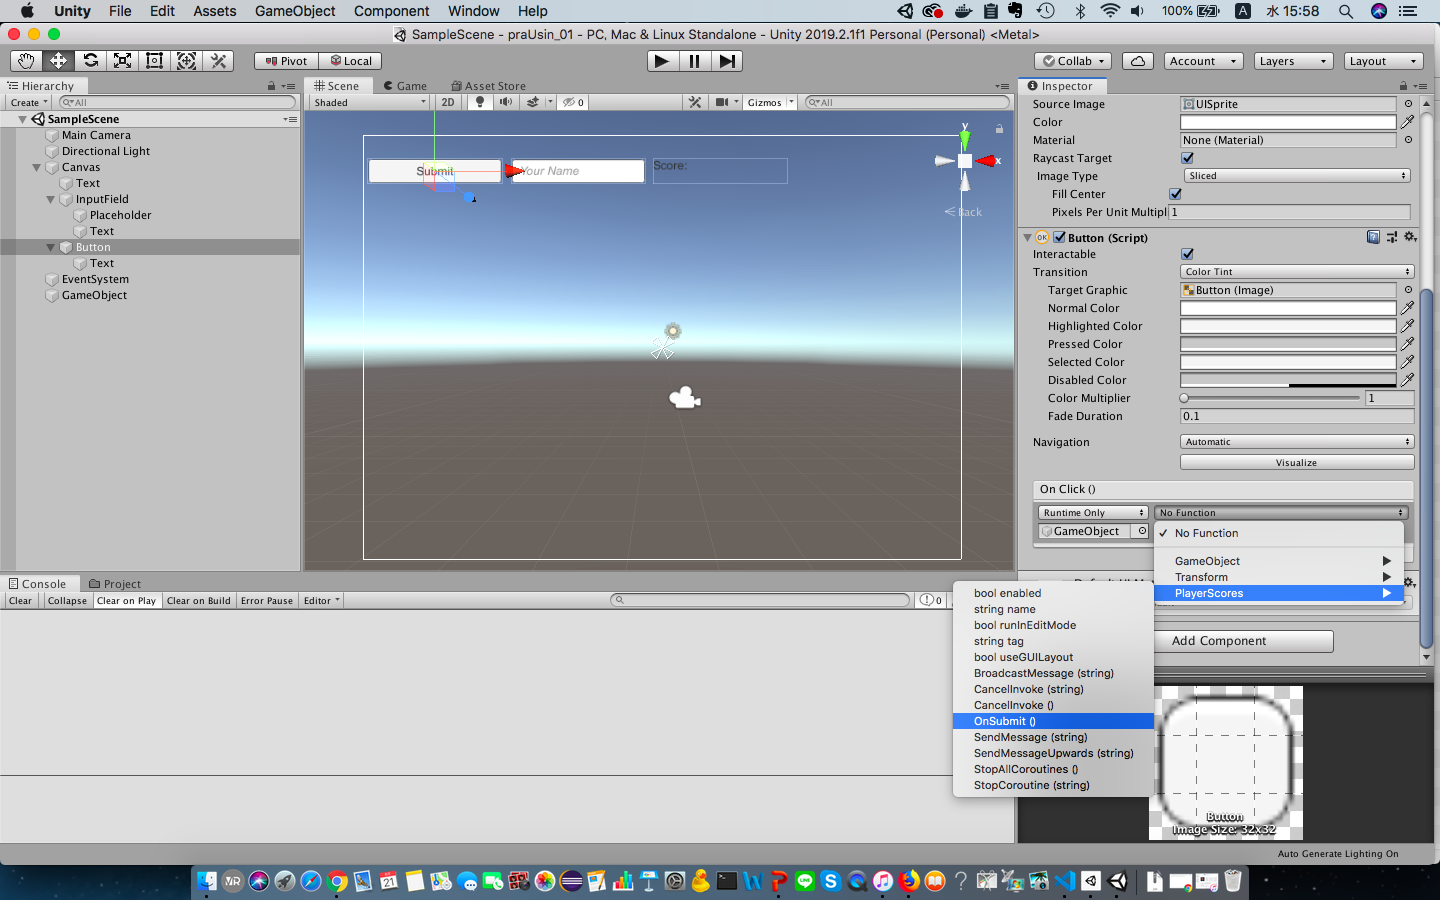
- ButtonのOnClick()にGameObjectをアサインし、PlayerScoresのOnSubmit()ファンクションを選択
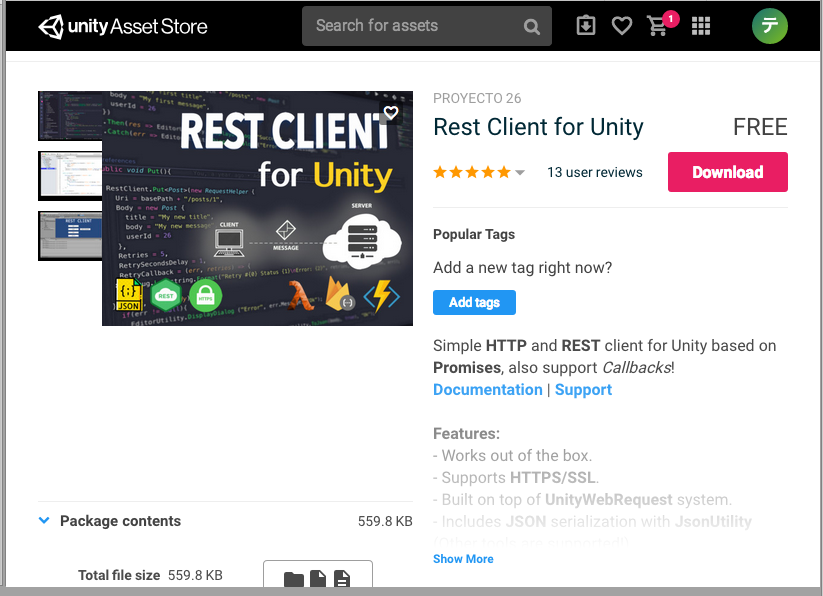
- 次に、REST APIを投げられるように、Rest Client for Unity をAssetStore で検索し [Download] and [Import]
- importまで完了したら、ProjectフォルダのAssetsのなかで、右クリックし、[Create]->[C# Script]で
User.csを作成し、下記のように編集
using System;
using System.Collections;
using System.Collections.Generic;
using UnityEngine;
[Serializable]
public class User
{
    public string userName;
    public int userScore;

    public User(){
        userName = PlayerScores.playerName;
        userScore = PlayerScores.playerScore;
    }
}
-
PlayerScores.csも下記の箇所を編集
    public void OnSubmit(){
        playerName = nameText.text;
    }
↓ PostToDatabase()メソッドを追加し、OnSubmit()にも追記
    public void OnSubmit(){
        playerName = nameText.text;
        PostToDatabase();
    }

    private void PostToDatabase(){
        User user = new User();
        RestClient.Post("https://forunity-e2ac2.firebaseio.com/.json",user);
    }
- スクリプトの追加と修正が終わったら、GameObjectのPlayerScoresスクリプトのフィールドの部分に、Score TextにはScoreのTextオブジェクトを、Name TextにはInputFieldオブジェクトをそれぞれアサイン
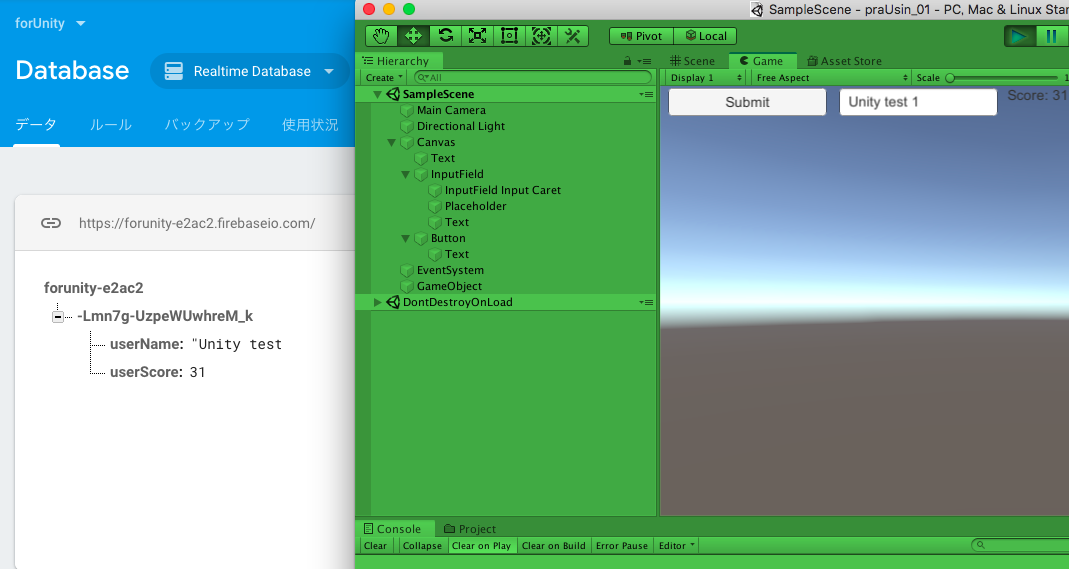
- アサインできたら、Unityプロジェクトを実行し、Name欄に名前を入れて、Submitをクリックし、Firebaseのデータベースに値が入れば登録は成功
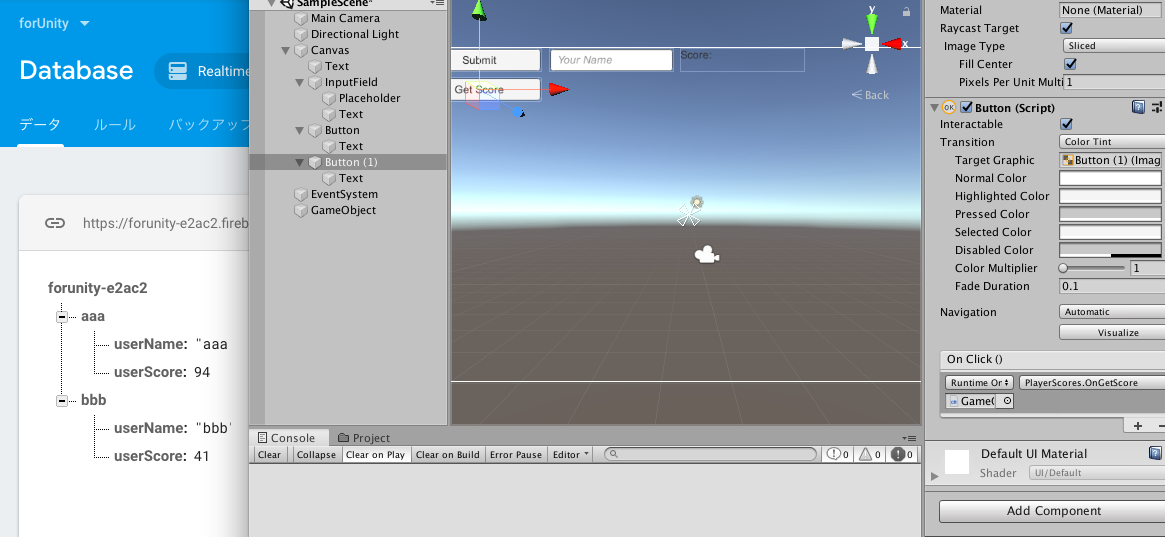
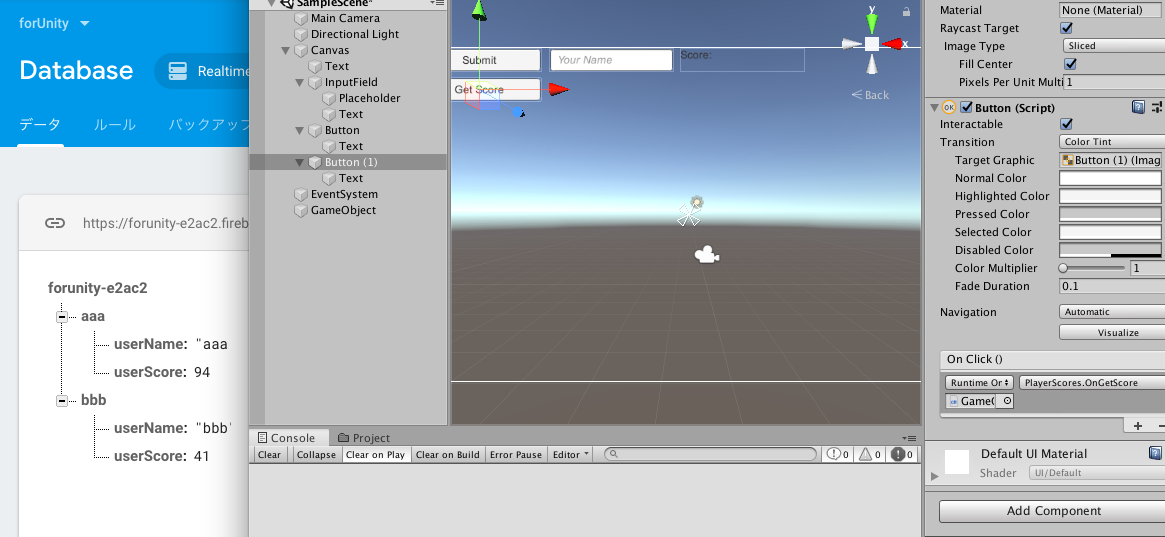
- 次に、firebaseからデータを取得するために、Buttonを複製し、Textを「Get Score」に変更
-
PlayerScores.csのPlayerScoresクラス配下にOnGetScore(),UpdateScore(),RetrieveFromDatabase()メソッドを追加し、
User user = new User();を上の方で宣言
using System.Collections;
using System.Collections.Generic;
using UnityEngine;
using UnityEngine.UI;
using Proyecto26;

public class PlayerScores : MonoBehaviour
{
    public Text scoreText;
    public InputField nameText;

    private System.Random random = new System.Random();

    User user = new User();

    public static int playerScore;
    public static string playerName;

    // Start is called before the first frame update
    void Start()
    {
        playerScore = random.Next(0, 101);
        scoreText.text = "Score: " + playerScore;
    }

    public void OnSubmit(){
        playerName = nameText.text;
        PostToDatabase();
    }

    public void OnGetScore(){
        RetrieveFromDatabase();
    }

    private void UpdateScore(){
        scoreText.text = "Score: " + user.userScore;
    }

    private void PostToDatabase(){
        User user = new User();
        //PostではなくPutに変更し、playerNameの配下にデータが入るようにした
        RestClient.Put("https://forunity-e2ac2.firebaseio.com/"+ playerName +".json",user);
    }

    private void RetrieveFromDatabase(){
        RestClient.Get<User>("https://forunity-e2ac2.firebaseio.com/"+ nameText.text +".json").Then(response =>
        {
            user = response;
            UpdateScore();
        });
    }
}
- Name欄に登録ずみのNameを入力し、[Get Store]でScoreの表示されている値が登録済みのものにさし変わったら、データの取得も完了!
最後に、Sphereを作成してscore値によって色を変化させる
-
PlayerScores.csのPlayerScoresクラス配下にChangeColorName()メソッドを追加し、public GameObject targetObject;を上の方で宣言し、UpdateScore(),PostToDatabase()に、引数にscoreを持たせてChangeColorName()を追記
using System.Collections;
using System.Collections.Generic;
using UnityEngine;
using UnityEngine.UI;
using Proyecto26;

public class PlayerScores : MonoBehaviour
{
    public Text scoreText;
    public InputField nameText;

    private System.Random random = new System.Random();

    User user = new User();

    public static int playerScore;
    public static string playerName;

    public GameObject targetObject;

    // Start is called before the first frame update
    void Start()
    {
        playerScore = random.Next(0, 101);
        scoreText.text = "Score: " + playerScore;
    }

    public void OnSubmit(){
        playerName = nameText.text;
        PostToDatabase();
    }

    public void OnGetScore(){
        RetrieveFromDatabase();
    }

    private void UpdateScore(){
        scoreText.text = "Score: " + user.userScore;
        ChangeColorName(user.userScore);
    }

    private void PostToDatabase(){
        User user = new User();
        RestClient.Put("https://forunity-e2ac2.firebaseio.com/"+ playerName +".json",user);
        ChangeColorName(user.userScore);
    }

    private void RetrieveFromDatabase(){
        RestClient.Get<User>("https://forunity-e2ac2.firebaseio.com/"+ nameText.text +".json").Then(response =>
        {
            user = response;
            UpdateScore();
        });
    }

    private void ChangeColorName(int score){
        //Debug.Log(score);
        if(score < 25){
            // red
            targetObject.GetComponent<Renderer>().material.color = Color.red;
        } else if (score < 50){
            // yellow
            targetObject.GetComponent<Renderer>().material.color = Color.yellow;
        } else if (score < 75){
            // green
            targetObject.GetComponent<Renderer>().material.color = Color.green;
        } else {
            // blue
            targetObject.GetComponent<Renderer>().material.color = Color.blue;
        }

    }
}
- [Create]->[3D Object]->[Sphere]でSphereを作成し、[GameObject]の[Target Object]にアサイン
- Sphereの色がScore値(0~100)によって下記仕様で色が変化すればOK
0~24: red
25~49: yellow
50~74: green
75~100: blue
-
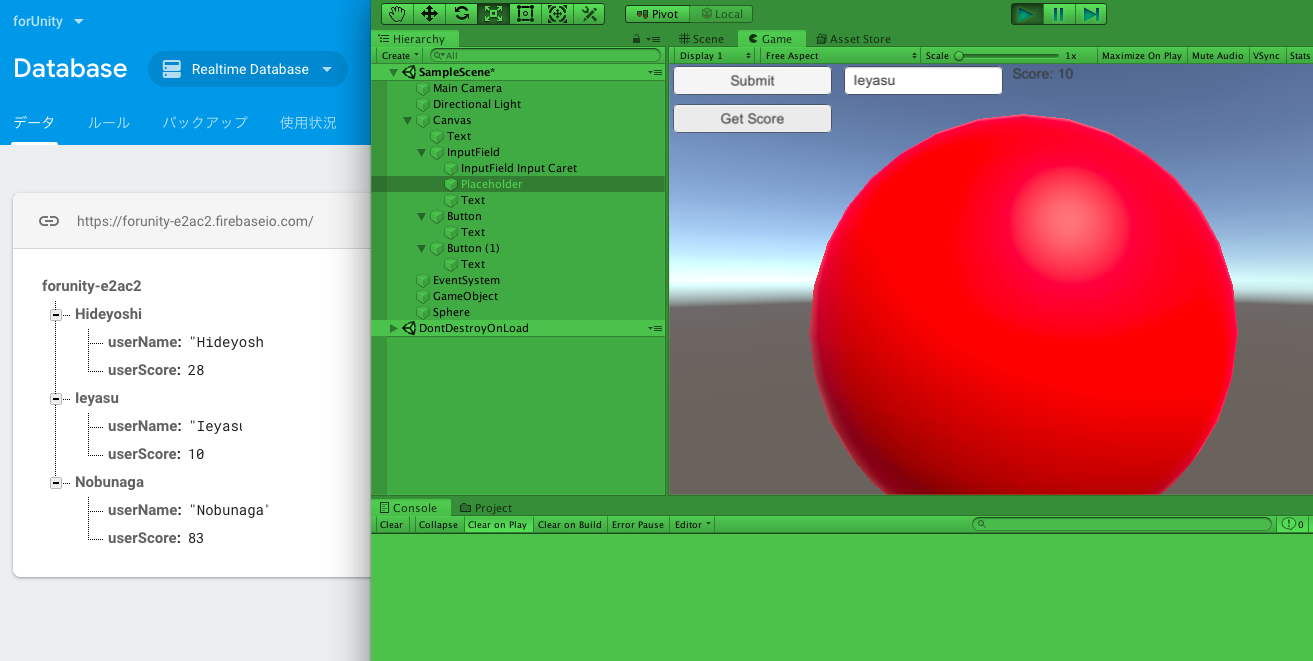
まず、確認しやすくするためFirebaseのデータベースに入っているテストデータをいったん削除
-
次に、Unityプロジェクトを実行し、Name欄に「Nobunaga」を入力して[Submit]し、Scoreに合った色であることを確認し実行解除、再度Unityプロジェクトを実行し、今度はName欄に「Ieyasu」を入力して[Submit]し、Scoreに合った色であることを確認
-
確認できたら、Name欄に「Nobunaga」を入力して[Get Score]、正しいScoreと色であることを確認し、続けてName欄に「Ieyasu」を入力して[Get Score]、正しいScoreと色であることも確認できたらサンプルコンテンツ完成
確認作業
iOSでビルドしてiPhone実機で確認
完成したUnityプロジェクトをiOS用にビルドして、実機で動作確認する
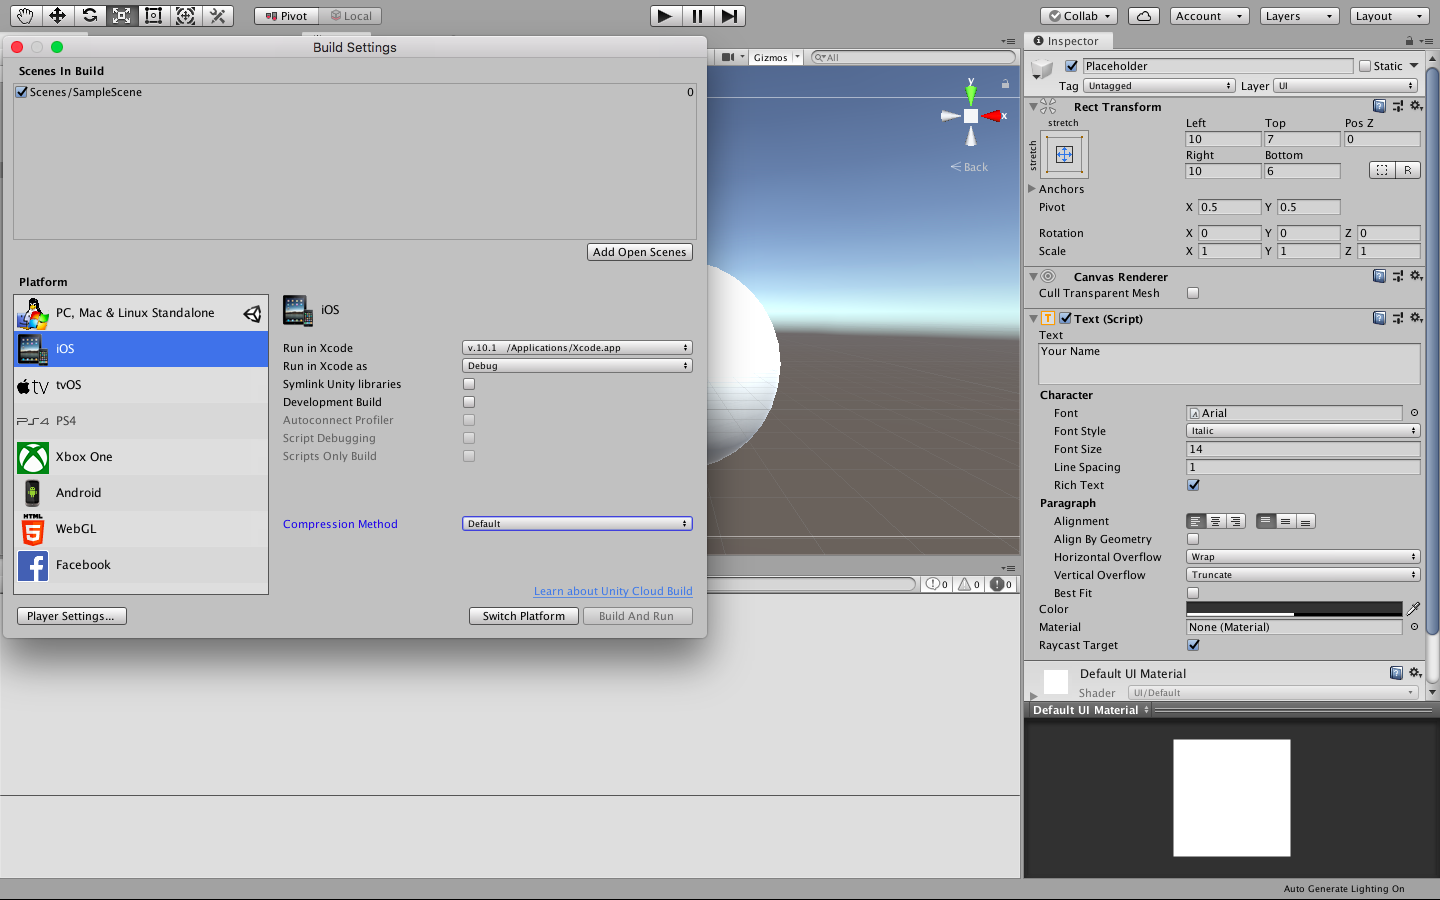
- まずは [File]->[Build Settings]からiOSを選択して[Switch Platform]、完了したら、Sceneが追加されてなかったら、[Add Open Scene]でSceneを追加してから、[Build And Run]をクリック
- 保存場所を聞かれるのでSSDのUnityプロジェクトのディレクトリ配下に適当な名前をつけて[Save]するとビルドが始まる
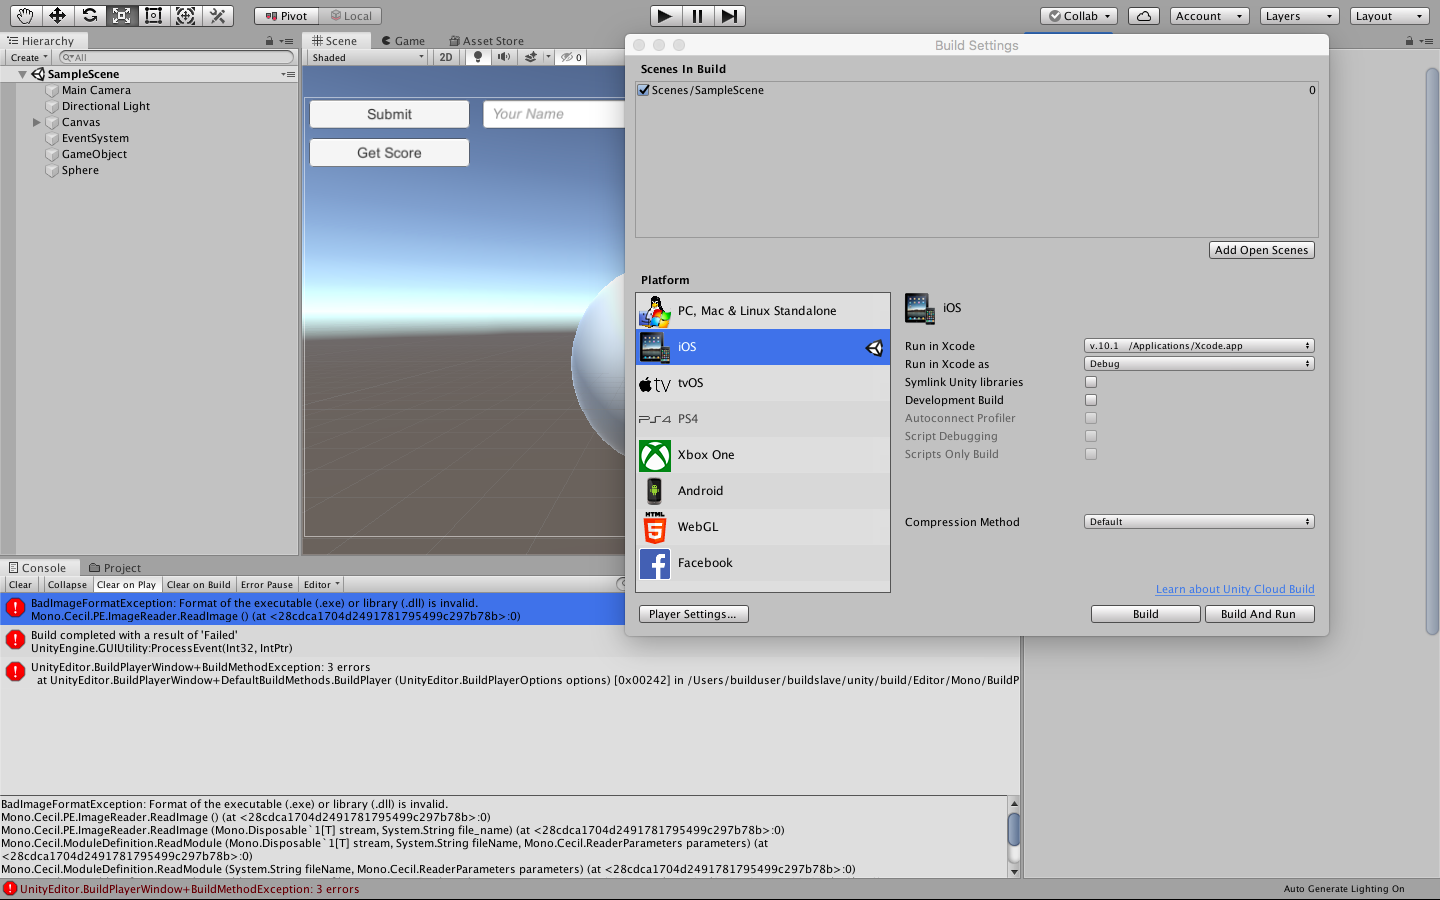
...エラー![]()
BadImageFormatException: Format of the executable (.exe) or library (.dll) is invalid.
調べてみたところ、どうやら保存先が外付けなのがよくない模様。。
試しに、Save先をPC側にして再度実行してみた、、が、同様のエラーに。。
なので今度はPC側に今回作成したUnityプロジェクトを丸っとコピーして、それをプロジェクトリストに追加してUnityエディタで開き、Unity上で問題なく動作することを確認してから、Save先をPC側にして再度実行
そしたら、Xcodeまでは無事行けたけれど、別のエラー
error: "Target名" requires a provisioning profile. Select a provisioning profile for the "Debug" build configuration in the project editor. (in target 'Target名')
これについては、Targetの[General]タブの[Signing]の[Automatically]にチェックを入れて、適切なTeamを選択してから、再度実行(▶︎)マークを押したら、無事にiPhone実機で確認できました!
(※Sphereの位置がボタンとかよりも前過ぎたので、Unityで調節し直してから再度ビルドしたのですが、そこは本題ではないので割愛しますprz)
 振り返り
振り返り
またしてもSSD運用のデメリットが見つかってしまい悲しいです。。
とりあえず、 ビルドの段階になったら、
Unityプロジェクトを丸っとPC側にコピーして、プロジェクトリストにPC側にコピーしたものを追加してUnityエディタで開く
↓
BuildのSave先もPC側を指定して、Build And Runして実機確認
↓
諸々デバッグ・調整完了したら、PC側の修正を丸っとSSD側にコピーして反映
という運用で頑張ろうと思います。
コンテンツ自体はとても簡単なものではありますが、REST APIの部分でAssetを使ったこともあり、想像していたよりあっさり実装できたなと感じました。
今度は Rest Client for Unity を使わずに UnityWebRequest を使って実装してみたいです!
以上!
→ UnityWebRequest版 実装しました! 【続】Unityでデータベースと連携させたい!(Firebase編)
以上!

