sorceryとは
less is moreな認証用gem。
deviseが「generate したらログインスパーン!!よっしゃ認証できんで!!!!」なのに対して
sorceryは「generateしたら、サブモジュールやら追加したるし、処理は自分で書くんやで」
と言ったイメージ。
個人的な感想としては
高機能の認証を手っ取り早く作りたいなら「devise」
少し面倒臭さは感じても、ある程度はロジックを自分で書いていきたい方は「sorcery」
を使用すればいいんじゃないかなと思います。
sorceryできること
- 永続ログイン
- セッションタイムアウト
- パスワードリセット
- メールによる認証
- パスワードなしの認証
- SNSログイン
- etc....
こんなけ機能あってless is moreなんか(小声)
懸念点
- deviseの方が使用例は多いので信頼性は高い
- 開発が現在それほど活発ではない(一応ver0.9.1でrails5に対応している)
- 情報量がそれほど多くないのでエラーが辛い
- コードを書く量がdeviseより多い
- 複数モデルの認証はSTIを使用しないとおそらくできない
公式Github
導入
gem 'sorcery'
$ bundle install
$ rails g sorcery:install
$ rake db:migrate
上のコマンドで、sorceryで認証されるUserモデルが作成されます。
Userモデルには暗号化パスワードであるcrypted_passwordカラムと、暗号化用データのsaltが用意されています。
  create_table "users", force: :cascade do |t|
    t.string   "email",                           null: false
    t.string   "crypted_password"
    t.string   "salt"
    t.datetime "created_at"
    t.datetime "updated_at"
  end
基本的な導入はここまで
今回はscaffoldも使用したいので
$ rails g scaffold user email:string crypted_password:string salt:string --migration false
これでscaffold,sorceryなUserモデルが完成。
後application.html.erbにnav適当にナビバーを追加しておきましょう。
  <body>
    <%= yield %>
   <div id="nav">
     <% if current_user %>
       <%= link_to "Edit Profile", edit_user_path(current_user.id) %>
       <%= link_to "Logout", :logout, method: :post %>
     <% else %>
       <%= link_to "Register", new_user_path %> |
       <%= link_to "Login", :login %>
     <% end %>
   </div>
   <div>
     <p id="notice"><%= flash[:notice] %></p>
     <p id="alert"><%= flash[:alert] %></p>
   </div>
   <%= yield %>
  </body>
ここから実装に入ります。
最後まで読めば
email,passwordのログイン機能
永続ログイン
メールによるユーザーアクティベーション機能
パスワードリセット機能
SNSログイン機能
が実装された認証ができます。
シンプルなemail、パスワードログインを実装する
1. フォーム、strong paramatersの変更。
デフォルトではcrypted_passwordになっているため変更。
<div class="field">
   <%= f.label :password %><br />
   <%= f.password_field :password %>
</div>
<div class="field">
   <%= f.label :password_confirmation %><br />
   <%= f.password_field :password_confirmation %>
</div>
params.require(:user).permit(:email, :password, :password_confirmation)
2. validationの追加
  validates :password, length: {minimum: 6}
  validates :password, confirmation: true
  validates :password_confirmation, presence: true
  validates :email, uniqueness: true
3. セッション用のコントローラー作成
class UserSessionsController < ApplicationController
  def new
    @user = User.new
  end

  def create
    if @user = login(params[:email], params[:password])
      redirect_back_or_to(:users, notice: 'login successful!!!')
    else
      flash.now[:alert] = 'login failed'
      render action: 'new'
    end
  end

  def destroy
    logout
    redirect_to(:users, notice: 'logged out!')
  end
end
login,logoutメソッドについては説明は要らないと思います。
redirect_back_or_toメソッドは、保存されたURLがある場合そのURLに、ない場合は指定されたURLにリダイレクトします。
例えば、User#editページに行く => 認証が必要 => ログインページに飛ぶ
と言った挙動の場合User#editページが保存され、ログイン成功後にUser#editにリダイレクトすることができます。
4. セッション用のviewの追加
セッション用のフォームの追加を行っていきます。
<%= form_tag user_sessions_path, :method => :post do %>

  <div class="field">
    <%= label_tag :email %><br />
    <%= text_field_tag :email %>
  </div>

  <div class="field">
    <%= label_tag :password %><br />
    <%= password_field_tag :password %>
  </div>

  <div class="field">
    <%= f.label :password_confirmation %>
    <%= f.password_field :password_confirmation %>
  </div>

  <div class="actions">
    <%= submit_tag "Login" %>
  </div>

<% end %>
<h1>Login</h1>

<%= render 'form' %>

<%= link_to 'Back', user_sessions_path %>
5. routesの変更
Rails.application.routes.draw do
  root 'users#index'
  resources :users
  resources :users_sessions

  get 'login' => 'user_sessions#new'
  post 'logout' => 'user_sessions#destroy'

end
6. ログインチェックの追加
ログインしていないユーザーをアクセス制限するために、require_loginメソッドを使用します。
また、デフォルトでは、ログインしていないユーザーが権限のないページにアクセスすると、rootにリダイレクトしてしまうので、not_authenticatedメソッドを定義して、リダイレクト先を変更します。
class ApplicationController < ActionController::Base
  before_action :require_login

  protect_from_forgery with: :exception

  private
  def not_authenticated
    redirect_to login_path, alert: "please login first"
  end
end
これでシンプルなemail, passwordログインは完成です。
コード結構書くやーん
永続ログイン
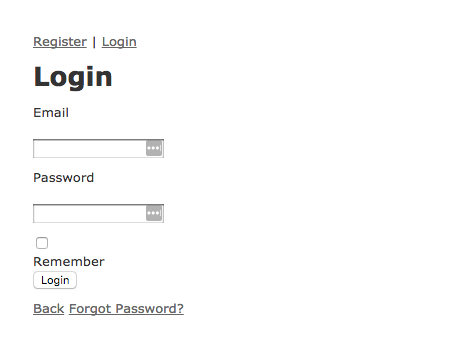
上のようなフォームでチェックボックスをクリックすると永続ログインを有効にする機能を作ります。
Sorceryでは使いたい機能をサブモジュールとしてインストールしていき、それを元に自分たちで処理を書いていくという方式を取っています。
今回はremember_meというサブモジュールをインストールしていきます。
$ rails g sorcery:install remember_me --only-submodules
サブモジュールをインストールすると
sorcery.rbのRails.application.config.sorcery.submodulesにシンボルが追加され
対応したマイグレートファイルが作成されます。
Rails.application.config.sorcery.submodules = [:remember_me]
class SorceryRememberMe < ActiveRecord::Migration
  def change
    add_column :users, :remember_me_token, :string, :default => nil
    add_column :users, :remember_me_token_expires_at, :datetime, :default => nil

    add_index :users, :remember_me_token
  end
end
$ rake db:migrate
フォームの追加
<div>
  <%= check_box_tag :remember, params[:remember], true %>
  <%= label_tag :remember %>
</div>
パラメーターの追加
if @user = login(params[:email], params[:password], params[:remember])
ログイン維持時間の設定
下の設定ですると2週間
Rails.application.config.sorcery.submodules = [:remember_me]

Rails.application.config.sorcery.configure do |config|
  config.user_config do |user|
    user.remember_me_for = 1209600
  end

  config.user_class = "User"
end
これで完成!!!!!
ログイン維持は簡単。
sorceryで追加したい機能があるときは今回のように
サブモジュールの追加 => migrate => 処理をガリガリ
という手順を追っていきます。
自分で実装している感がよいですね😆
メールによるアクティベーション
新規登録したらメールが来て、そのリンクをクリックすると、ユーザー認証が完了するというよくある機能を追加していきます。
1. サブモジュールの追加
$ rails g sorcery:install user_activation --only-submodules
サブモジュールカラムが追加されている確認し
user.user_activation_mailer = UserMailerを追加
Rails.application.config.sorcery.submodules = [:remember_me, :user_activation]

Rails.application.config.sorcery.configure do |config|
  config.user_config do |user|
    user.remember_me_for = 1209600
    user.user_activation_mailer = UserMailer
  end

  config.user_class = "User"
end
$ rake db:migrate
2. メイラーの追加
$ rails g mailer UserMailer activation_needed_email activation_success_email
アクションの設定。
class UserMailer < ApplicationMailer

  def activation_needed_email(user)
    @user = user
    @url  = "http://localhost:3000/users/#{user.activation_token}/activate"
    mail(:to => user.email,
     :subject => "Welcome to My Awesome Site")
  end

  def activation_success_email
    @user = user
    @url  = "http://localhost:3000/login"
    mail(:to => user.email,
         :subject => "Your account is now activated")
  end
end
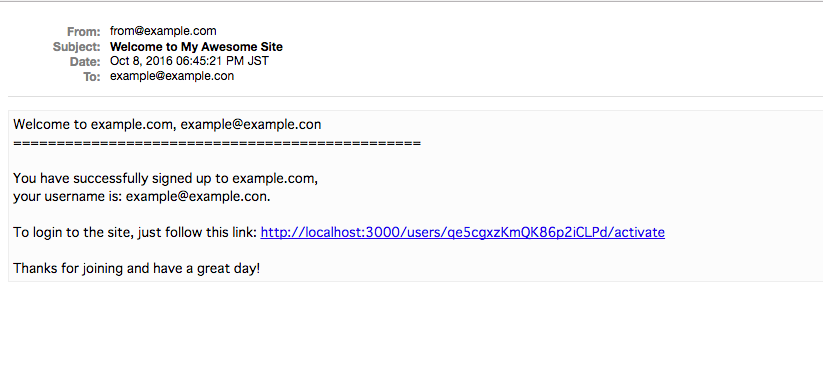
メール本文の作成
Welcome to example.com, <%= @user.email %>
===============================================

You have successfully signed up to example.com,
your username is: <%= @user.email %>

To login to the site, just follow this link: <%= @url %>

Thanks for joining and have a great day!
Congratz, <%= @user.email %>
===============================================

You have successfully activated your example.com account,
your username is: <%= @user.email %>

To login to the site, just follow this link: <%= @url %>

Thanks for joining and have a great day!
3. activateアクションの追加
認証のためのアクション、ルートを定義していきます。
load_from_activation_tokenでアクセストークンの認証を行っています。
def activate
  if (@user = User.load_from_activation_token(params[:id]))
    @user.activate!
    redirect_to(login_path, :notice => 'User was successfully activated.')
  else
    not_authenticated
  end
end
resources :users do
  member do
    get :activate
  end
end
4. letter_openerの追加
開発環境でメールをチェクするためのgemを追加します。
必要のない方は飛ばしてください。
gem 'letter_opener'
config.action_mailer.default_url_options = { host: 'localhost:3000' }
config.action_mailer.delivery_method = :letter_opener
これで開発環境でメールが送られると、ブラウザの新しいタブが開きメールが表示されるようになります。
これでメール認証は終了です。
かなり簡単に実装できますね。
パスワードリセット
パスワードを忘れてしまった場合のためにパスワードリセット機能を作成します。
1.サブモジュールの追加
まずは勿論サブモジュールの追加です。
$ rails g sorcery:install reset_password --migrations
$ rake db:migrate
Rails.application.config.sorcery.submodules = [:user_activation, :reset_password]

Rails.application.config.sorcery.configure do |config|
  config.user_config do |user|
    user.user_activation_mailer = UserMailer
    user.reset_password_mailer = UserMailer
  end

  config.user_class = "User"
end
2. パスワードリセットメールの作成
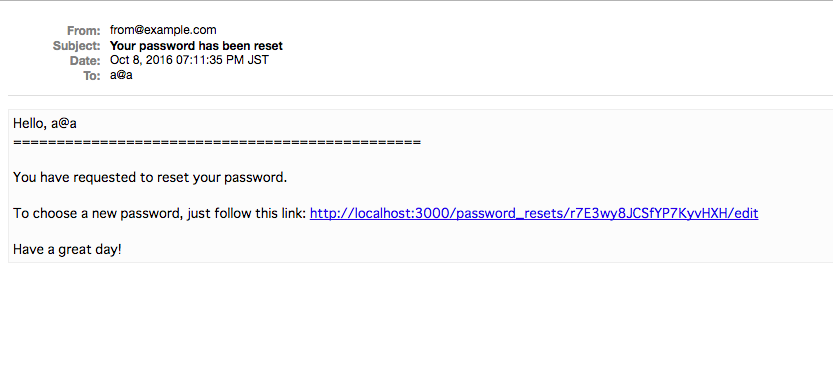
メール本文の作成
Hello, <%= @user.email %>
===============================================

You have requested to reset your password.

To choose a new password, just follow this link: <%= @url %>

Have a great day!
アクション定義
  def reset_password_email(user)
    @user = User.find user.id
    @url = edit_password_reset_url(@user.reset_password_token)
    mail(:to => user.email,  :subject => "Your password has been reset")
  end
3. パスワードリセット用コントローラの作成
class PasswordResetsController < ApplicationController
  skip_before_action :require_login

   def create
     @user = User.find_by_email(params[:email])
     if @user
       @user.deliver_reset_password_instructions!
     else
       return  redirect_to(new_password_reset_path, :notice => 'This email is not correct')
     end
     return redirect_to(root_path, :notice => 'Instructions have been sent to your email.')
   end

   def edit
     @token = params[:id]
     @user = User.load_from_reset_password_token(params[:id])

     if @user.blank?
       not_authenticated
       return
     end
   end

   def update
     @token = params[:id]
     @user = User.load_from_reset_password_token(params[:id])

     if @user.blank?
       not_authenticated
       return
     end

     @user.password_confirmation = params[:user][:password_confirmation]
     if @user.change_password!(params[:user][:password])
       redirect_to(root_path, :notice => 'Password was successfully updated.')
     else
       render :action => "edit"
     end
   end
end
createアクション内のdeliver_reset_password_instructions!で設定されたmailer内のreset_password_emailメソッドを呼びだし、メールを送信しています。
load_from_reset_password_tokenメソッドでは、パスワードトークンを元に、ユーザーを探します。
4. viewの追加
それぞれviewを追加していきます。
<%= form_tag password_resets_path, :method => :post do %>
  <div class="field">
    <%= label_tag :email %><br />
    <%= text_field_tag :email %> <%= submit_tag "Reset my password!" %>
  </div>
<% end %>
<h1>Forgot Password?</h1>
<%= render 'forgot_password_form' %>
<h1>Choose a new password</h1>
<%= form_for @user, :url => password_reset_path(@token), :html => {:method => :put} do |f| %>
  <% if @user.errors.any? %>
    <div id="error_explanation">
      <h2><%= pluralize(@user.errors.count, "error") %> prohibited this user from being saved:</h2>

      <ul>
      <% @user.errors.full_messages.each do |msg| %>
        <li><%= msg %></li>
      <% end %>
      </ul>
    </div>
  <% end %>

  <div class="field">
    <%= f.label :email %><br />
    <%= @user.email %>
  </div>
  <div class="field">
    <%= f.label :password %><br />
    <%= f.password_field :password %>
  </div>
  <div class="field">
    <%= f.label :password_confirmation %><br />
    <%= f.password_field :password_confirmation %>
  </div>
  <div class="actions">
    <%= f.submit %>
  </div>
<% end %>
これでパスワードリセット完成!!!!!!!
SNSログイン
執筆中