はじめに
あまりにデプロイに苦労したため、自分メモを主に記録を残しておきます。
初心者なので、なにかありましたらご指摘いただけましたら嬉しいです。
下準備として、Herokuのユーザー登録が完了しているgit環境済みとします。
Herokuに新規アプリケーションを作成する
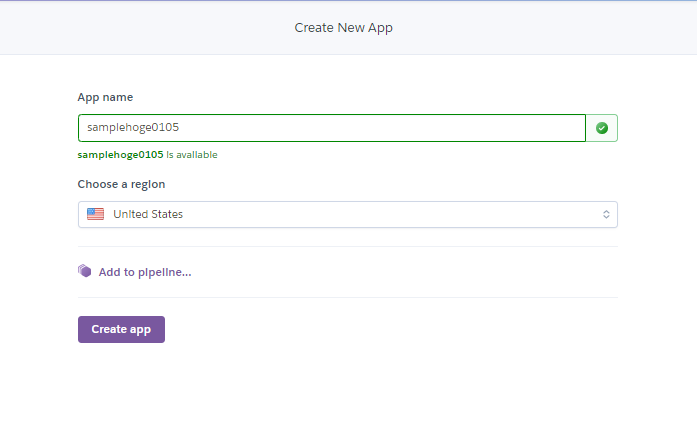
まず、右上の「new」→「create new app」を選択し、アプリケーションを作成する。今回は、「samplehoge0105」とする
MySQLの用意(ClearDB)
clearDBを登録
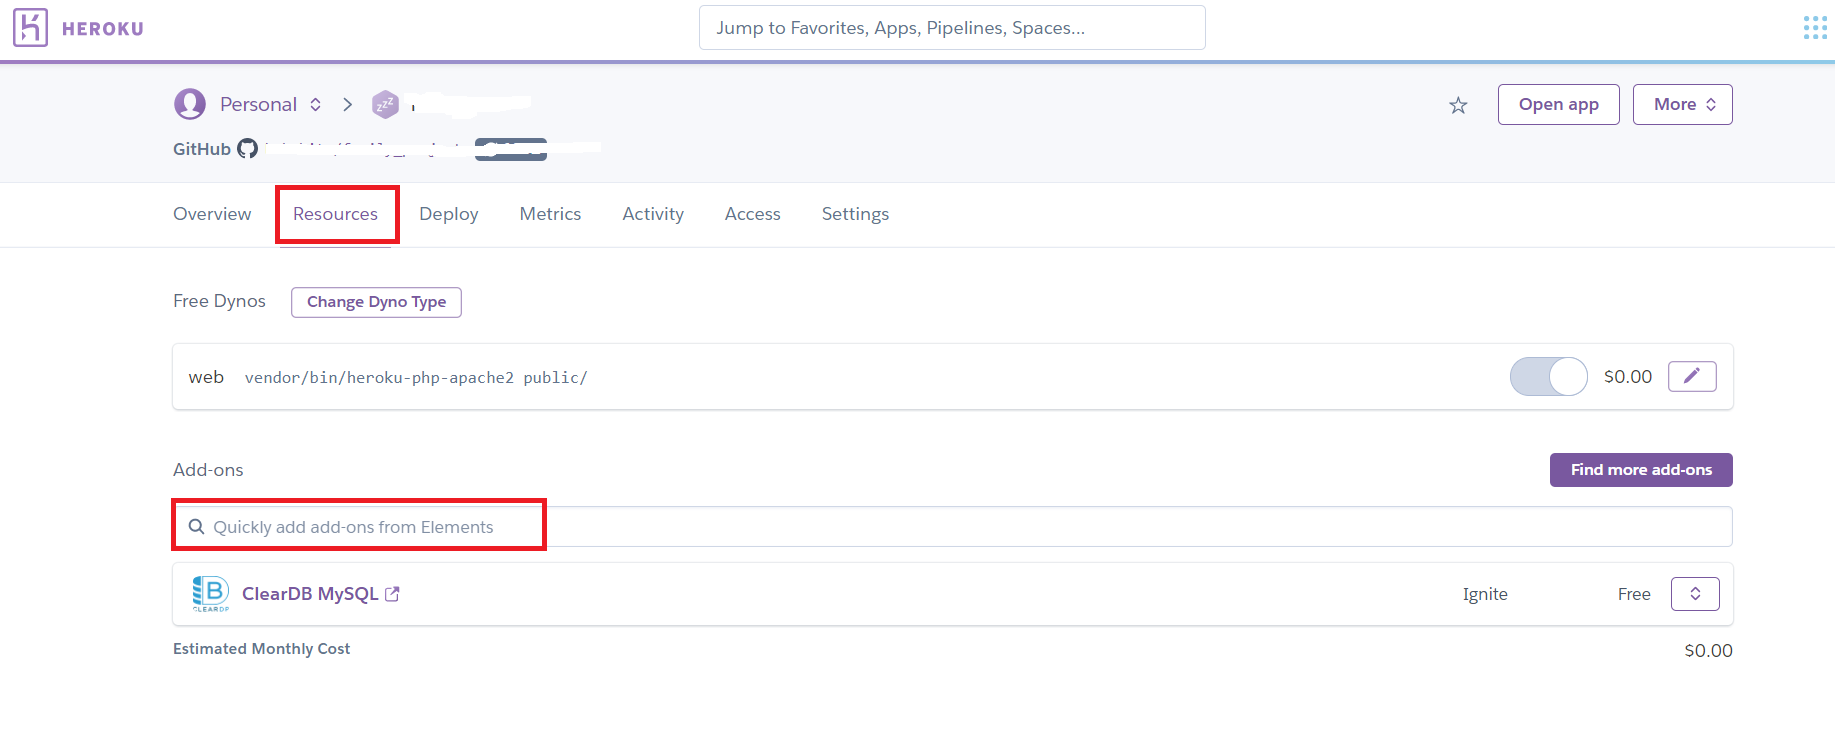
MySQLを使うために、Herokuの「Resources」のAddoneより「clearDB MySQL」を選択し、下記の無料プランを選択し、登録する。
clearDBをLaravelで使用できるように環境設定
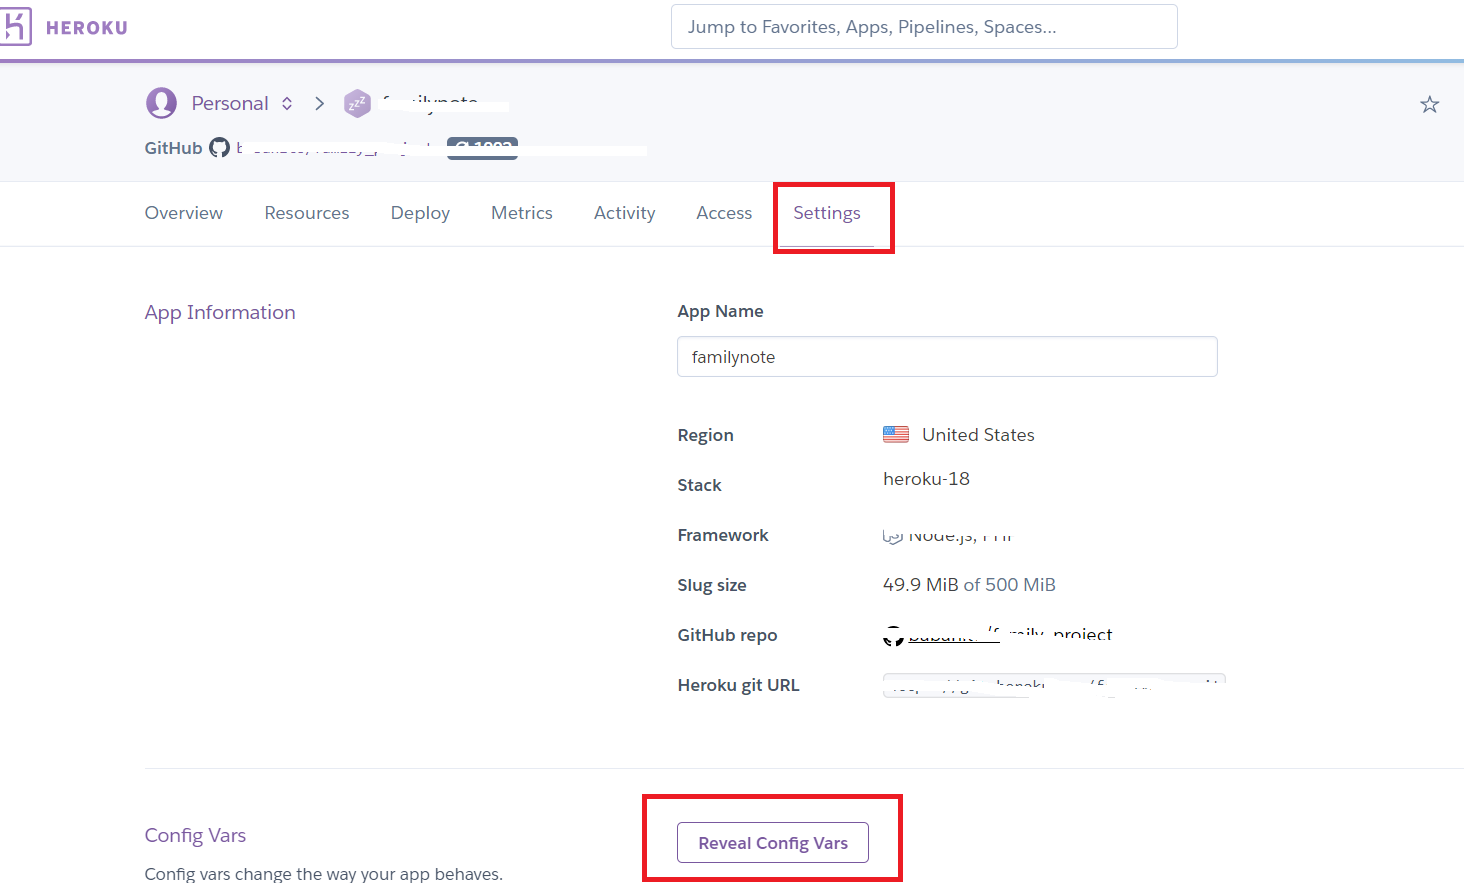
まず、「settings」の「Reveal config Vars」を選択する。
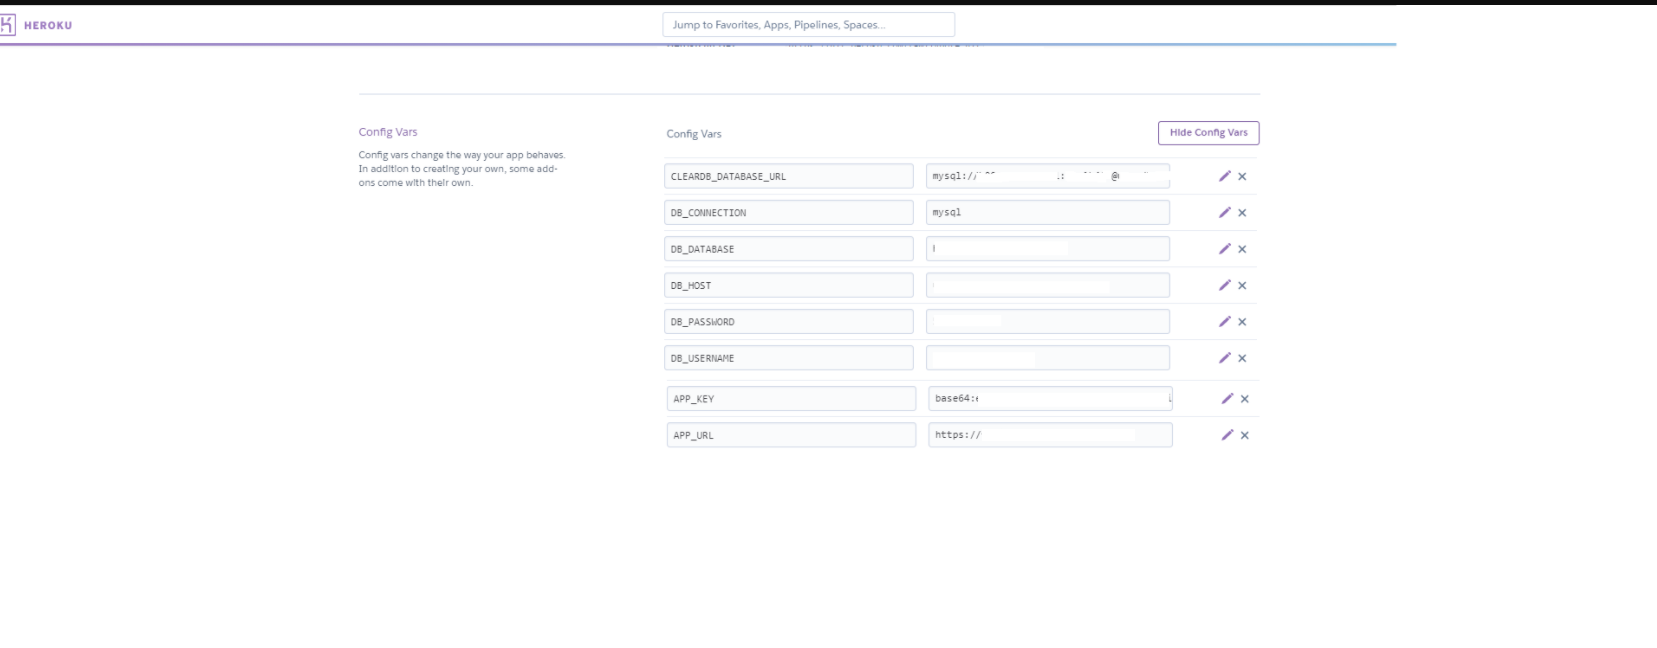
すると、下記の箇所に環境設定に必要な情報が入ってくるため、控えておく
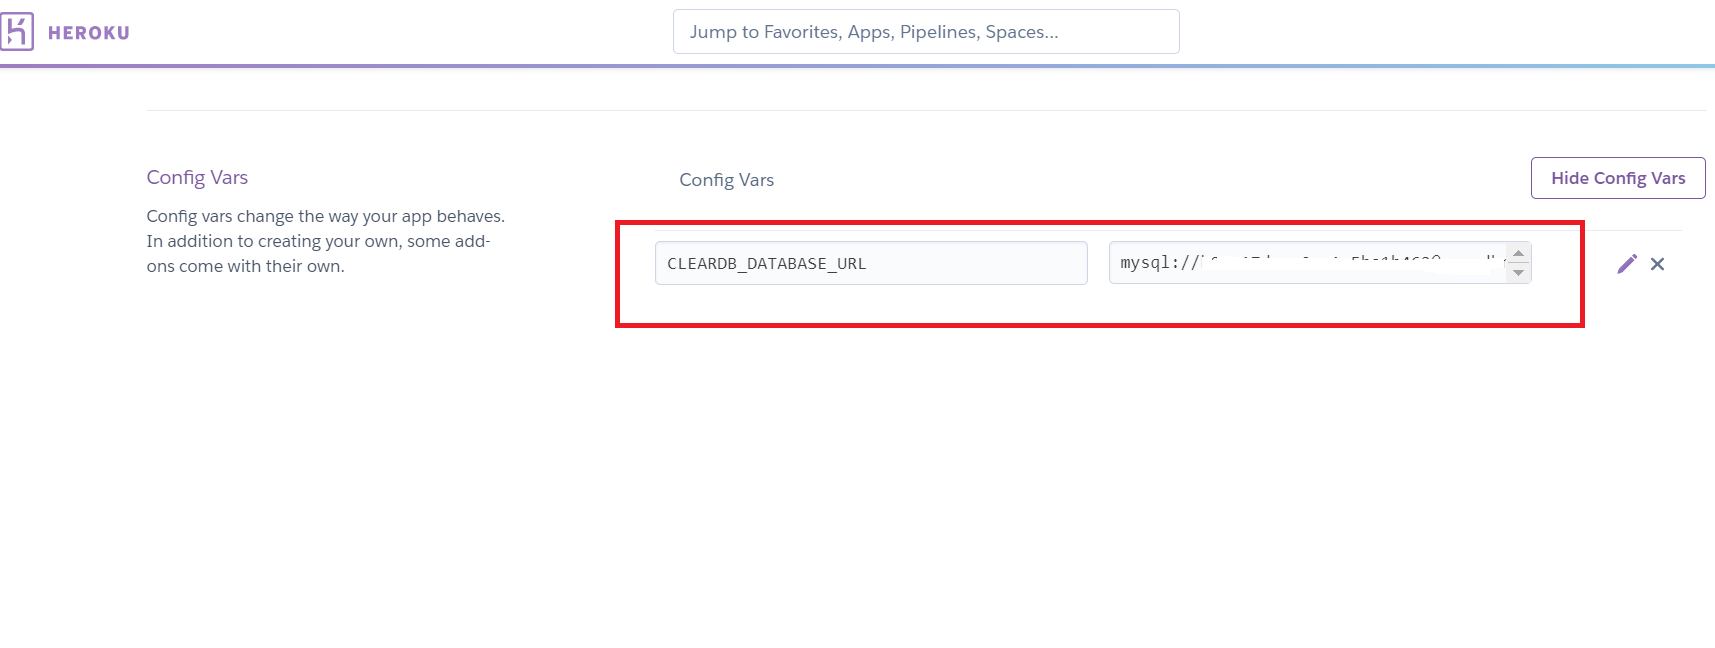
上記で控えた情報を、下記のように設定していく。
mysql://(ユーザ名):(パスワード)@(ホスト)/(DB名)?reconnect=true
DB_CONNECTION=mysql
DB_HOST=ホスト
DB_DATABASE=DB名
DB_USERNAME=ユーザ名
DB_PASSWORD=パスワード
APP_KEY=base64:--------
APP_URL=https://(herokuアプリケーション名)samplehoge0105.herokuapp.com
※APP_KEYは取得できます。herokuでlaravelを使うために設定してください。
php artisan key:generate --show
herokuでphpを使えるようにする
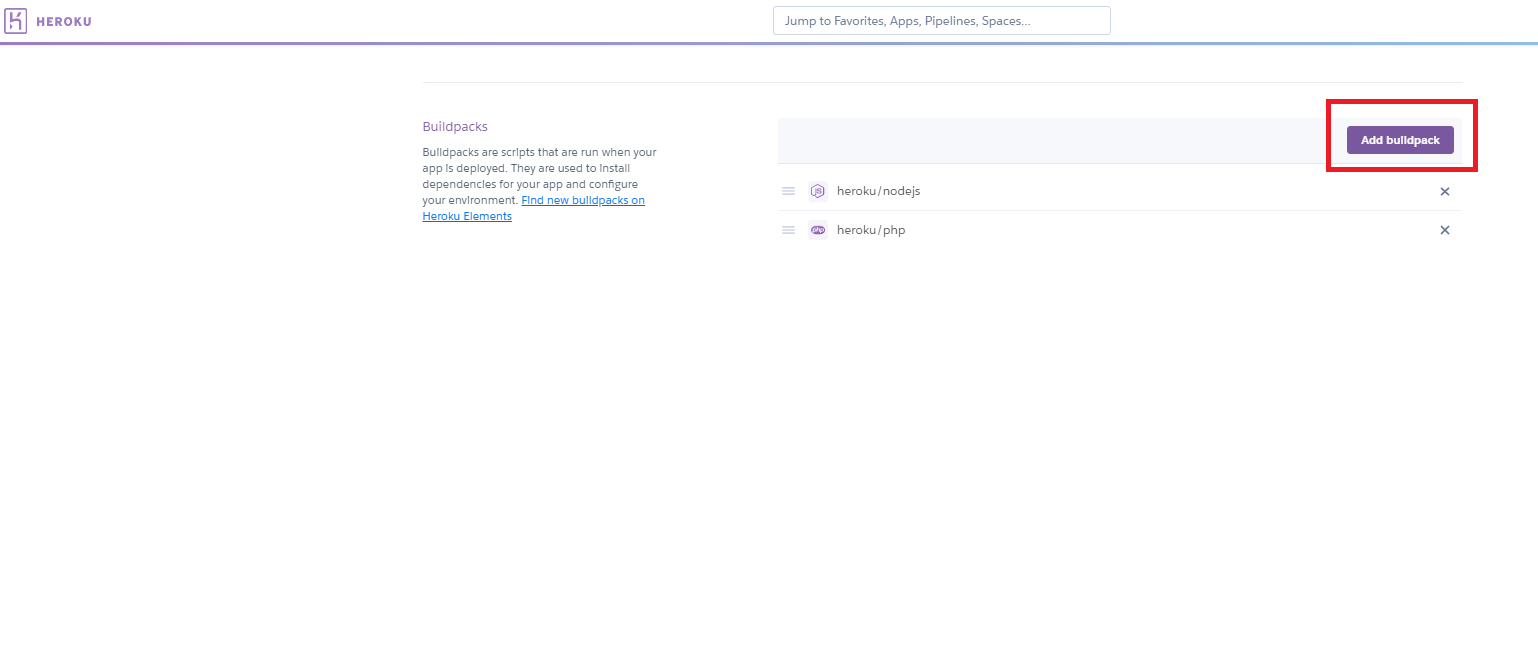
「setting」→「Buildpacks」でphpを選択し、追加する。
この際、nodeを利用している場合はここで追加しておく。
package.jsonおよび、AppServiceProvider.phpに追加
- laravelのプロジェクトの「package.json」ファイルに下記項目を追加する
"scripts":{
"heroku-postbuild": "npm run prod",`(←この行のみ追加)
- laravelのプロジェクトの「app/Providers/AppServiceProvider.php」に下記項目に変更
use Illuminate\Support\Facades\Schema;
public function boot()
{
	Schema::defaultStringLength(191);
}
Procfileを作成する
laravelプロジェクトの直下に、procfile(拡張子なし)を作成し、下記内容を記入します。
web: vendor/bin/heroku-php-apache2 public/
※herokuを動かすために、必要なファイルになります。必ず用意してください。
httpsにするために
laravelでは、デフォルト設定では、httpでの動作とされるため、laravelプロジェクト内の「App\Http\Middlewar\TrustProxies」の設定を変える必要があります。
class TrustProxies extends Middleware
{
protected $proxies = '*';(←ここの変更)
herokuへデプロイしていく
ここまで下準備ができたら、デプロイしていきます。
下記コマンドを順番にうっていきます。
$heroku login (herokuへログイン、別ウィンドウでherokuが立ち上がるので、ログインしてください)
$git init (git管理していたら不要です)
$git add .
$git commit -m "コミットメッセージ"
$heroku git:remote -a samplehoge0105(herokuのアプリケーション名)
$git push heroku master (これでデプロイSTART)
データベースのテーブルを作成する
ここで、やっとmigrationします(ここまではやらない方が無難です)
$heroku run php artisan migrate
デプロイ完成
https://(herokuアプリ名)samplehoge0105.herokuapp.comで確認する
この後、画像の投稿に関して続きます。
