はじめに
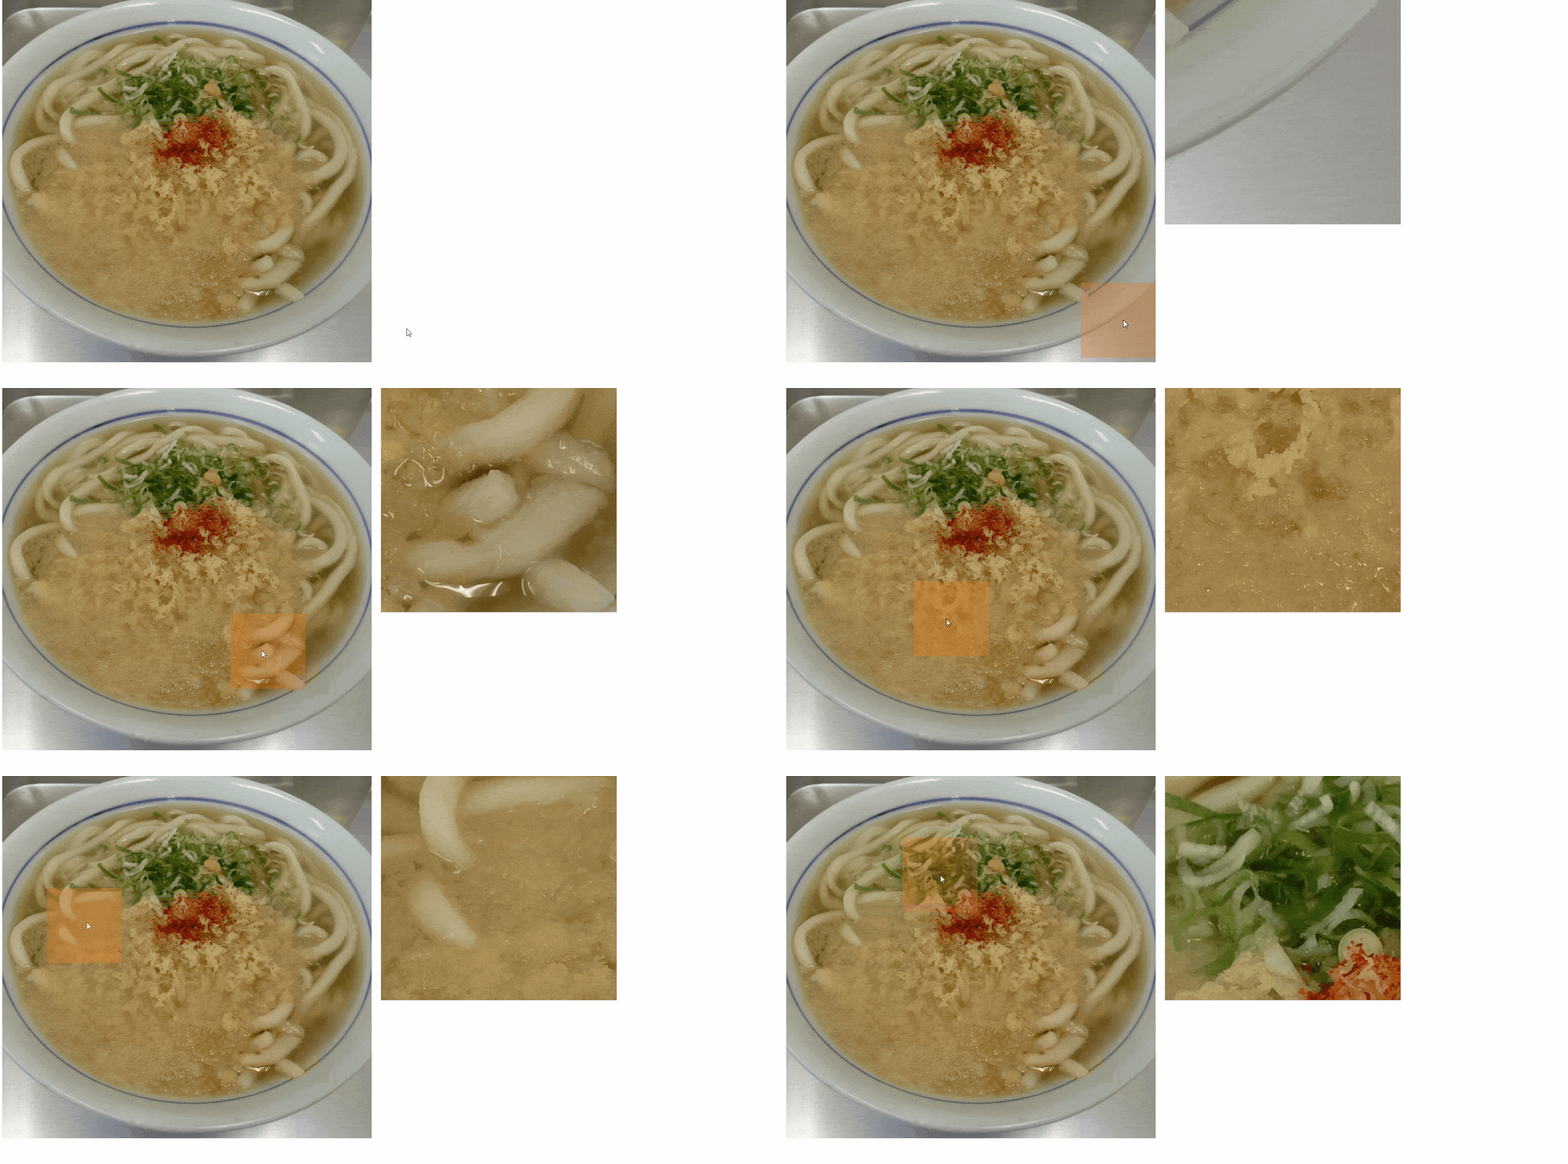
業務で拡大機能が必要になり、その案の一つとして拡大プレビュー機能を作成したのですが、結局、日の目を見ることがなかったので、備忘録&いつの日か日が当たることを信じて残しておきます。
今回の機能の作成にあたっては@AmatsukiKuさんの以下の記事を参考にさせていただきました。
細かい部分の詳細等は@AmatsukiKuさんの記事でご確認ください。
環境&コード内容
環境
今回の記事用にはCDNのunpkgを使用。
コード内容
html
<div id="app">
  <div class="images">
    <!-- 拡大プレビューエリア -->
    <div v-if="showZoomArea" class="zoom-area active" :style="zoomAreaStyle">
      <img :src="imgSrc" :style="zoomImageStyle" />
    </div>
    <div class="slides-container" :style="slidesContainerStyle">
      <div
        class="cell"
        @mouseover="showZoomArea=true"
        @mouseleave="showZoomArea=false"
      >
        <div
          class="m-lens-container"
          @mousemove="changePreviewArea"
        >
          <!-- 基準の画像 -->
          <img :src="imgSrc" :style="mLensContainerImgStyle">
          <!-- 拡大エリア -->
          <div v-if="showZoomArea" class="m-lens" :style="lensStyle"></div>
        </div>
      </div>
    </div>
  </div>
</div>
css
.m-lens-container {
  display: inline-block;
  position: relative;
}
.m-lens {
  position: absolute;
  z-index: 2;
  background: #f57716;
  opacity: 0.3;
}
.cell {
  display: table-cell;
  vertical-align: middle; /* 縦に中央揃え */
}
.images {
  position: relative;
}
.slides-container { /* カルーセル表示領域 */
  overflow: hidden;
}
.zoom-area {
  display: none;
  position: absolute;
  border: 1px solid #ccc;
  height: 520px;
  width: 520px;
  overflow: hidden;
}
.zoom-area.active {
  display: block;
}
js
var app = new Vue({
  el: '#app',
  data: {
    imgSrc: 'udn.jpg',
    imgWidth: 2447 / 3,
    imgHeight: 2481 / 3,
    size: null,
    scale: null,
    showZoomArea: false,
    slidesContainerStyle: {
      width: null
    },
    lensStyle: {
      top: null,
      left: null,
      height: null,
      width: null
    },
    zoomAreaStyle: {
      top: null,
      left: null
    },
    zoomImageStyle: {
      width: null,
      marginLeft: null,
      marginTop: null
    },
    mLensContainerImgStyle: {
      maxHeight: null,
      maxWidth: null
    }
  },
  methods: {
    // 拡大プレビューの変更
    changePreviewArea (event) {
      let size = this.size
      let scale = this.scale

      // 座標を取得
      let container = document.querySelectorAll('.m-lens-container')
      let rect = container[0].getBoundingClientRect()
      let mouseX = event.pageX
      let mouseY = event.pageY

      // スクロール分も計算に入れる
      // コンテナの左上からの距離 = ページの左上からの距離 - スクロール量 - ウィンドウの左上からの距離
      let positionX = rect.left + window.pageXOffset
      let positionY = rect.top + window.pageYOffset
      let offsetX = mouseX - positionX
      let offsetY = mouseY - positionY
      let left = offsetX - (size / 2)
      let top = offsetY - (size / 2)

      // 拡大エリアの限界値を設定
      let img = container[0].querySelector('img')
      let xMax = img.offsetWidth - size
      let yMax = img.offsetHeight - size
      if (left > xMax) {
        left = xMax
      }
      if (top > yMax) {
        top = yMax
      }
      if (left < 0) {
        left = 0
      }
      if (top < 0) {
        top = 0
      }

      // 拡大エリアの位置
      this.lensStyle.top = top + 'px'
      this.lensStyle.left = left + 'px'

      // 拡大エリアのプレビュー表示箇所の変更処理
      this.zoomImageStyle.marginLeft = -(left * scale) + 'px'
      this.zoomImageStyle.marginTop = -(top * scale) + 'px'
    },
    // styleのプロパティをセット
    setStyleProperty () {
      let width = this.imgWidth
      let height = this.imgHeight

      // コンテナのサイズを設定
      this.slidesContainerStyle.width = width

      // 表示する基準の画像のサイズを設定
      this.mLensContainerImgStyle.maxHeight = height + 'px'
      this.mLensContainerImgStyle.maxWidth = width + 'px'

      // ズームエリアの位置を設定
      this.zoomAreaStyle.left = width + 20 + 'px'

      // 拡大鏡エリアのサイズを設定
      // 数値を変更することでズームエリアの画像サイズも変更される
      this.size = width >= height ? width * 0.2 : height * 0.2
      let size = this.size
      this.lensStyle.height = size + 'px'
      this.lensStyle.width = size + 'px'

      // スケールの設定
      this.scale = 524 / size
      let scale = this.scale

      // ズームエリアに表示する画像のサイズを設定
      this.zoomImageStyle.width = width * scale + 'px'
    }
  },
  mounted () {
    this.setStyleProperty()
  }
})
終わりに
今回作成した拡大プレビュー機能は特定の画像をモーダルウィンドウにて表示し、その中で使用するコンポーネントの一つとして使用する想定でした。
そのため、バイナリデータを親コンポーネントから受け取るといった親子間のデータ受け渡しを前提にした作りとなっています。
記事にするにあたっての最適化は行っておりませんので、読みにくい点もあるかと思いますが、あしからず・・・。
まだまだvueを使い始めて日も浅いので、ご指摘等がございましたらよろしくお願いいたします。
日が当たるといいなぁ・・・。
