はじめに
最近、Input Systemをさわってみたので、備忘録として簡易的なシューティングゲームを作ってみました。
この記事は、Input Systemを利用した部分にフォーカスして記載します。
Input Systemのインストール
Projectビューで、Input Actionsを作成
Create > Input Actions
ここでは、「InputActions」という名称で作成しています

Input Actions の設定
-
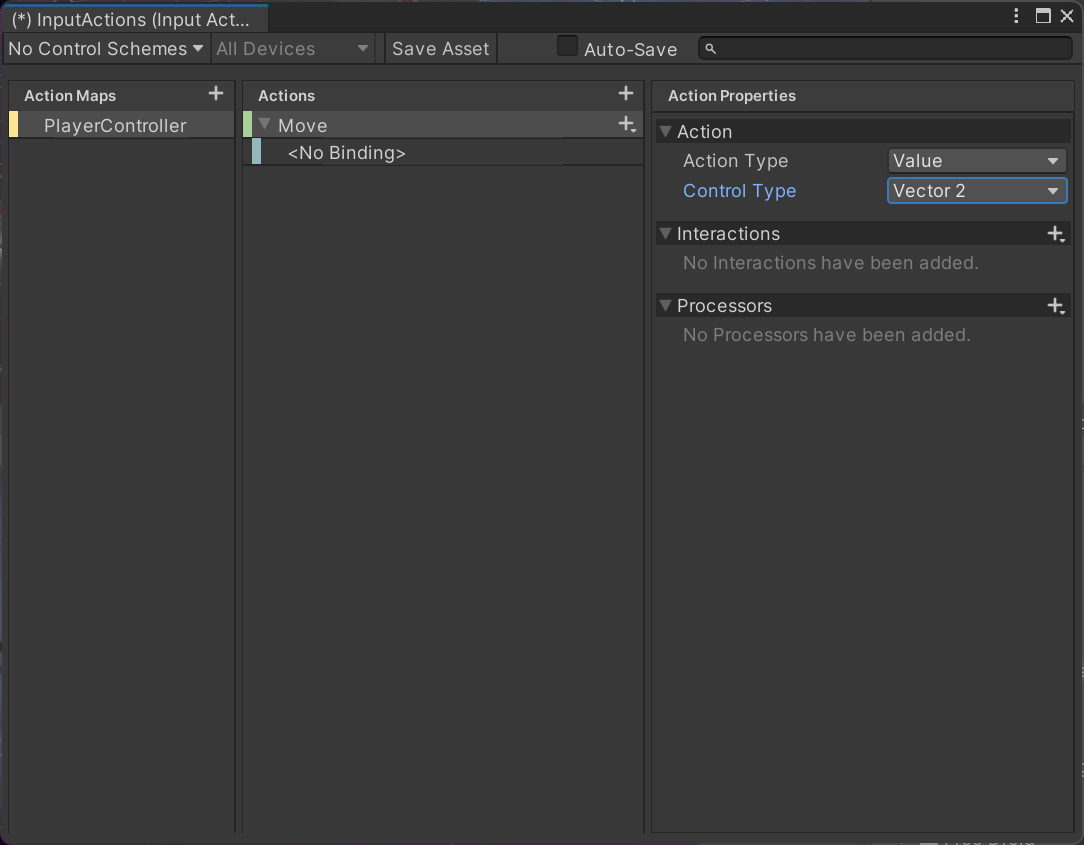
Action Maps の右のプラスボタンをクリックして、「PlayerController」という名称でAction Mapを作成します

-
「Move」Action のAction Typeを「Value」、Control Typeを「Vector2」に変更します

-
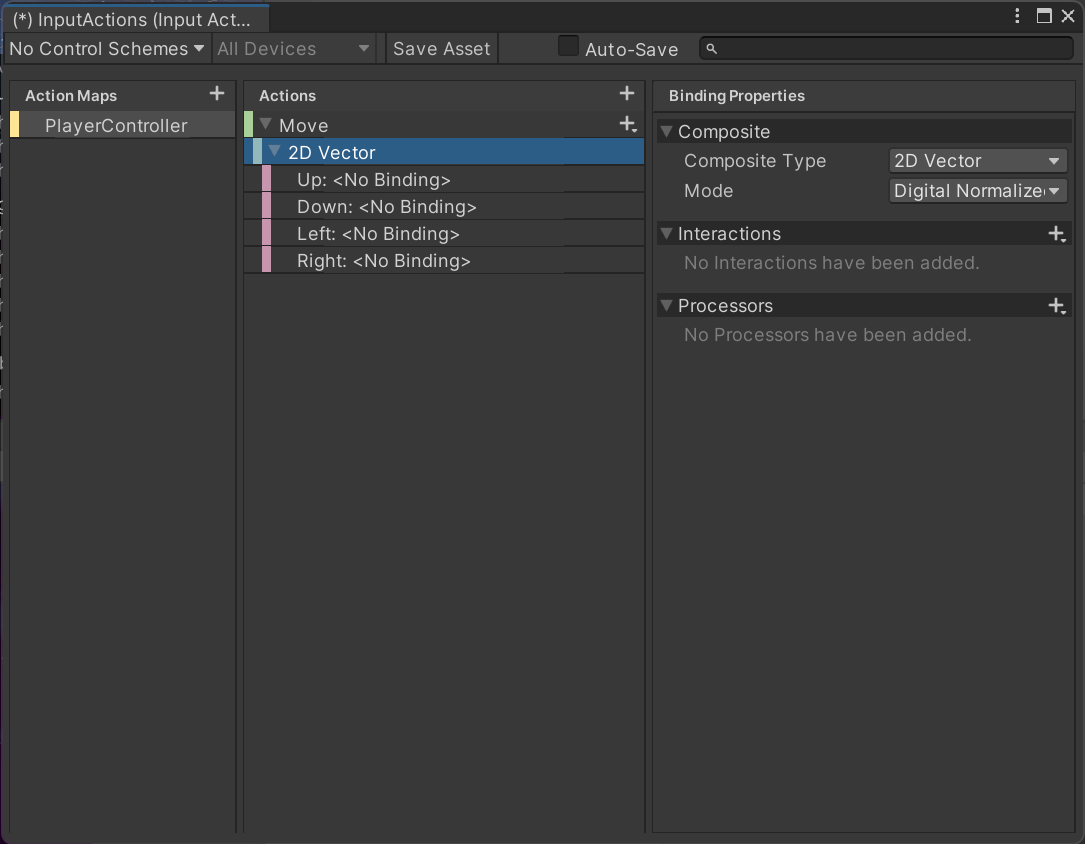
「Move」Actionの下の No Bindings というBindingを削除します。そして、「Move」Actioinの右のプラスボタンから「Add Up\Down\Left\Right Composite」を選択します

-
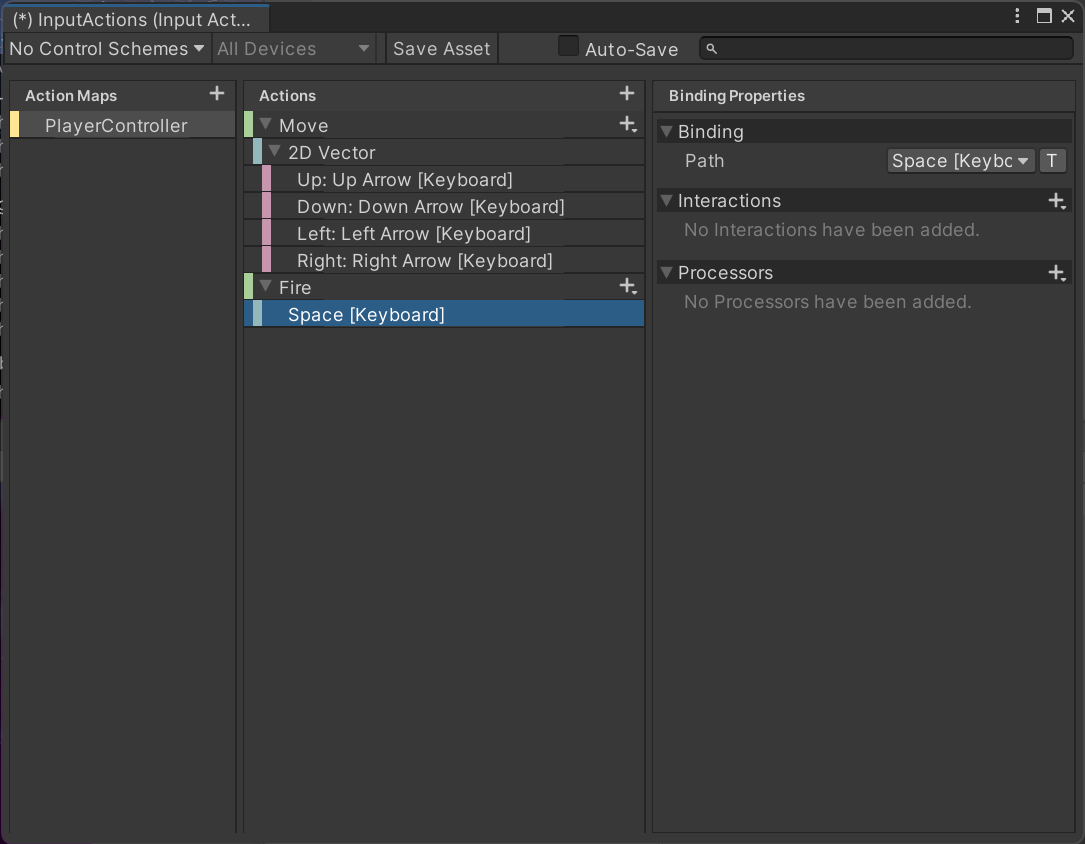
Up/Down/Left/Right それぞれのBinding PropertiesのBinding Pathに以下を設定します
Up : Keybord > By Location of Key > Up Arrow
Down : Keybord > By Location of Key > Down Arrow
Left : Keybord > By Location of Key > Left Arrow
Right : Keybord > By Location of Key > Right Arrow

-
「Fire」Actionの下の No Binding をクリックします。Binding PropertiesのBinding Path に以下を設定します
Keybord > By Location of Key > Space

-
「Save Asset」ボタンをクリックします
Playerとなる機体オブジェクトの設定
using UnityEngine;
using UnityEngine.InputSystem;

namespace UnitySkillTest
{
    [RequireComponent(typeof(PlayerInput))]
    public class PlayerMove : MonoBehaviour
    {
        [Header("ミサイルPrefab"), SerializeField] private GameObject _missilePrefab;
        [Header("ミサイルの射出位置"),SerializeField] private Transform _missileSpawnPoint;

        [Header("機体のスピード"), SerializeField] private float _speed = 10f;
        private float _rotateAngle = 30f;   // プレイヤーの傾き角度

        private PlayerInput _playerInput;   // PlayerInputコンポーネント
        private InputAction _moveAction;    // Moveアクション

        private void Awake()
        {
            // PlayerInputコンポーネントを取得
            _playerInput = GetComponent<PlayerInput>();
        }

        // Start is called before the first frame update
        void Start()
        {
            // Moveアクションを取得
            _moveAction = _playerInput.actions["Move"];

            // Moveアクションが取得できなかった場合はゲームを終了
            if (_moveAction is null)
            {
               Application.Quit();
            }
        }

        // Update is called once per frame
        void Update()
        {
            // Moveアクションが押されている場合
            if (_moveAction.IsPressed())
            {
                // Moveアクションは、Vector2の値を設定しているため、Vector2を取得できる
                // 以下の値が取得できる
                // UP: (0, 1)
                // DOWN: (0, -1)
                // LEFT: (-1, 0)
                // RIGHT: (1, 0)
                Vector2 direction = _moveAction.ReadValue<Vector2>();
                Vector3 moveDelta = new Vector3(direction.x, direction.y, 0)
                                    * (_speed * Time.deltaTime);
                transform.position += moveDelta;
            }
        }

        /// <summary>
        /// Moveアクションが押された時、Player Input コンポーネントによって、自動的に呼び出される
        /// 名称は、On + アクション名 とする必要がある
        /// </summary>
        /// <param name="value"></param>
        private void OnMove(InputValue value)
        {
            // LEFT、RIGHTのみ傾けるため、xの値のみ利用
            transform.rotation = Quaternion.Euler(
                0,
                0,
                value.Get<Vector2>().x * (-1) * _rotateAngle);
        }

        /// <summary>
        /// Fireアクションが押された時、Player Input コンポーネントによって、自動的に呼び出される
        /// 名称は、On + アクション名 とする必要がある
        /// </summary>
        /// <param name="value"></param>
        private void OnFire(InputValue value)
        {
            Instantiate(_missilePrefab, _missileSpawnPoint.position, Quaternion.identity);
        }
    }
}


