地図上にマーカーを表示させる
※この記事は「Angular9でOpenLayersを使う」の続きです。前回作成したプロジェクトを使って解説をしていきます。
前回はOpenLayersを使用して地図を表示しました。今回は現在地などの場所を示すマーカーを表示します。
OpenLayersでは地図上に新しい要素を追加する際、新しいレイヤ(層)を追加してその上に描画していきます。普通の地図の上に透明なフィルムを重ねて、その上からペンで印をつけたり、線を引いたりするようなイメージです。そのためには、
- Layer(VectorLayer): 新しい層(上記の例では透明なフィルムに該当します)
- Source(VectorSource): ソース(地図上の要素のカテゴリを分けるための箱のようなもの)
- Feature: アイコンなどの要素
の3つが主に必要となります。
使用ライブラリ等
前回と変わりませんが記載しておきます。
- Angular9: https://angular.io/
- OpenLayers v6.3.1: https://openlayers.org/
- CodeSandbox: Online IDE: https://codesandbox.io/
インポート
//app.component.ts
import { Component, OnInit } from "@angular/core";
import "ol/ol.css";
import { Map, View, Feature } from "ol";
import { OSM } from "ol/source";
import { fromLonLat } from "ol/proj";
import { Tile } from "ol/layer";
import VectorLayer from "ol/layer/Vector";
import VectorSource from "ol/source/Vector";
import Icon from "ol/style/Icon";
import Style from "ol/style/Style";
import { Point } from "ol/geom";
メンバオブジェクトに追加
//app.component.ts

  iconFeature = new Feature({
    geometry: new Point(fromLonLat(this.skytree))
  });

  iconVectorSource = new VectorSource({
    features: []
  });

  iconVectorLayer = new VectorLayer({
    source: this.iconVectorSource //VectorLayerにソースを追加
  });

  iconPinStyle = new Style({
    image: new Icon({
      anchor: [0.5, 1], //受け取った座標に対するアイコンの表示位置。[0.5,0.5]だとアイコン画像の中心を座標に合わせる
      src: "../assets/pin.svg", //ディレクトリ ../assets 下のアイコン画像を参照
      color: "black", //なにか色を指定しないとなぜかデフォルトの色が出ない
      scale: 0.4 //画像のスケール
    })
  });
../assets下に任意のアイコン画像を追加しましょう。Styleではアイコン等の型を指定して描画の指定をできます。
ngOnInit()
//app.component.ts

    this.map.addLayer(this.iconVectorLayer);

    this.iconFeature.setStyle(this.iconPinStyle);

    this.iconVectorSource.addFeature(this.iconFeature);
ngOnInit()の下部にこれらを追加しましょう。
map
├ Layer
├ Source
├ Feature
├ Style
上の図のように追加されます。
ソースコード全体
//app.component.ts

import { Component, OnInit } from "@angular/core";
import "ol/ol.css";
import { Map, View, Feature } from "ol";
import { OSM } from "ol/source";
import { fromLonLat } from "ol/proj";
import { Tile } from "ol/layer";
import VectorLayer from "ol/layer/Vector";
import VectorSource from "ol/source/Vector";
import Icon from "ol/style/Icon";
import Style from "ol/style/Style";
import { Point } from "ol/geom";

@Component({
  selector: "app-root",
  templateUrl: "./app.component.html",
  styleUrls: ["./app.component.css"]
})
export class AppComponent implements OnInit {
  title = "OpenLayers";

  skytree = [139.81083333, 35.71000138];

  map: Map;

  iconFeature = new Feature({
    geometry: new Point(fromLonLat(this.skytree))
  });

  iconVectorSource = new VectorSource({
    features: []
  });

  iconVectorLayer = new VectorLayer({
    source: this.iconVectorSource
  });

  iconPinStyle = new Style({
    image: new Icon({
      anchor: [0.5, 1],
      src: "../assets/pin.svg",
      color: "black",
      scale: 0.4
    })
  });

  ngOnInit() {
    this.map = new Map({
      target: "map",
      layers: [
        new Tile({
          source: new OSM()
        })
      ],
      view: new View({
        center: fromLonLat(this.skytree),
        zoom: 15
      })
    });

    this.map.addLayer(this.iconVectorLayer);

    this.iconFeature.setStyle(this.iconPinStyle);

    this.iconVectorSource.addFeature(this.iconFeature);
    }
}
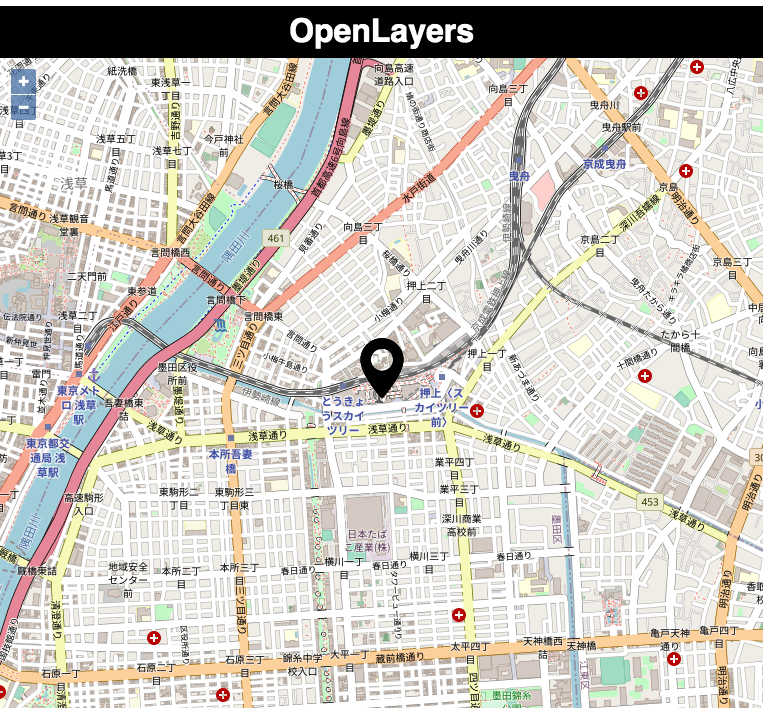
出力結果
このような出力結果であれば、問題なくマーカーが表示されています。
気になった点
初めは新しいメンバオブジェクトが多いので、ngOnInit()内で宣言してthis.mapからLayerとその下部要素へアクセスするつもりでした。しかし、
- this.map.getLayer(LayerID)のようなメソッドがない
- this.map.getLayers().forEach()のような形でVectorLayerを参照しても、getSource()がメンバにないため使えないというエラーが出力される
- ↑に関してはローカルの環境では使えたので原因がわからない
という問題があったので、今回はメンバに追加しています。
