Raspberry PiへのインストールはInstalling ROS Kinetic on the Raspberry Piの通りですが、作業メモとして残しつつ、Raspberry PiをROSのセンサーノードとして動くところまで仕立てます。
ROS歴浅くてチュートリアルの域から脱していない感がありますがお付き合いください!
用意するもの
- Raspberry Pi 2 or 3 (Raspbian Jessie)
- 適当なセンサー。本稿では温度センサを使います。
- roscoreを動かすホストマシンを別途準備(以降ROS_MASTERと呼びます)
個人的には気軽にWiFiが使えるRaspberry Pi 3がオススメです。
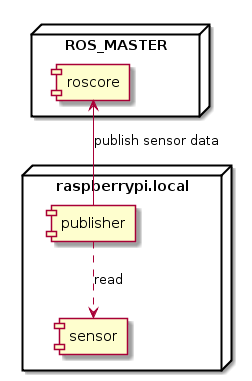
構成
ROS_MASTERにRaspberry Piで取得したセンサデータを送信する感じ。
Raspberry PiにROSをインストール
ROS-Commをインストールします。Desktop(GUIのツールなどが含まれる)はRaspberry Piより汎用PCにUbuntu 16.04をインストールして利用することをオススメします。
一応スクリプトを下に貼ります。先にも述べたように、Installing ROS Kinetic on the Raspberry Piを守れば良いと思います。
# !/bin/bash

set -e

# http://wiki.ros.org/ROSberryPi/Installing%20ROS%20Kinetic%20on%20the%20Raspberry%20Pi

echo "=== setup: setup ROS repositories"
sudo sh -c 'echo "deb http://packages.ros.org/ros/ubuntu $(lsb_release -sc) main" > /etc/apt/sources.list.d/ros-latest.list'
sudo apt-key adv --keyserver hkp://ha.pool.sks-keyservers.net:80 --recv-key 0xB01FA116

echo "=== setup: install bootstrap dependencies"
sudo apt-get update
sudo apt-get -y upgrade
sudo apt-get install -y python-rosdep python-rosinstall-generator python-wstool python-rosinstall build-essential cmake

echo "=== setup: initializing rosdep"
sudo rosdep init
rosdep update

echo "=== setup: create a catkin workspace"
mkdir -p ~/ros_catkin_ws
pushd ~/ros_catkin_ws
rosinstall_generator ros_comm common_msgs tf --rosdistro kinetic --deps --wet-only --tar > kinetic-ros_comm-wet.rosinstall
wstool init src kinetic-ros_comm-wet.rosinstall

echo "=== setup: resolving dependencies"
rosdep install -y --from-paths src --ignore-src --rosdistro kinetic -r --os=debian:jessie

echo "=== setup: building the catkin workspace"
sudo ./src/catkin/bin/catkin_make_isolated --install -DCMAKE_BUILD_TYPE=Release --install-space /opt/ros/kinetic -j2

popd

echo "source /opt/ros/kinetic/setup.bash" >> ~/.bashrc
インストールは数時間かかります。気長に待ちましょう。Raspberry Pi 3を使っている場合はUSBの電流(2.5A)が足りているか確認しておいたほうが良いかも。
ROSのクライアントにする
Raspberry PiのROSをクライアントとして使うために、環境変数として以下のものを設定しておきましょう。
export ROS_MASTER_URI=http://<ROS_MASTER machine address>:11311
export ROS_HOSTNAME=raspberrypi.local
Raspberry Piのhostnameを変えておくと複数のRaspberry Piを区別できて便利ですが、本稿では割愛します。
ROS_MASTERでRaspberry Piのセンサデータを見てみよう
温度センサをつなぐ
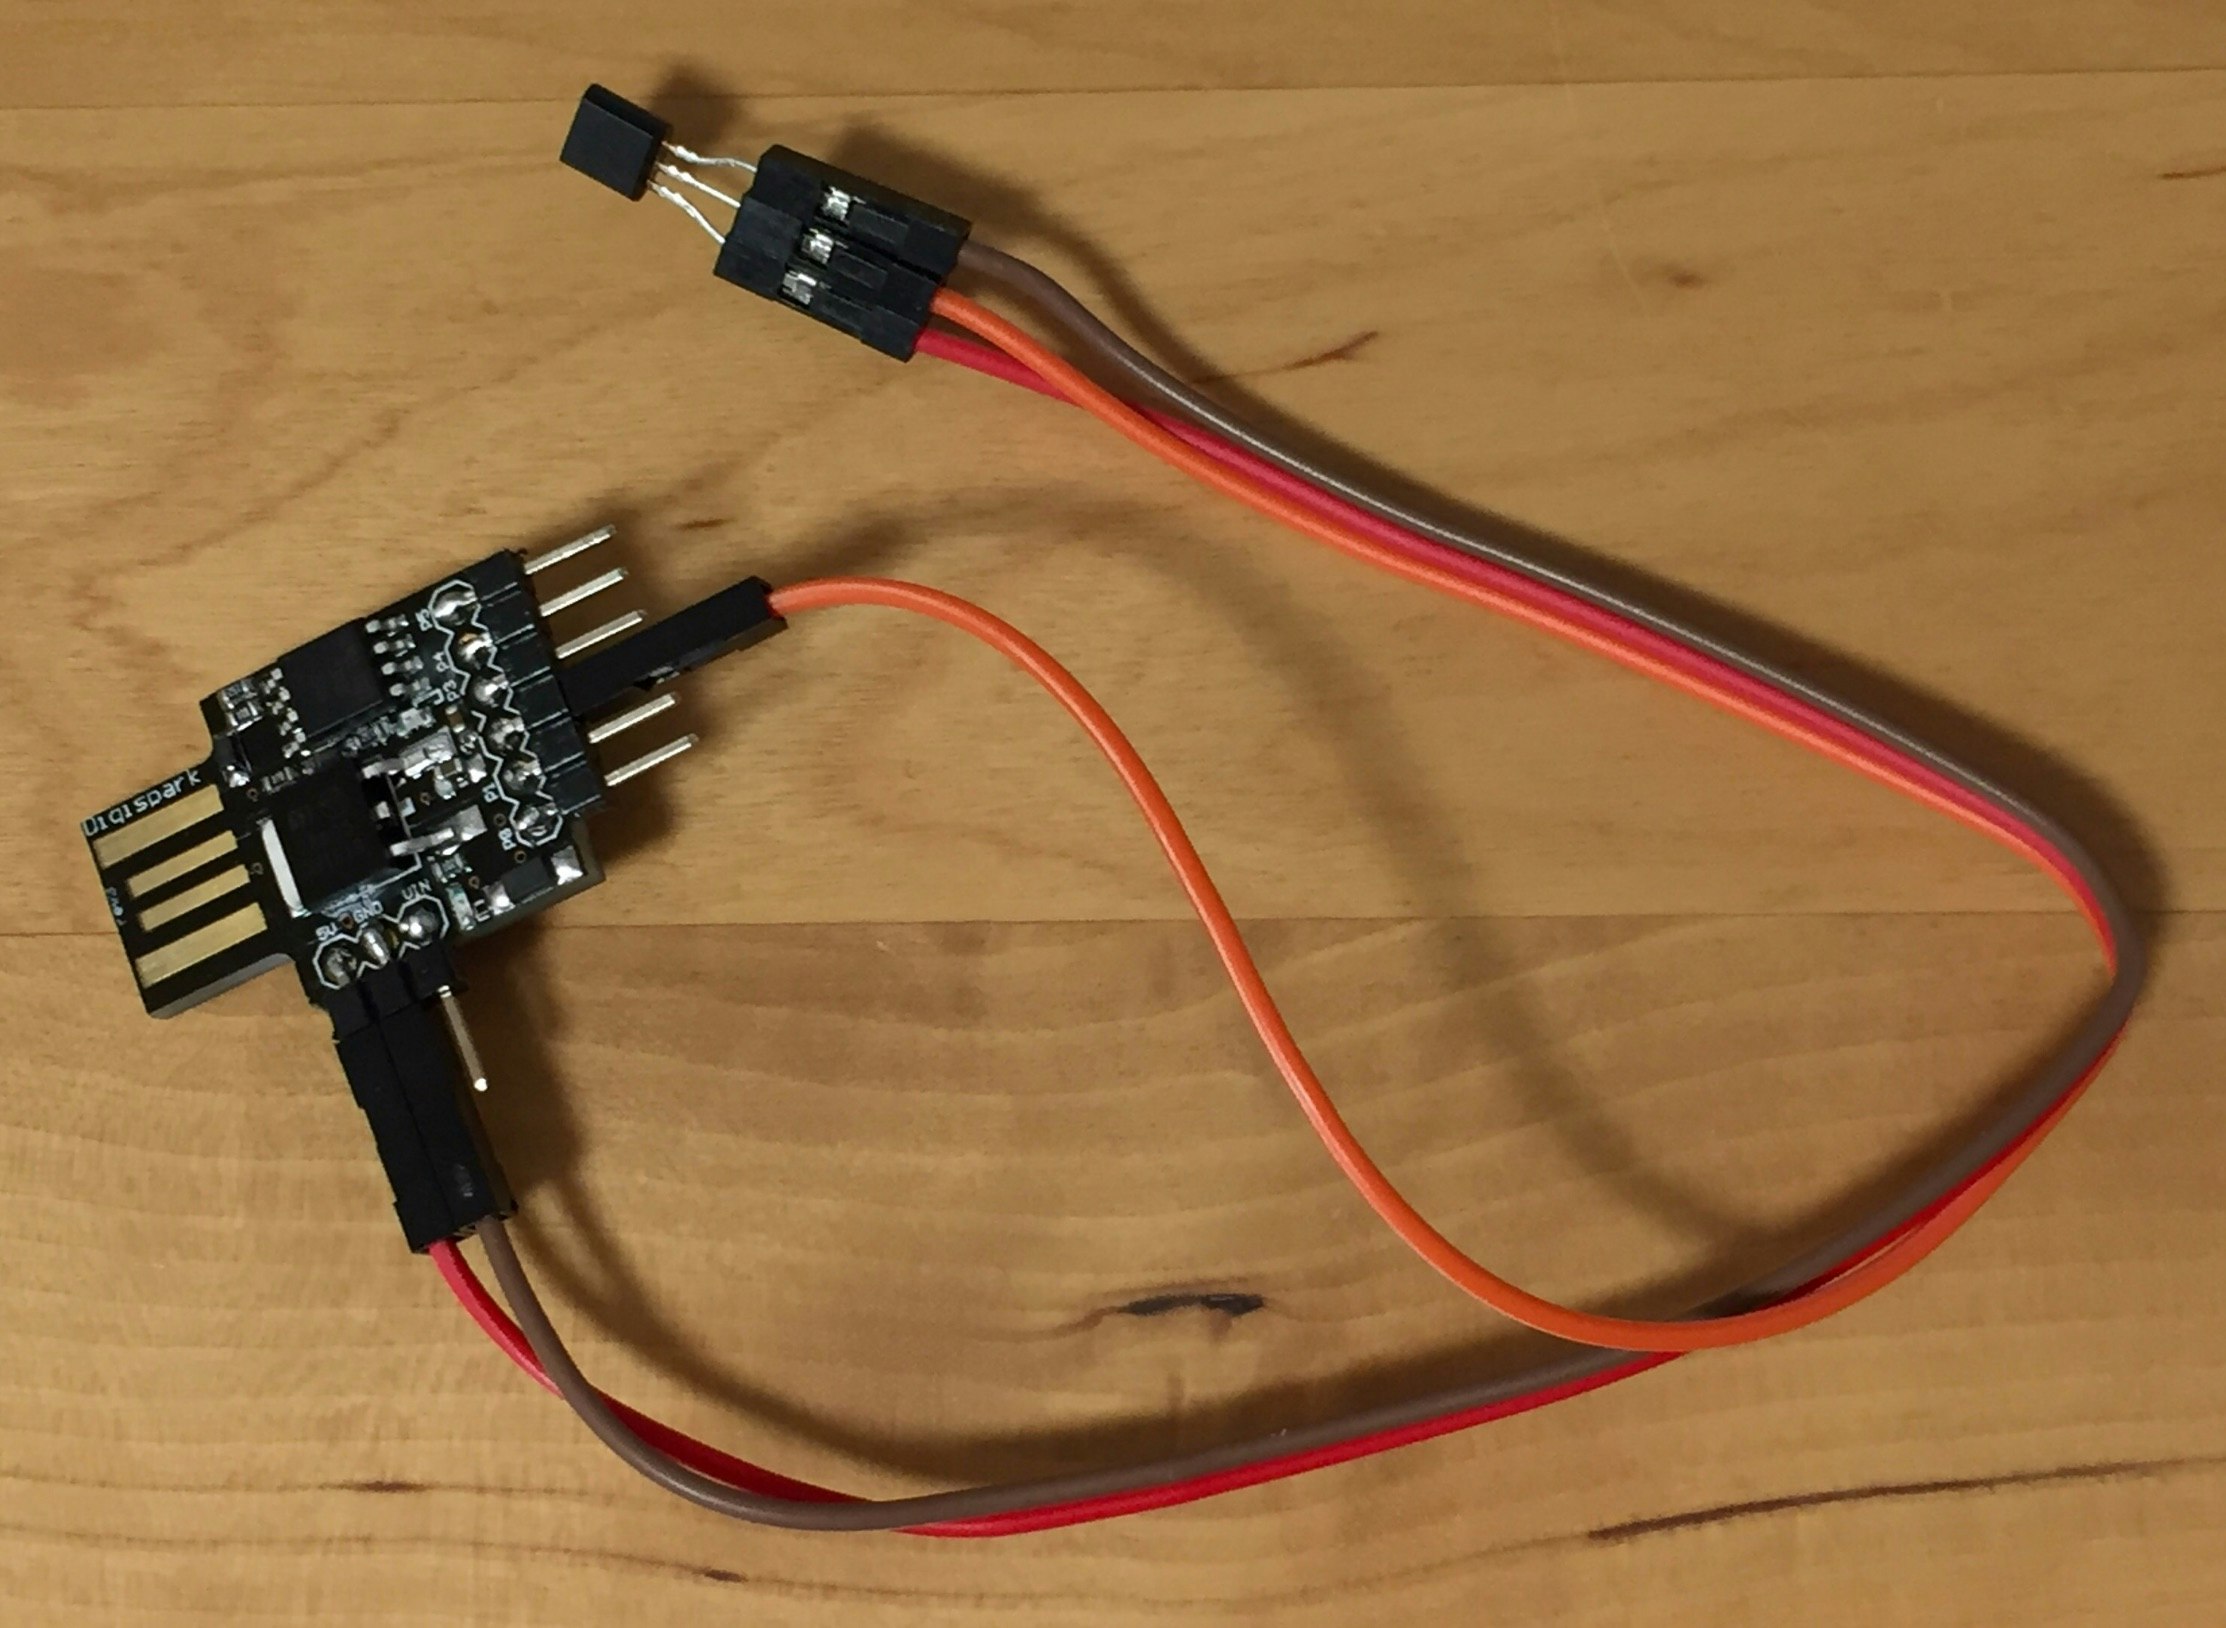
センサはなんでも良いですが、今回は手元にあったDigispark(Arduino)で温度データを取るようにしました1。本稿ではリポジトリにあげてあるArduinoのコードをDigisparkにアップロードし、センサをつけておきます。詳しい組み方はこちらを参考にすると使えるようになると思います。
LM61CIZをP2につないで使えるようにしています
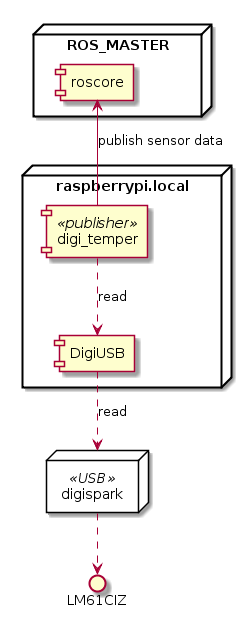
少し詳細な構成:
ROS_MASTERでの操作
$ roscore
Raspberry Piでの操作
$ cd catkin_ws/src
$ git clone https://github.com/atotto/digi_temper.git --depth 1
$ roslaunch digi_temper digi_temper.launch
すると、ROS_MASTERにデータが入ってきます。
rostopicだと:
$ rostopic echo /temp
header:
  seq: 62
  stamp:
    secs: 1482133245
    nsecs: 292054891
  frame_id: temp_frame
temperature: 26.43
variance: 0.0
---
rvizで見てみると:
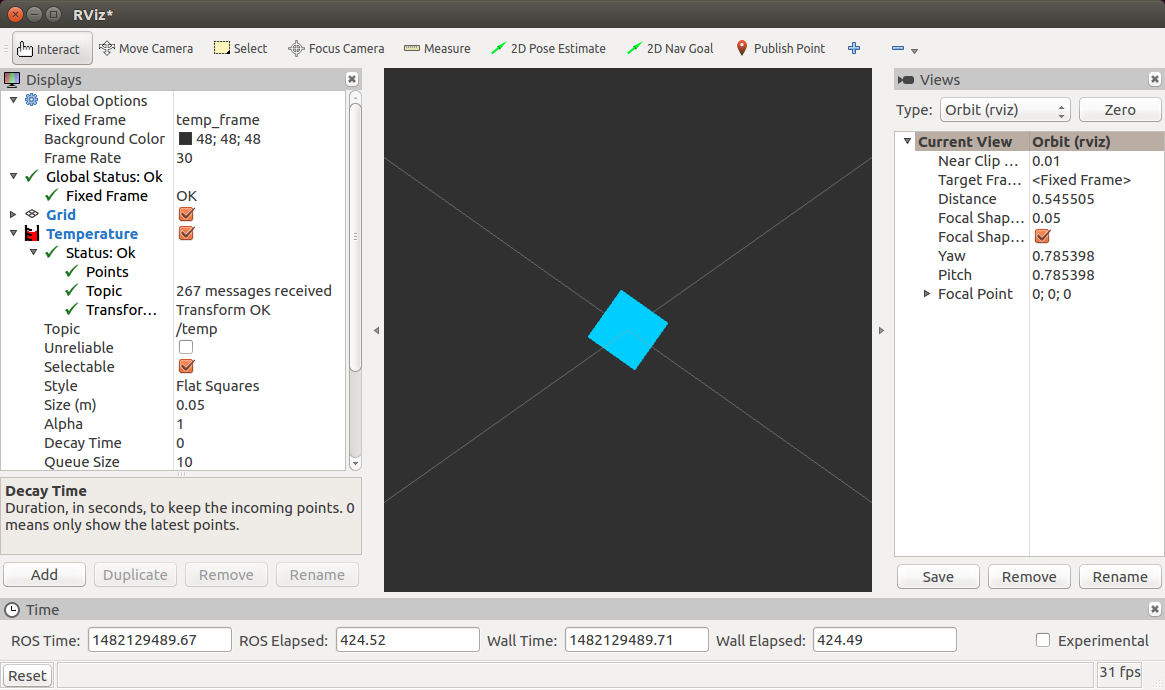
となってました。温度が変わると色が変わるようです(しらべてない)。
部屋の中であちこちに配置したセンサ群を視覚化するのに使えそうです。
このあたりPlotter2D使うと面白い、のかもしれません。
センサを持ってない場合
センサなにも持ってないよーという方はRaspberry Pi本体のCPU温度を測ってみるのも良いかもしれません。
Raspberry Piでの操作
$ cd catkin_ws/src
$ git clone https://github.com/atotto/vcgencmd.git --depth 1
$ roslaunch vcgencmd vcgencmd.launch
ちゃんと読めます:
$ rostopic echo /temp
header:
  seq: 1
  stamp:
    secs: 1482153508
    nsecs: 106316089
  frame_id: temp_frame
temperature: 46.2
variance: 0.0
ネットワーク帯域が許せば画像などの大きなデータを送ってみるのも面白いと思います。
以上!
-
Raspberry Piでアナログ値読むならArduino使うほうがらくなのでこうしました ↩