今度のsense hatゲームは、IMU(慣性測定ユニット)を試してみました。
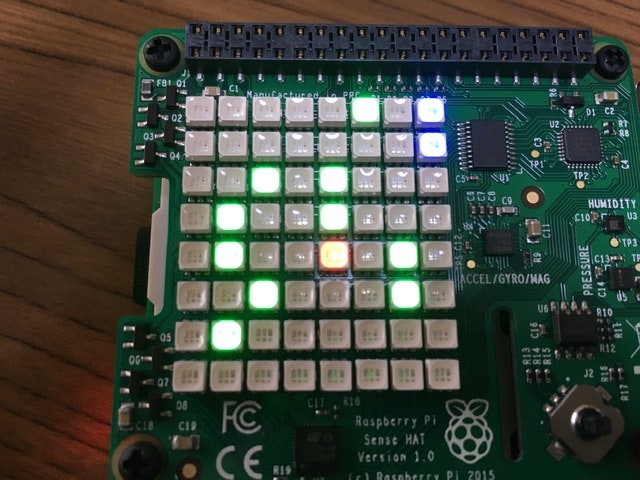
本体を傾けると、赤いピクセルが動きます。これで緑のピクセルをすべて取るとクリア。最右列の青いピクセルは、時間制限です。
ただ今回苦労したのは、IMUではなく、同時に初めて使ったPythonのスレッドです。
IMUの方は、ジョイスティックと同様、結構簡単でした。
メインループと並行して時間制限をカウントするスレッドを動かしてみましたが、相互の制御(ゲームクリアならスレッドを停止し、タイムオーバーしたらメインループを停止)の方法が分かりませんでした。
threading.Event()による制御を知り、解決できました。
from sense_hat import SenseHat, ACTION_PRESSED, ACTION_HELD, ACTION_RELEASED
from time import sleep
from random import randint
from copy import copy
import threading

sense = SenseHat()
sense.clear()

red = (255, 0, 0)
blue = (0, 0, 255)
yellow=(255,255,0)
purple=(128,0,128)
green=(0,255,0)
indigg=(75,0,130)
orange=(255,128,0)
black=[0,0,0]

sense.set_rotation(0)

ncol = 8
nrow = 8
col_max = ncol - 2
row_max = nrow - 1

event = threading.Event()

def setdisturbs(num_disturbs, initpos):
    disturbs = list()
    for i in range(0,num_disturbs):
        while True:
            candi = (randint(0, col_max), randint(0, row_max))
            if candi == initpos:
                continue

            duplicated = False
            for j in disturbs:
                if candi == j:
                    duplicated = True
                    break
            if duplicated:
                continue
            disturbs.append(candi)
            break

    color_disturb = green
    for i in disturbs:
        sense.set_pixel(i[0], i[1], color_disturb)

def timecount(interval):
    col = ncol - 1
    for row in range(row_max):
        sense.set_pixel(col, row, blue)
        if event.wait(interval):
            break
    event.set()

speed = 0.2
num_disturbs = 10
interval = 3

ballpos = (ncol/2, nrow/2)
sense.set_pixel(ballpos[0], ballpos[1], red)
ballvec = (0, 0)

setdisturbs(num_disturbs, ballpos)

t1 = threading.Thread(target=timecount, args=(interval,))
t1.start()

success = False
while True:
    if event.is_set():
        break

    acceleration = sense.get_accelerometer_raw()
    x = acceleration['x']
    y = acceleration['y']
    z = acceleration['z']

    x=int(round(x, 0))
    y=int(round(y, 0))
    z=int(round(z, 0))

    #print("x={0}, y={1}, z={2}".format(x, y, z))

    ballvec = (x, y)
    # if x  == -1: #left
    #   ballvec = (-1, 0)
    # elif y == -1: #top
    #   ballvec = (0, -1)
    # elif x == 1: #right
    #   ballvec = (1, 0)
    # elif y == 1: #bottom
    #   ballvec = (0, 1)
    # else:
    #   ballvec = (0, 0)

    sense.set_pixel(ballpos[0], ballpos[1], black)
    ballpos = (max(min(ballpos[0] + ballvec[0], col_max), 0), max(min(ballpos[1] + ballvec[1], row_max), 0))
    sense.set_pixel(ballpos[0], ballpos[1], red)

    #print("col={0}, row={1}".format(ballpos[0], ballpos[1]))
    num_colorpx = 0
    cur_px = sense.get_pixels()
    for px in cur_px:
        if px == [0,252,0]: # green
            num_colorpx = num_colorpx + 1
    if num_colorpx == 0:
        event.set()
        success = True
        break

    sleep(speed)

if success:
    sense.show_letter("O")
else:
    sense.show_letter("X")

sleep(2)
sense.clear()