Firebase :FireAuthを使って管理者ページを制限したいのだが
前々々回:Angularの新規プロジェクト作成手順 - material2とService Workerは使いたい
前々回:AngularプロジェクトにFirebaseを導入設定
前回:Angular + FirebaseでCRUD機能を実現
Firebaseの認証機能、基本的にユーザー、ビジターを認証するための機能みたいで、.htaccessを使ったベーシック認証のような単純な使い方できないのだろうか。
どうもFirebase Functionを使えばベーシック認証機能を使えるらしいが、Authenticationでもっと簡単にできるはずだ。
試行錯誤してできた、の備忘録。
Firebaseの設定
いきなり管理者ユーザーを追加してしまう。
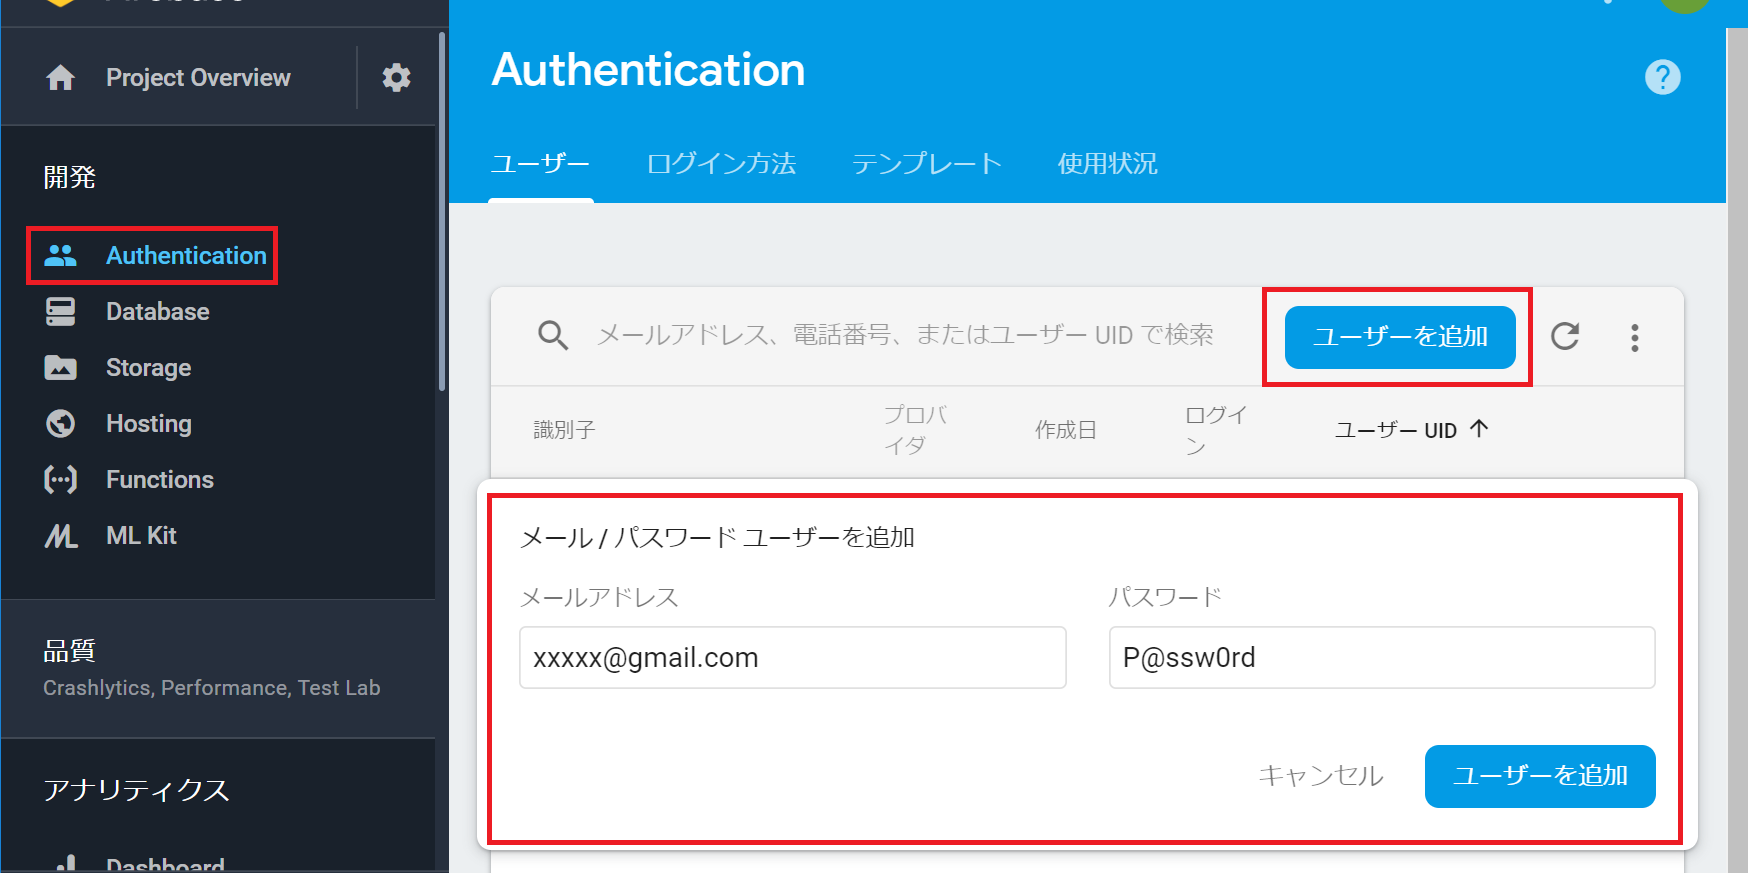
メール/パスワードのみ有効にする。
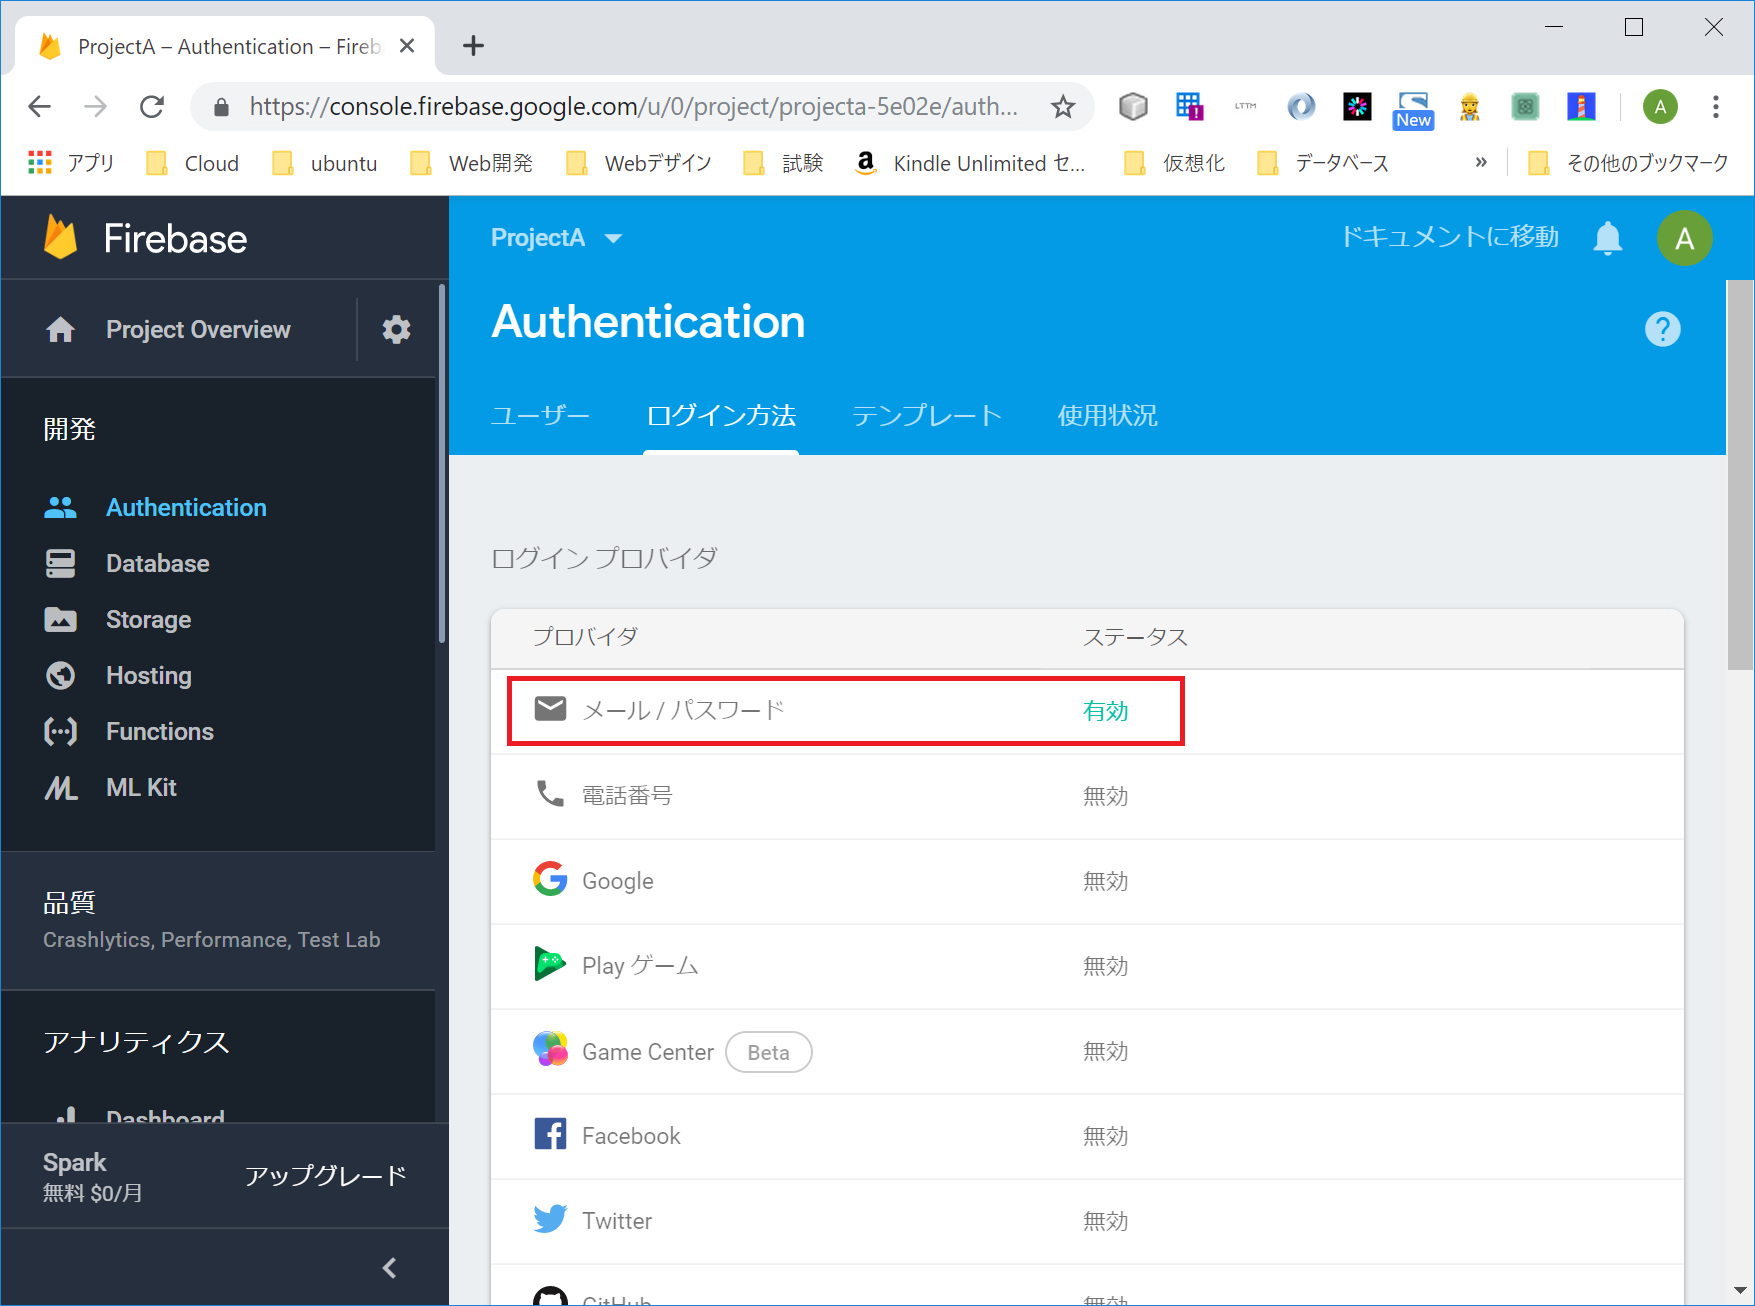
そうしたら次にログイン画面を作成する。
loginコンポーネントを作成
C:\ProjectA>ng g c component/login
そしてapp.route.tsにルート追加
初期画面がログイン画面になるようにする。
app.route.ts
//====================
// ルータ定義
//====================

import {Routes} from "@angular/router";
import {RootComponent} from "./component/root/root.component";
import { HomeComponent } from './component/home/home.component';
import { LoginComponent} from './component/login/login.component';

//urlパスと表示するコンポーネントの関連づけ
export const AppRoutes: Routes = [
    {path: "", component: LoginComponent}, // 変更
    {path: "login", component: LoginComponent},  // 追加
    {path: "home", component: HomeComponent},
];
で、login.component.htmlにフォーム画面を、、、の前に、FirebaseのAuthenticationサービスを作っておこう。
C:\ProjectA>ng g s service/auth.service
auth.service.tsを開いて以下のように編集
auth.service.ts
import { Injectable } from '@angular/core';
import { Router } from '@angular/router';
import { AngularFireAuth } from '@angular/fire/auth';
import { User } from 'firebase';


@Injectable({
  providedIn: 'root'
})
export class AuthService {
  user: User;

  constructor(
    private router: Router,
    private afAuth: AngularFireAuth,
  ) {
    this.afAuth.authState.subscribe(user => {
      if (user) {
        this.user = user;
        localStorage.setItem('user', JSON.stringify(this.user));
      } else {
        localStorage.setItem('user', null);
      }
    })
   }

   async login(email: string, password: string) {
    try {
        await  this.afAuth.auth.signInWithEmailAndPassword(email, password)
        this.router.navigate(['home']);
      } catch (e) {
        alert("Error!" + e.message);
      }
    }

    async logout(){
      await this.afAuth.auth.signOut();
      localStorage.removeItem('user');
      this.router.navigate(['/']);
    }

    get isLoggedIn(): boolean {
      const user = JSON.parse(localStorage.getItem('user'));
      return user !== null;
    }


}
認証ステートはafAuth.authState.subscribeだけで簡単に取得。ここではブラウザのlocalstrageにuser情報を格納。
あとは見ての通り。signinメソッドはない。(新しくユーザを追加する必要はないので)。
では、ログイン画面を。
login.component.html
<div class="myContainerMain">
 <div style="yokonarabi">

  <mat-form-field>
    <input matInput type="email" placeholder="Email" #userEmail required autofocus>
  </mat-form-field>

  <mat-form-field>
    <input matInput placeholder="Password" #userPassword required>
  </mat-form-field>


  <mat-form-field>
    <button mat-flat-button color="accent" (click)="authService.login(userEmail.value, userPassword.value)">Login</button>
  </mat-form-field>

 </div>

</div>
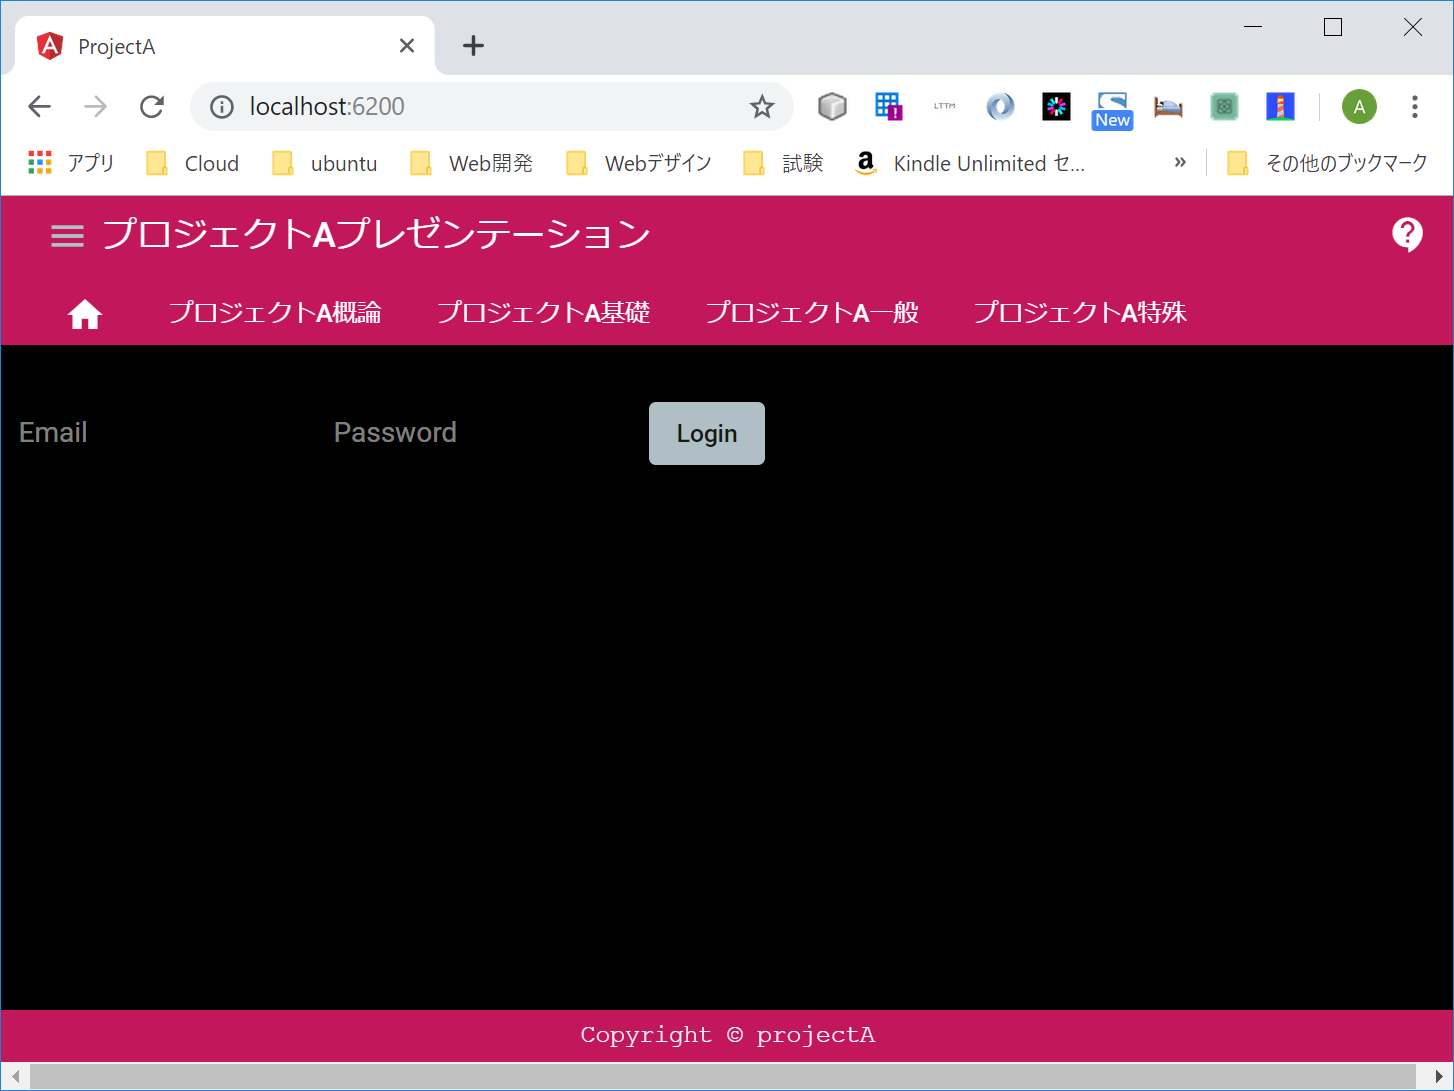
画面はこう。
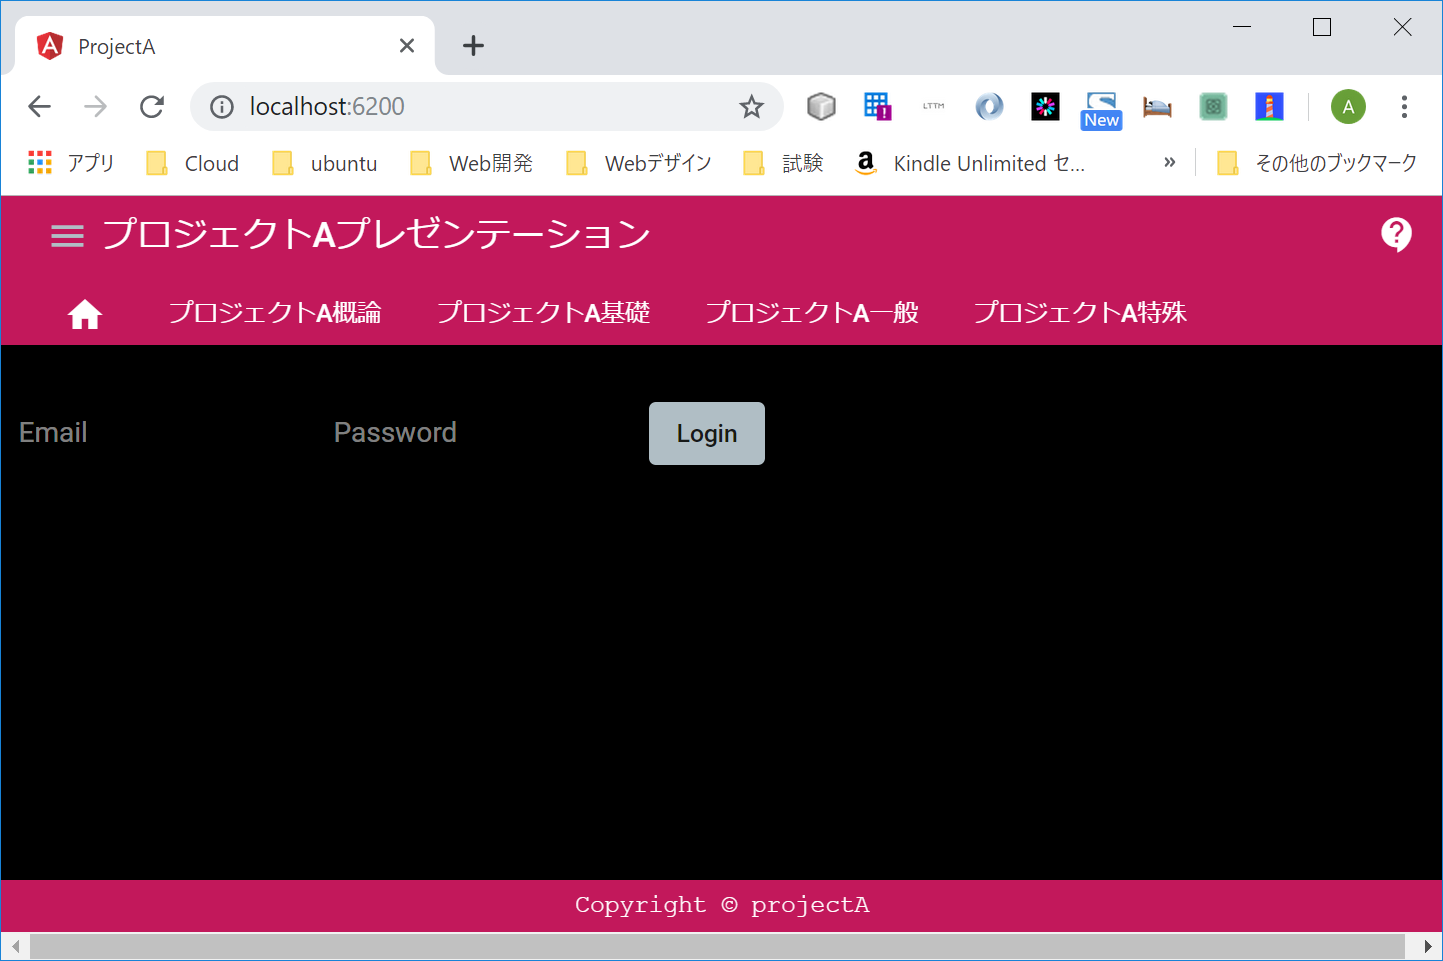
ボタンのクリックでauth.serviceのloginメソッドを呼び出してるだけ。
(click)="authService.login(userEmail.value, userPassword.value)"
auth.serviceを呼び出せるように、login.component.tsでインポートしておく。
login.component.ts
import { Component, OnInit } from '@angular/core';
import { AuthService } from  '../../service/auth.service'; // 追加

@Component({
  selector: 'app-login',
  templateUrl: './login.component.html',
  styleUrls: ['../../common.css','./login.component.css']
})
export class LoginComponent implements OnInit {

  constructor(private authService: AuthService) { }  // 追加

  ngOnInit() {
  }

}
ログアウトボタンを追加
ログインするとhome画面に飛ぶようになっている。
auth.service.ts
   async login(email: string, password: string) {
    try {
        await  this.afAuth.auth.signInWithEmailAndPassword(email, password)
        this.router.navigate(['home']); // ← ココ
      } catch (e) {
        alert("Error!" + e.message);
      }
なのでhome.component.htmlにログアウトボタンを追加する。
home.component.html
…上略
    <div class="yokonarabi">
      <button mat-flat-button color="accent" (click)="authService.logout()">Logout</button>
    </div>
authService.logout()を呼び出せるよう、home.component.tsにもauth.serviceをインポートしておく。
home.component.ts
import { Component, OnInit } from '@angular/core';
import { AngularFirestore, AngularFirestoreCollection } from '@angular/fire/firestore';
import { Comments } from '../../class/comments';  // commentsデータタイプインターフェース
import { Observable } from 'rxjs'; // 正式名称「Reactive Extensions for JavaScript」
import { FormBuilder,FormControl,FormGroup,Validators } from '@angular/forms';
import { map } from "rxjs/operators";
import { AuthService } from  '../../service/auth.service';   // 追加

@Component({
  selector: 'app-home',
  templateUrl: './home.component.html',
  styleUrls: ['../../common.css','./home.component.css']
})
export class HomeComponent implements OnInit {


  commentsRef: AngularFirestoreCollection<Comments>;
  comments: Observable<Comments[]>;


  constructor(private db: AngularFirestore, private fb: FormBuilder,private authService: AuthService) {      // 追加

    this.commentsRef = this.db.collection<Comments>('comments') //, ref => ref.where('initial', '==', this.SearchByInitial))
    this.comments = this.commentsRef.snapshotChanges().pipe
      (map(actions => {
      return actions.map(action => {
        const data = action.payload.doc.data() as Comments;
        const id = action.payload.doc.id;
        return { id, ...data };
        });
      }));
  }
…以下略…
ログインしてみる
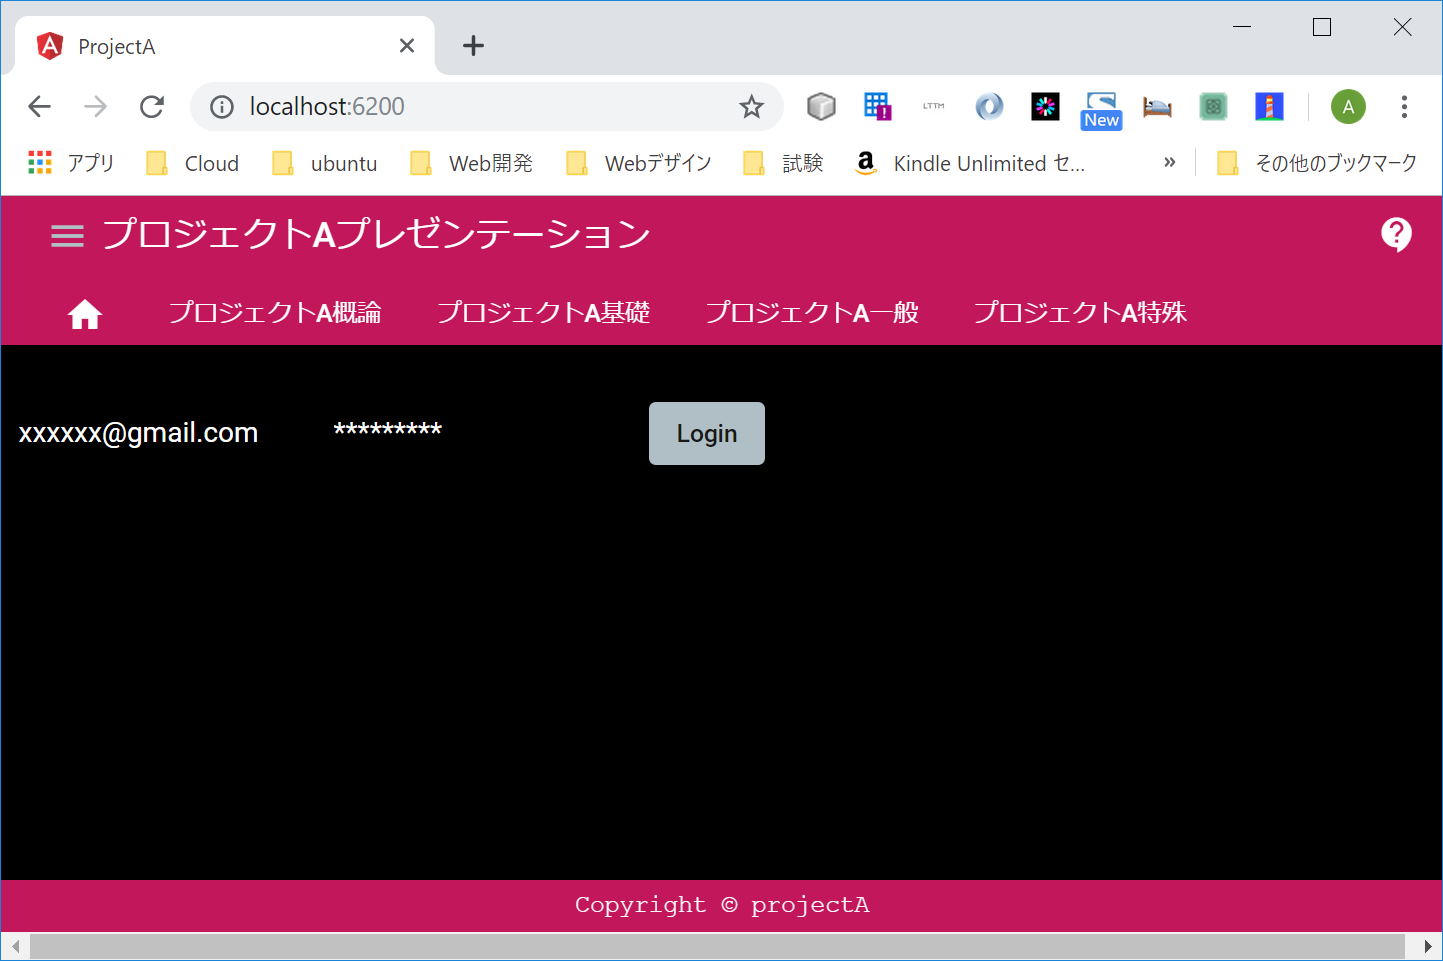
成功すればhome画面に飛んでログアウトボタンが表示される。
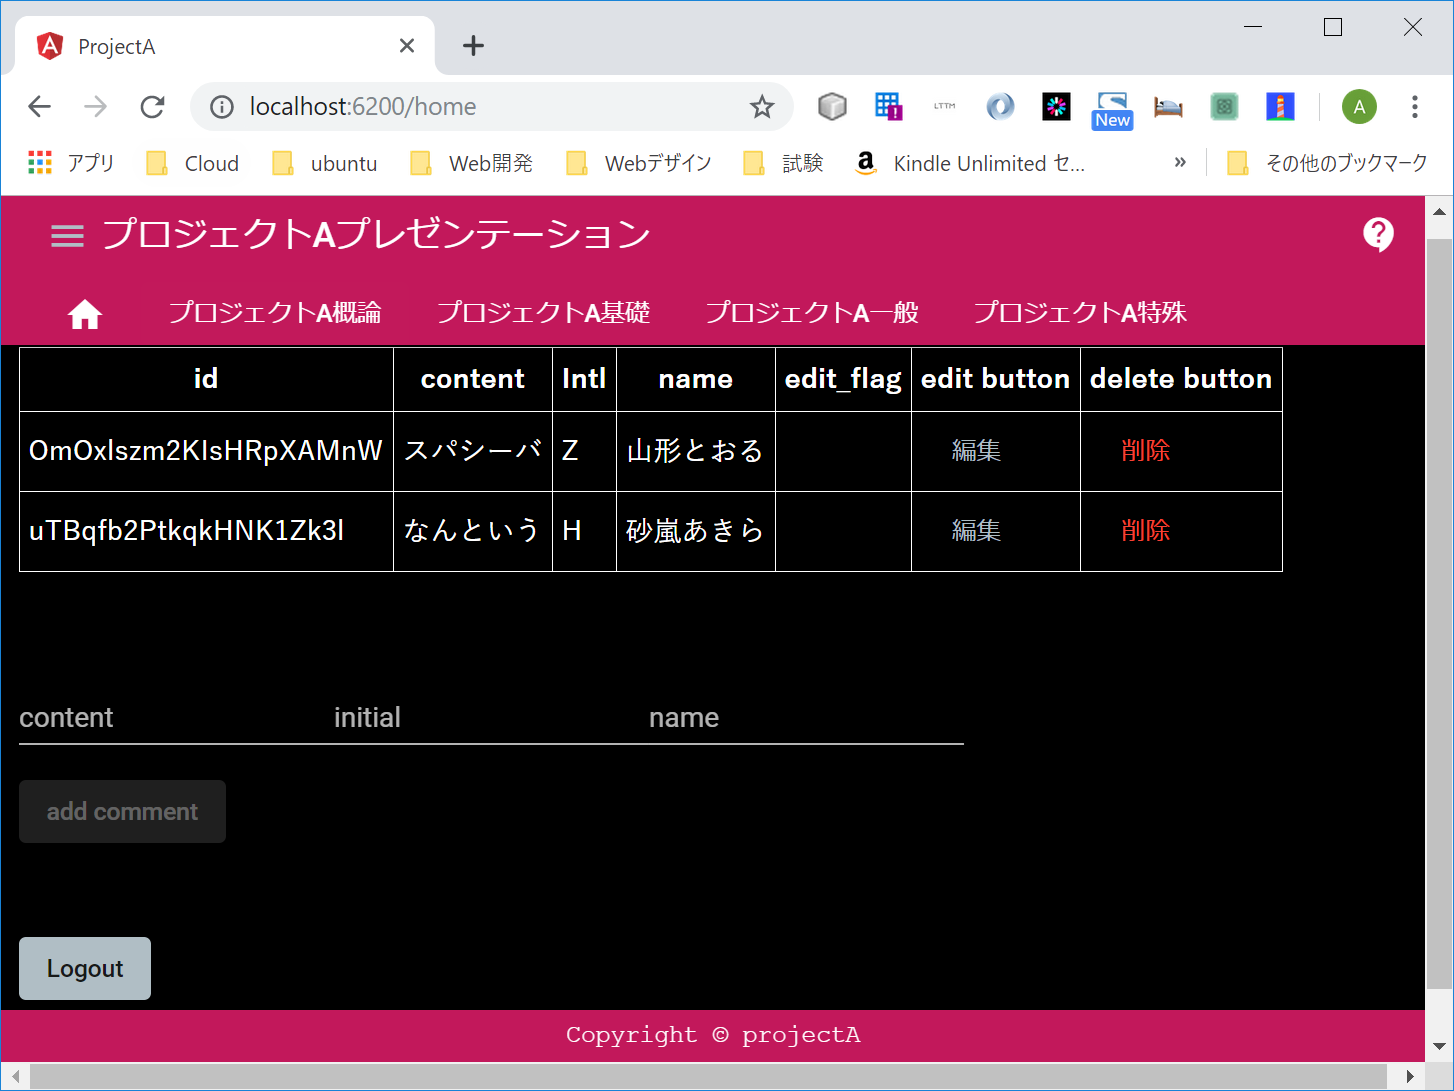
ログアウトボタンをクリックすると、ルート画面、すなわちログイン画面に戻るようになっている。
auth.service.ts
    async logout(){
      await this.afAuth.auth.signOut();
      localStorage.removeItem('user');
      this.router.navigate(['/']); // ← ココ
    }
add.route.ts
//urlパスと表示するコンポーネントの関連づけ
export const AppRoutes: Routes = [
    {path: "", component: LoginComponent},  // ← ココ
    {path: "login", component: LoginComponent},
    {path: "home", component: HomeComponent, canActivate: [AdminGuard]},
];
戻った。
しかし・・・・
今のままでは別にログインしなくとも、URLパスを知っていれば/homeに行けてしまう。

Router Guardを利用する
それを防ぐために、guardというものを作成する。
C:\projectA>ng g guard component/admin

選ぶオプションはこうしておく。詳細は調べて。
admin.guard.tsが生成されるので、以下のように編集する。
admin.guard.ts
import { Injectable } from '@angular/core';
import { CanActivate, ActivatedRouteSnapshot, RouterStateSnapshot } from '@angular/router';
import { Observable } from 'rxjs';

import { AuthService } from './auth/auth.service'; // 追加

@Injectable({
  providedIn: 'root'
})
export class AdminGuard implements CanActivate {

  constructor(private authService: AuthService){}

  canActivate(
    next: ActivatedRouteSnapshot,
    state: RouterStateSnapshot): Observable<boolean> | Promise<boolean> | boolean {
      return this.authService.isLoggedIn; // 変更
  }
}
canActivate()メソッドが、authServiceのisLoggedInメソッドを呼び出せるようにしただけ。
そうしたら、app.route.tsを開いて、ガードしたいURLにcanActivate: [AdminGuard]を追加する。
app.route.ts
//====================
// ルータ定義
//====================

import {Routes} from "@angular/router";
import {RootComponent} from "./component/root/root.component";
import { HomeComponent } from './component/home/home.component';
import { LoginComponent} from './component/login/login.component';
import { AdminGuard } from  './component/admin.guard';         // 追加

//urlパスと表示するコンポーネントの関連づけ
export const AppRoutes: Routes = [
    {path: "", component: LoginComponent},
    {path: "login", component: LoginComponent},
    {path: "home", component: HomeComponent, canActivate: [AdminGuard]},  // 変更
];
これでOK!
UrlTreeを導入
あとで知ったが、Angular6まではguardはbooleanしか返してくれなかった(つまりログインしてないとなにも表示されない)。でも今はUrlTreeという変数を返してくれる。その中にはRouteステートが入っている。
なのでadmin.guard.tsを編集してログイン失敗時に任意のパスへリダイレクトするようにできる。
admin.guard.ts
import { Injectable } from '@angular/core';
import { CanActivate, ActivatedRouteSnapshot, Router, RouterStateSnapshot, UrlTree } from '@angular/router';  // 変更 RouterとUrlTreeを追加した
import { Observable } from 'rxjs';
import { AuthService } from  '../service/auth.service';

@Injectable({
  providedIn: 'root'
})
export class AdminGuard implements CanActivate {

  constructor(private authService: AuthService, private router: Router){}

  canActivate(
    next: ActivatedRouteSnapshot,
    state: RouterStateSnapshot): Observable<boolean> | Promise<boolean> | boolean | UrlTree {         // 変更 UrlTreeを追加した
      if(this.authService.isLoggedIn){
        return true;
      }
      else{
        return this.router.parseUrl("login");  // 追加
      }
  }
}
authService.isLoggedInがFalseなら、ログインページへ飛ぶ。
直接/homeをURLにタイプしてみてもやはりログインページへ飛ぶ
Firestoreのルールを変更
いちばん大切で複雑な記述。
詳細はのちのち学ぼう。
とりあえず…
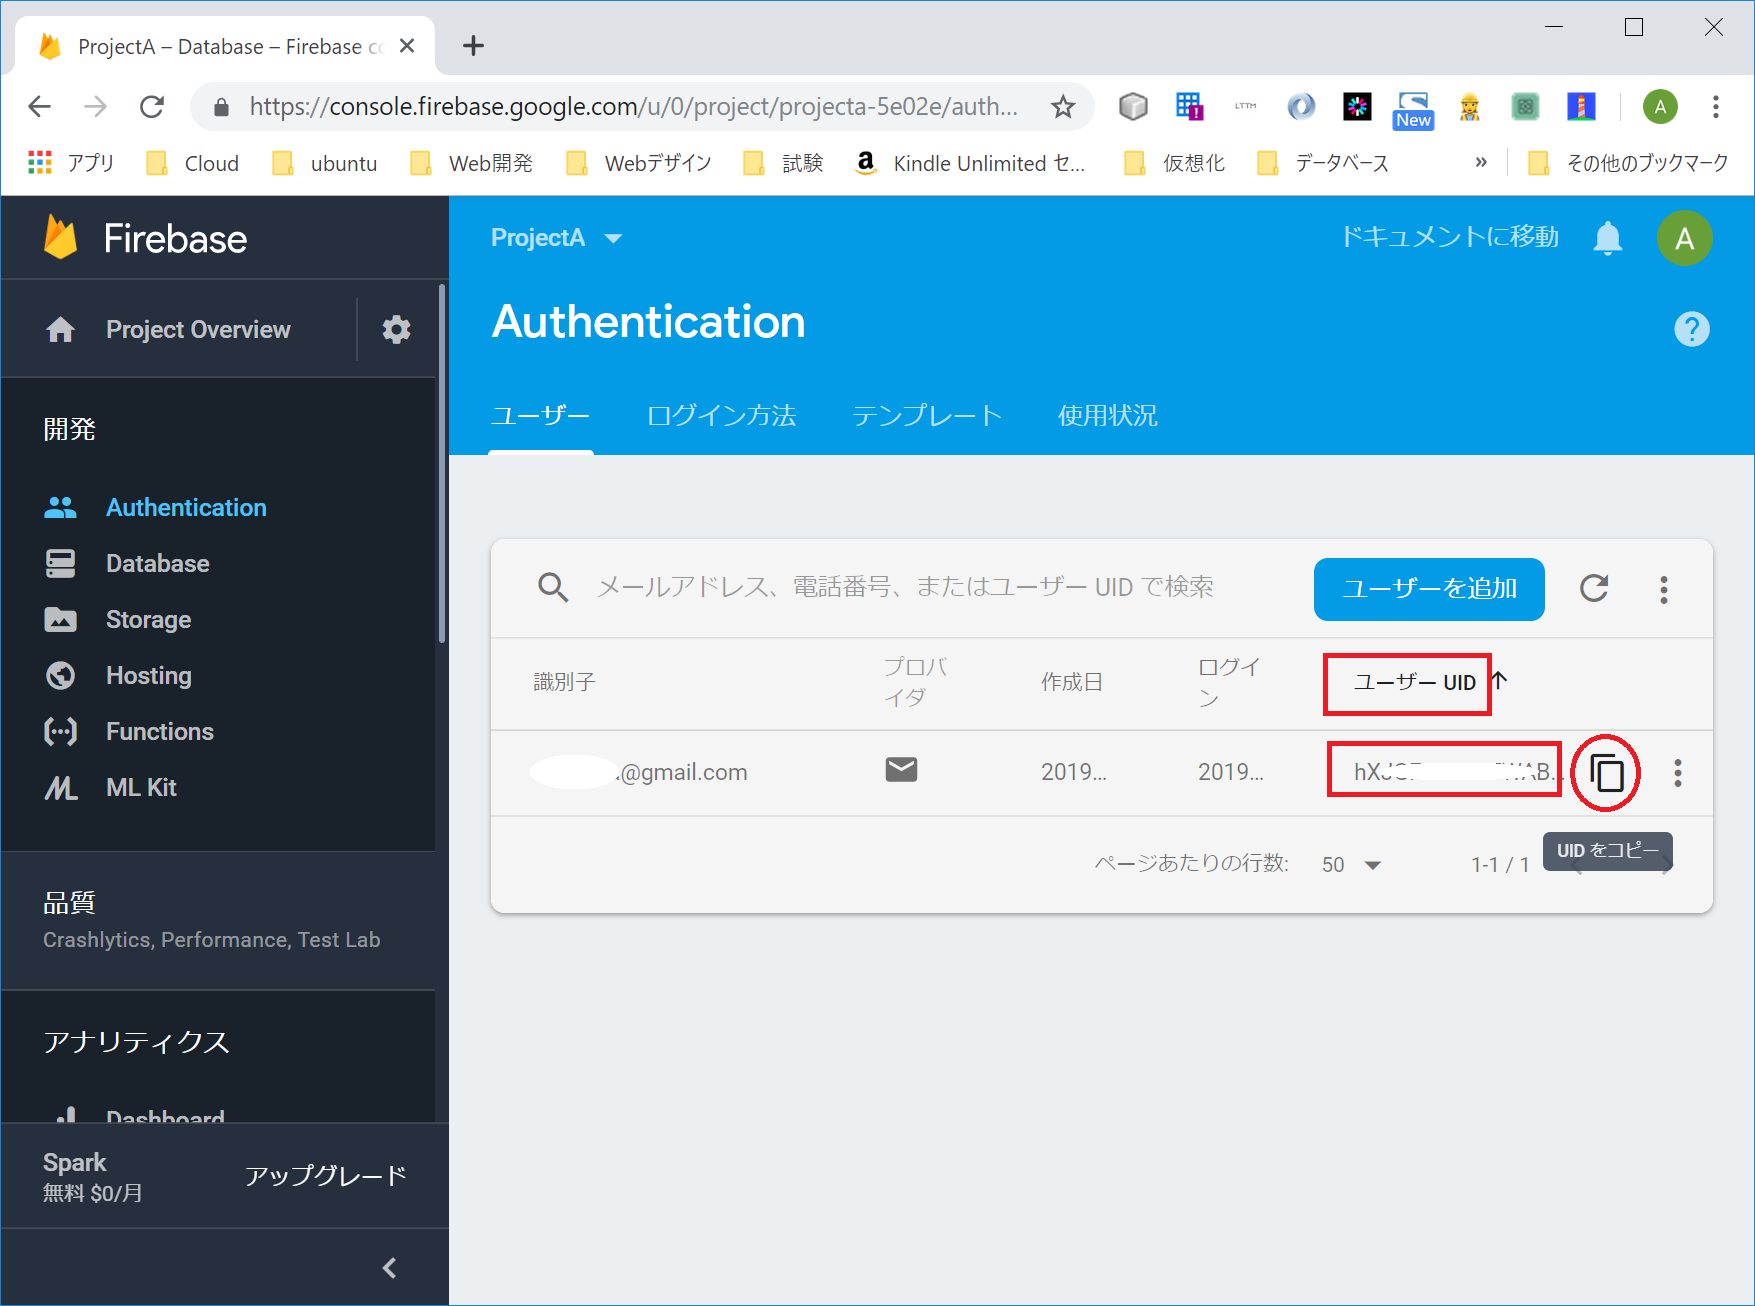
Authenticationに行って、追加した自分のアカウントのUIDをコピー
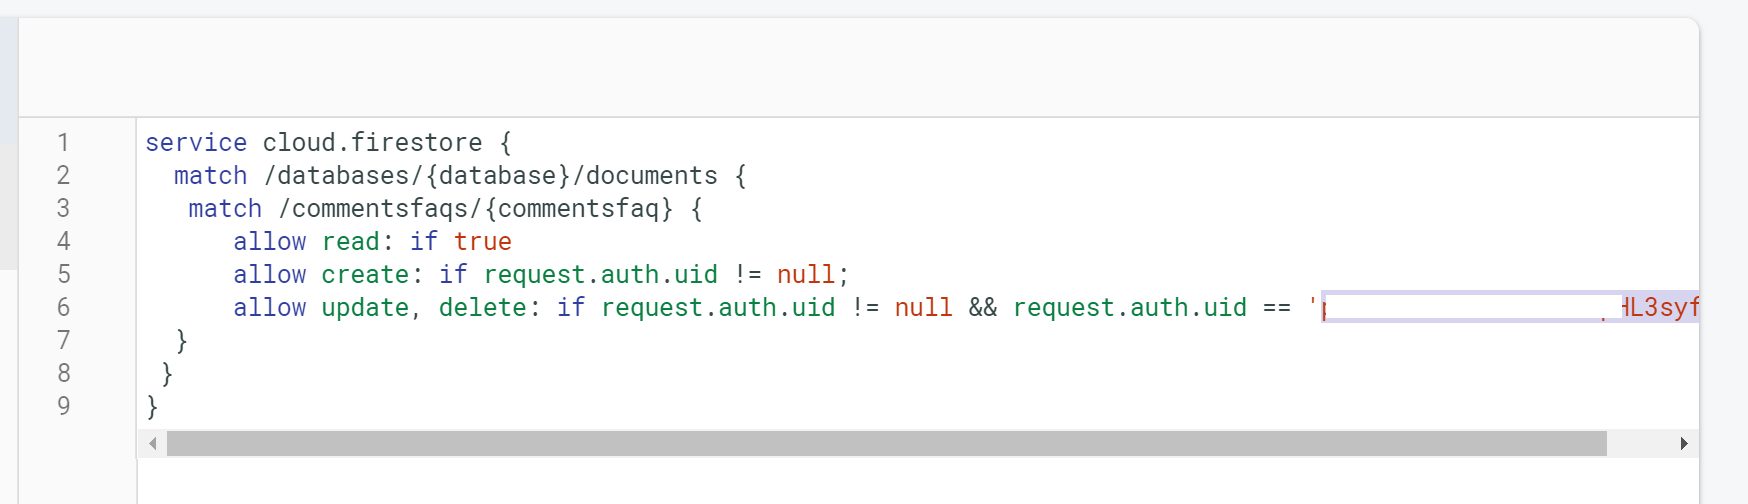
Databaseのルールへ行って、こんな感じで。
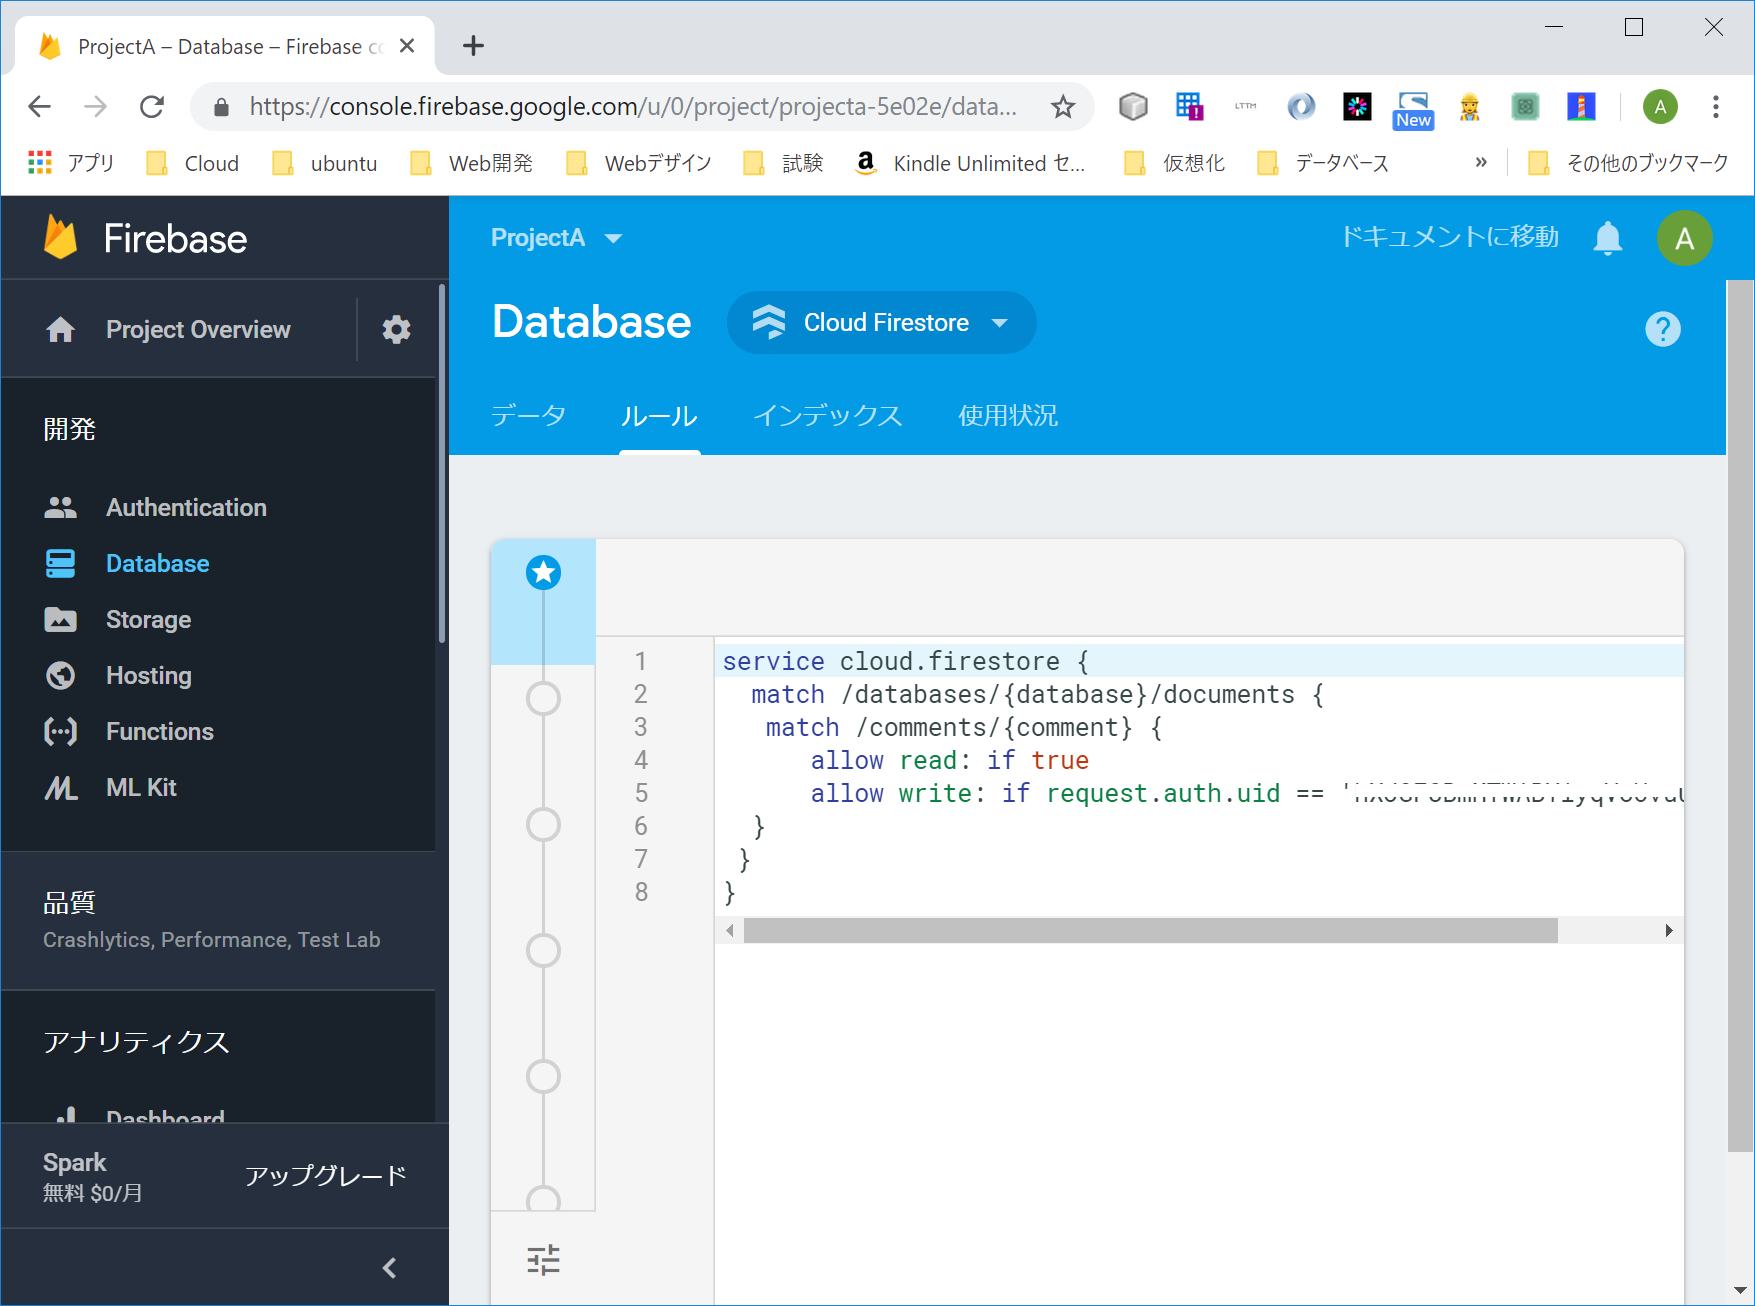
commentsコレクションの、readはすべて許し、writeは管理人UIDのみ許す、という設定。
/comments/{comment} でcommentsコレクションのすべて、というワイルドカード
以下の設定だと「誰でも読める、認証された者は誰でも書ける、更新と削除は管理者だけ、という設定
以上。
Githubはこちら。