準備
下記のサイトを参考にスタンダードなHolo開発環境を整えてください
参考サイト
手順
1. Hand Interaction Touchを使用する方法(タッチイベントのみほしい場合)
2. Interactableを使用する方法(タッチイベント以外も欲しい場合)
-
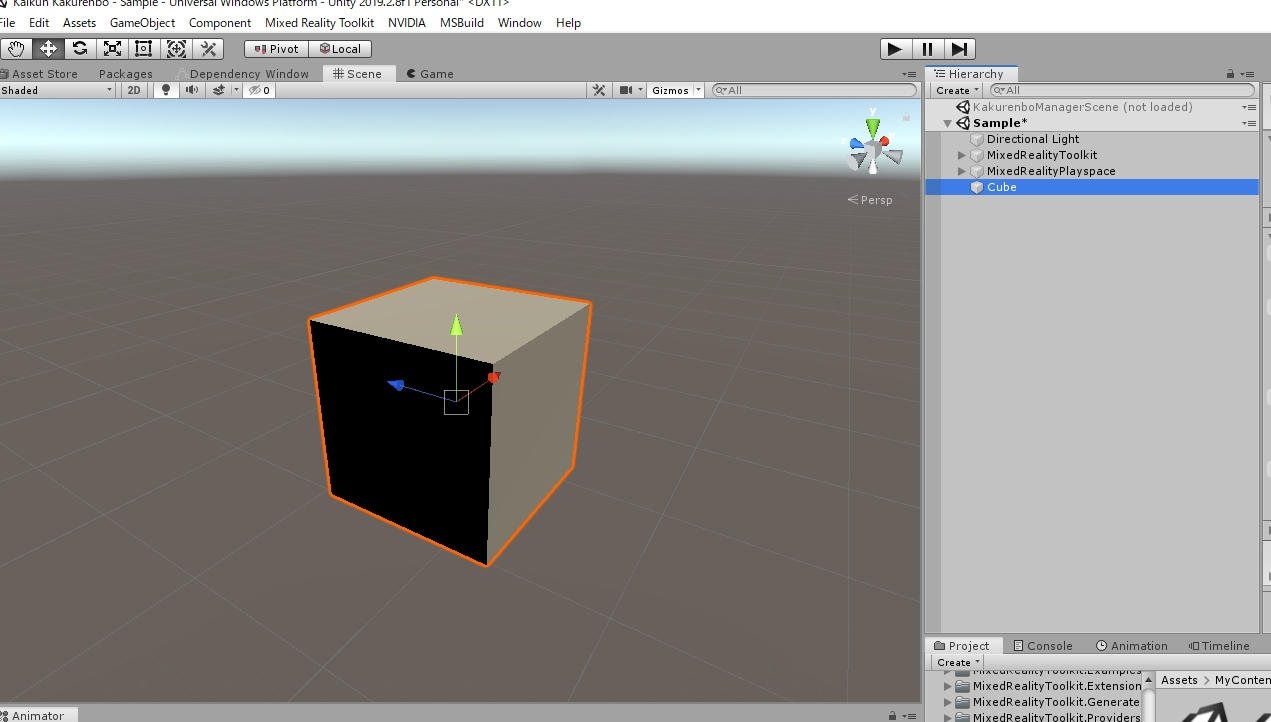
タッチしたいオブジェクトをSceneに配置
-
Colliderをセットする(セットされていない場合)
-
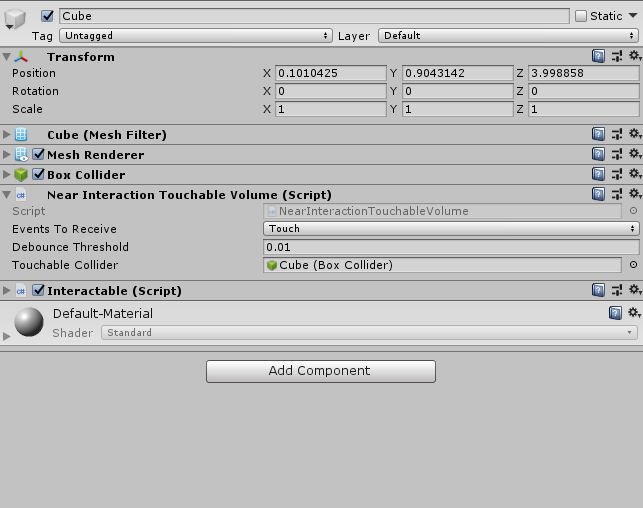
Near Interaction Touchable Volumeコンポーネントを追加する
※この段階でTochable ColliderにColliderがセットされていない場合、先ほど追加したColliderをセットするか、RemoveComponentしてもう一度セットしてみてください。 -
Interactableコンポーネントを追加する -
Statusを作成する
-
Profilesを作成する
-
EventReceiverを設定する
※6, 7はどちらでもいいです。
6のほうが色を変えたり同時に複数行えるので管理しやすいと思います。
7はタッチイベントの情報だけ設定できるので便利です。
では順番に説明します。
1 タッチしたいオブジェクトをSceneに配置
2 Colliderをセットする(セットされていない場合)
CubeにはColliderが設定されているので特に作業は必要ありません
3 Near Interaction Touchable Volumeコンポーネントを追加する
公式の文章を読むとこれを追加すことでタッチイベントの対象になるようです。
It is generally recommended to utilize the DefaultInteractableStates when creating Interactable components.
However, there are 17 Interactable states available that can be used to drive themes, though some are meant to be driven by other components. Here is a list of those with built-in functionality.
- Visited: the Interactable has been clicked.
- Toggled: The button is in a toggled state or Dimension index is an odd number.
- Gesture: The hand or controller was pressed and has moved from the original position.
- VoiceCommand: A speech command was used to trigger the Interactable.
- PhysicalTouch: A touch input is currently detected, use NearInteractionTouchable to enable.
- Grab: A hand is currently grabbing in the bounds of the object, use NearInteractionGrabbable to enable
4 Interactableコンポーネントを追加する
5 Statusを作成する
Hololens2ではInteractionを使用する際に、どのinput要素の信号を受け取るようにするかの設定が必要になります。
HoloLens1ではReceiverという機能を使うことで、AirTapの信号などを一括して受け取っていたかと思いますが、
Holo2はstatusという独自定義ファイルを使用します。
handに関する情報を受け取るには、physicaktouchという項目を追加する必要があります。
- focus
- pressed
- targeted
- interactive
- observationTargeted
- observation
- disabled
- visited
- toggled
- gesture
- gesture max
- collision
- voice command
- physical touch
- grab
- custom
以上の項目から、レシーバーとして受け取れます。
それぞれの状態に遷移した際にアクションを起こせるようになるので、あれ?動かない?
と思ったらここの設定をせていない可能性が高いです。
画像(準備中)
6 Profilesを設定する
themeを設定することで、先ほどstatusで設定した項目の状態になった際のオブジェクトの状態を定義することができます。
ここで便利なのが、対象のゲームオブジェクトは自身ではなく、他のGameObjectも設定することができるので、ボタンなどにこのINTERACTIVEの設定を行い状態の変化は別のものを使用するようなことも可能になります。
themeには下記のようにたくさんの項目の状態を遷移させることができます!
※準備中
7 ReceiverEventを追加する
UIやUX周りのイベントはたいがいProfileで完結することができるのですが、
システム的なことを行いたい(UnityEventで発火させることにはなるが)場合は、EventReceiverを追加することで、対応するStatusを設定していればイベントの発火を行うことができます。
かなり重要なことなので二回いいますが、
Statusを設定しないとイベントの値は受け取れません!(戒め)

