NativeScript
「ハイブリッドアプリ」
何と素晴らしい響きでしょう...![]()
弊社でもそんな言葉に魅了された技術者が跡を絶ちません。
そのうち、
は、それらを用いたサービスが既に世にでております。
そこで今回はこれら以外のハイブリッドアプリフレームワーク
NativeScriptでHelloWorldまでをやってみたいと思います![]()
インストール
環境はMacです
Node.js
兎にも角にもNode.jsが無いと始まらない![]()
![]()
-
Node.jsのバージョン確認
本日付けでのバージョンは以下$ node --version v6.9.2 # (安定版) v7.2.1 # (最新版)古かったら以下のリンク先からどちらかインストールしておきましょう
https://nodejs.org/en/
NativeScript CLI
ド本命。![]()
$ sudo npm install -g nativescript

# ~ 省略 ~

Allow the script to install Homebrew?
(Y)es/(N)o
Y
Installing Homebrew...
# ~ 省略 ~
==> Installation successful!

Allow the script to install Java SE Development Kit?
(Y)es/(N)o
Y
Installing the Java SE Development Kit... This might take some time, please, be patient. (You will be prompted for your password)
# ~ 省略 ~
🍺  java was successfully installed!

Allow the script to install Android SDK?
Note that if you type all you won't be prompted for subsequent installations
(Y)es/(N)o/(A)ll
A
Installing Android SDK
# ~ 省略 ~

Do you want to install Android emulator? (y/n)
y
Do you want to install HAXM (Hardware accelerated Android emulator)? (y/n)
y
# ~ 省略 ~
色々省略しましたが、HomebrewとかJavaとかAndroid SDKとかも一緒にインストールするかとか聞いてくれる。
親切...![]()
各プラットフォームとの依存関係の解決
NativeScript CLIのインストール時にやって無ければ...
ちなみに僕は考える事をヤメたので全部「Yes![]() 」
」![]()
- Mac
$ ruby -e "$(curl -fsSL https://www.nativescript.org/setup/mac)"
- Windows
@powershell -NoProfile -ExecutionPolicy Bypass -Command "iex ((new-object net.webclient).DownloadString('https://www.nativescript.org/setup/win'))"

#  Intel HAXMはダウンロードされるが手動でインストーラを実行する必要があるとの事
%ANDROID_HOME%\extras\intel\Hardware_Accelerated_Execution_Manager\intelhaxm-android.exe
インストールが成功したかの検証
大事っすよね...検証って...![]()
$ tns doctor

# これが出ればOK!!
No issues were detected.
ちなみに、検証中に表示されるメッセージについて
Verifying CocoaPods. This may take some time, please be patient..
> 訳) CocoaPodの確認。これには時間がかかることがあります。
> (本当に結構時間掛かった...15分くらい:question::question:)

# プロジェクトの追加

### 作成コマンドを実行

確固たる意志で「HelloWorld」プロジェクトを作ります...:bangbang:

```bash
$ tns create HelloWorld --ng
プラットフォームの追加
# iOS
$ tns platform add ios

# Android
## Androidはパスを通しておく
$ export ANDROID_HOME=/usr/local/opt/android-sdk
$ export JAVA_HOME=/Library/Java/Home
## *パスを通しておかないと下記エラー
The ANDROID_HOME environment variable is not set or it points to a non-existent directory. You will not be able to perform any build-related operations for Android.

$ tns platform add android
とにかく動かしてみる、まずは
起動コマンドにはいくつか種類がありますが、
$ tns livesync ios --emulator --watch
開発時はこのコマンドが多いと思います。
The tns livesync command updates your app by transferring the updated source code to the device or simulator. By adding the --watch flag, the livesync command additionally watches the files in your NativeScript project. Whenever one of those files changes, the command detects the update, and patches your app with the updated code.
訳)
tns livesyncコマンドは、更新されたソースコードをデバイスまたはシミュレータに転送することによって、アプリケーションを更新します。--watchフラグを追加することによって、livesyncコマンドは、NativeScriptプロジェクト内のファイルを追加で監視します。これらのファイルのいずれかが変更されると、コマンドは更新を検出し、更新されたコードでアプリケーションを修正します。
との事。
実際に動かしてみた画面がこちら
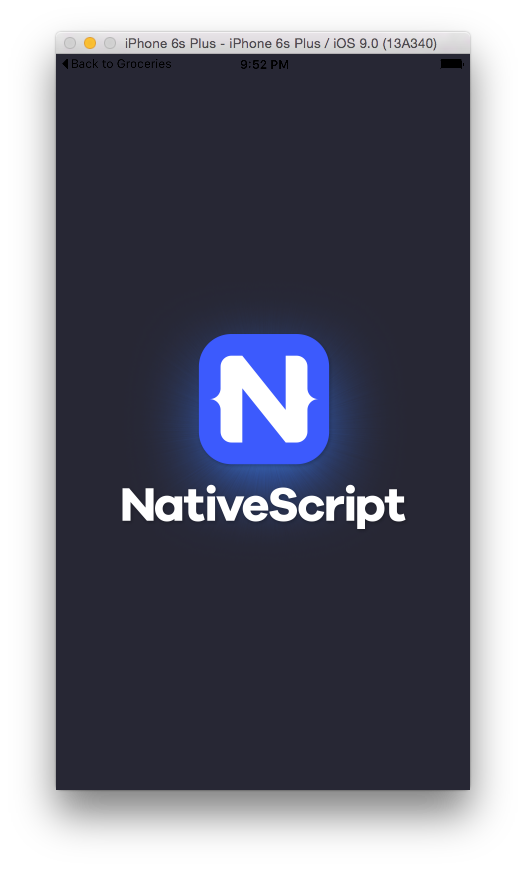
カ、カ〜ッコイイ![]()
![]()
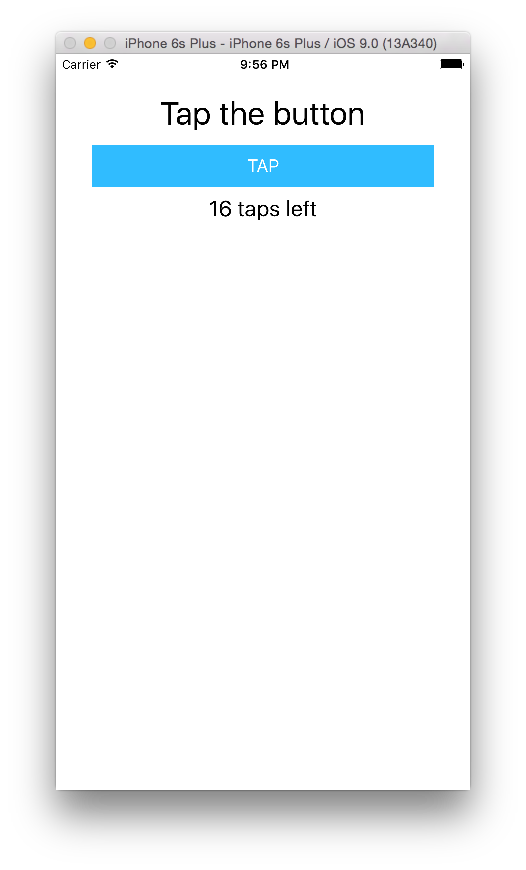
16回「Tap」をタップすると
「Hoorraaay! You are ready to start building!」
訳) ほれ〜ぃ!あなたはビルドを開始する準備ができています!
と、ドヤられる(![]() )
)
アプリケーション
アプリケーションのパスは
./HelloWorld/app
その中で、メインになるのがapp.component.tsというファイル
中を見てみると
import { Component } from "@angular/core";

@Component({
    selector: "my-app",
    templateUrl: "app.component.html",
})
export class AppComponent {
    public counter: number = 16;

    public get message(): string {
        if (this.counter > 0) {
            return this.counter + " taps left";
        } else {
            return "Hoorraaay! \nYou are ready to start building!";
        }
    }

    public onTap() {
        this.counter--;
    }
}
となっています。
templateUrlという所でhtmlファイルが宣言されており、
app.component.tsと同階層にapp.component.htmlがありました。
<StackLayout class="p-20">
    <Label text="Tap the button" class="h1 text-center"></Label>
    <Button text="TAP" (tap)="onTap()" class="btn btn-primary btn-active"></Button>
    <Label [text]="message" class="h2 text-center" textWrap="true"></Label>
</StackLayout>
中身を見ると分かる通り、最初は
- 処理
app.component.ts - 表示
app.component.html
という作りになっていますね
Hello World
いよいよ大詰め...![]()
app.component.htmlを以下の様に修正します
<StackLayout class="p-20">
    <!-- ↓ 追加 ↓ -->
    <Label text="Hello World" class="h1 text-center"></Label>
    <!-- ↑ 追加 ↑ -->
    <Label text="Tap the button" class="h1 text-center"></Label>
    <Button text="TAP" (tap)="onTap()" class="btn btn-primary btn-active"></Button>
    <Label [text]="message" class="h2 text-center" textWrap="true"></Label>
</StackLayout>
livesync及び--watchを使って起動している場合は、
編集してsaveしたらすぐにアプリケーションが立ち上げ直されます
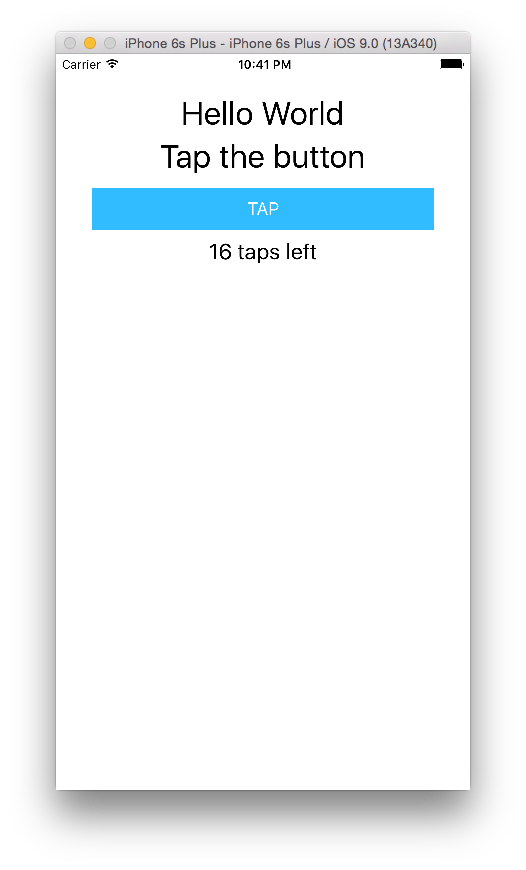
やったーーー![]()
![]()
Gitのサンプルソース
公式が公開しているサンプルソースはこちらです
まとめ
他のハイブリッドアプリフレームワークと同様、インストールはそんなに躓かないと思います。
ネイティブアプリ開発が目的のため、個人的にはcordovaの方が自由度が高くて良いなと感じました。
ただ、iOS・Androidのネイティブアプリのコードをインポート出来たり、
ネイティブアプリに特化してるが故に、ネイティブのAPIも基本的に使えるとの事なので、
アプリ開発の一つの選択肢としては良いのではないでしょうか![]()
(後はスプラッシュ画面がカッコイイ...)