これまでのお話
前回の記事はこちら。
Azure Functionsを使ってサーバレスアーキテクチャのTwitter botサービスを作ろうとしたらPowerShellスクリプトの実行ポリシーでドはまりした。今回からはいよいよ開発に着手します、たぶん。
Azure Functionsのローカル・デバッグ実行でdotnet.exeが見つからない問題
前回の記事でAzure Functionsのローカル実行でできるようになったので試してみます。
dotnet.exeが見つからない
F5を押下してデバッグ実行したところ、次の表示がされました。よく読むとdotnet.exeが見つからないと言っています。
> Executing task: .venv\Scripts\python -m pip install -r requirements.txt <

Requirement already satisfied: azure-functions in simple-twitter-bot\.venv\lib\site-packages (from -r requirements.txt (line 5)) (1.7.0)
WARNING: You are using pip version 20.1.1; however, version 21.1.2 is available.
You should consider upgrading via the 'simple-twitter-bot\.venv\Scripts\python.exe -m pip install --upgrade pip' command.

Terminal will be reused by tasks, press any key to close it.

> Executing task: .venv\Scripts\activate ; func host start <

Found Python version 3.7.9 (python3).

Azure Functions Core Tools
Core Tools Version:       3.0.3477 Commit hash: 5fbb9a76fc00e4168f2cc90d6ff0afe5373afc6d  (64-bit)
Function Runtime Version: 3.0.15584.0

[2021-06-15T15:10:42.877Z] File 'C:\Program Files\dotnet\dotnet.exe' is not found, 'dotnet' invocation will rely on the PATH environment variable.
[2021-06-15T15:10:43.460Z] File 'C:\Program Files\dotnet\dotnet.exe' is not found, 'dotnet' invocation will rely on the PATH environment variable.
[2021-06-15T15:10:43.721Z] File 'C:\Program Files\dotnet\dotnet.exe' is not found, 'dotnet' invocation will rely on the PATH environment variable.

Functions:

        TimerTriggerTweet: timerTrigger

For detailed output, run func with --verbose flag.
[2021-06-15T15:10:46.530Z] Worker process started and initialized.
.Net Core 3系のインストール
MicrosoftのこのページによるとPythonを使う場合も.Netのruntimeが必要になるようです。当方のPythonは3.7だったので、最新の.Net Core 3系をインストールすることにしました。
インストールはこちらのページをご覧ください。当方は執筆時最新の.Net Core Runtime v3.1.16(x64)をインストールしました。
インストールして再び実行
再びVSCodeでF5を押下します。今回は無事Core Toolsが起動したようです。
> Executing task: .venv\Scripts\python -m pip install -r requirements.txt <

Requirement already satisfied: azure-functions in simple-twitter-bot\.venv\lib\site-packages (from -r requirements.txt (line 5)) (1.7.0)
WARNING: You are using pip version 20.1.1; however, version 21.1.2 is available.
You should consider upgrading via the '\simple-twitter-bot\.venv\Scripts\python.exe -m pip install --upgrade pip' command.

Terminal will be reused by tasks, press any key to close it.

> Executing task: .venv\Scripts\activate ; func host start <

Found Python version 3.7.9 (python3).

Azure Functions Core Tools
Core Tools Version:       3.0.3477 Commit hash: 5fbb9a76fc00e4168f2cc90d6ff0afe5373afc6d  (64-bit)
Function Runtime Version: 3.0.15584.0


Functions:

        TimerTriggerTweet: timerTrigger

For detailed output, run func with --verbose flag.
[2021-06-15T15:37:15.664Z] Worker process started and initialized.
Azure Functionsのローカル・デバッグ実行でStorage Accountに接続できない問題
F5を押下してCore Toolsを起動するたびに次のダイアログが表示されていました。これを解消するためにはAzure Storage Accountに接続するか、ローカルPCにストレージエミュレーターをインストールする必要があります。

余談ですが、このダイアログはTimerTriggerの場合に表示されるようです。
ストレージエミュレーターの構築
Learn moreボタンを押下すると次のページに遷移しました。こちらを参考にしてAzureのストレージエミュレーターを構築します。
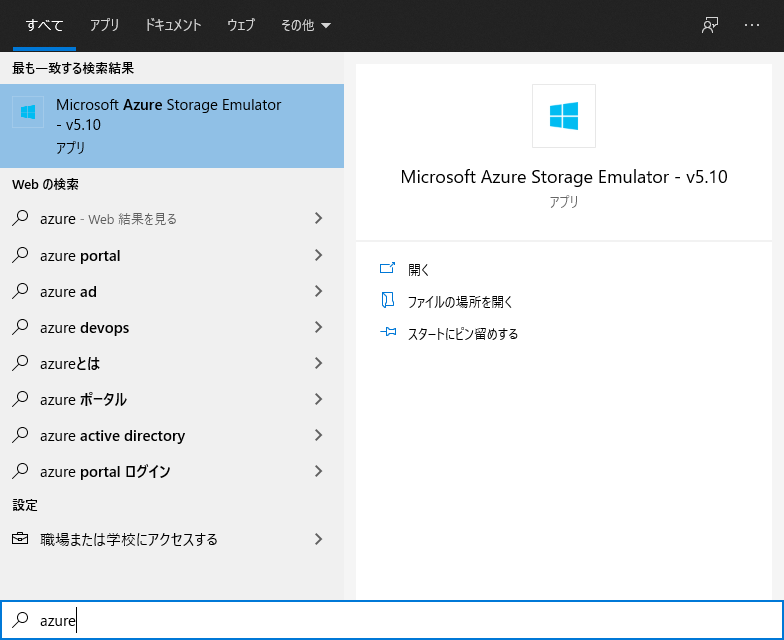
具体的には上記のURLに「スタンドアロンのインストーラー」へのリンクが張ってあるので、それをクリックしてインストーラーをダウンロードしてインストールするだけです。そうするとMicrosoft Azure Storage Emulatorがインストールされるのでクリックしてください。
クリックするとコマンドプロンプトが立ち上がるのですが、エミュレーターの起動に失敗しました。どうやら初回仕様時にSQL Serverを指定してAzureStorageEmulator.exe initコマンドを実行しなければならないようです。Microsoft SQL ServerがローカルPCにインストールされている必要があり、Azure Storage EmulatorはそのSQLサーバーとAzure Core Toolsの接続を行ってくれるツールのようです。コマンドは以下のURLからご確認ください。
ローカルPCにSQL Serverを構築するのが面倒なのでこの手法はここで諦めました。どちらにしても最終的にAzureにFunctionsをデプロイするので、Azure Storage Accountを作成してそこに直接つなぐことにします。
Azure Storage Accountの作成
今回はこちらの記事を参考にVSCodeからAzure上にAzure Functionsリソースを作成します。Azure Functionsを作成するとAzure Storage Accountも同時に作成されます。
VSCodeからAzure Functionsサービスの作成
VSCodeでアジュールのマークを押下します。
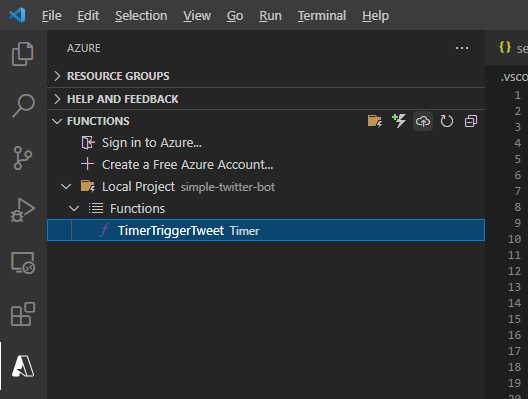
続いて、FUNCTIONSと文字列があるところに5つアイコンが並んでいますが、真ん中の雲に上矢印(↑)のあるアイコンを押下します。そうすると、VSCodeでチュートリアルのようなものが始まるのでそれに従って入力します。まずはAzureへのサインインでした。(この辺はバージョンによって変わるので適宜対応してください。)

続いて、新しいFunctsionsを作成するか聞かれました。今回はCreate new Functions App in Azure...を選択しました。

Pythonのラインタイムが聞かれたのでローカルPCにインストールしているバージョンを記載するとよいと思います。


適宜対応してください。Azure Functionsリソースを作成すると、リソースグループと次のリソースが作成されます。
- App Service プラン
- Application Insights
- Azure Functions
- Azure Storage Account
VSCodeから作成するとAzure FunctionsがApp Serviceプランで作成されるようです。Azure Portalでの表示を抜粋します。App ServiceプランはVMを借りるのと同じだと考えるとよいと思います。コストを考えると従量課金プランが望ましいのでイマイチですね。従量課金プランがサーバーレス・アーキテクチャに近しいと思います。(すみません、ちゃんとわかってないです。)

Azure PortalからAzure Functionsを従量課金プランで作成する
VSCodeからAzure Functionsリソースを作成したところ、App Serviceプランで作成されたのでAzure Portalからリソースを作成することにします。先ほど作成したリソースはリソースグループごと削除しました。
なお、Create new Functions App in Azure...Adbancedを選択すると選べるのかもしれませんが、今回は調査しませんでした。
Azure PortalでAzure Functionsを作成
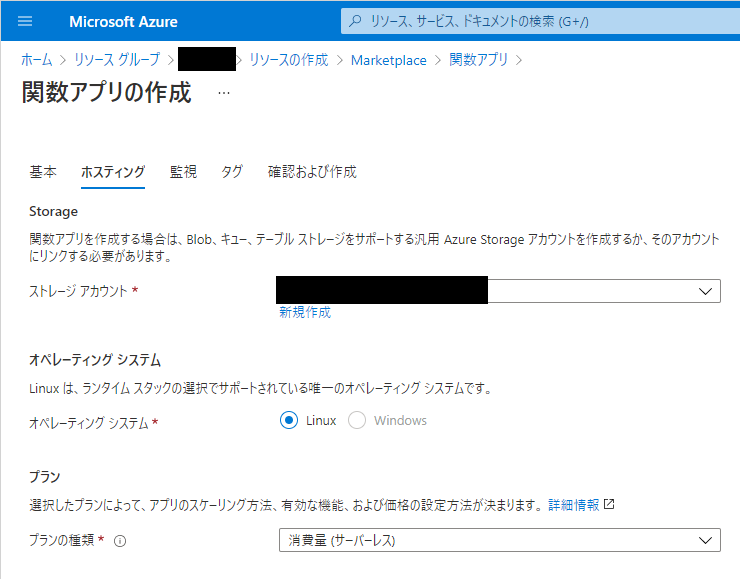
リソースグループを作成し、そこでAzure Functionsリソースを生成します。リソースの追加でAzure Functionsを選択してください。日本語名は関数アプリでした。

ホスティングで「プラン」→「プランの種類」→「消費量(サーバーレス)」を選択してください。
移行はデフォルトの設定で作成しました。
VSCodeからプロジェクトをデプロイする
VSCodeのAzureボタンを押下してDeploy to Function App...を押下します。先ほど作成したAzure Functionsリソースが選択できるようになります。(白色で塗りつぶしているところに表示されます。)それを押下してください。

ダイアログが表示され、デプロイされるか問われます。大丈夫だったらDeployボタンを押下します。

VSCodeの向かって右下に次の表示がなされます。デプロイ中のようです。

完了すると次の表示になります。

ローカル実行時にAzure Storage Accountに接続するための設定
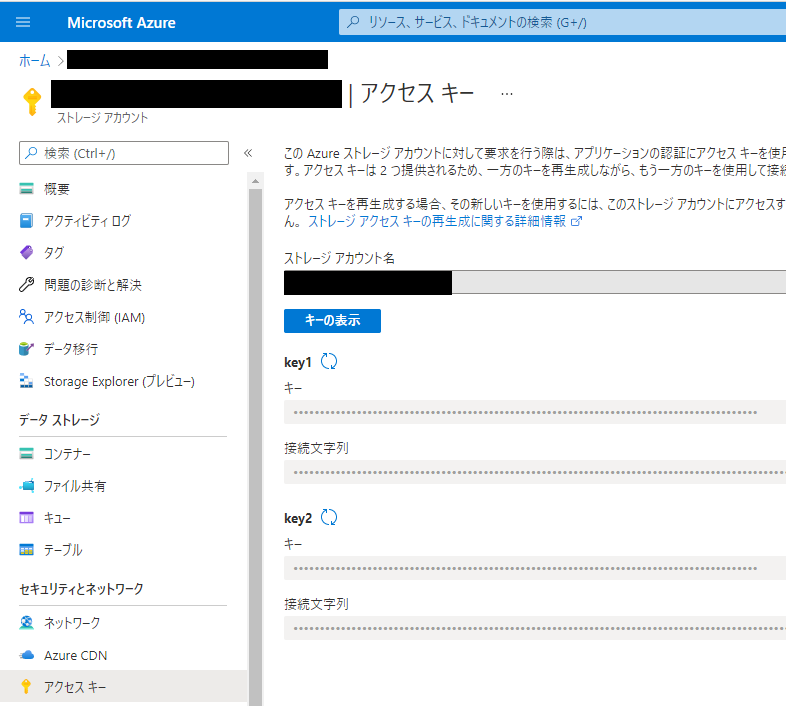
Azure PortalからStorage Accountの接続文字列を取得します。ストレージアカウントのアクセスキー画面に遷移してください。キーの表示ボタンを押下して接続文字列を表示しコピーしてください。
local.settings.jsonにAzureWebJobsStorageというキーがあります。
{
  "IsEncrypted": false,
  "Values": {
    "AzureWebJobsStorage": "UseDevelopmentStorage=true",
    "FUNCTIONS_WORKER_RUNTIME": "python",
(以下略)
先ほどコピーした接続文字列を貼り付けてください。
{
  "IsEncrypted": false,
  "Values": {
    "AzureWebJobsStorage": "<Azure Storage Accountの接続文字列>",
    "FUNCTIONS_WORKER_RUNTIME": "python",
(以下略)
F5を押下してローカルデバッグ実行します。今度はダイアログが表示されることなく実行できました。
> Executing task: .venv\Scripts\python -m pip install -r requirements.txt <

Requirement already satisfied: azure-functions in \simple-twitter-bot\.venv\lib\site-packages (from -r requirements.txt (line 5)) (1.7.0)
WARNING: You are using pip version 20.1.1; however, version 21.1.2 is available.
You should consider upgrading via the '\simple-twitter-bot\.venv\Scripts\python.exe -m pip install --upgrade pip' command.

Terminal will be reused by tasks, press any key to close it.

> Executing task: .venv\Scripts\activate ; func host start <

Found Python version 3.7.9 (python3).

Azure Functions Core Tools
Core Tools Version:       3.0.3477 Commit hash: 5fbb9a76fc00e4168f2cc90d6ff0afe5373afc6d  (64-bit)
Function Runtime Version: 3.0.15584.0


Functions:

        TimerTriggerTweet: timerTrigger

For detailed output, run func with --verbose flag.
[2021-06-19T13:12:48.026Z] Worker process started and initialized.
[2021-06-19T13:12:50.482Z] Host lock lease acquired by instance ID '000000000000000000000000919C9F3E'.
関数のデバッグ実行
TimerTriggerの関数はF5でデバッグ実行してしばらく待つと実行されますが、意思を持って実行する方法を解説します。
Core Toolsを実行したまま、VSCodeのアジュールアイコンを押下し、Azure:Functions領域に移動し、実行したい関数を選んで(今回の場合はTimerTriggerTweet)右クリック、Execute Function Now...を押下します。

コンソールに次のようなログが表示されました。
[2021-06-21T14:49:53.294Z] Executing 'Functions.TimerTriggerTweet' (Reason='This function was programmatically called via the host APIs.', Id=121725c7-d3c2-4fea-9436-22095b5cb57b)
[2021-06-21T14:49:53.304Z] Python timer trigger function ran at 2021-06-21T14:49:53.301974+00:00
[2021-06-21T14:49:53.308Z] Executed 'Functions.TimerTriggerTweet' (Succeeded, Id=121725c7-d3c2-4fea-9436-22095b5cb57b, Duration=171ms)
まとめ
プロジェクトをAzureにFunctionsリソースを作成し、そこにプロジェクトをデプロイしました。Azure Storage Accountの接続文字列をローカル実行の設定に追加し、ローカル・デバッグ実行することができました。次回はいよいよコードを書きます。