Ruby on Rails 7でMicrosoft Entra IDを使ったログインを実装
今回は、Ruby on RailsのDeviseを使って、Microsoft Entra IDでログインできるようにします。
前提
条件
- Azureアカウントを作成済みである
- Azure Portalへログインできる
環境
- ruby 3.3.1
- Rails 7.1.3.4
Microsoft Entra ID(旧Azure AD)とは?
クラウドベースのID管理とアクセス管理のサービスを提供します。(Microsoft 認定資格試験テキストAZ900:Micosoft Azure Fundamentals 改訂第2版 須屋聡史/富岡洋/佐藤雅信)
今回は、認証・認可サーバをEntra IDに担わせてRails側でその情報を受け取る実装にしていきます。
プロジェクトの作成
- プロジェクトの作成をします
$ rails new entraid(entraid)は適当でOK -
$ cd entraidでプロジェクトフォルダに移動します
Gemの追加
Gemfileに必要なGemを追加します
gem 'devise'
gem "omniauth"
gem "omniauth-rails_csrf_protection"
gem 'omniauth-azure-activedirectory-v2'
gem 'dotenv-rails', groups: [:development, :test]
-
$ bundle installを実行します
Deviseのセットアップ
Deviseをセットアップします
$ rails generate devise:install
$ rails generate devise User
$ rails db:migrate
Omniauthの設定を追加する
config/initializers/devise.rbファイルに、Azure ADの設定を追加します。
Devise.setup do |config|
  # 他の設定
  config.omniauth :azure_activedirectory_v2,
                  client_id:     ENV['AZURE_CLIENT_ID'],
                  client_secret: ENV['AZURE_CLIENT_SECRET'],
                  tenant_id:     ENV['AZURE_TENANT_ID']
end
UserモデルにOmniauthの設定を追加する
app/models/user.rbファイルに以下を追加します。
class User < ApplicationRecord
  devise :database_authenticatable, :registerable,
         :recoverable, :rememberable, :validatable, :omniauthable, omniauth_providers: [:azure_activedirectory_v2]

  def self.from_omniauth(auth)
    where(provider: auth.provider, uid: auth.uid).first_or_create do |user|
      user.email = auth.info.email
      user.password = Devise.friendly_token[0, 20]
      # ユーザーの追加情報を必要に応じて設定
    end
  end
end
コントローラにOmniauthのコールバックを追加する
app/controllers/users/omniauth_callbacks_controller.rbファイルを作成し、以下を追加します。
class Users::OmniauthCallbacksController < Devise::OmniauthCallbacksController
  def azure_activedirectory_v2
    @user = User.from_omniauth(request.env["omniauth.auth"])

    if @user.persisted?
      sign_in_and_redirect @user, event: :authentication
      set_flash_message(:notice, :success, kind: "Azure") if is_navigational_format?
    else
      session["devise.azure_data"] = request.env["omniauth.auth"]
      redirect_to new_user_registration_url
    end
  end

  def failure
    redirect_to root_path
  end
end
ルーティングの設定をする
config/routes.rbファイルに以下を追記します。
Rails.application.routes.draw do
  devise_for :users, controllers: {
    omniauth_callbacks: 'users/omniauth_callbacks'
  }

  # 他のルート
  # ルートパスの設定
  root to: 'home#index'
end
ホームページの作成
ホームページのコントローラとアクションを作成します。
$ rails generate controller home index
これで、app/controllers/home_controller.rbとapp/views/home/index.html.erbが作成されます。
ビューをカスタマイズする
ログインボタンを追加するために、ビューをカスタマイズします。例えば、app/views/devise/sessions/new.html.erbに以下を追加します。
<h2>Log in</h2>
<%= render "devise/shared/links" %>
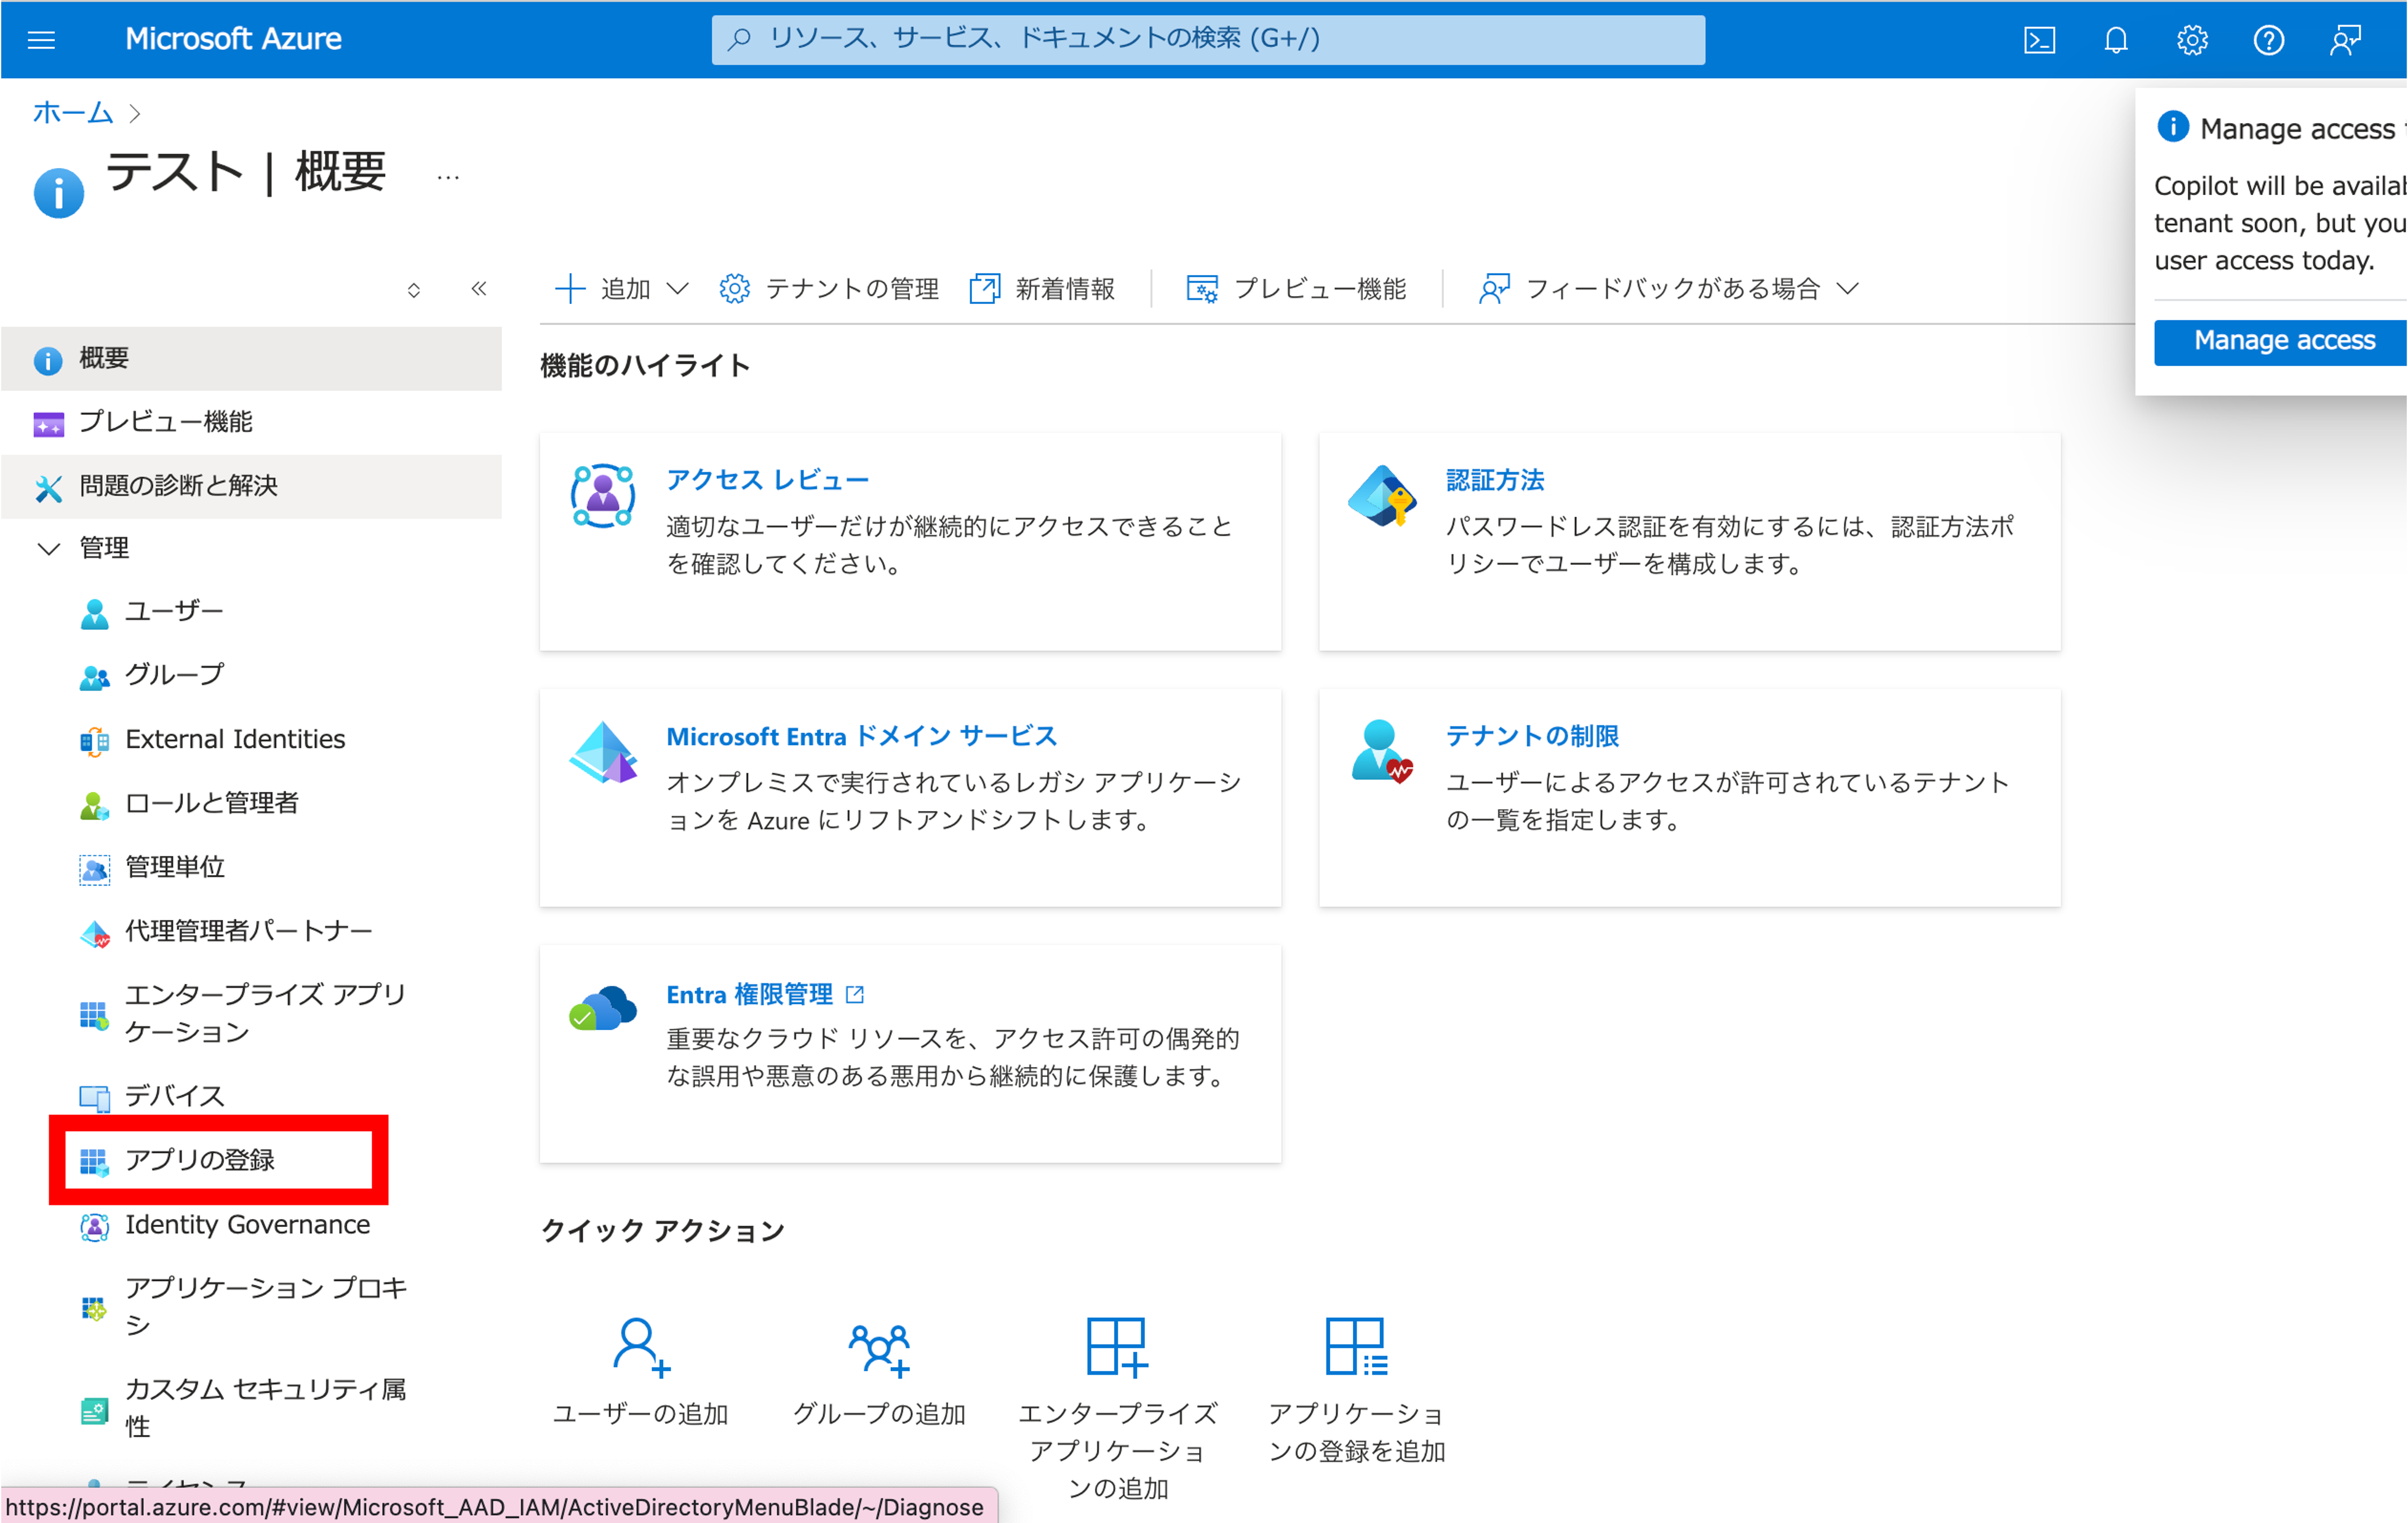
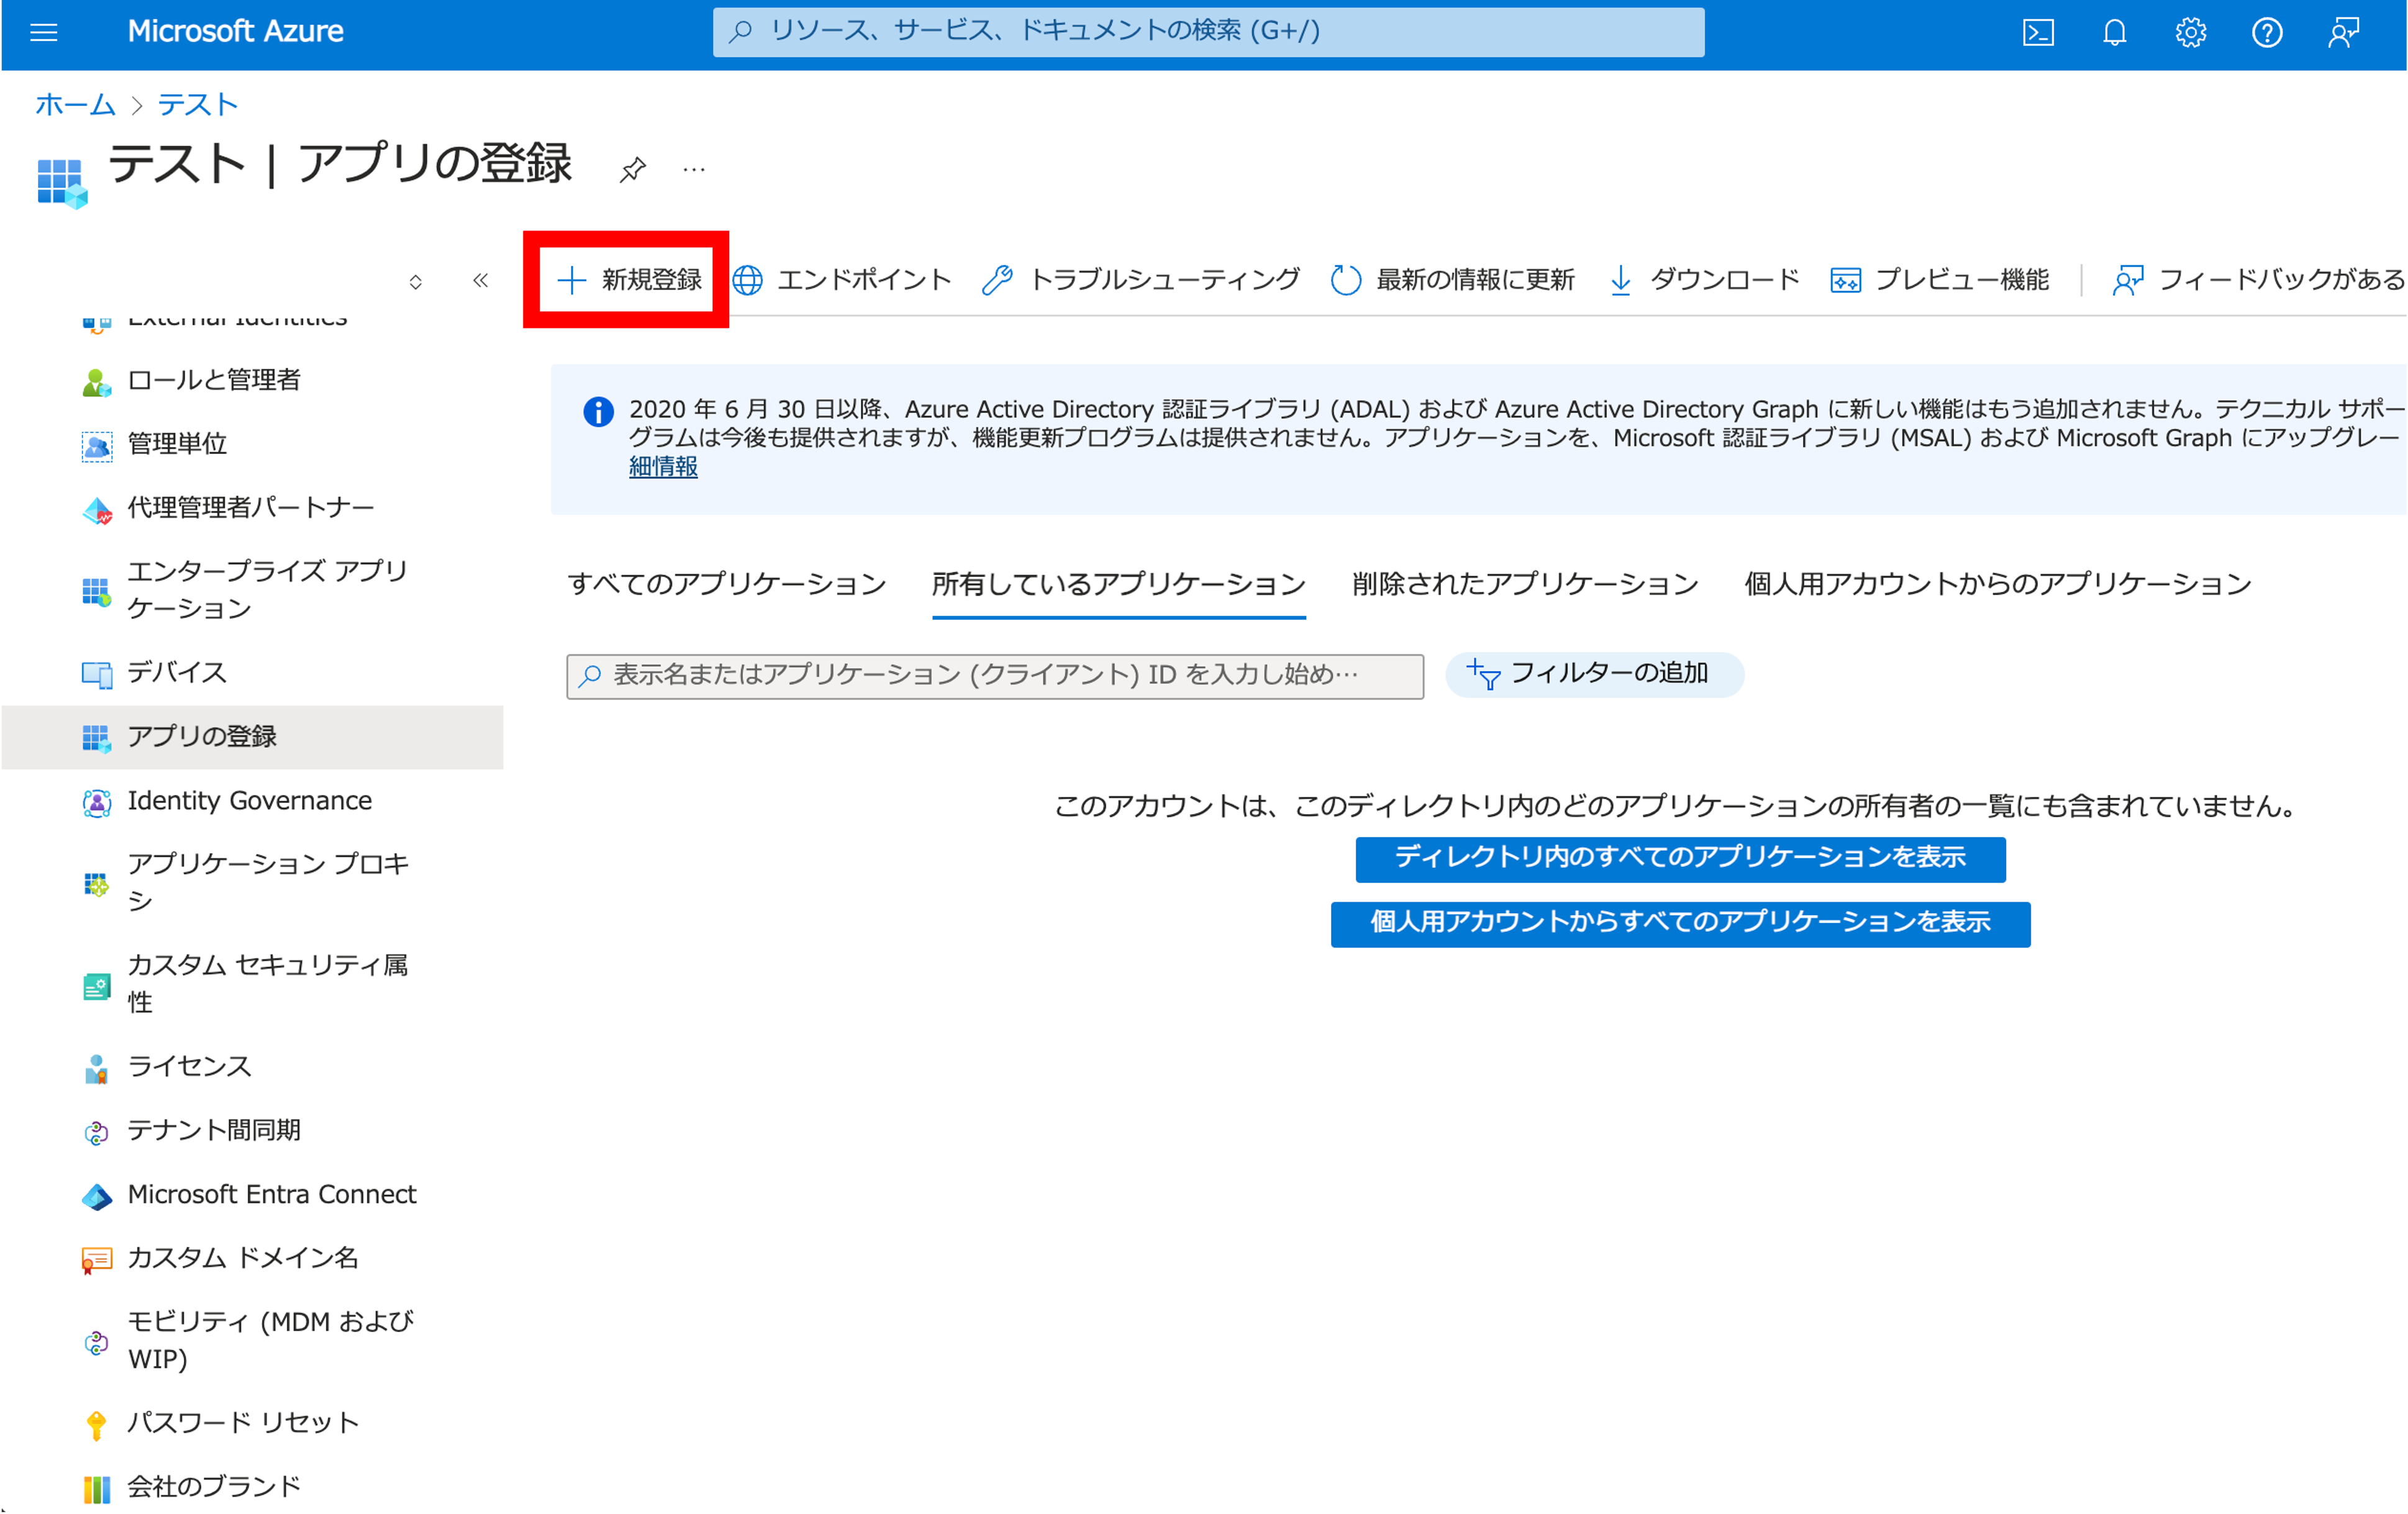
Azureポータルでアプリケーションを登録する
-
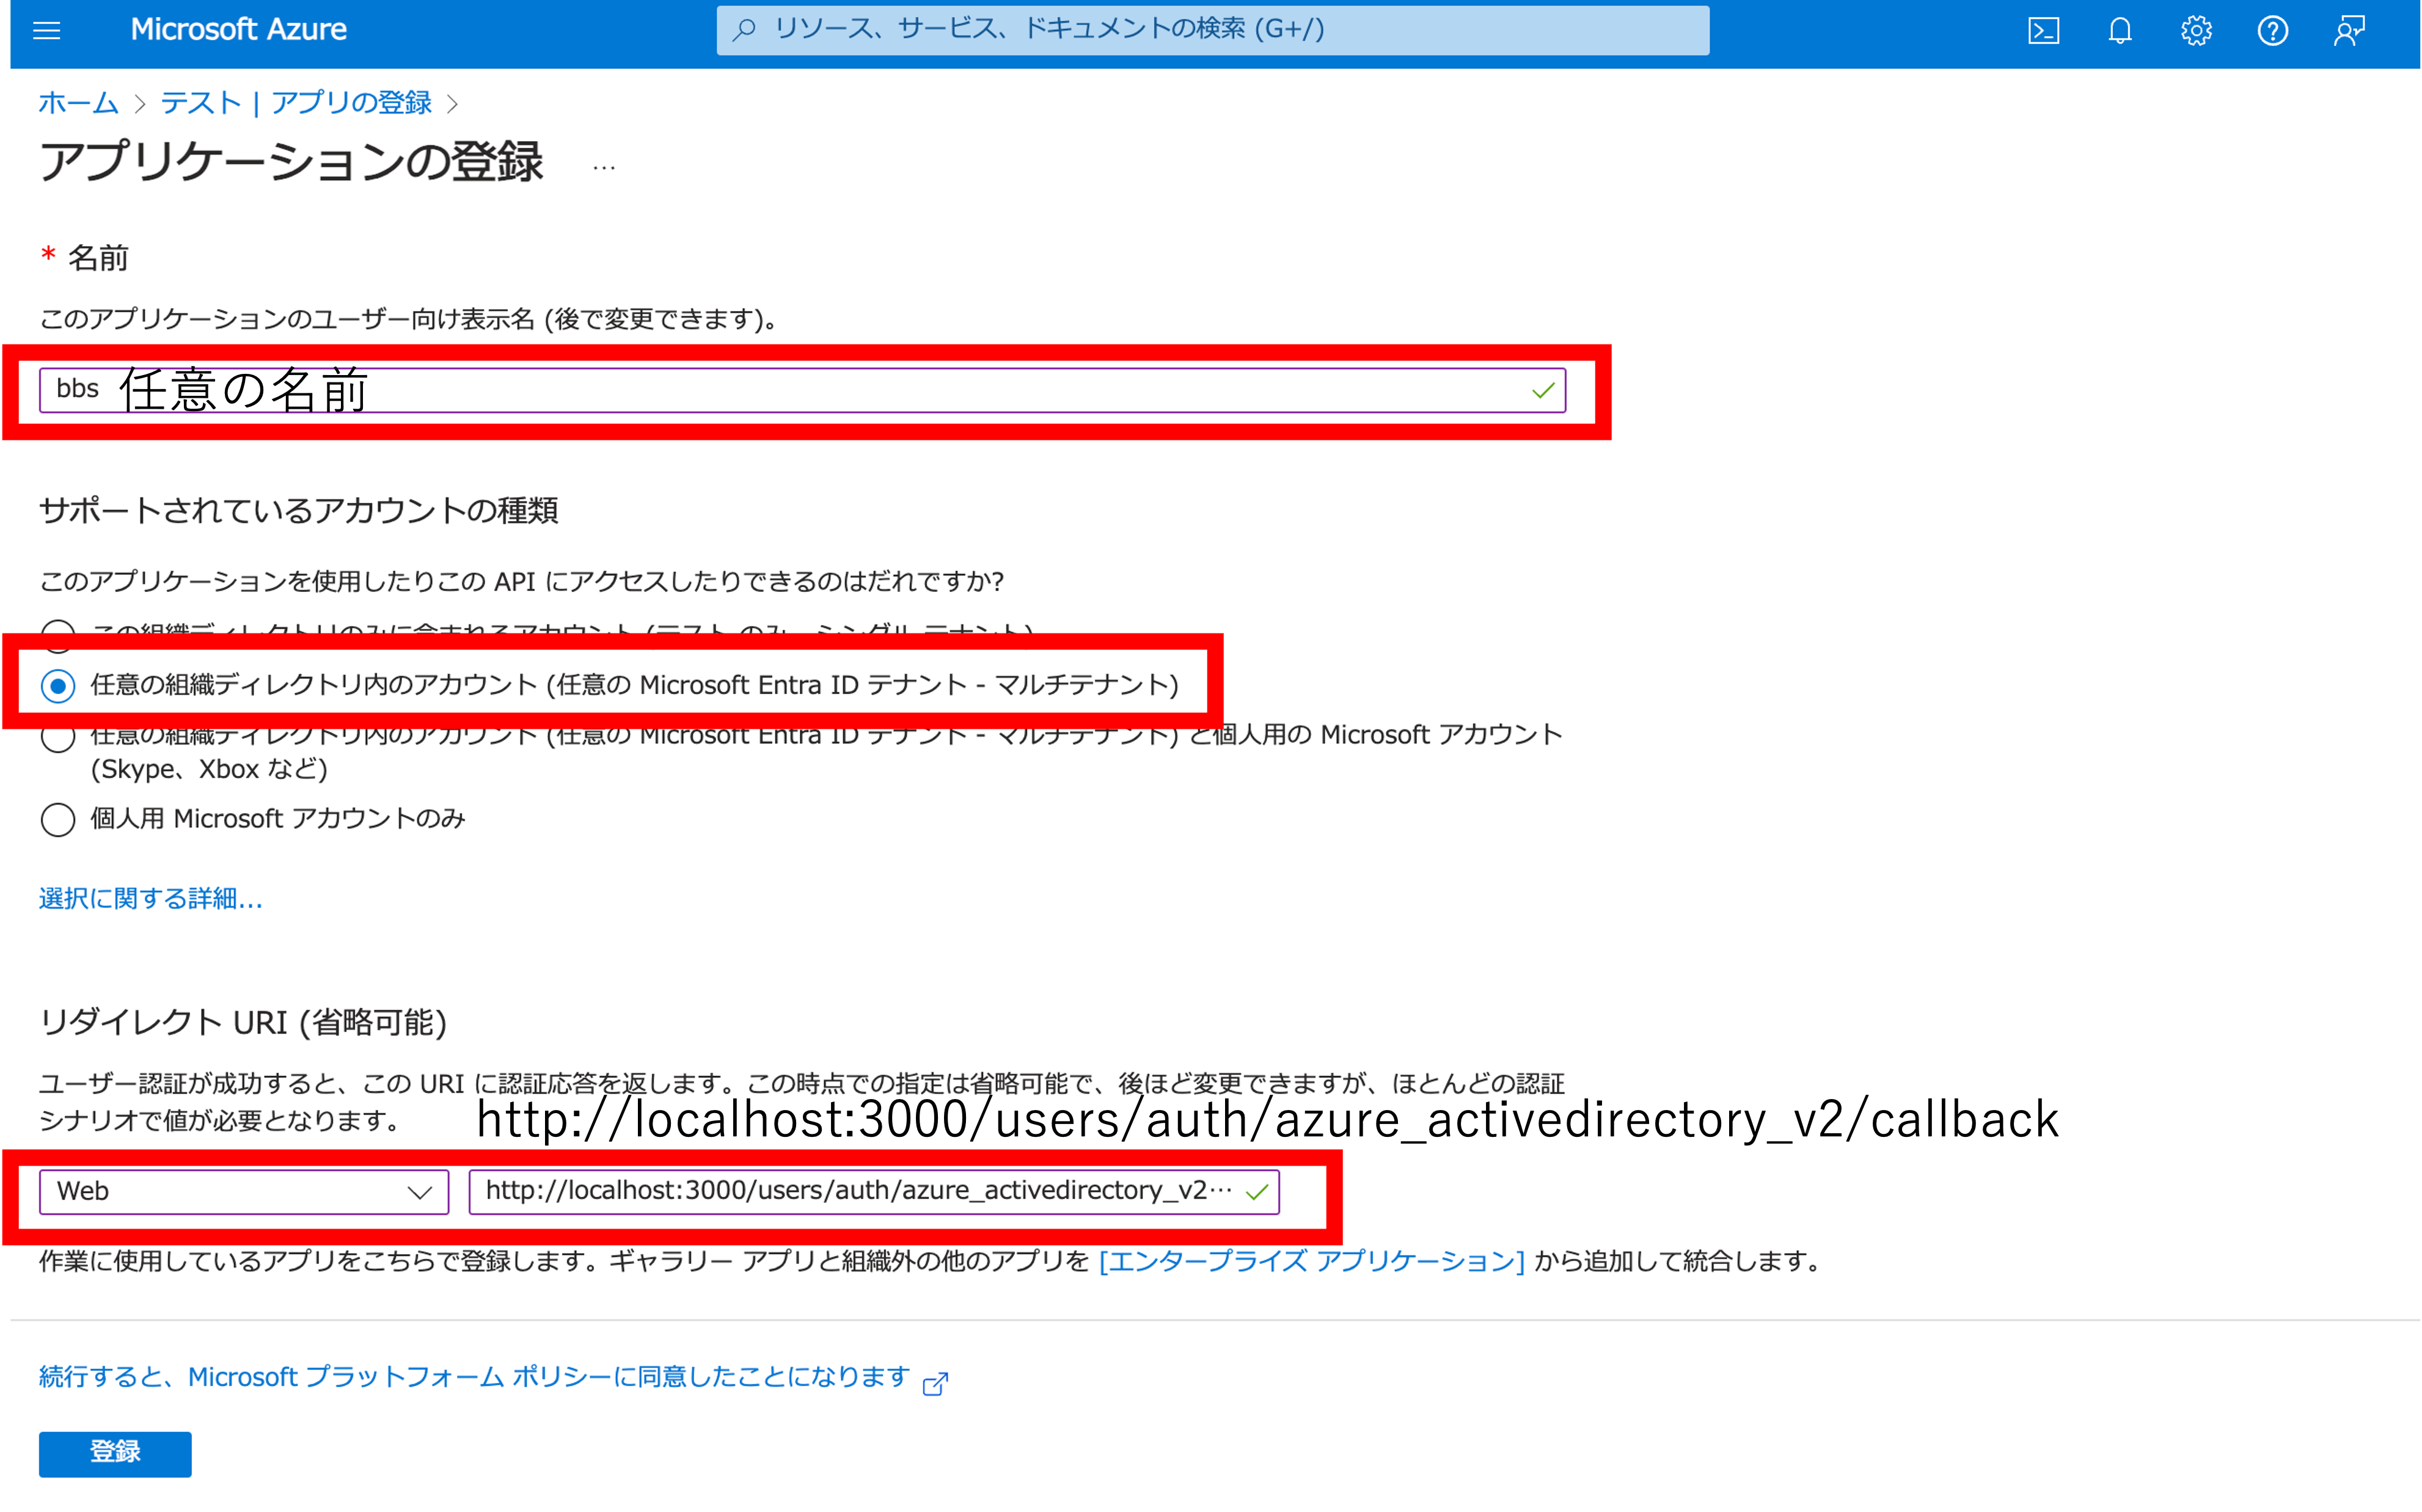
必要な情報を入力し、リダイレクトURIとしてhttp://localhost:3000/users/auth/azure_activedirectory_v2/callbackを追加します。
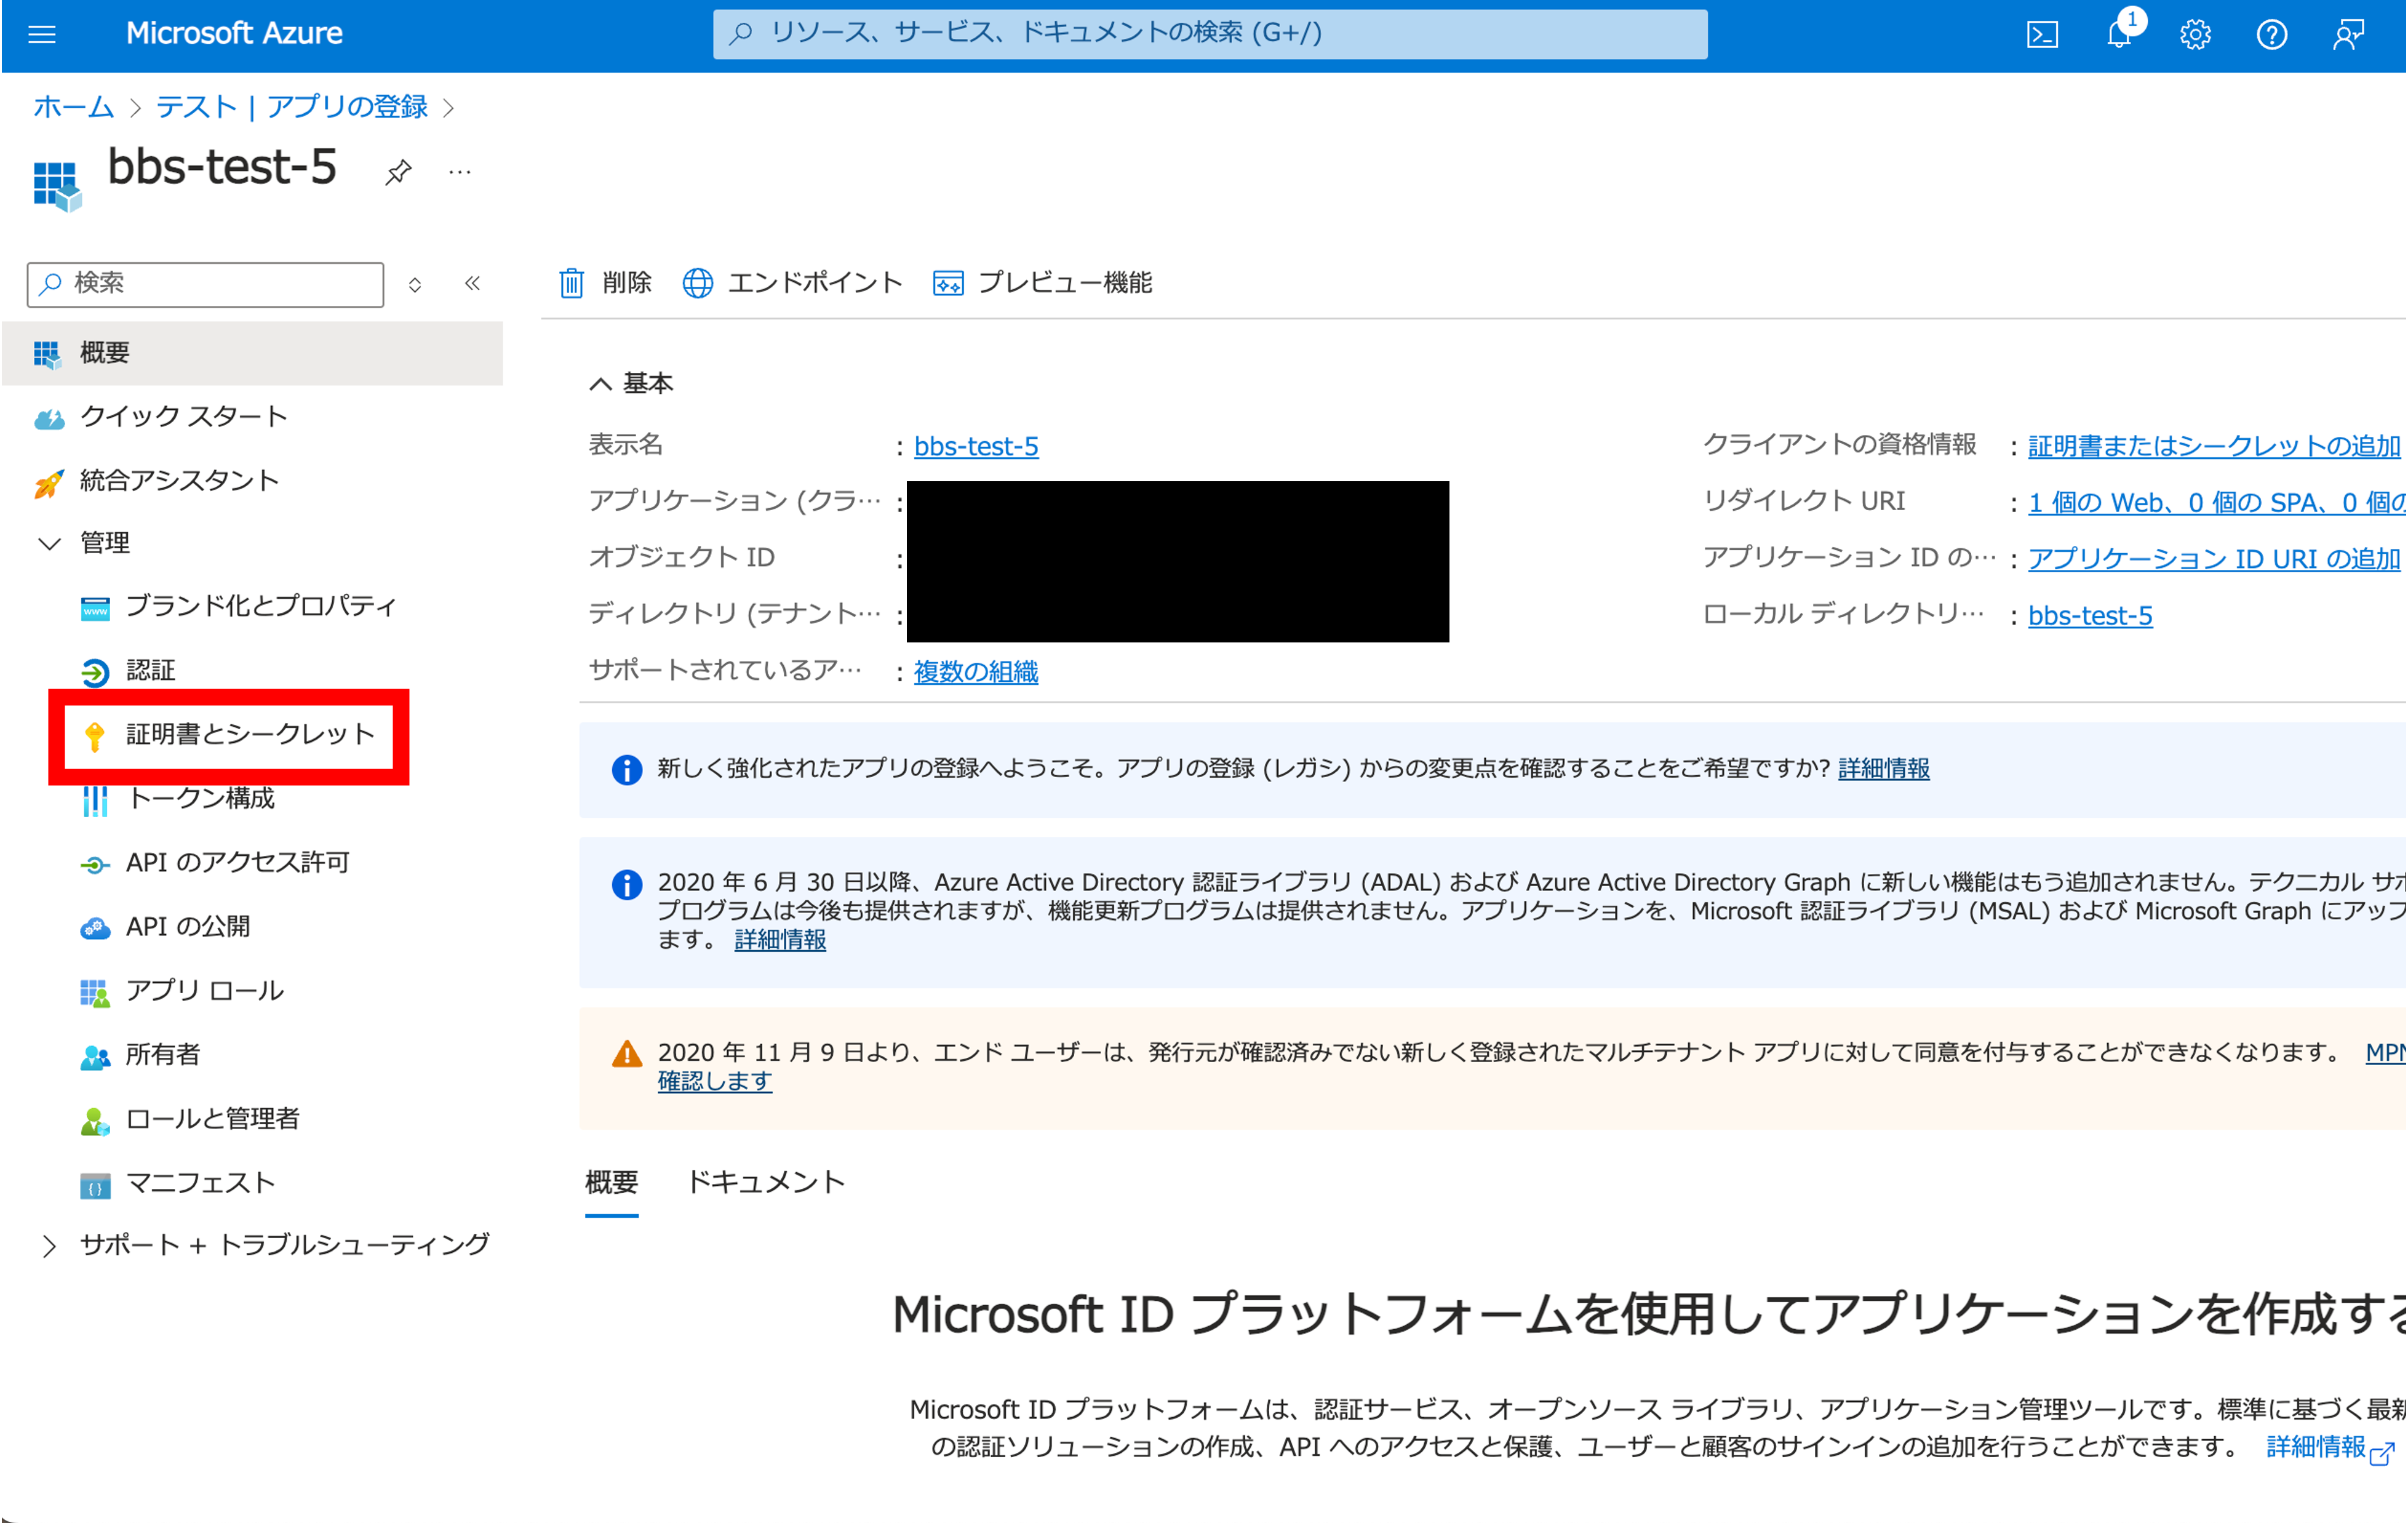
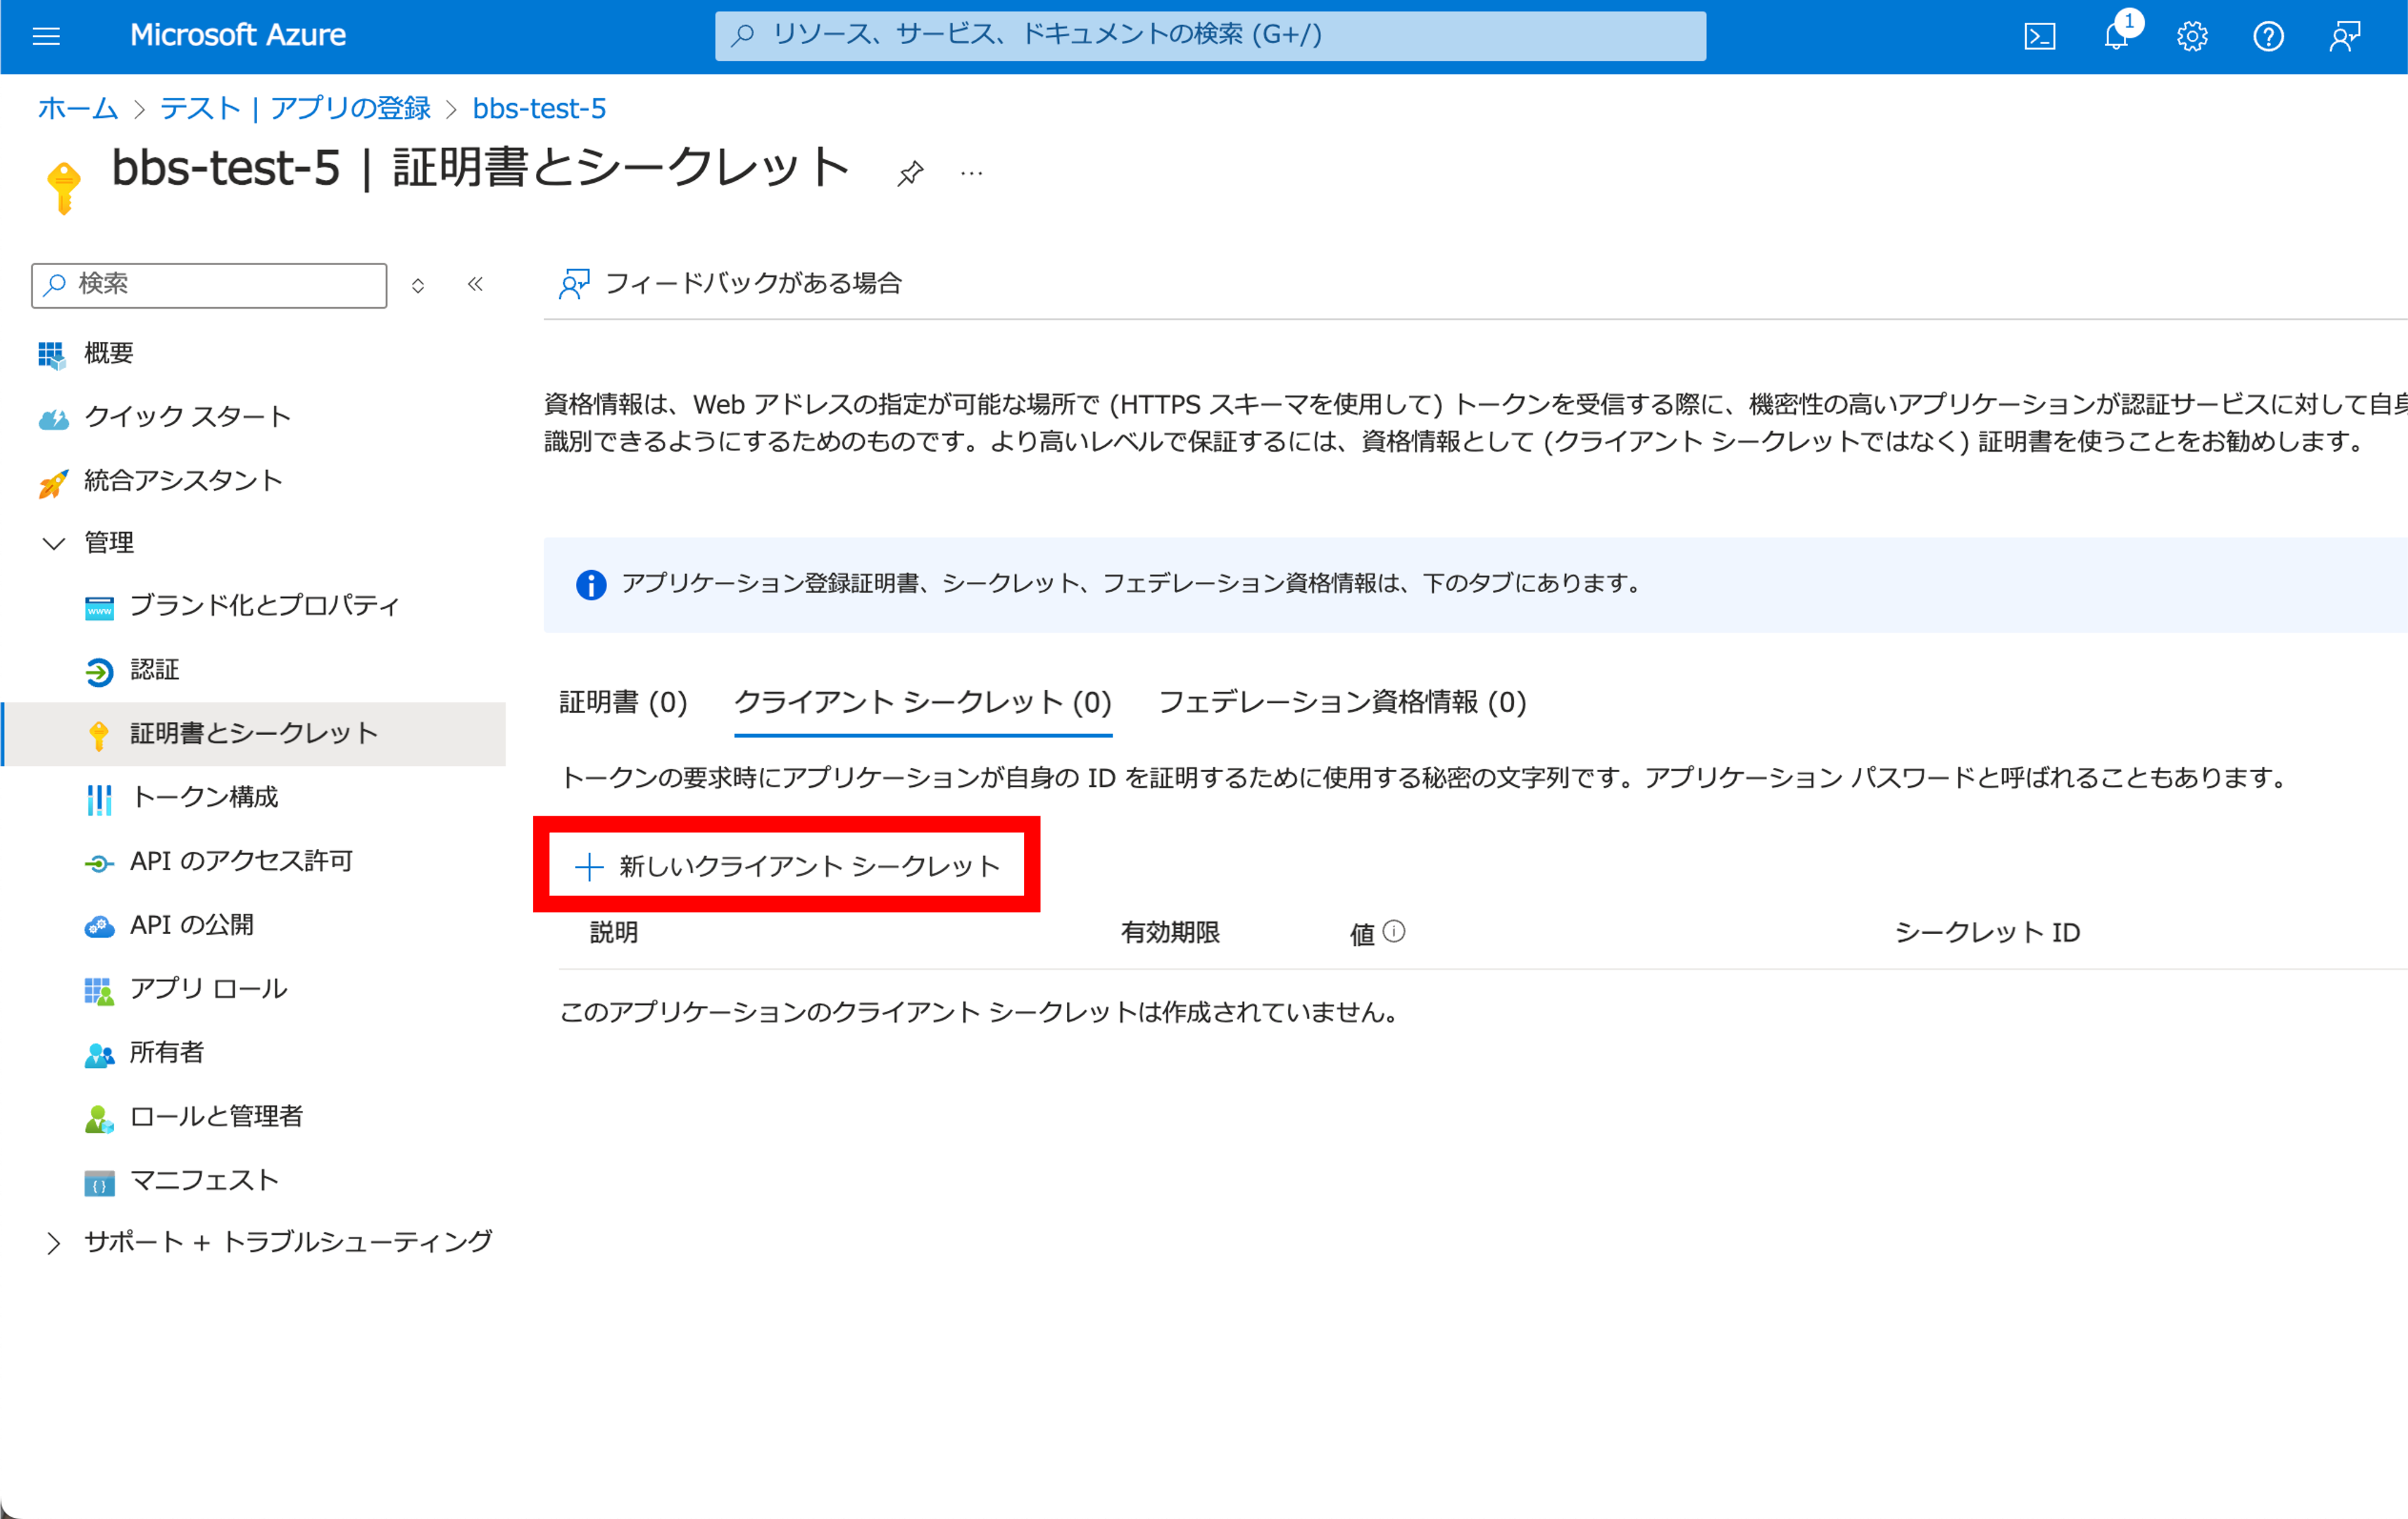
-
.envファイルを作成します。
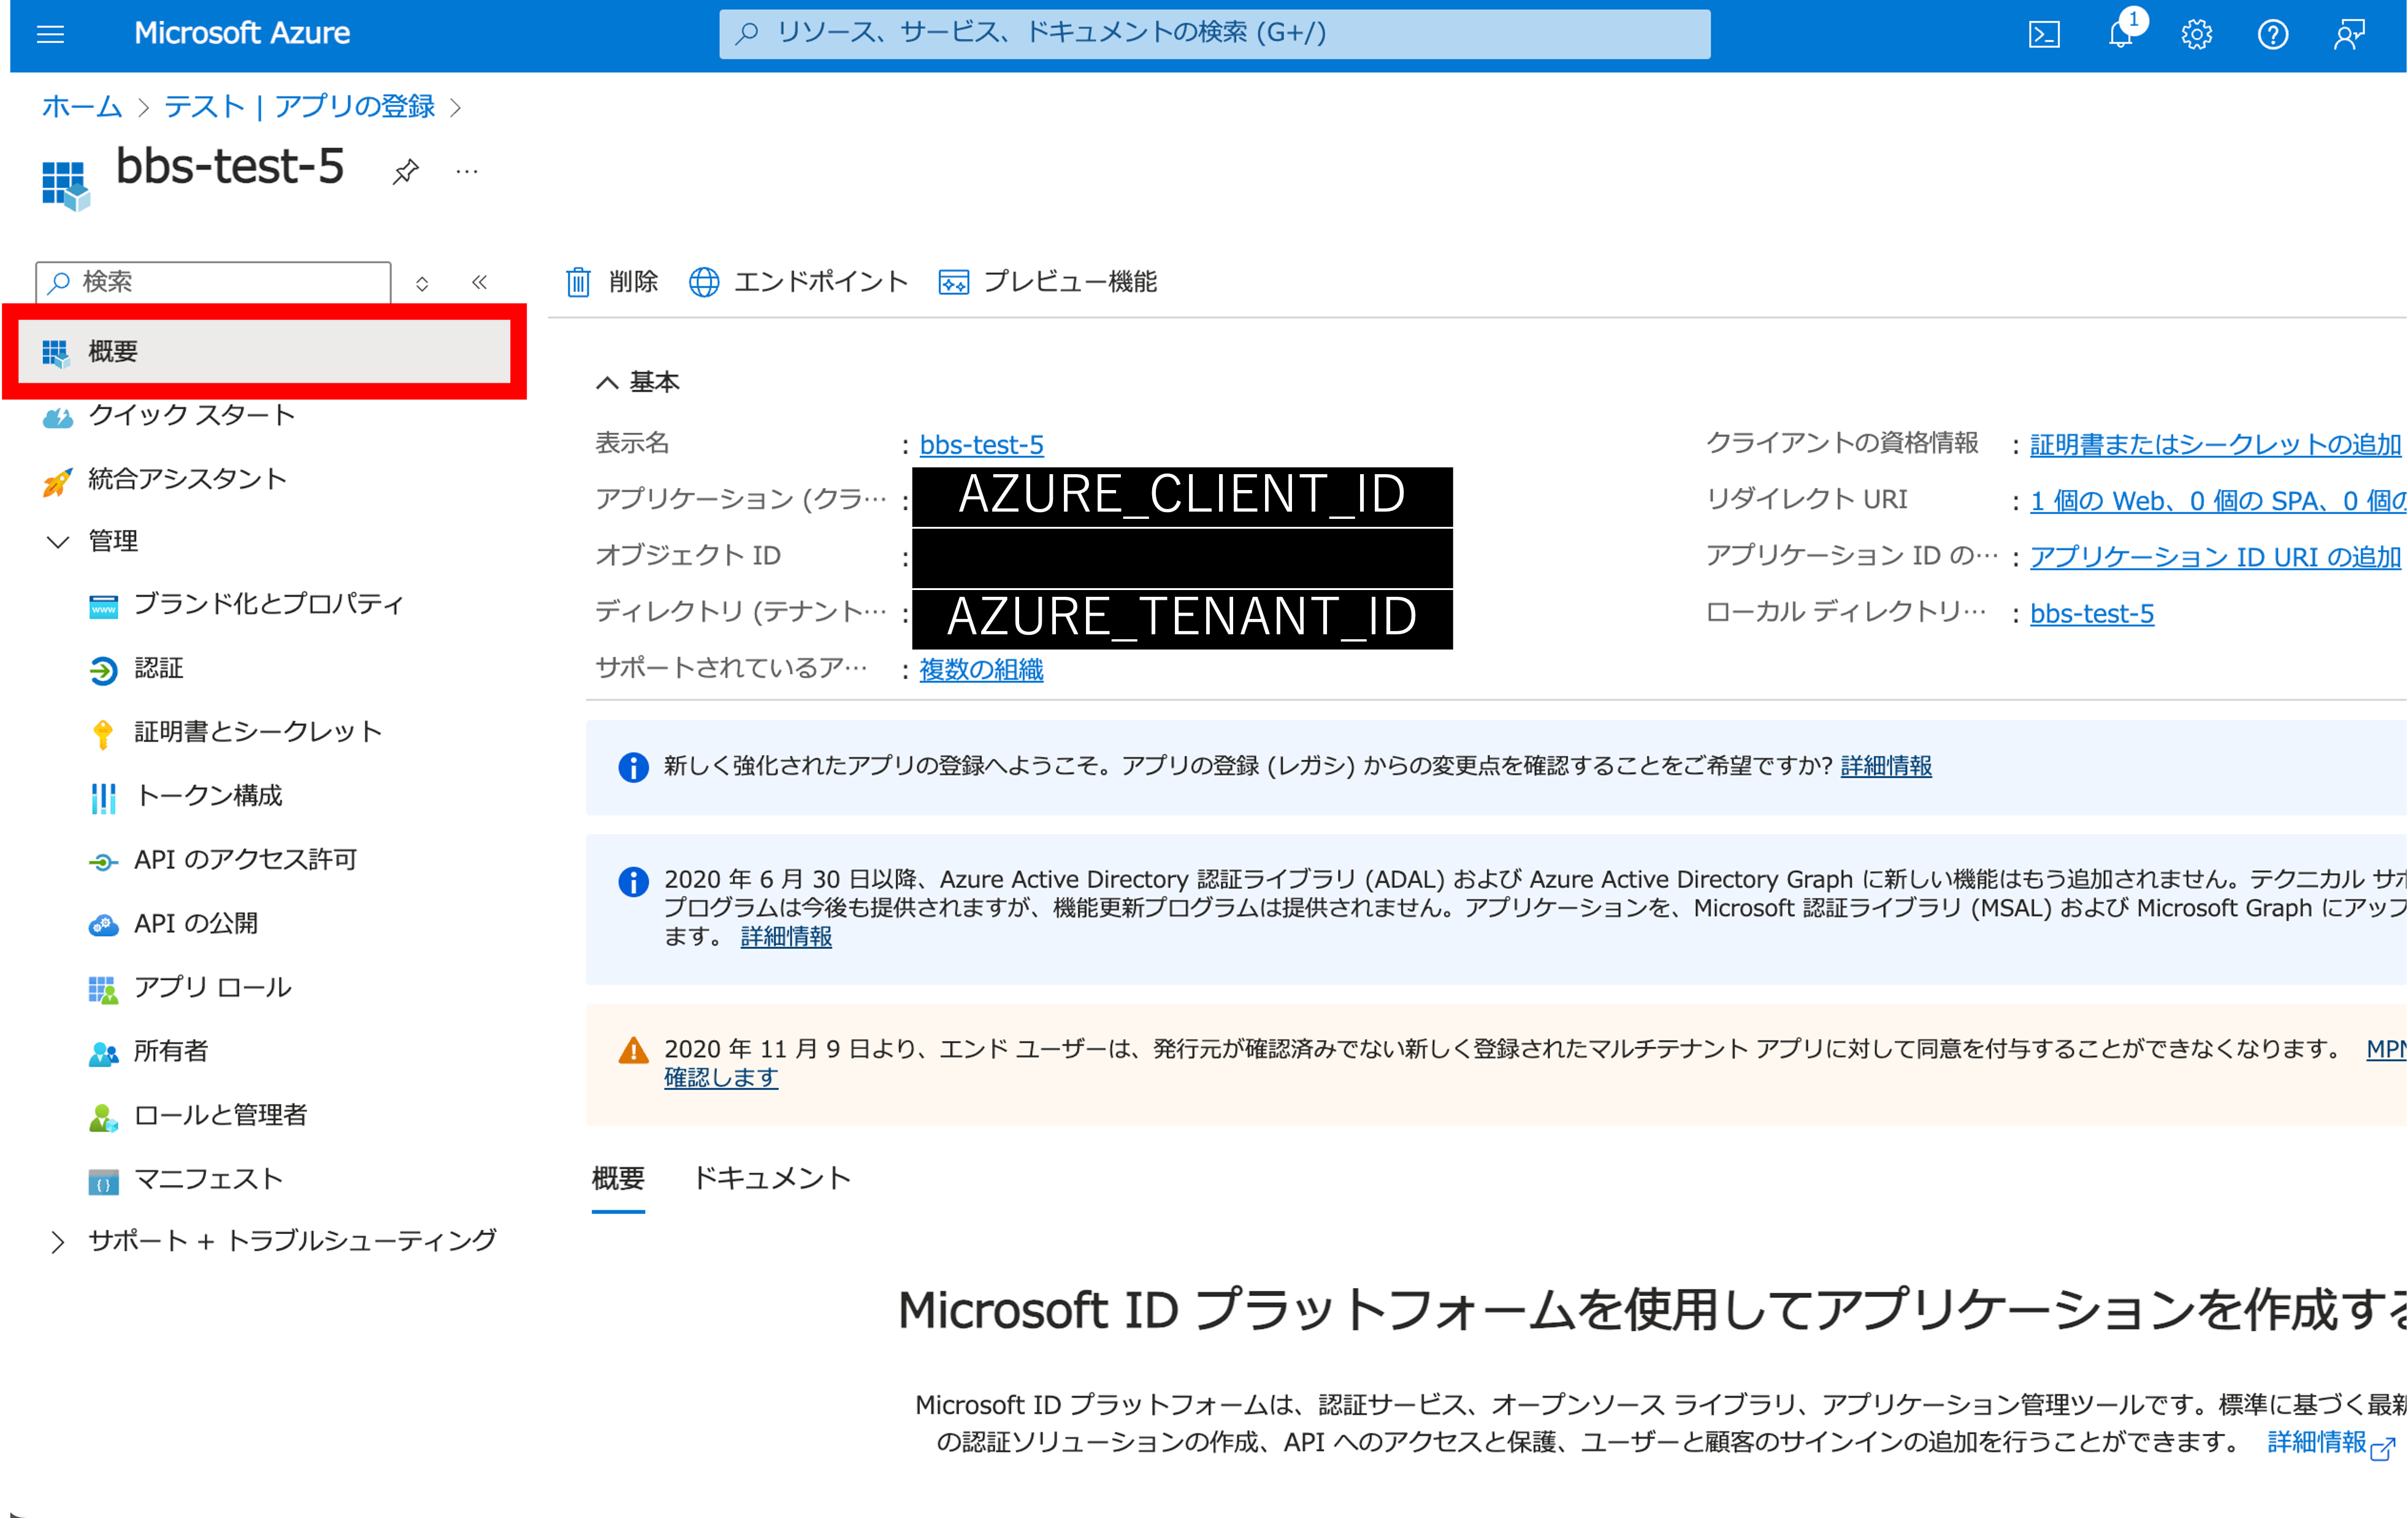
AZURE_CLIENT_ID,AZURE_TENANT_IDは、以下の画像の欄からコピーします。
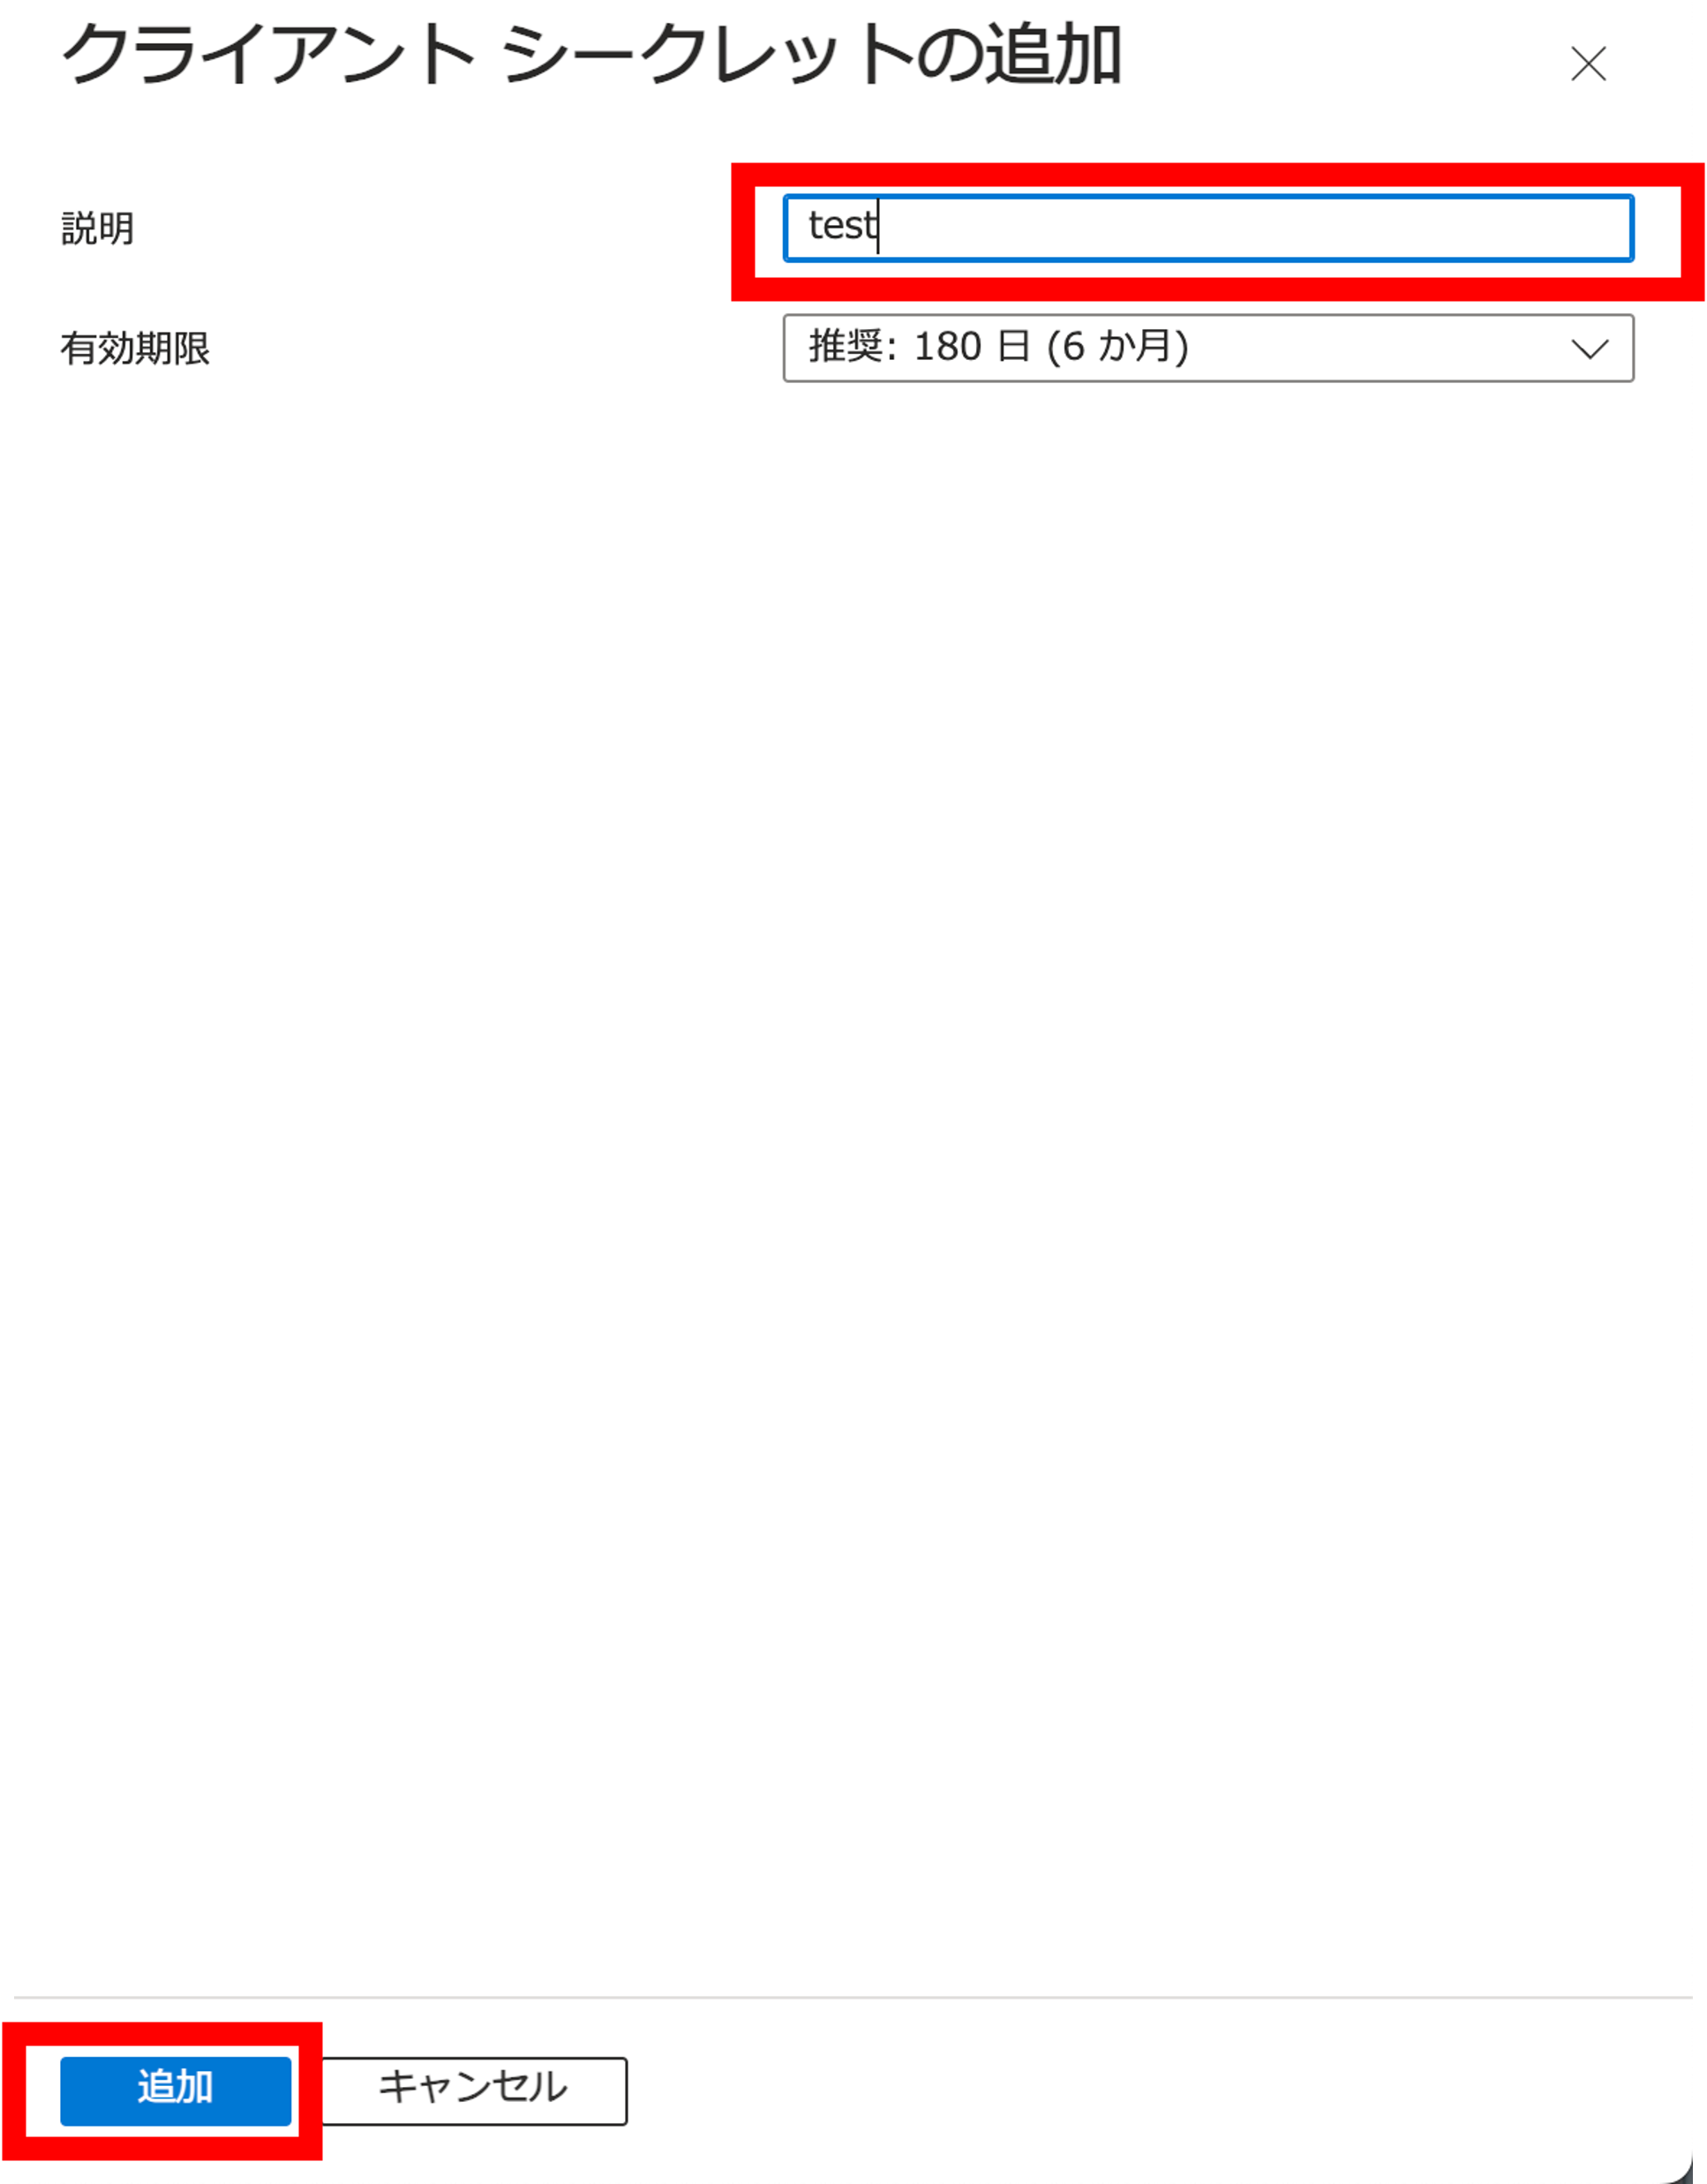
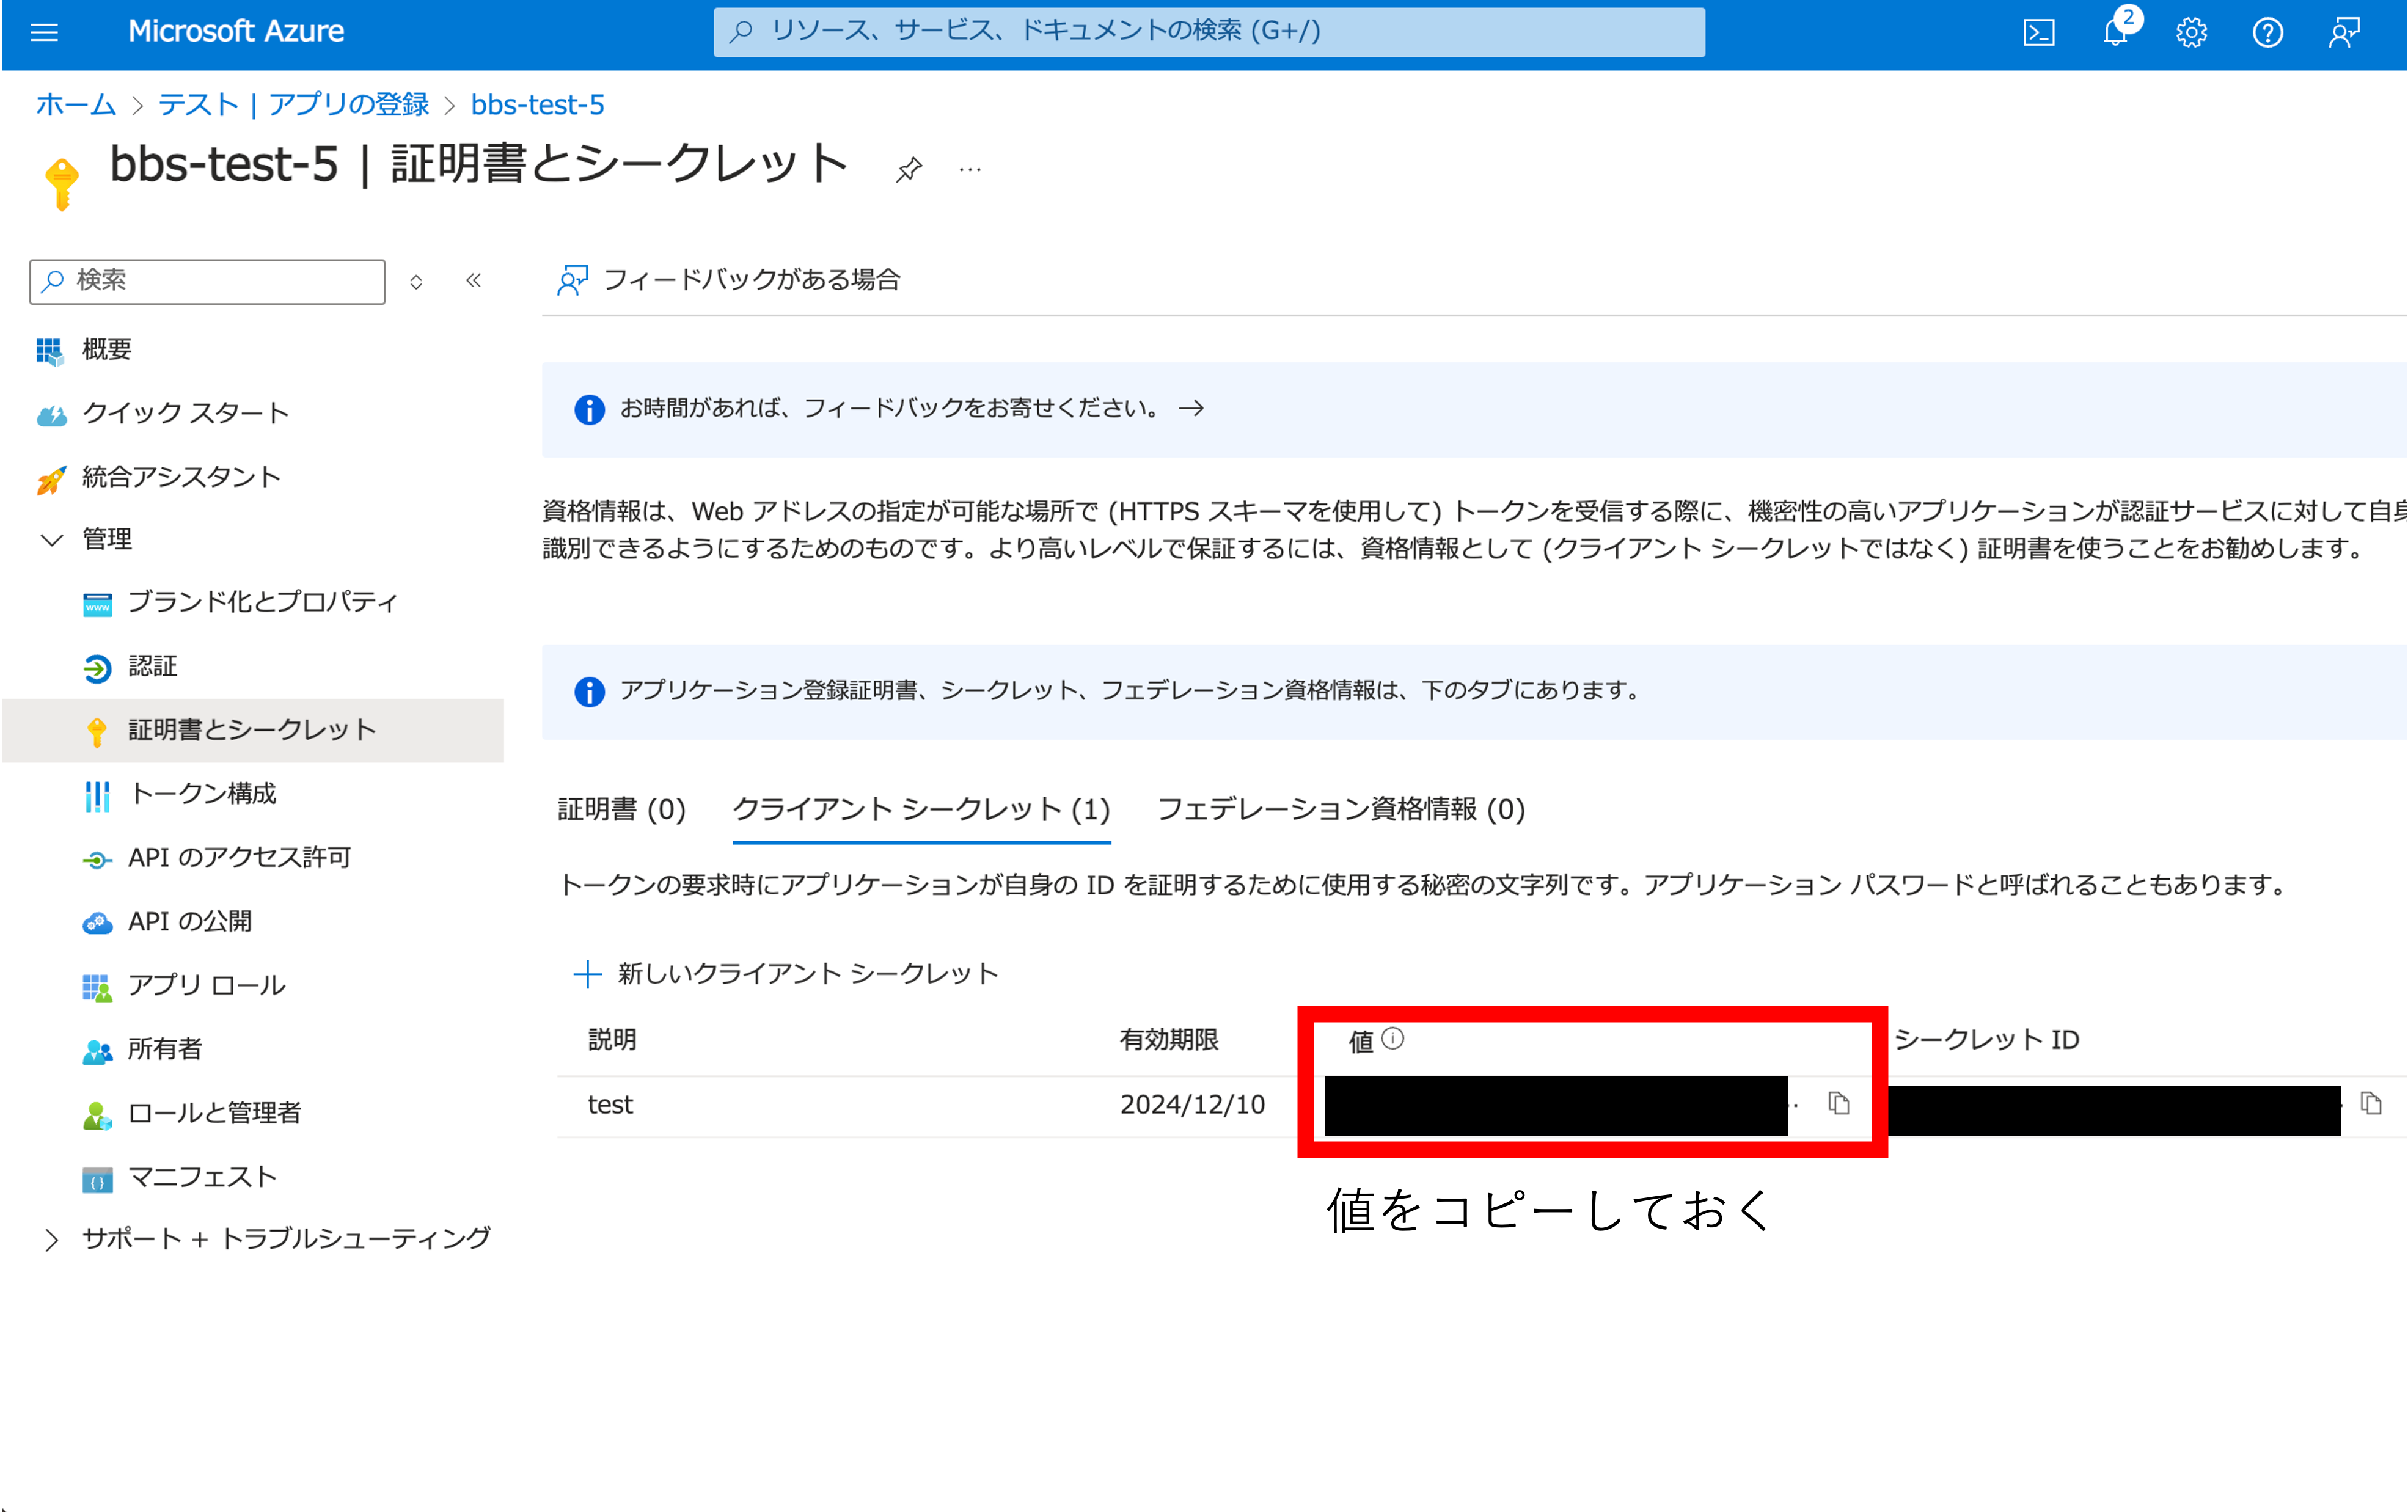
AZURE_CLIENT_SEACRETは手順5で取得したシークレット値を利用します。
AZURE_CLIENT_ID=your_client_id
AZURE_CLIENT_SECRET=your_client_secret
AZURE_TENANT_ID=your_tenant_id
7.Railsを再起動します。
$ rails s

