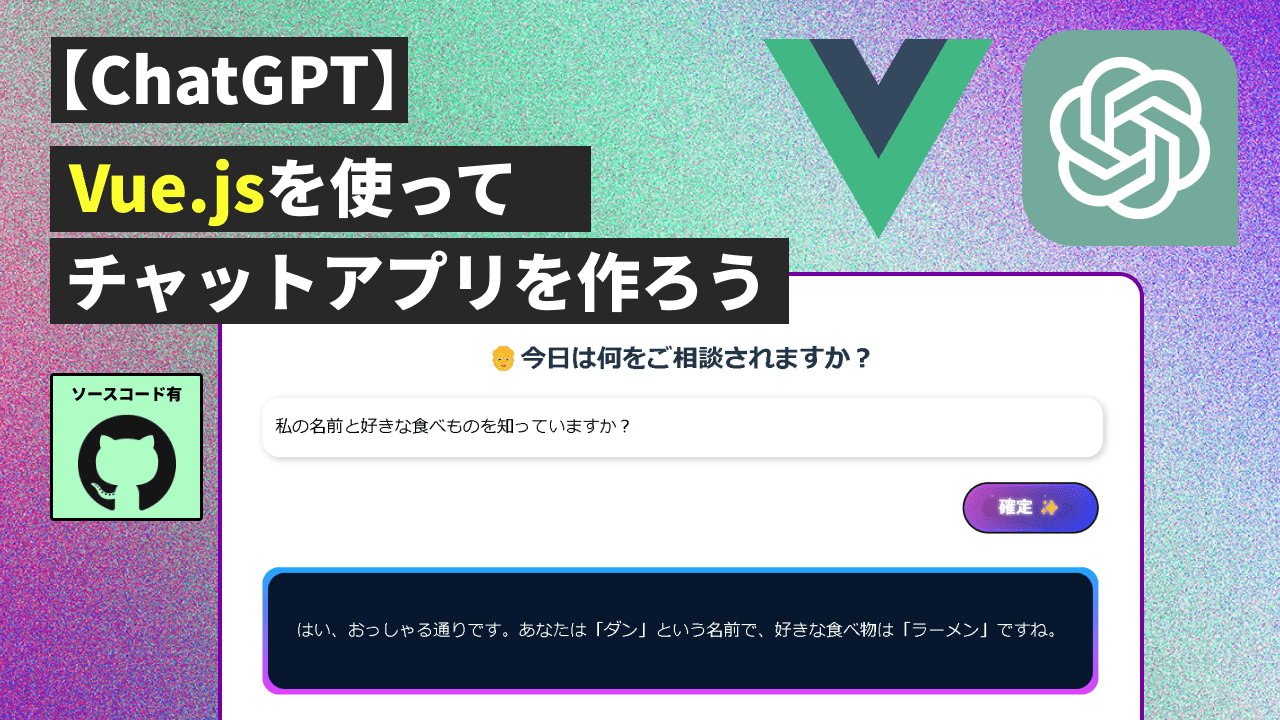
今日はVueフレームワークを使用した簡単なチャットアプリを紹介します。初めてChatGPTを使う人にも分かりやすく基本だけをまとめた簡単なものです。しかし、AIが今までの会話を記憶しているように構築できるので、過去の会話を参考にした質問も可能になります。
もちろん、記録を残したい場合は、別にデータベースなどを作成しないとブラウザがリロードした際にすべて初期化されてしまいます。
完成したコードはGitHubのリポジトリから見てください。
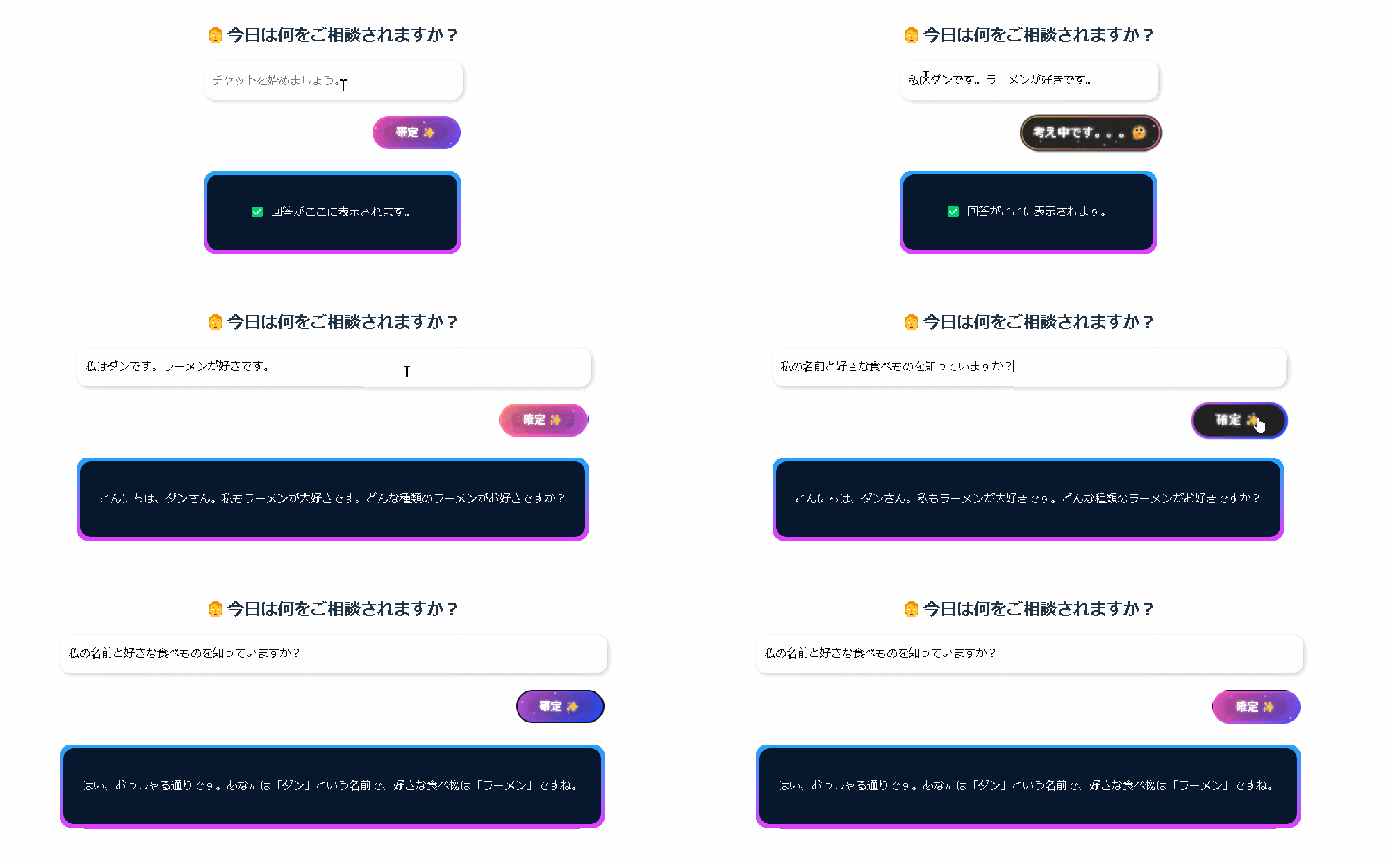
完成したものはこんな感じになります。
先に知っておくべきこと
**User-Agent エラー
上記の記事で紹介したNodeでChatGDPを使ったCLIではopenaiのライブラリを使いました。しかし、クライアント側で実行できるJavaScriptアプリでnpm i openaiでインストールしたライブラリを使ってOpenAIををコールをかけると下記のエラーが出ます。
Refused to set unsafe header "User-Agent"
これは前回の記事で使用したopenaiライブラリはより安全なNode.jsやPythonなどのサーバー側からのコールを許可したもののみになるからです。
今回はaxiosを使ってコールをかけますが、下記にopenAIのエンドポイントにHTTPリクエストを送るaxiosを使わないサンプルコードを紹介しておきます。
      const requestOptions = {
        method: 'POST',
        headers: {
          'Content-Type': 'application/json',
          'Authorization': 'Bearer ' + String(openAIKey)
        },
        body: JSON.stringify({
          'prompt': prompt,
          'temperature': 0.1,
          'max_tokens': Math.floor(fileLength/2),
          'top_p': 1,
          'frequency_penalty': 0,
          'presence_penalty': 0.5,
          'stop': ["\"\"\""],
        })
      };
      fetch('https://api.openai.com/v1/engines/code-davinci-001/completions', requestOptions)
          .then(response => response.json())
          .then(data => {
            # Do something with data
        }).catch(err => {
          console.log("Ran out of tokens for today! Try tomorrow!");
        });
    }
今日の記事では、axiosのライブラリを使って作業をするので自分の好みでコードを変えてください。
Vueのセットアップ
ではViteを使ってVueのプロジェクトを作成します。
npm create vite@latest
√ Project name: ... vue-chat-app
√ Select a framework: » Vue
√ Select a variant: » JavaScript
Scaffolding project in D:\GitHub\vue-chat-app...
Done. Now run:
cd vue-chat-app
npm install
npm run dev
次にaxiosをインストールします。
npm i axios
では、テキストエディタを開いて、早速コードを書いていきます。
コードを書こう
では以下のようにApp.vueにコードを書いていきます。
App.vue
<template>
  <h2>🧑今日は何をご相談されますか?</h2>
  <div class="chat">
    <input
      class="input"
      placeholder="チャットを始めましょう。"
      v-model="content"
      clear
    />
    <div class="button-block">
      <button
        type="button"
        @click="askAi"
        class="btn"
      >
        <strong>{{ btnText }}</strong>
        <div id="container-stars">
          <div id="stars"></div>
        </div>
        <div id="glow">
          <div class="circle"></div>
          <div class="circle"></div>
        </div>
      </button>
    </div>
    <div class="card">
      <pre>{{ res }}</pre>
    </div>
  </div>
</template>
<script setup>
import { ref } from 'vue';
import axios from 'axios';
// console.log(import.meta.env)
const http = axios.create({
  baseURL: 'https://api.openai.com/v1/chat',
  headers: {
    'Content-Type': 'application/json',
    Authorization: `Bearer ${import.meta.env.VITE_API_KEY}`,
    // 'OpenAI-Organization': import.meta.env.VITE_ORG_ID,
  },
});
const content = ref('');
const BTN_TEXT = '確定 ✨';
const res = ref('✅ 回答がここに表示されます。');
const btnText = ref(BTN_TEXT);
const messages = ref([
  // ChatGPTとの会話をここに追加
]);
const askAi = () => {
  btnText.value = '考え中です。。。🤔';
  const message = { role: 'user', content: content.value };
  messages.value.push(message);

  http
    .post('/completions', {
      model: 'gpt-3.5-turbo',
      messages: messages.value,
      temperature: 0.7,
    })
    .then((response) => {
      console.log(response);
      res.value = response.data.choices[0].message.content;
      // ChatGPTからの応答を追加
      messages.value.push(response.data.choices[0].message);
    })
    .catch((error) => {
      console.log(error);
    })
    .finally(() => {
      btnText.value = BTN_TEXT;
    });
};
</script>
- 基本となる初期値の設定:
-
content変数: ユーザーが入力するチャットメッセージを保持します。 -
BTN_TEXT定数とbtnText変数: ボタンのテキストを制御します。 -
res変数: 回答結果を表示するための変数です。 -
messages変数: チャットの会話履歴を保持するための配列です。最初は空の配列で初期化します。
-
- HTTPリクエストの送信方法の設定:
-
http変数:axiosを使用してHTTPリクエストを送信するためのインスタンスを作成します。OpenAIのAPIエンドポイントと認証情報を設定します。必要に応じて組織キーを追加してください。
-
- HTMLへの組み込み:
-
<h2>タグ: チャットアプリケーションのタイトルを表示します。 -
<input>タグ: ユーザーがチャットメッセージを入力するためのテキストボックスです。v-modelディレクティブを使用してcontent変数と双方向バインディングします。 -
<button>タグ: チャットを送信するためのボタンです。@clickディレクティブを使用してaskAi関数が呼び出されるようにします。ボタンのテキストはbtnText変数にバインドされます。 -
<div class="card">: 回答結果を表示するためのプレースホルダーです。{{ res }}を使用してres変数の値を表示します。
-
-
askAi関数の定義:- ボタンがクリックされたときに呼び出される関数です。
-
btnTextを更新して、ボタンのテキストを変更します。 - ユーザーの入力メッセージを
messages配列に追加します。 -
http.postメソッドを使用してChatGPTへのリクエストを送信します。messages配列とその他のパラメーターをリクエストのボディに含めます。 - レスポンスが正常に返された場合、回答を取得し
res変数に格納します。また、ChatGPTからの応答もmessages配列に追加します。 - エラーが発生した場合はエラーメッセージをログに出力します。
- 最後に、
btnTextを元のテキストに戻します。
補足:
- ChatGPTの会話履歴の追加:
-
messages配列は、ユーザーとChatGPTとの会話履歴を保持します。 - ユーザーの入力メッセージが送信される前に、新しい会話メッセージとして
messages配列に追加されます。 - ChatGPTからの応答が受け取られた後、その応答も
messages配列に追加されます。
-
- ChatGPTのリクエストパラメーター:
-
http.postメソッドでのリクエストはChatGPTに対して行われます。 -
modelパラメーターはChatGPTのモデルを指定します。ここでは”gpt-3.5-turbo”を使用しています。 -
messagesパラメーターには、ユーザーとChatGPTとの会話履歴が含まれます。 -
temperatureパラメーターは、ChatGPTの生成結果の多様性を制御します。
-
- HTMLとVue.jsの統合:
-
<script setup>ブロック内で、Vue.jsのref関数を使用して変数を定義します。 -
<template>内の要素は、変数や関数をバインドするためのディレクティブを使用しています。 -
v-modelディレクティブを使用して、入力フィールドとcontent変数を双方向にバインドします。 -
@clickディレクティブを使用してボタンのクリックイベントがaskAi関数に関連付けられます。
-
最後にスタイルを追加して完了です。
<style scoped>
h1 {
  margin-bottom: 64px;
}
/*
.chat {
} */
.input {
  width: calc(100% - 20px);
  height: 32px;
  padding: 12px;
  border: none;
  border-radius: 16px;
  box-shadow: 2px 2px 7px 0 rgb(0, 0, 0, 0.2);
  outline: none;
  font-size: 16px;
}
.input:invalid {
  animation: justshake 0.3s forwards;
  color: red;
}
@keyframes justshake {
  25% {
    transform: translateX(5px);
  }
  50% {
    transform: translateX(-5px);
  }
  75% {
    transform: translateX(5px);
  }
  100% {
    transform: translateX-(5px);
  }
}
button {
  cursor: pointer;
  height: 32px;
  font-size: 16px;
  margin-top: 24px;
  background: royalblue;
  color: white;
  padding: 0.7em 1em;
  padding-left: 0.9em;
  display: flex;
  align-items: center;
  border: none;
  border-radius: 16px;
  overflow: hidden;
  transition: all 0.2s;
}
button span {
  display: block;
  margin-left: 0.3em;
  transition: all 0.3s ease-in-out;
}
button svg {
  display: block;
  transform-origin: center center;
  transition: transform 0.3s ease-in-out;
}
.card {
  background: #07182e;
  position: relative;
  display: flex;
  place-content: center;
  place-items: center;
  overflow: hidden;
  border-radius: 16px;
  margin: 24px 0;
  /* max-height: 420px; */
}
.card {
  margin-top: 32px;
}
.card span,
.card pre {
  z-index: 1;
  color: white;
  font-size: 16px;
}
.card::before {
  content: '';
  position: absolute;
  width: 100%;
  background-image: linear-gradient(
    180deg,
    rgb(0, 183, 255),
    rgb(255, 48, 255)
  );
  height: 130%;
  animation: rotBGimg 3s linear infinite;
  transition: all 0.2s linear;
}
.card::after {
  content: '';
  position: absolute;
  background: #07182e;
  inset: 5px;
  border-radius: 16px;
}
.button-block {
  display: flex;
  align-items: center;
  justify-content: end;
}
.btn {
  display: flex;
  justify-content: center;
  align-items: center;
  min-width: 8rem;
  max-width: 13rem;
  height: 3rem;
  background-size: 300% 300%;
  backdrop-filter: blur(1rem);
  border-radius: 5rem;
  transition: 0.5s;
  animation: gradient_301 5s ease infinite;
  border: double 4px transparent;
  background-image: linear-gradient(#212121, #212121),
    linear-gradient(
      137.48deg,
      #ffdb3b 10%,
      #fe53bb 45%,
      #8f51ea 67%,
      #0044ff 87%
    );
  background-origin: border-box;
  background-clip: content-box, border-box;
}
#container-stars {
  position: fixed;
  z-index: -1;
  width: 100%;
  height: 100%;
  overflow: hidden;
  transition: 0.5s;
  backdrop-filter: blur(1rem);
  border-radius: 5rem;
}
strong {
  z-index: 2;
  font-size: 16px;
  color: #ffffff;
  text-shadow: 0 0 4px white;
}
#glow {
  position: absolute;
  display: flex;
  width: 12rem;
}
.circle {
  width: 100%;
  height: 30px;
  filter: blur(2rem);
  animation: pulse_3011 4s infinite;
  z-index: -1;
}
.circle:nth-of-type(1) {
  background: rgba(254, 83, 186, 0.636);
}
.circle:nth-of-type(2) {
  background: rgba(142, 81, 234, 0.704);
}
.btn:hover #container-stars {
  z-index: 1;
  background-color: #212121;
}
.btn:hover {
  transform: scale(1.1);
}
.btn:active {
  border: double 4px #fe53bb;
  background-origin: border-box;
  background-clip: content-box, border-box;
  animation: none;
}
.btn:active .circle {
  background: #fe53bb;
}
#stars {
  position: relative;
  background: transparent;
  width: 200rem;
  height: 200rem;
}
#stars::after {
  content: '';
  position: absolute;
  top: -10rem;
  left: -100rem;
  width: 100%;
  height: 100%;
  animation: animStarRotate 90s linear infinite;
}
#stars::after {
  background-image: radial-gradient(#ffffff 1px, transparent 1%);
  background-size: 50px 50px;
}
#stars::before {
  content: '';
  position: absolute;
  top: 0;
  left: -50%;
  width: 170%;
  height: 500%;
  animation: animStar 60s linear infinite;
}
#stars::before {
  background-image: radial-gradient(#ffffff 1px, transparent 1%);
  background-size: 50px 50px;
  opacity: 0.5;
}
@keyframes animStar {
  from {
    transform: translateY(0);
  }
  to {
    transform: translateY(-135rem);
  }
}
@keyframes animStarRotate {
  from {
    transform: rotate(360deg);
  }
  to {
    transform: rotate(0);
  }
}
@keyframes gradient_301 {
  0% {
    background-position: 0% 50%;
  }
  50% {
    background-position: 100% 50%;
  }
  100% {
    background-position: 0% 50%;
  }
}
@keyframes pulse_3011 {
  0% {
    transform: scale(0.75);
    box-shadow: 0 0 0 0 rgba(0, 0, 0, 0.7);
  }
  70% {
    transform: scale(1);
    box-shadow: 0 0 0 10px rgba(0, 0, 0, 0);
  }
  100% {
    transform: scale(0.75);
    box-shadow: 0 0 0 0 rgba(0, 0, 0, 0);
  }
}
</style>
アプリの検証とまとめ
ではnpm run devのコマンドでアプリを起動してテストしてみましょう。
今日は基本のOpenAI APIの使い方を紹介しました。
OpenAIのAPIを使用すると、さまざまなタスクとアプリケーションを構築できます。以下にいくつかの例を挙げます:
- 自然言語処理(NLP)タスク:APIを使用して、テキストの要約、文章の生成、文章の翻訳、質問応答、文章の分類、文書の類似性の計算など、自然言語処理タスクを実行できます。
- チャットボット:APIを使用して、対話型のチャットボットを構築することができます。ユーザーとの対話に基づいて応答を生成し、質問に答えたり、情報を提供したりすることができます。
- コンテンツの生成:APIを使用して、ブログの記事、商品の説明、ニュース記事など、さまざまな種類のコンテンツを生成することができます。
- 製品やサービスの推薦:ユーザーの嗜好や要件に基づいて、製品やサービスの推薦を生成することができます。例えば、映画の推薦、商品の購入のサポートなどです。
- 質問応答システム:APIを使用して、与えられた質問に対する回答を生成するシステムを構築することができます。例えば、FAQシステムやオンラインヘルプデスクなどです。
このように色々なことに活用できそうなので今後も注目が集まりそうです。

