0
1

Delete article

Deleted articles cannot be recovered.

Draft of this article would be also deleted.

Are you sure you want to delete this article?

More than 1 year has passed since last update.

WSL2をDドライブにインストールする

Posted at
  1. WSL2をインストールします。

    wsl --install Ubuntu
    
  2. デフォルトユーザのUIDをメモしておきます

    id -u
    

    おそらく1000です。

  3. WSL2をエクスポートします。

    wsl --export Ubuntu D:\Ubuntu.tar
    

    ファイルは1GB程度です。

  4. WSL2インスタンスを削除します

    wsl --unregister Ubuntu
    
  5. WSL2をインポートします。

    wsl --import Ubuntu D:\wsl D:\Ubuntu.tar
    
  6. WSL起動時のデフォルトユーザー変更

    1. Windowsキー+Rから regedit でレジストリエディタ起動

      • wslの各Distro情報は以下にディストリビューションごとに格納されている
        HKEY_CURRENT_USER\Software\Microsoft\Windows\CurrentVersion\Lxss

      • DistributionNameで今回入れたUbuntuを特定
        image.png

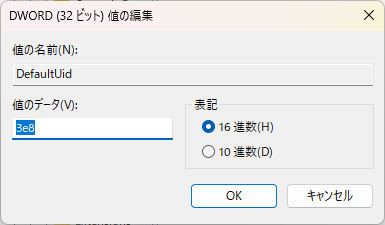
      • DefaultUidの値を変更する(例:0から1000(16進数では3e8)に変更)
        image.png

0
1
0

Register as a new user and use Qiita more conveniently

  1. You get articles that match your needs
  2. You can efficiently read back useful information
  3. You can use dark theme
What you can do with signing up
0
1

Delete article

Deleted articles cannot be recovered.

Draft of this article would be also deleted.

Are you sure you want to delete this article?