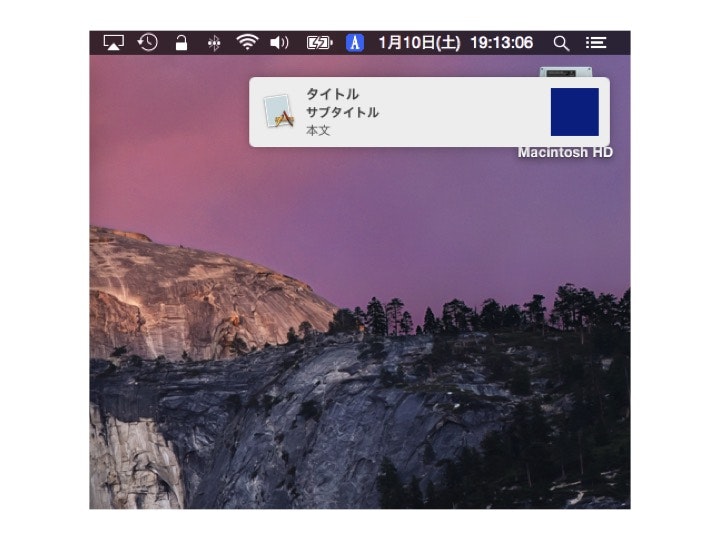
OS X Mountain Lionから実装された通知センターに通知するアプリケーションをSwiftで記述します。
AppDelegate.swiftにコードを書き足します。
AppDelegate.swift
import Cocoa

@NSApplicationMain
class AppDelegate: NSObject, NSApplicationDelegate, NSUserNotificationCenterDelegate {

	func applicationDidFinishLaunching(aNotification: NSNotification) {
		// Insert code here to initialize your application

		NSUserNotificationCenter.defaultUserNotificationCenter().delegate = self
		let notification = NSUserNotification()
		notification.title = "タイトル"
		notification.subtitle = "サブタイトル"
		notification.informativeText = "本文"
		notification.contentImage =  NSImage(named: "blue")
		notification.userInfo = ["title" : "タイトル"]
		NSUserNotificationCenter.defaultUserNotificationCenter().deliverNotification(notification)
	}

	func applicationWillTerminate(aNotification: NSNotification) {
		// Insert code here to tear down your application
	}

	func userNotificationCenter(center: NSUserNotificationCenter, didActivateNotification notification: NSUserNotification) {
		let info = notification.userInfo as [String:String]

		println(info["title"]!)
	}
}
通知の内容を設定します。
任意の画像を指定することができます。
ここでは用意した青い画像を指定します。
notification.title = "タイトル"
notification.subtitle = "サブタイトル"
notification.informativeText = "本文"
notification.contentImage =  NSImage(named: "blue")
通知する時間を指定できます。
例えば10秒後に通知する場合は、以下のように記述します。
notification.deliveryDate = NSDate().dateByAddingTimeInterval(10.0)
NSUserNotificationCenter.defaultUserNotificationCenter().scheduleNotification(notification)
通知をクリックしたときに、どの通知がクリックされたか判断するために情報を保持させます。
notification.userInfo = ["title" : "タイトル"]
通知をクリックしたときに、通知に保持させた情報を取り出します。
NSUserNotificationCenterDelegateを記述してdelegateを設定します。
通知に保持させた情報の型が[String, String]なので、notification.userInfo as [String:String]と記述します。
func userNotificationCenter(center: NSUserNotificationCenter, didActivateNotification notification: NSUserNotification) {
    let info = notification.userInfo as [String:String]

    println(info["title"]!)
}
