概要
フロントエンド開発をしていると、「コンポーネントのUIに意図しない変更が反映されていないか」と気になることが何度かあります。
しかし数多くあるコンポーネントを一つずつ目視で確認するのは骨が折れますね...
そこでGitHubにpushするたび、自動的にUIの差分の有無を確認できるテスト(Visual Regression Test)をできるように設定します!
使用技術
- Storybook
- Playwright
- reg-suit
- Slack Webhook
- AWS
- CodeBuild
- S3
- CloudFront
本記事では、Storybook, Slack Webhookの設定方法の説明は割愛させていただきます
構成図
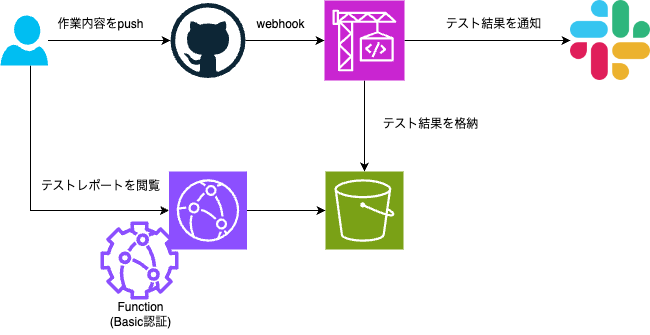
AWSリソースの構築
S3
テスト結果を格納するS3バケットを作成します。
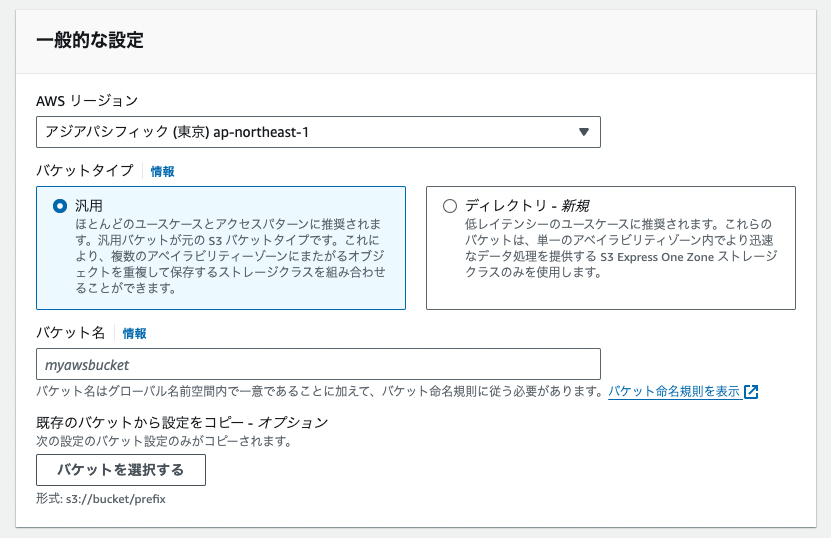
今回は「パブリックアクセスは全部ブロック」「ACL無効」という設定で作成します。
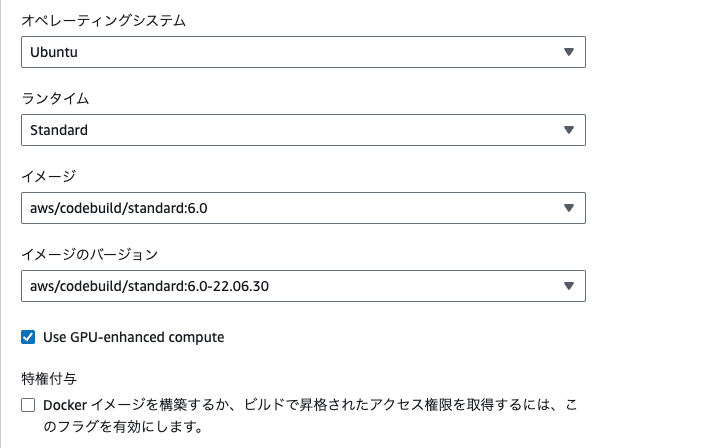
CodeBuild
Playwrightが利用できるOS, イメージ, ランタイムを選択すればOKです
(今回はUbuntu, aws/codebuild/standard 6.0を指定)
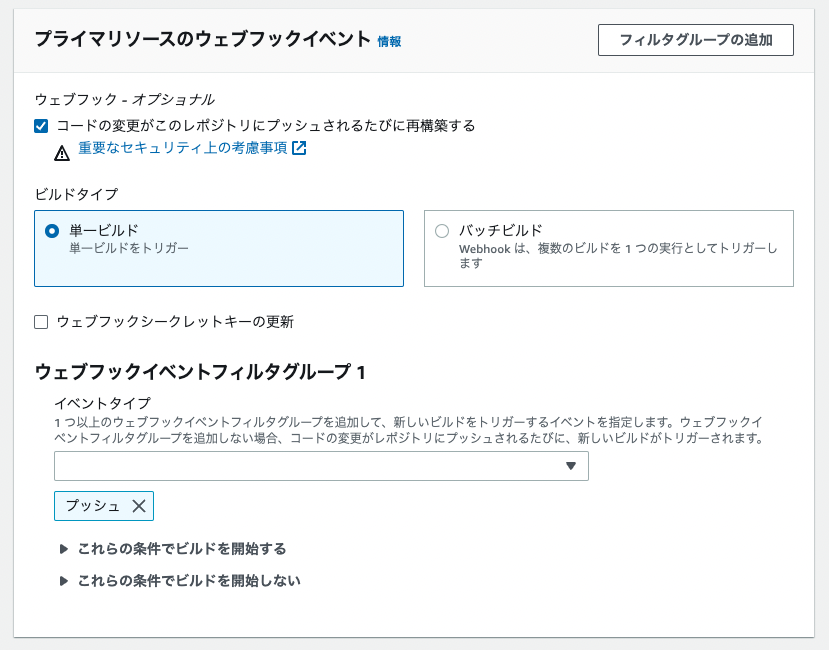
ソースプロバイダとして今回はGitHubを設定します
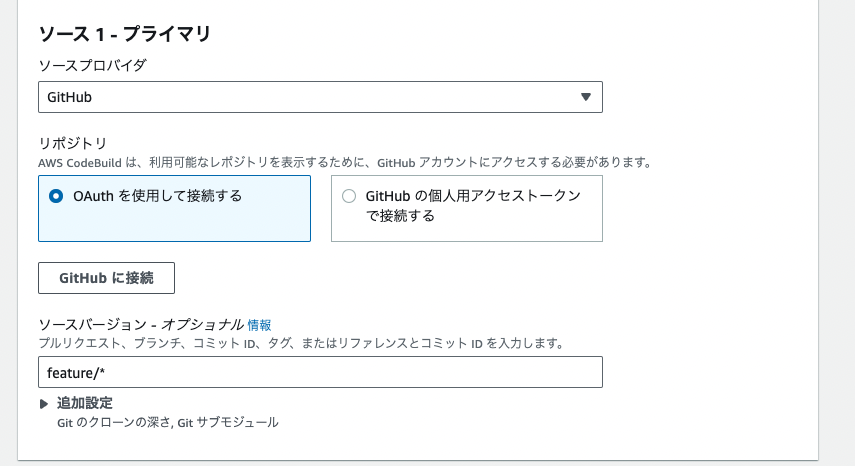
プライマリソースのウェブフックイベントで「プッシュ時」・「PRのマージ時」などCodeBuildを実行するトリガーをお好みで設定します
(今回はプッシュをトリガーとして設定)
CodeBuildのサービスロールのポリシーをカスタマイズします
前の手順で作成したS3バケットにオブジェクトを操作する権限を付与します
{
	"Version": "2012-10-17",
	"Statement": [
		{
			"Action": [
				"s3:PutObject",
				"s3:GetObjectVersion",
				"s3:GetObject",
				"s3:GetBucketLocation",
				"s3:GetBucketAcl"
			],
			"Effect": "Allow",
			"Resource": [
				"arn:aws:s3:::[テスト結果を格納するS3バケット]/*",
                "arn:aws:s3:::[テスト結果を格納するS3バケット]",
				"arn:aws:s3:::[アーティファクトを格納するS3バケット]/*",
				"arn:aws:s3:::[アーティファクトを格納するS3バケット]"
			]
		}
	]
}
CloudFront
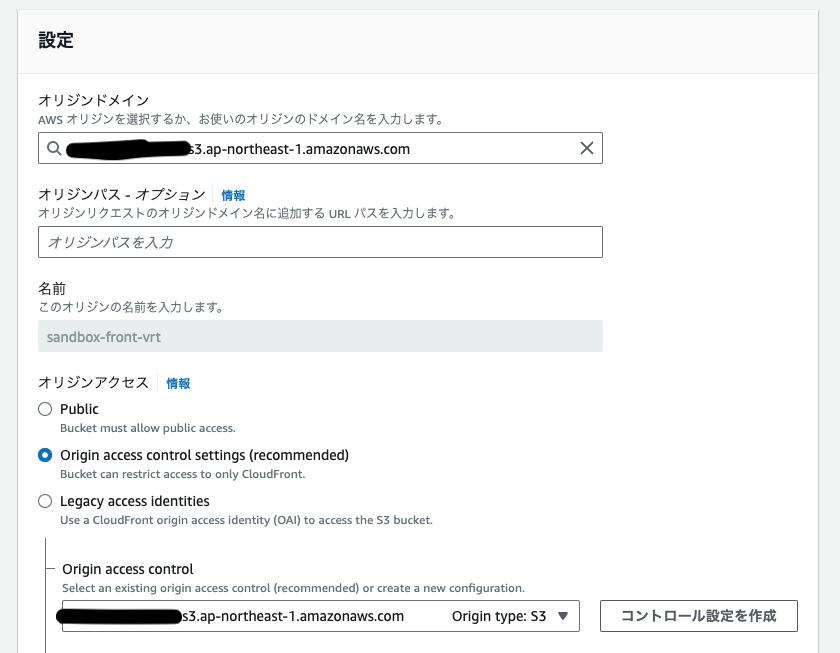
① ディストリビューションの作成
予め作成しておいたS3バケット([バケット名].s3.ap-northeast-1.amazonaws.com)をオリジンドメイン・オリジンアクセスコントロールとして設定しておきます
ディストリビューションの作成後、S3バケットのバケットポリシーを更新し、CloudFront経由でオブジェクトを閲覧できるように設定します。
{
    "Version": "2008-10-17",
    "Id": "PolicyForCloudFrontPrivateContent",
    "Statement": [
        {
            "Sid": "AllowCloudFrontServicePrincipal",
            "Effect": "Allow",
            "Principal": {
                "Service": "cloudfront.amazonaws.com"
            },
            "Action": "s3:GetObject",
            "Resource": "arn:aws:s3:::[作成したバケット名]/*",
            "Condition": {
                "StringEquals": {
                    "AWS:SourceArn": "[作成したディストリビューションのARN]"
                }
            }
        }
    ]
}
② 関数の作成
S3に格納されたテスト結果をCloudFront経由で確認する際にBasic認証で、特定のメンバーだけ見られるように設定しておきます。
CloudShellで以下コマンドを入力します
echo -n "[お好きなユーザー名]:[お好きなパスワード]" | base64
入力後、CloudShellに出力された文字列を控えておきます
CloudFront > 関数 から関数の作成を行います
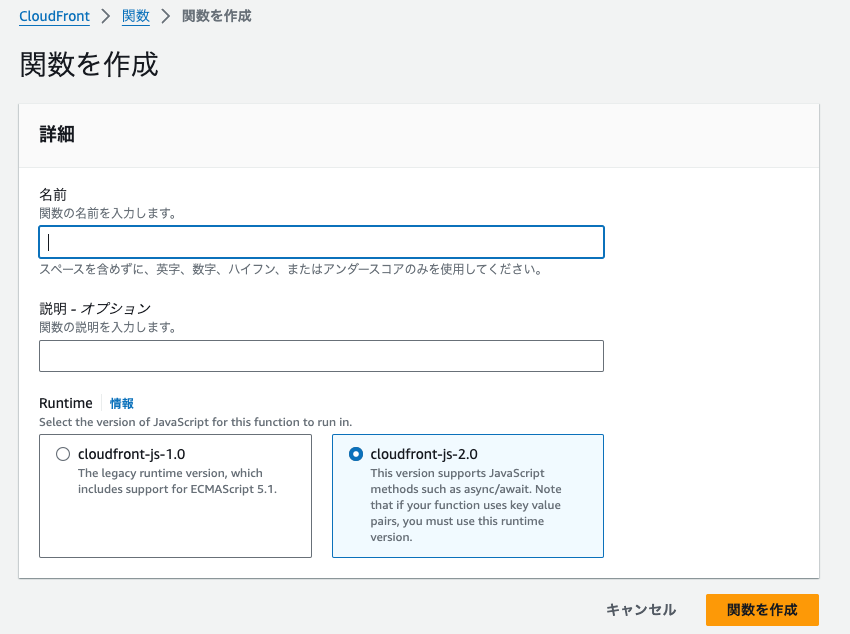
関数のコードとしては以下を入力します
function handler(event) {
  var request = event.request;
  var headers = request.headers;

  // echo -n username:password | base64 で作成された文字列を設定
  var authString = "Basic XXXXYYYYZZZZ";

  if (
    typeof headers.authorization === "undefined" ||
    headers.authorization.value !== authString
  ) {
    return {
      statusCode: 401,
      statusDescription: "Unauthorized",
      headers: { "www-authenticate": { value: "Basic" } }
    };
  }

  return request;
}
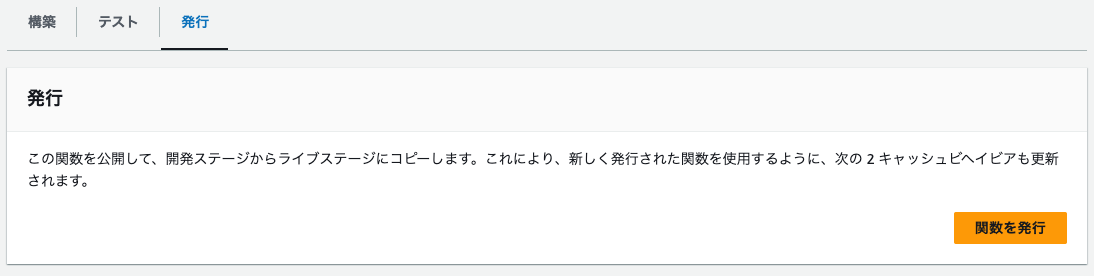
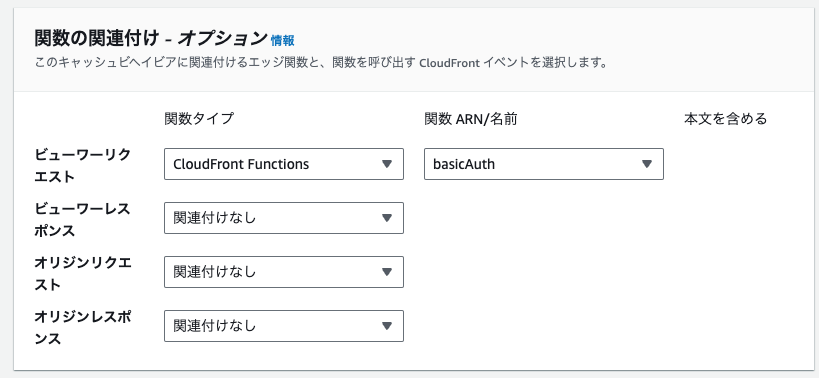
関数を作成・保存した後、発行タブから「関数の発行」を行います
① ディストリビューションの作成で作成したディストリビューションのビヘイビアの設定から、作成した関数を紐づけます
アプリケーション側の設定
reg-suitの設定
reg-suitをインストール
yarn add --dev reg-suit
インストール後、reg-suitの初期設定を行います
npx reg-suit init --use-yarn

# 利用するプラグインの選択(今回はreg-keygen-git-hash-plugin, reg-publish-s3-pluginを利用)

? Plugin(s) to install (bold: recommended) (Press <space> to select, <a> to toggle all, <i> to invert selection, and <enter> to proceed)
❯◉  reg-keygen-git-hash-plugin : Detect the snapshot key to be compare with using Git hash.
 ◯  reg-notify-github-plugin : Notify reg-suit result to GitHub repository
 ◉  reg-publish-s3-plugin : Fetch and publish snapshot images to AWS S3.
 ◯  reg-notify-chatwork-plugin : Notify reg-suit result to Chatwork channel.
 ◯  reg-notify-github-with-api-plugin : Notify reg-suit result to GHE repository using API
 ◯  reg-notify-gitlab-plugin : Notify reg-suit result to GitLab repository
  ◉  reg-notify-slack-plugin : Notify reg-suit result to Slack channel.
(Move up and down to reveal more choices)

? Working directory of reg-suit. .reg
? Append ".reg" entry to your .gitignore file. Yes
? Directory contains actual images. __screenshots__
? Threshold, ranges from 0 to 1. Smaller value makes the comparison more sensi
tive. 0
[reg-suit] info Set up reg-publish-s3-plugin:
? Create a new S3 bucket No
? Existing bucket name [作成したバケット名]
[reg-suit] info Configuration:
[reg-suit] info {
  "core": {
    "workingDir": ".reg",
    "actualDir": "__screenshots__",
    "thresholdRate": 0,
    "addIgnore": true,
    "ximgdiff": {
      "invocationType": "client"
    }
  },
  "plugins": {
    "reg-keygen-git-hash-plugin": true,
    "reg-notify-slack-plugin": {
      "webhookUrl": "[Slack Webhook URL]"
    },
    "reg-publish-s3-plugin": {
      "bucketName": "[作成したバケット名]"
    }
  }
}
? Update configuration file Yes
? Copy sample images to working dir No
[reg-suit] info Initialization ended successfully ✨
作成されたregconfig.jsonに予め作成したCloudFrontのディストリビューションを設定します
{
  "core": {
    "workingDir": ".reg",
    "actualDir": "__screenshots__",
    "thresholdRate": 0,
    "ximgdiff": {
      "invocationType": "client"
    }
  },
  "plugins": {
    "reg-keygen-git-hash-plugin": true,
    "reg-notify-slack-plugin": {
      "webhookUrl": "[Slack Webhook URL]"
    },
    "reg-publish-s3-plugin": {
      "acl": "private",
      "bucketName": "[作成したバケット名]",
      "customDomain": "[作成したディストリビューションのURL]"
    }
  }
}
PlayWrightの設定
インストール
yarn add -D playwright/test
初期設定(構成ファイルが作成されます)
yarn create playwright
作成されたplaywright.config.tsに以下設定を追加します
webServer: {
  command: 'npx http-server storybook-static --port 6006',
  url: 'http://127.0.0.1:6006',
  reuseExistingServer: !process.env.CI,
},
Storybookに登録されているコンポーネントのスクリーンショットを撮る設定を作成します
import { readFileSync } from 'node:fs';
import { resolve } from 'node:path';

import { test } from '@playwright/test';
import { StoryIndex } from '@storybook/store';

const storybookDir = resolve(__dirname, '../../../', 'storybook-static');
const data: StoryIndex = JSON.parse(readFileSync(resolve(storybookDir, 'stories.json')).toString());
test.describe.parallel('take screenshot', () => {
  Object.values(data.stories).forEach((story) => {
    test(`snapshot test ${story.title}: ${story.name}`, async ({ page }) => {
      await page.goto(`http://localhost:6006/iframe.html?id=${story.id}`, {
        waitUntil: 'networkidle',
      });
      await page.screenshot({ path: `./__screenshots__/${story.id}.png`, fullPage: true });
    });
  });
});
buildspec.ymlの作成
以下の内容でbuildspec.ymlを作成します。
version: 0.2

env:
  variables:
    PLAYWRIGHT_JUNIT_OUTPUT_NAME: playwright-report/results.xml
    CI: true

phases:
  install:
    runtime-versions:
      nodejs: 16
  pre_build:
    on-failure: ABORT
    commands:
      - curl -sS https://dl.yarnpkg.com/debian/pubkey.gpg | apt-key add -
      - apt update
      - yarn install
      - npx playwright install chromium
      - npx playwright install-deps
  build:
    on-failure: CONTINUE
    commands:
      - yarn build-storybook
      - mkdir -p __screenshots__
      - npx playwright test --reporter=junit --project=chromium
      - yarn reg-suit run
reports:
  report-group-name-or-arn:
    files:
      - ${PLAYWRIGHT_JUNIT_OUTPUT_NAME}
    file-format: JUNITXML
artifacts:
  files:
    - playwright-report/**/*
    - test-results/**/*
  name: artifact-$(date +%Y-%m-%d)
  enable-symlinks: no
cache:
  paths:
    - node_modules/*
テストを実行してみる
CodeBuildのトリガーとして設定したGitHubリポジトリ・ブランチにpushします
(「進行中」と表示されればOKです)
ビルドの成功を確認後、CodeBuild > ビルドプロジェクト > ビルドログから、テストレポートのURLを取得します
[reg-publish-s3-plugin] info Upload 5 files to [作成したバケット名].
[reg-suit] info Published snapshot 'snapshot_1703483539' successfully.
[reg-suit] info Report URL: https://[作成したディストリビューション].cloudfront.net/snapshot_XXXXXXXXXX/index.html
[reg-suit] info Skipped to notify result because notifier plugins are not set up.
Done in 0.83s.
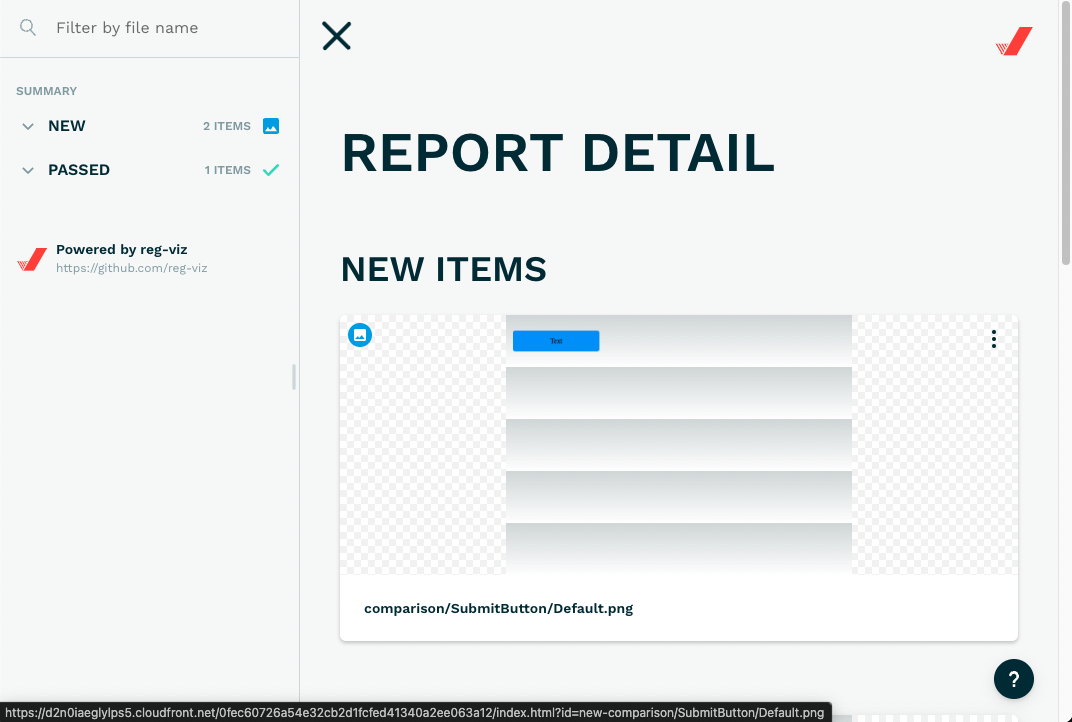
Storybookに登録しているコンポーネントをもとにVisual Regression Testが実行され、レポートが出力されます!
導入した結果
Before
- ソースコード変更時、「UIに意図しない差分が発生していないか」を目視で確認していた
- PRをマージする前にレビュワーもローカル環境で意図しない差分がないかを確認していた
After
- リモートブランチにpushすることで自動的に「UIに意図しない差分が発生しないか」を確認できるようになった
- レビュワーは自動生成されたテストレポートを確認するだけで、UIの差分を確認することができるようになった
参考