はじめに
初めてawsに触れるため、まずはインターネットに接続されたIoTデバイスの接続、管理できるAws IoT Coreというサービスを使ってみようと思う
Azure IoT Hubサービスに似ているものかな?
使用したもの
- RaspberryPi 3B+
- DHT22温湿度センサー
- Aws IoT Core
- node.js
AWS設定
ポリシーの作成
- AWSマネージメントコンソールにログイン
マネージメントコンソールにログイン
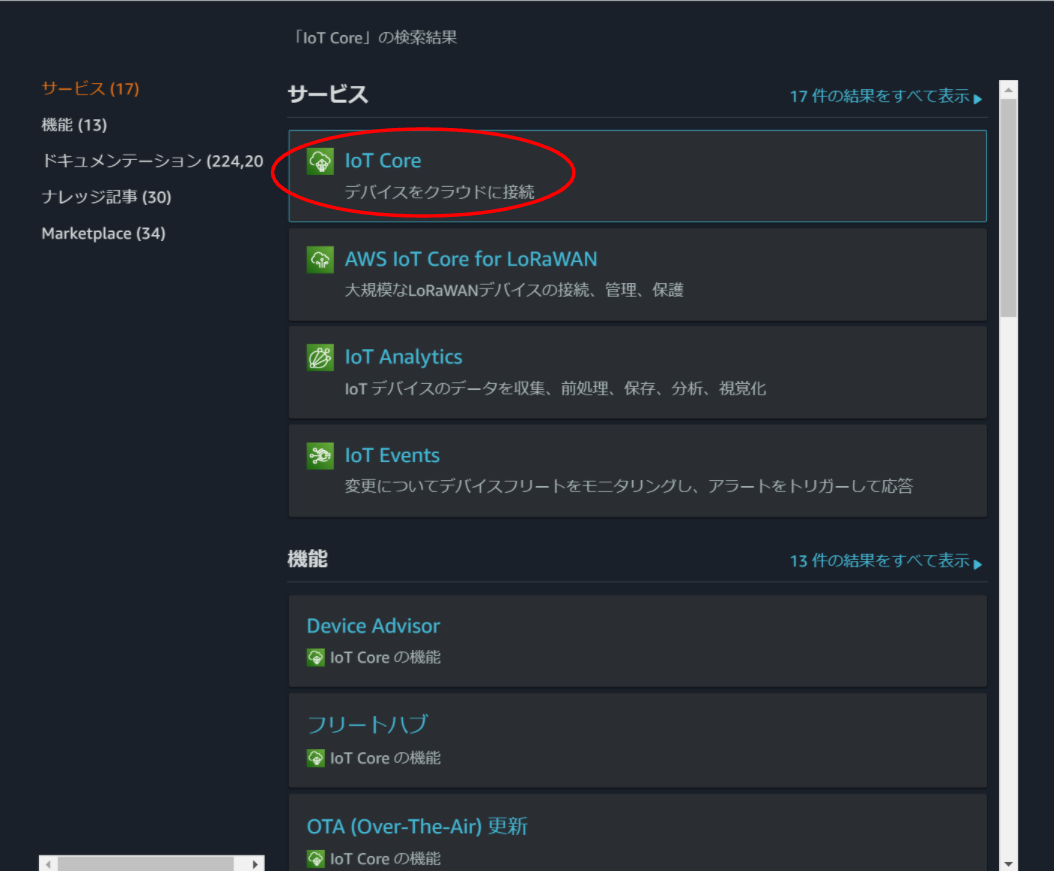
- 画面上の検索で「IoT Core」と検索し、IoT Coreを選択
- 「安全性」→ 「ポリシー」を選択

- 「作成」をクリック

- それぞれ必要事項を入力して作成をクリック
- 名前:任意の名前を入力
- アクション:今回は、広い権限を持たすために「IoT.*」を入力
- リソースARN:今回は、広い権限をもたすために「*」を入力
- 効果:「許可」にチェック

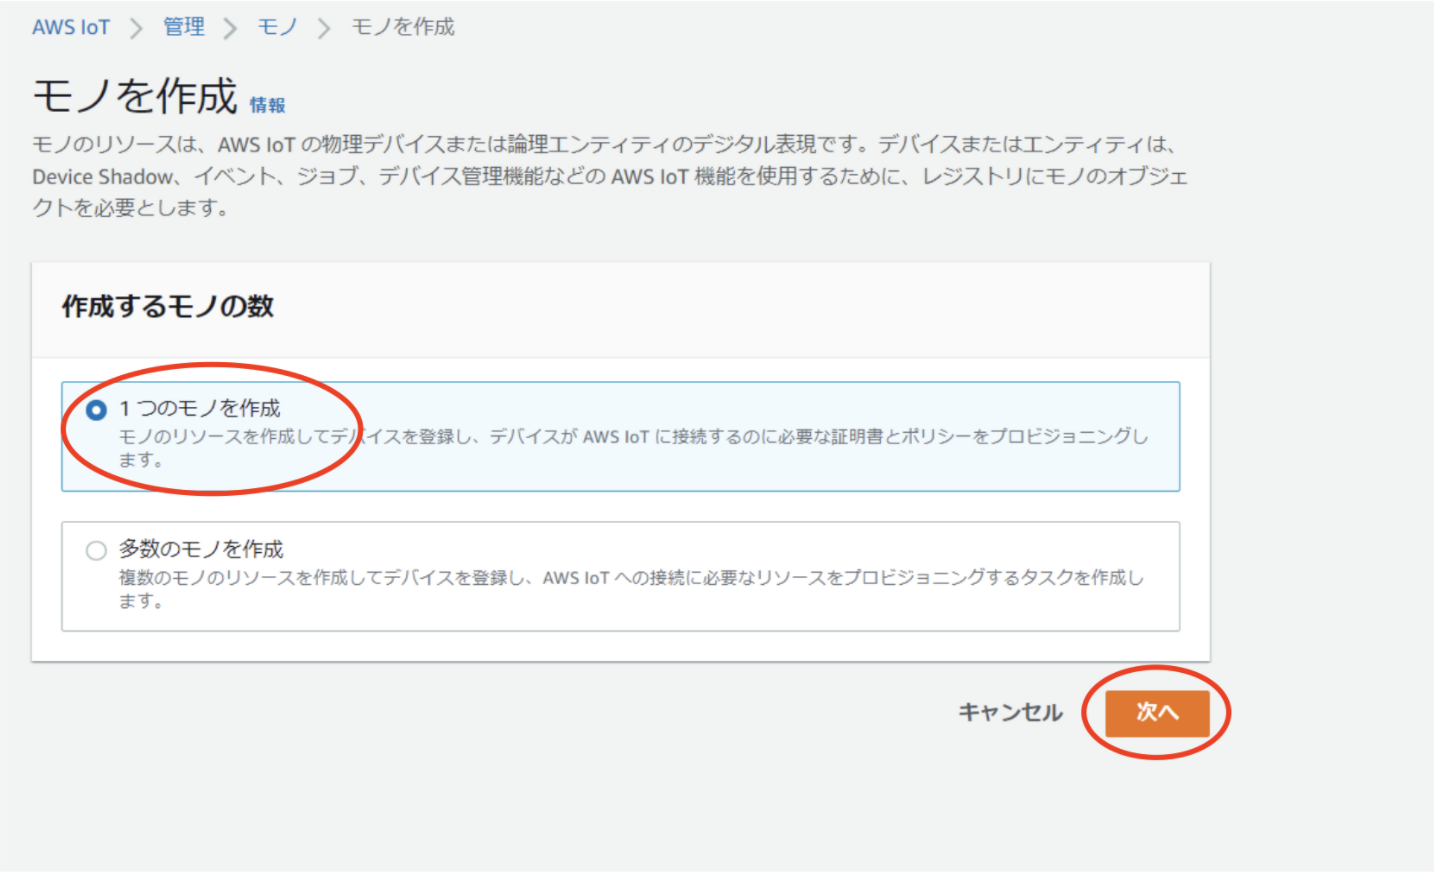
モノの作成
-
「管理」→ 「モノ」を選択し、「モノを作成」をクリック

-
「1つのモノを作成」を選択し、「次へ」をクリック
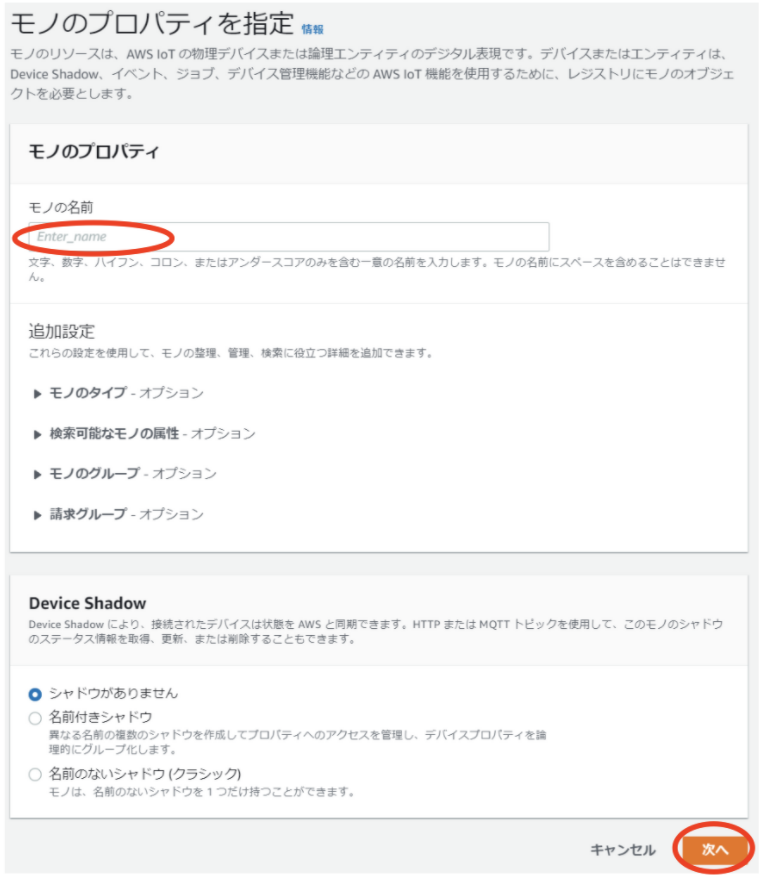
-
必要な事項を入力し、「次へ」をクリック
- モノの名前:任意の名前を入力
- その他は、デフォルトのままでok
-
「新しい証明書を自動生成」を選択し「次へ」をクリック

-
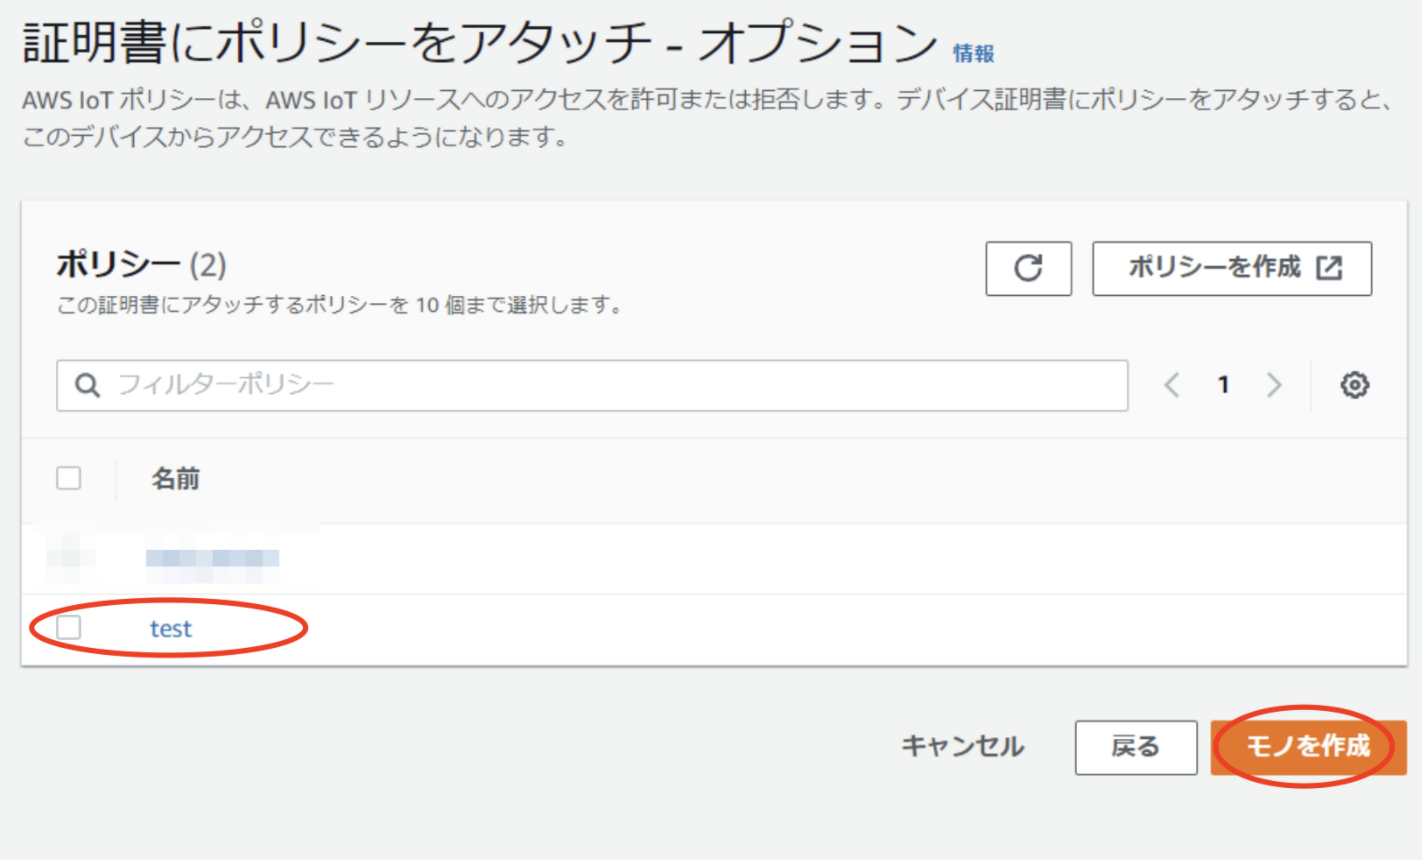
先ほど、任意の名前で作成したポリシーを選択し、「モノを作成」をクリック
-
ダウンロードできるものすべてダウンロードして「次へ」をクリック
-
注意:証明書とキーは、二度とダウンロードできないので注意

- 「設定」を選択し「エンドポイント」をコピーしてメモしておく


RaspberryPi
- 先ほど、ダウンロードした以下のファイルをraspberrypiに転送する
- 秘密鍵ファイル
- 証明書ファイル
- AmazonルートCA1ファイル
$ scp -r ローカルパス pi@raspberrypi.local:コピー先パス
ライブラリーのインストール
- 以下のライブラリーをインストール
$ npm install --save-dev node-dht-sensor
$ npm install --save-dev aws-iot-device-sdk
- mainファイルを作成して編集
$ touch main.js
main.js
// AWS IoT DeviceSDKの利用
const awsIot = require('aws-iot-device-sdk');
const sensor = require("node-dht-sensor");

// 秘密鍵、証明書などの設定
const device = awsIot.device({
  keyPath: './private.pem.key', // ダウンロードした秘密鍵
  certPath: './certificate.pem.crt', // ダウンロードした証明書
  caPath: './AmazonRootCA1.pem', // ダウンロードしたルートCA
  clientId: 'test', // ポリシーで許可したユニークなクライアント名
  host: '・・・・.amazonaws.com' // エンドポイント。コンソール画面でチェックできる
});

let count = 0;

// 通信確立した後、5秒ごとに呼び出されるイベント
device.on('connect', () => {
  console.log('connect');
  setInterval(async () => {
    count++;
    const res = await sensor.read(22, 4);  // 第二引数にピン番号を入力
    const temps = Math.round(res.temperature *10)/10;
    const humids = Math.round(res.humidity *10)/10;
    const data = {
        temp: temps,
        humid: humids
    }
    device.publish('topic', JSON.stringify(data)); // topic名もポリシーで許可したものを設定
    console.log(`published message for ${count} time`);
  }, 5000);
});
実行
$ node main.js


connect
published message for 1 time
published message for 2 time
published message for 3 time
published message for 4 time
published message for 5 time
published message for 6 time
published message for 7 time
published message for 8 time
published message for 9 time
published message for 10 time
接続確認
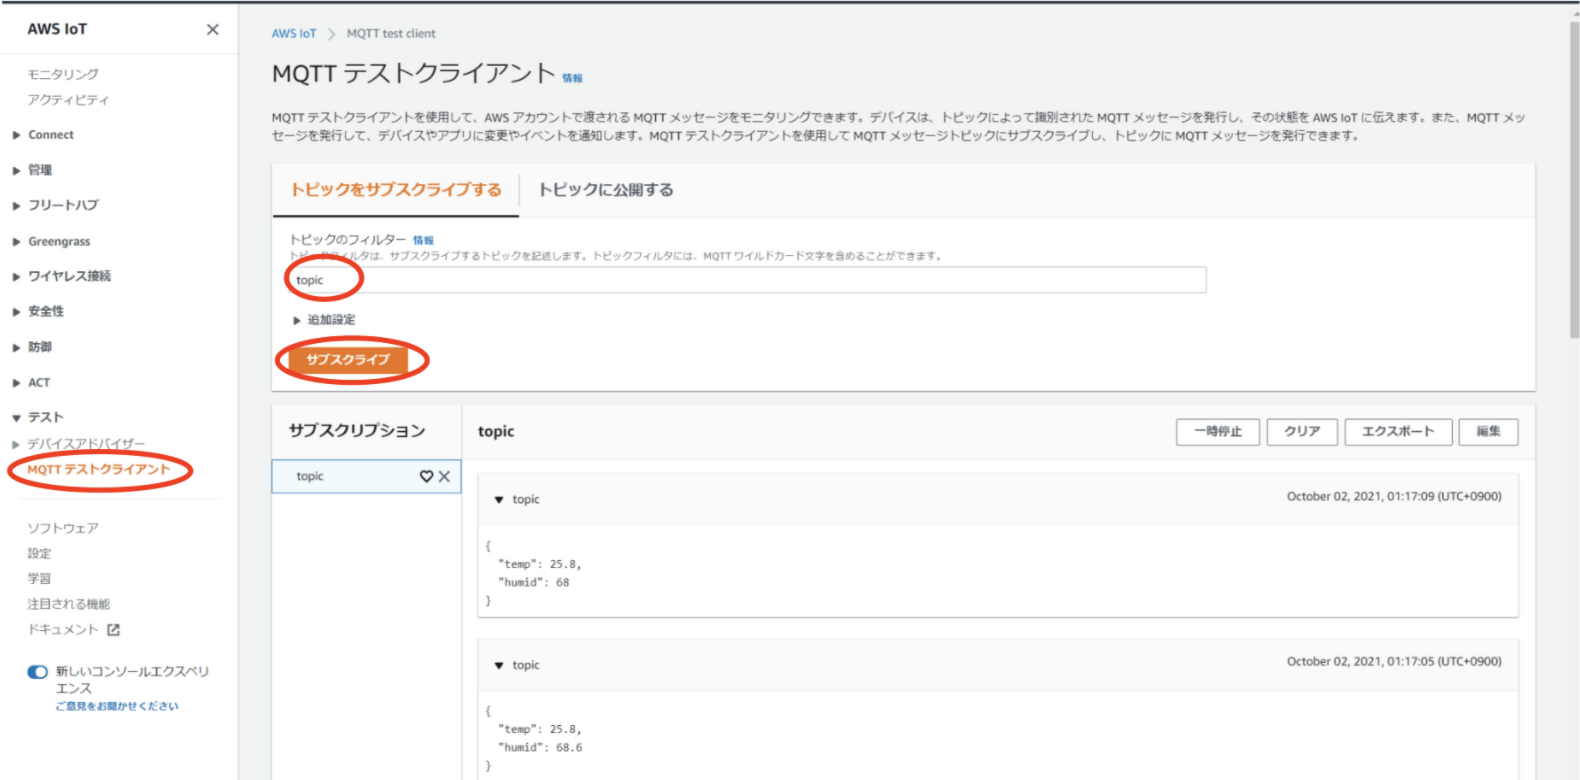
- AWS コンソールに戻り「テスト」→「MQTTクライアント」を選択し、topic名を入力し「サブスクライブ」をクリックすると受信データを確認することができる
まとめ
手探りで色々と手こずりましたが、覚えてしまえば簡単に使えるサービスですね!
デバイスとの接続ができたので、次はAws IoT Coreで受け取ったデータをDynamoDBを使ってデータを格納してみようと思います。