アプリにプッシュ通知を実装したい!
アプリをリリースしてダウンロード数も上昇。しかし、なかなか広告収入が増えないので、プッシュ通知の導入を検討してみました。ニフティの管理ページからタイトルとメッセージを入力して送信して、プッシュ通知を受け取るところまで、まとめてみました。
環境
Android Studio 1.5.1
Android4.4〜5.1で確認しました
Google Developers Consoleへアクセス
プロジェクトを作成する。
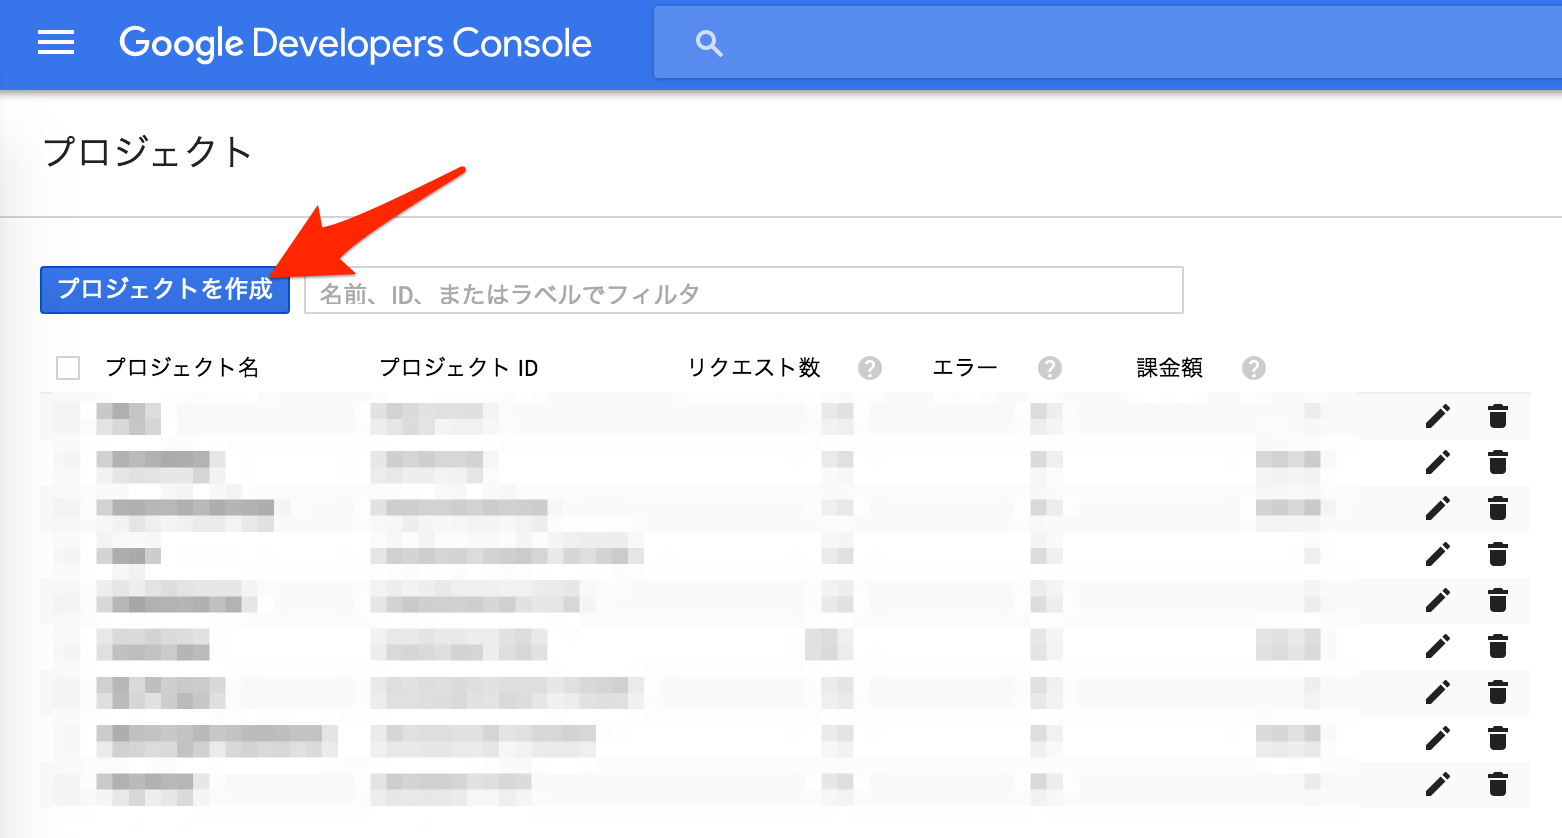
プロジェクト名を決める。

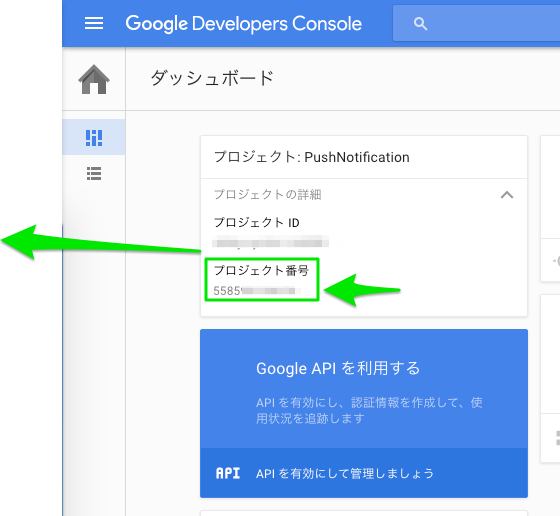
プロジェクト番号を覚えておく。
Androidのソースコードに貼り付けるのでメモ帳に貼っておきます。
APIを有効にする

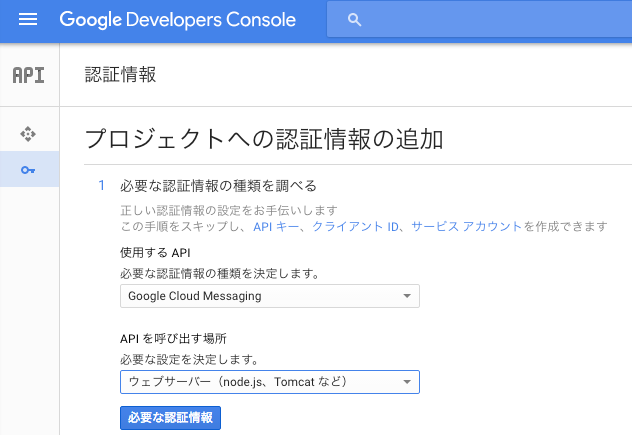
Google Cloumd Messagingを有効
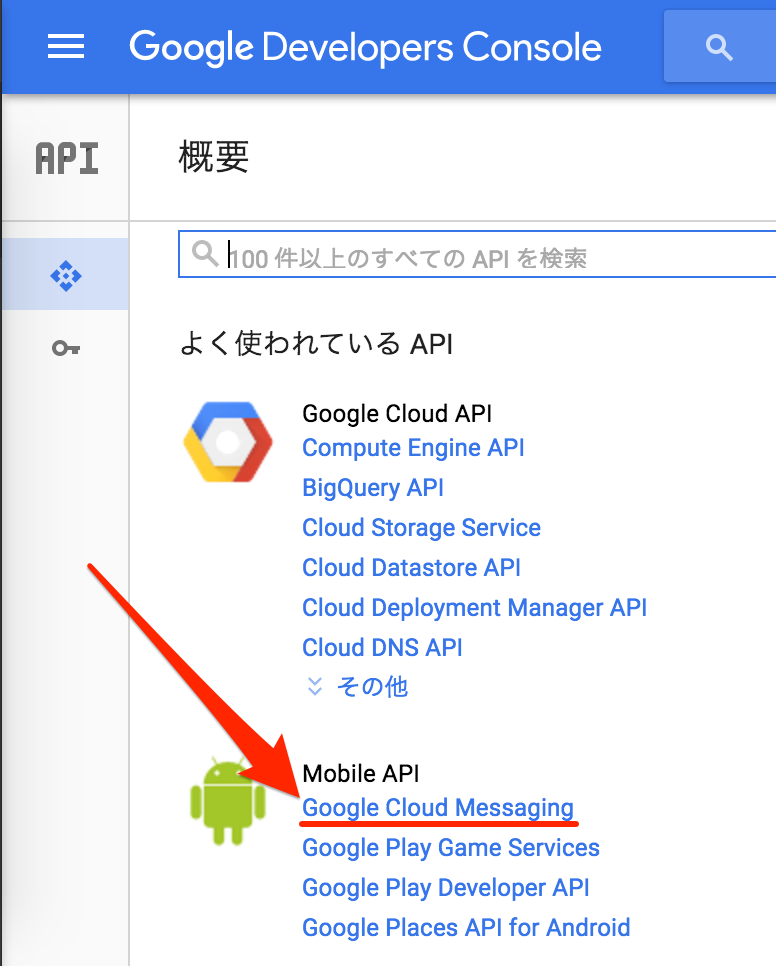
有効にする

認証情報へ進む

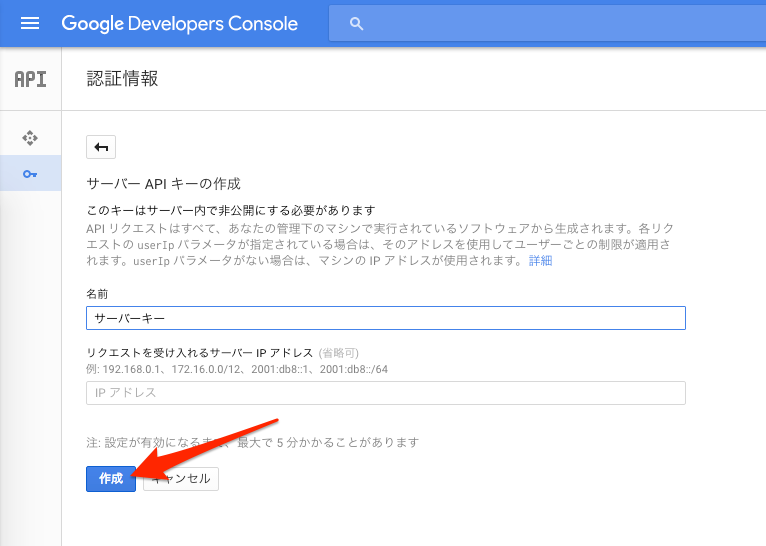
サーバーAPIキーの作成
名前だけ入力
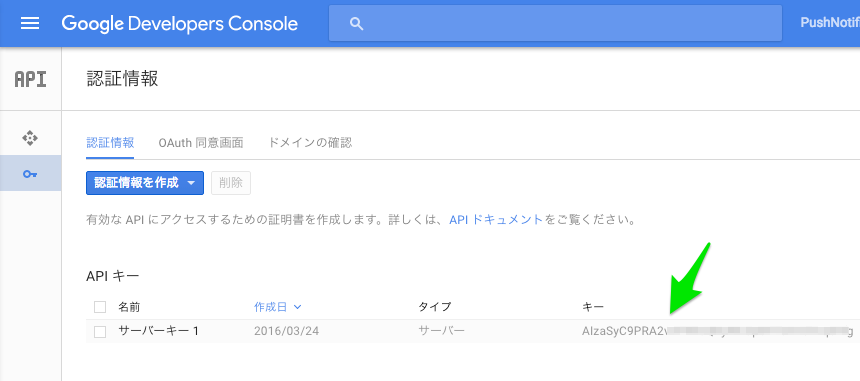
APIキーはNiftyモバイルバックエンドの管理ページに貼りますのでメモ帳へ
niftyモバイルバックエンド
Niftyの会員登録が必要ですので、会員登録を行ってください。
アプリ名を入力して新規作成

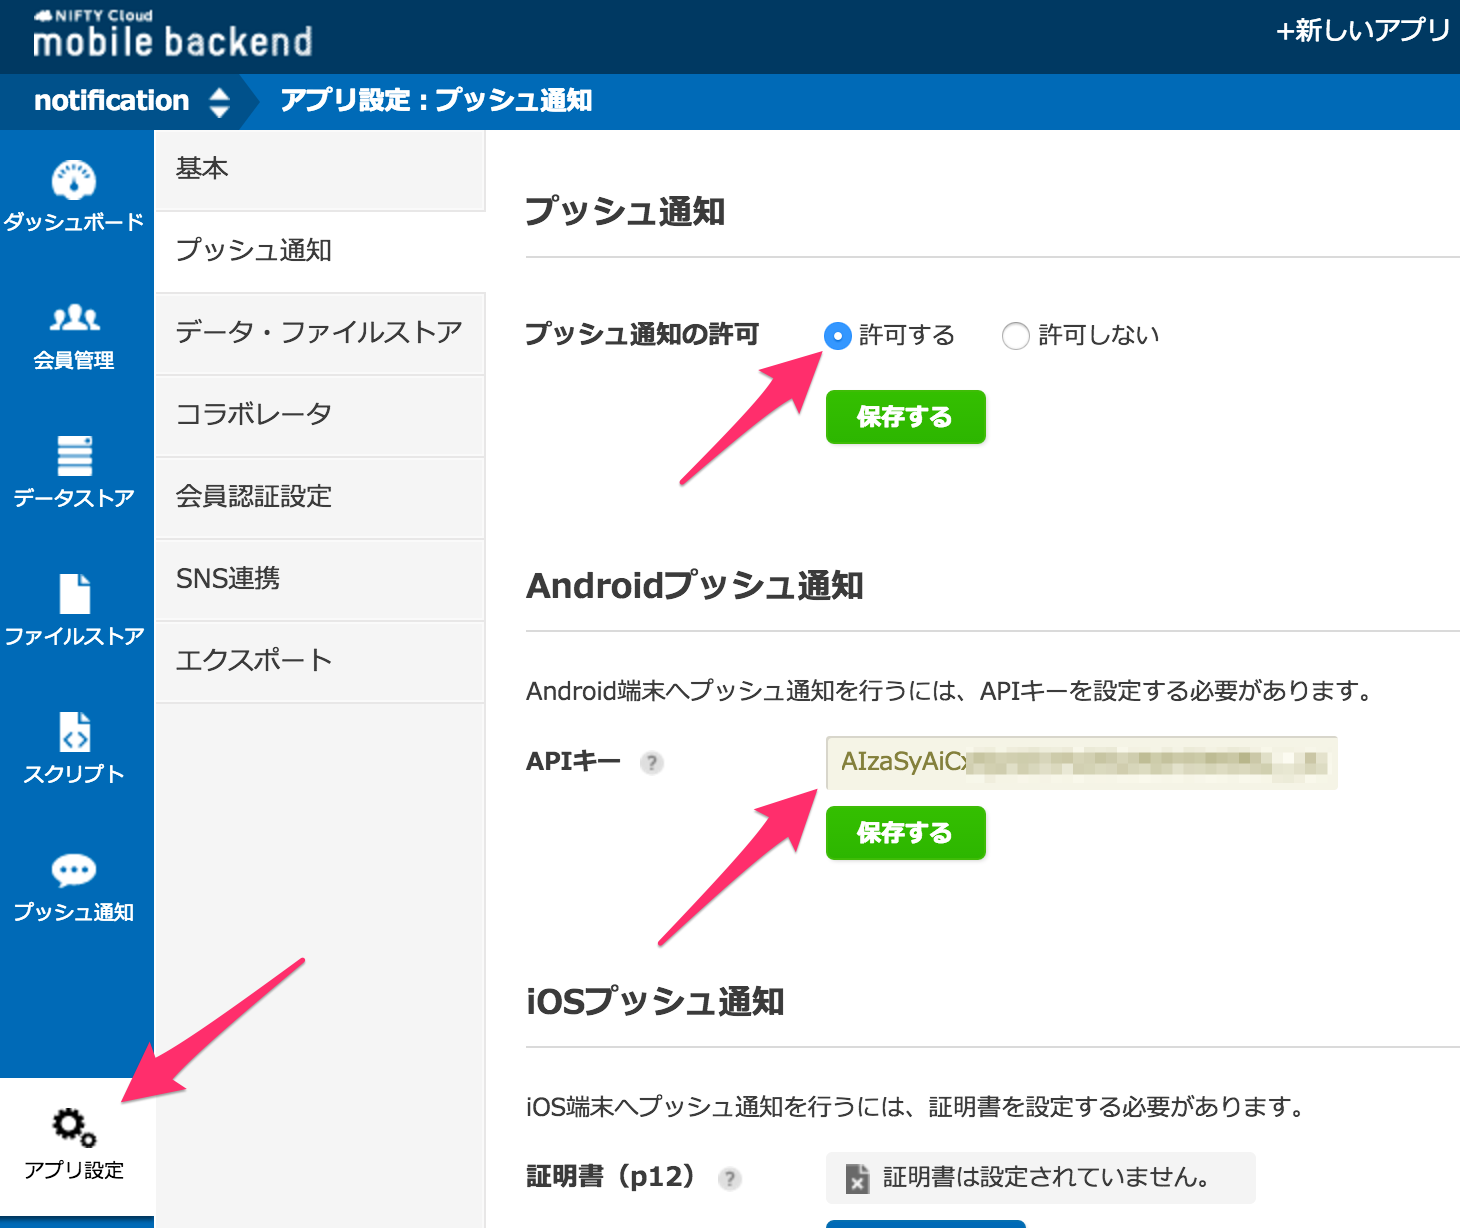
APIキーを登録
Google Developers Consoleで作成したAPIキーを入力、プッシュ通知の許可を選択して保存します。
SDKをダウンロード
プロジェクト作成

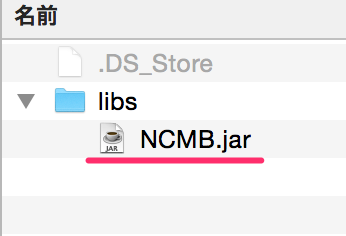
ダウンロードしたSDKを解凍してNCMB.jarをコピー。
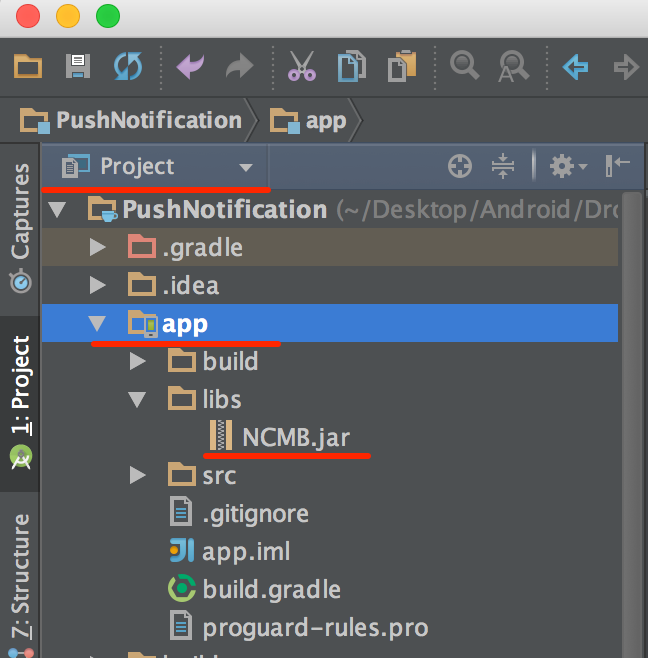
Project形式で表示させて、app/libsにペースト。
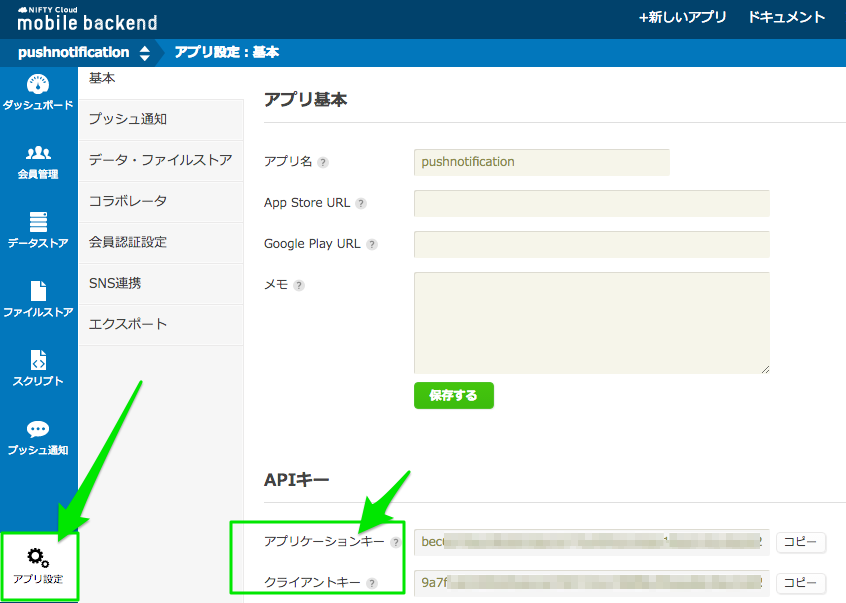
アプリケーションキーとクライアントキーをメモ帳へ
※ MainActivity.java
→プロジェクト番号、アプリケーションキー、クライアントキーを貼り付ける
import android.os.Bundle;
import android.support.v7.app.AppCompatActivity;
import android.util.Log;

import com.nifty.cloud.mb.core.DoneCallback;
import com.nifty.cloud.mb.core.NCMB;
import com.nifty.cloud.mb.core.NCMBException;
import com.nifty.cloud.mb.core.NCMBInstallation;

public class MainActivity extends AppCompatActivity {

    @Override
    protected void onCreate(Bundle savedInstanceState) {
        super.onCreate(savedInstanceState);
        setContentView(R.layout.activity_main);
        NCMB.initialize(this, "applicationKeyを貼り付ける",
                "clientKeyを貼り付ける");

        final NCMBInstallation installation = NCMBInstallation.getCurrentInstallation();
        Log.d("デバッグ","start");

        installation.getRegistrationIdInBackground("プロジェクト番号", new DoneCallback() {
            @Override
            public void done(NCMBException e) {
                if (e == null) {
                    //成功
                    try {
                        Log.d("デバッグ","成功");
                        //mBaaSに端末情報を保存
                        installation.save();
                    } catch (NCMBException saveError) {
                        //保存失敗
                        Log.d("デバッグ",saveError.getMessage());

                        //error = saveError;
                    }
                } else {
                    //ID取得失敗
                    //error = e;
                }
                //TestCompletion = true;
            }
        });
    }
}
dependencies {
    compile 'com.google.code.gson:gson:2.3.1'
    compile files('libs/NCMB.jar')
    compile fileTree(dir: 'libs', include: ['*.jar'])
    testCompile 'junit:junit:4.12'
    compile 'com.google.android.gms:play-services:8.1.0'
    compile 'com.android.support:appcompat-v7:23.1.1'
}
パッケージ名には、自分のパッケージ名を貼り付けて下さい。間違えると動かないですよ。
<?xml version="1.0" encoding="utf-8"?>
<manifest xmlns:android="http://schemas.android.com/apk/res/android"
    package="パッケージ名">
    <uses-permission android:name="android.permission.INTERNET" />
    <uses-permission android:name="android.permission.ACCESS_NETWORK_STATE" />
    <uses-permission android:name="android.permission.GET_ACCOUNTS" />
    <uses-permission android:name="android.permission.WAKE_LOCK" />
    <uses-permission android:name="android.permission.VIBRATE" />
    <uses-permission android:name="com.google.android.c2dm.permission.RECEIVE" />
    <permission android:name="パッケージ.permission.C2D_MESSAGE" android:protectionLevel="signature" />
    <uses-permission android:name="パッケージ.permission.C2D_MESSAGE" />

    <application
        android:allowBackup="true"
        android:icon="@mipmap/ic_launcher"
        android:label="@string/app_name"
        android:supportsRtl="true"
        android:theme="@style/AppTheme">

        <!-- push通知タップ時に遷移するActivity -->
        <meta-data android:name="openPushStartActivity" android:value=".MainActivity"/>
        <!-- 通知エリアに表示されるアイコン -->
        <!-- 通知の複数表示 0:複数表示しない , 1:複数表示する-->
        <meta-data android:name="notificationOverlap" android:value="0"/>
        <!-- ダイアログプッシュの背景画像 -->


        <activity android:name=".MainActivity">
            <intent-filter>
                <action android:name="android.intent.action.MAIN" />

                <category android:name="android.intent.category.LAUNCHER" />
            </intent-filter>
        </activity>
        <!-- GCM受信設定 -->
        <receiver
            android:name="com.google.android.gms.gcm.GcmReceiver"
            android:exported="true"
            android:permission="com.google.android.c2dm.permission.SEND">
            <intent-filter>
                <action android:name="com.google.android.c2dm.intent.RECEIVE"/>
                <category android:name="パッケージ名"/>
            </intent-filter>
        </receiver>
        <service
            android:name="com.nifty.cloud.mb.core.NCMBGcmListenerService"
            android:exported="false">
            <intent-filter>
                <action android:name="com.google.android.c2dm.intent.RECEIVE"/>
            </intent-filter>
        </service>

    </application>

</manifest>
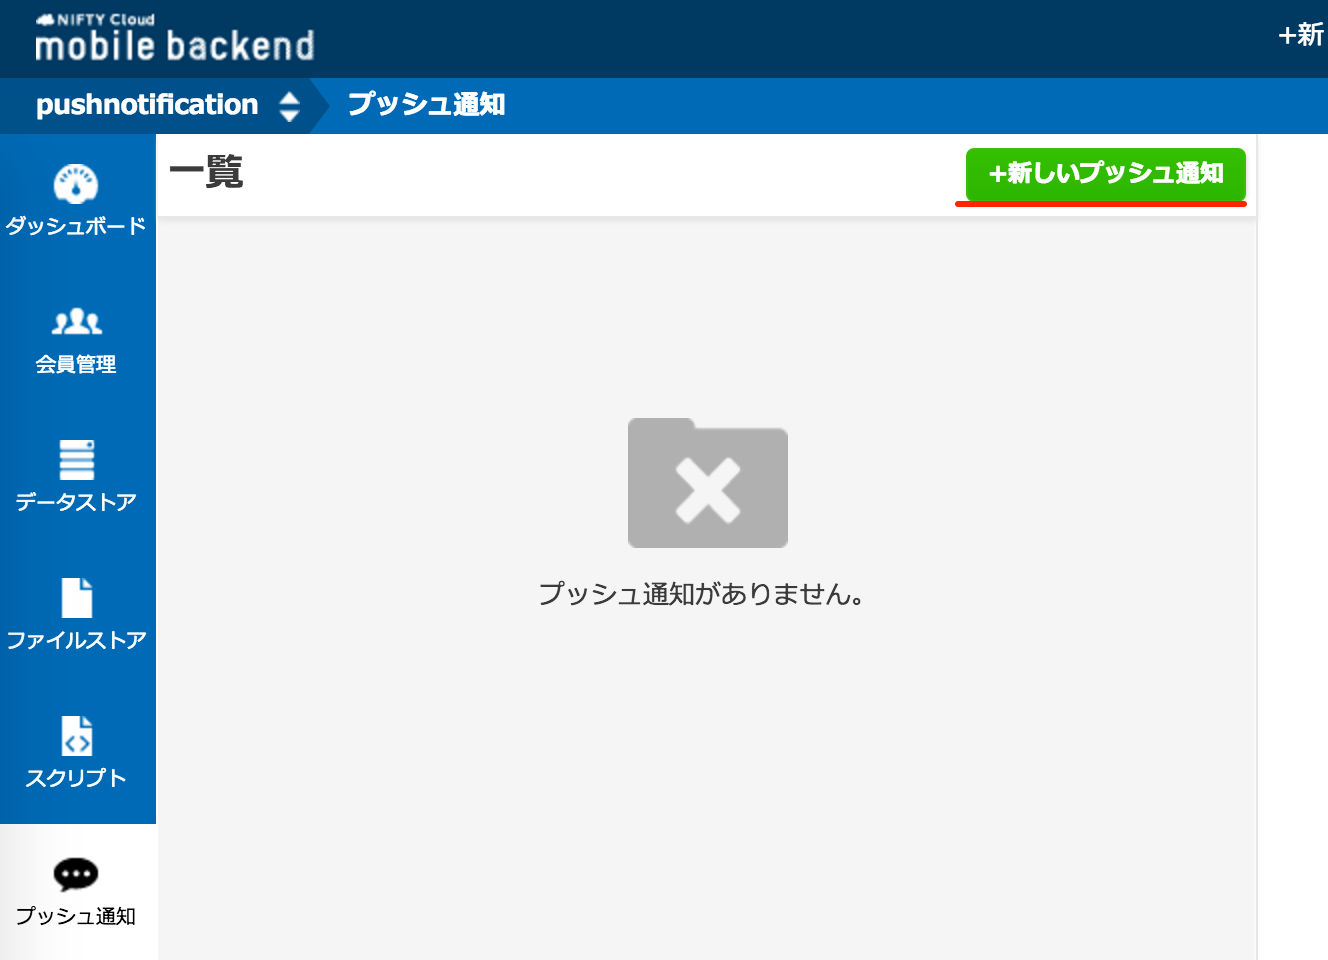
通知のタイトルとメッセージを入力
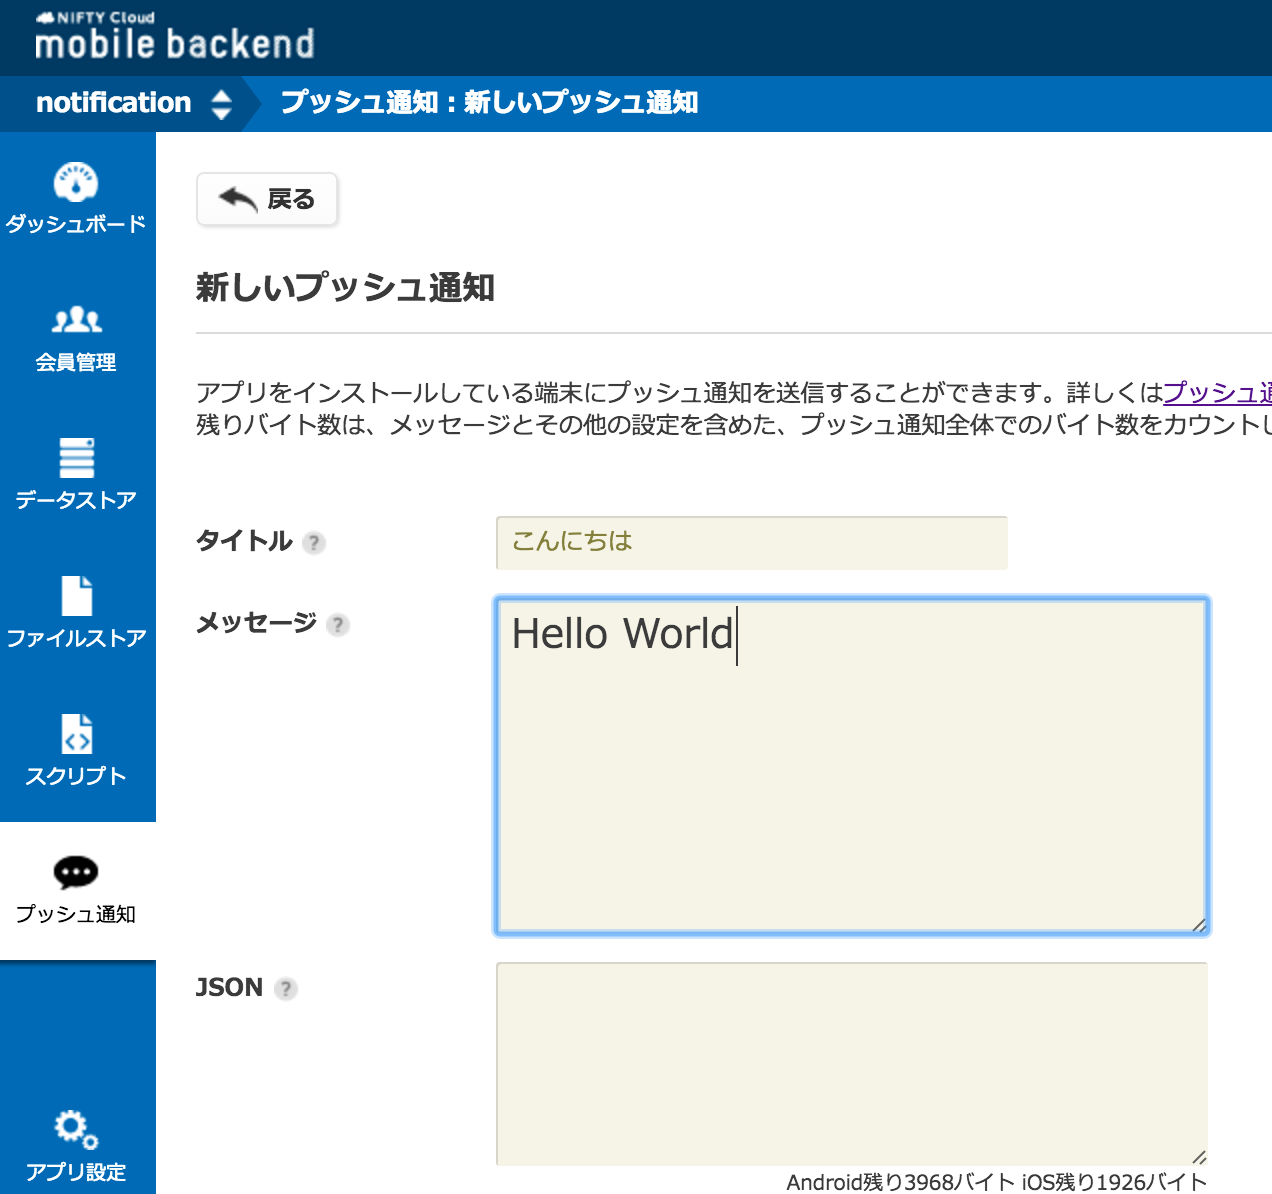
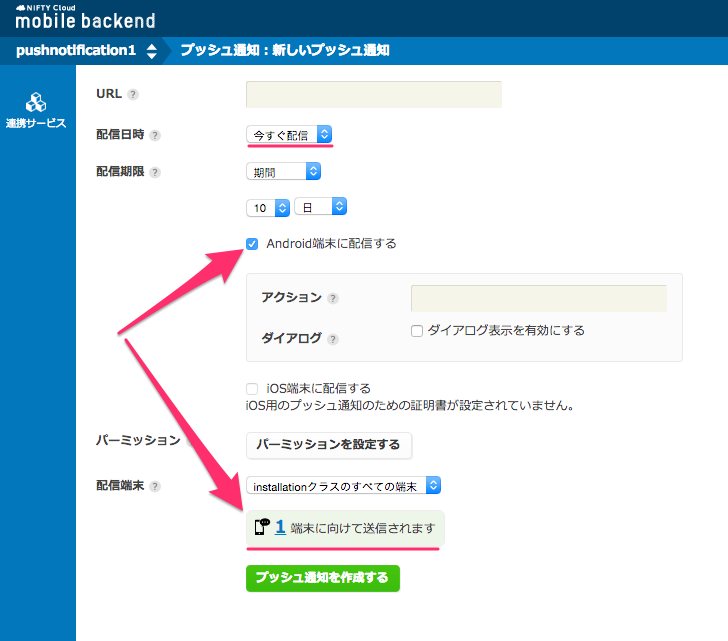
今すぐ配信、Android端末に配信するにチェックをつけること。1端末に向けて送信されますに更新されたことを確認してプッシュ通知ボタンを押す。
配信済み
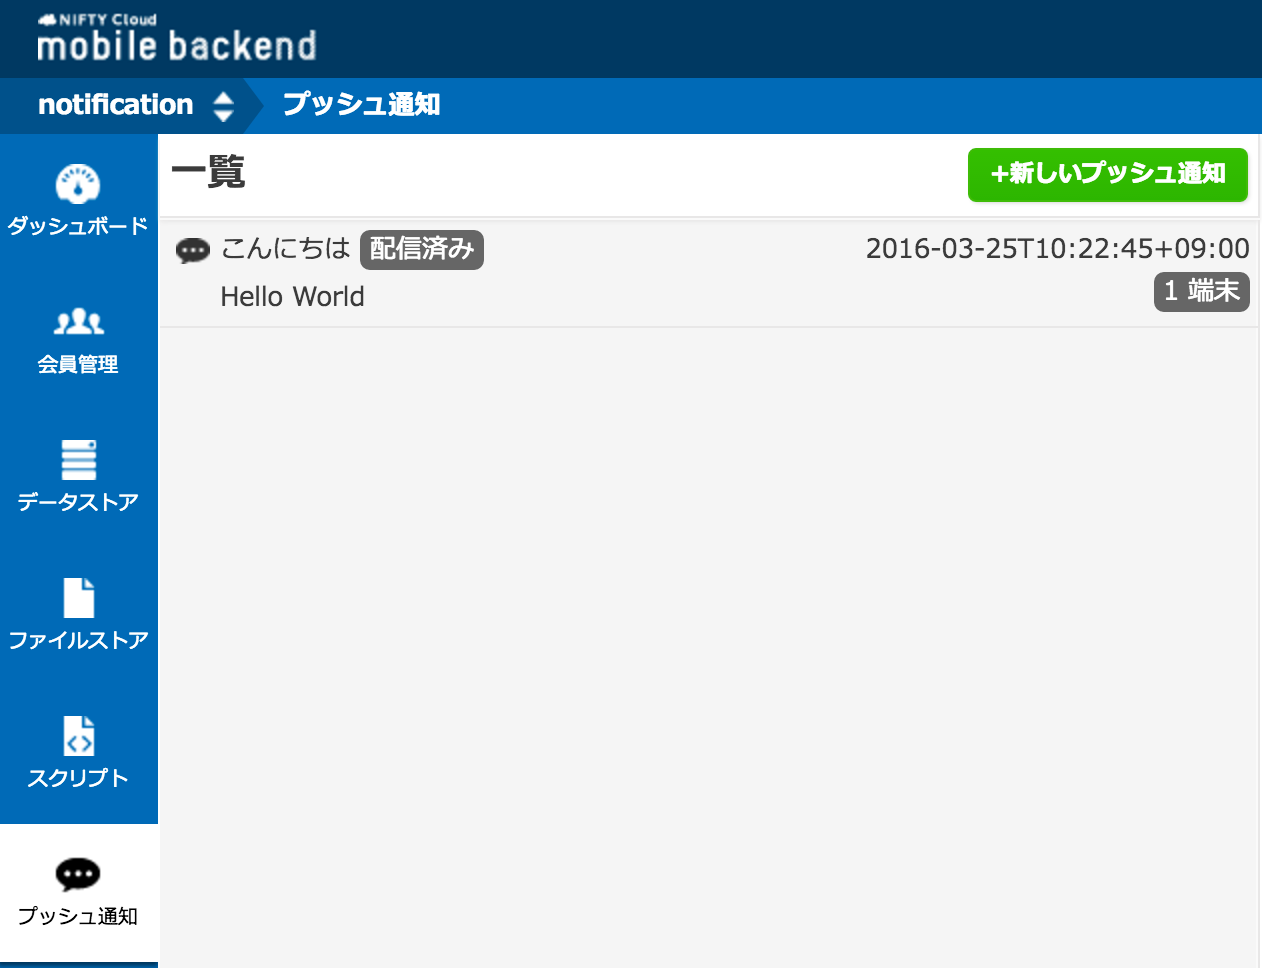
成功
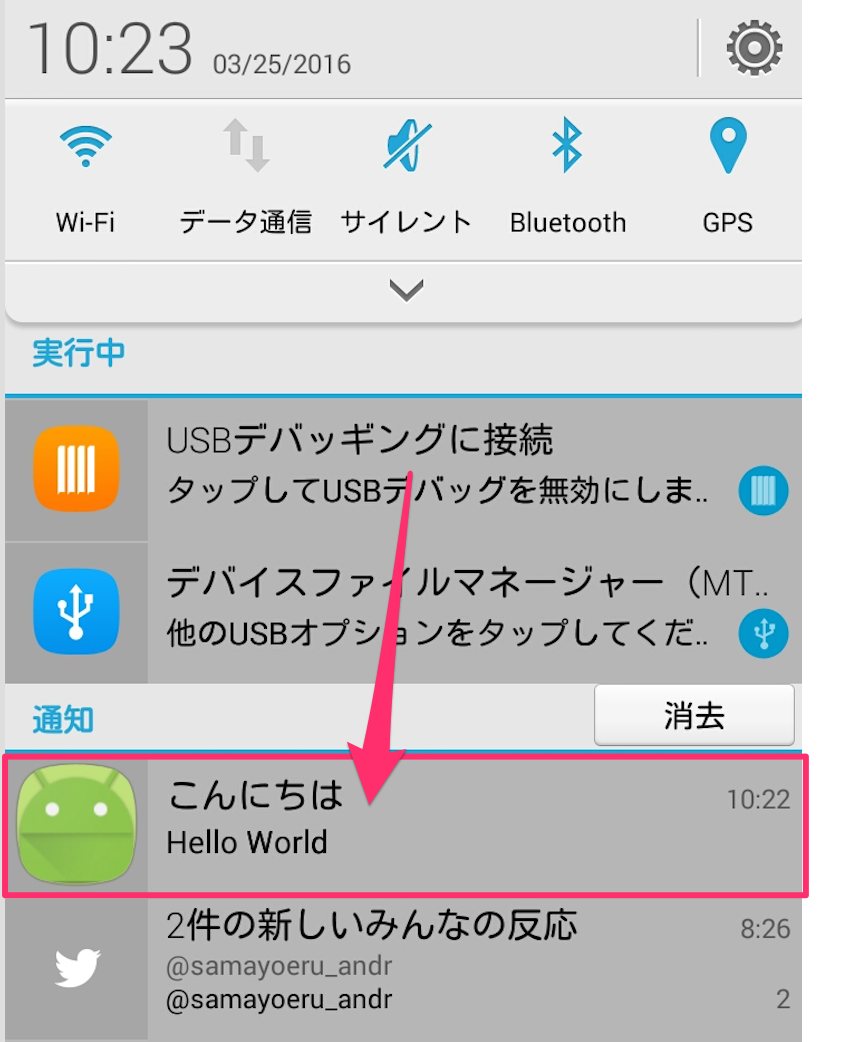
Androidのプッシュ通知
Googleが提供しているCloud Messaging(GCM)と連携して通知を配信している。
Registration ID
push通知を送るデバイスを認識するための値
