これはLibreOffice AdventCalendar2017 12月2日の記事です。
1日目は小笠原さんのLibreOfficeとSNSでした。
LibreOfficeを使わずプログラムだけでOpenDocument Formatを扱いたいと思ったことはないでしょうか?
典型的な例としては帳票でしょう。
- 印刷してほしい。
- 印刷データを変更できるように
- 升目の中に文字を入れてほしい
はい、来ました。
泣きそうな帳票案件。
LibreOfficeでこの案件に最適なDocumnetはDrawドキュメント,odgだけです。
Excelに逃げようしますが、Excelでは升目の中に文字を入れてほしいという要望が非常に難しいです。
Excelで作るテンプレートはセルのお化けなのでエンドユーザーがデータを変更するのは現実的ではありません。
最近、Pythonも弄るようになりました。
PythonのODFのライブラリであるodfpyを使ってDrawファイルを作るのにチャレンジしてみます。
環境
- Windows10 Pro/Home x64
- Windows System for Linux(WSL)
- Ubuntu16.04
- Python3
- Python3-pip (pip)
- Python3-venv (venv)
- odfpy
- iPython
- LibreOffice Draw for Windows
- Windows System for Linux(WSL)
Windows System for Linuxのインストールの説明は省略。
以下のリンクを参照
Install the Windows Subsystem for Linux
Windows 10でLinuxプログラムを利用可能にするWSL(Windows Subsystem for Linux)をインストールする
WSLが古いBash on Windows for Ubuntuと言われていた時代のものであれば一度アンインストールしてWSLを再インストールすること。
環境構築
WSLをインストールしたものとして進めて行きます。
$ lsb_release -a
No LSB modules are available.
Distributor ID: Ubuntu
Description:    Ubuntu 16.04.3 LTS
Release:        16.04
Codename:       xenial

# Ubuntuを最新の状態にする
$ sudo apt update
$ sudo apt upgrade
# Python3とpip,venvのインストール
$ sudo apt install Python3
$ sudo apt install Python3-pip
$ sudo apt install Python3-venv
# 仮想環境のフォルダを作る
$ mkdir odfpy
$ python3 -m venv odfpy
# 仮想環境実行
$ source odfpy/bin/activate
# odfpyに入る
(py3)$ cd odfpy
# pipのupdate
(py3)$ pip install -U pip
# iPythonとodfpyのインストール
(py3)$ pip install iPython
(py3)$ pip install odfpy
# Pythonのライブラリー一覧
(py3)$ pip list --format columns
venvまで使うのかはちょっと考える。
別に使ってもいいけど…。
DrawドキュメントとPageの作成
odfpyフォルダに居ることを確認してiPythonを起動しましょう。
$ iPython
Python 3.5.2 (default, Sep 14 2017, 22:51:06)
Type 'copyright', 'credits' or 'license' for more information
IPython 6.2.1 -- An enhanced Interactive Python. Type '?' for help.

In [1]:
まずは、Draw Documentを作成します。
In[1]:from odf.opendocument import OpenDocumentDrawing
In[2]:doc=Open #ここでTabを押してみる。
 open()                OpenDocumentDrawing()
OpenDocuぐらい入力して[tab]を押してみましょう。
なんと入力補助をしてくれます。
これでできたかな?
お、drawingにaddText()ってのがあるぞ。
入れてみようかな。
In[2]:doc=OpenDocumentDrawing()
In[3]:doc.drawing.addText('aaaa')
....(略)...
IllegalText: The <office:drawing> element does not allow text

In[4]:
Textが入れられません。
Drawドキュメントの場合は直接、Textや図形描画が置けません。
Pageを作ってPageの中にTextや図形描画を入れるようにします。
別のUbuntuのTerminalを開いてodfpyフォルダ上で下記のファイルを作りましょう。
from odf.opendocument import OpenDocumentDrawing
from odf.draw import Page
from odf.style import Style,MasterPage,PageLayout

## Create the drawing page style
dpstyle = Style(family="drawing-page",name="DP1")
doc.automaticstyles.addElement(dpstyle)

## Create page layout specifying dimensions
plstyle = PageLayout(name="PM1")
doc.automaticstyles.addElement(plstyle)

## Create a master page
masterpage = MasterPage(stylename=dpstyle, name="Default", pagelayoutname=plstyle)
doc.masterstyles.addElement(masterpage)

## Create a page to contain the drawing
drawpage = Page(masterpagename=masterpage, name="page1", stylename=dpstyle)
doc.drawing.addElement(drawpage)
Pageを作るためには、
- PageStyleとPage Layout を作成
- Masterpageを作成
- そのMasterPageを元にPageを作成
- Drawドキュメントに追加
という作業をやってあげないといけません。
なんだか面倒ですが、そういうものと思って下さい。
これをiPythonを実行しているTerminalで実行します。
# ファイルがあることを確認
In[4]:%ls
createpage.py
In[5]:%run createpage.py
エラーが無ければPage追加成功です。
LibreOffice Drawはこれらの作業をファイルを新規作成するだけでやっていてくれているのです。
Drawはとっても便利だったんですね。
用紙設定
用紙設定とかはどうするんでしょうか?
ちょっと変更してみます。
# PageLayoutPropertiesをload
In[5]:from odf.style import PageLayoutProperties
In[6]:plstyle.addElement(PageLayoutProperties(margin="0cm", pageheight="210mm", pagewidth="297mm", printorientation="portrait"))
In[7]:doc.automaticstyles.addElement(plstyle)
PaperSizeが無いので'A4','Letter'といった用紙設定は出来ません。
pageheight,pagewidthで用紙サイズを指定します。
printorientationは紙の向きです。
- portrait
- 縦
- landscape
- 横
になります。
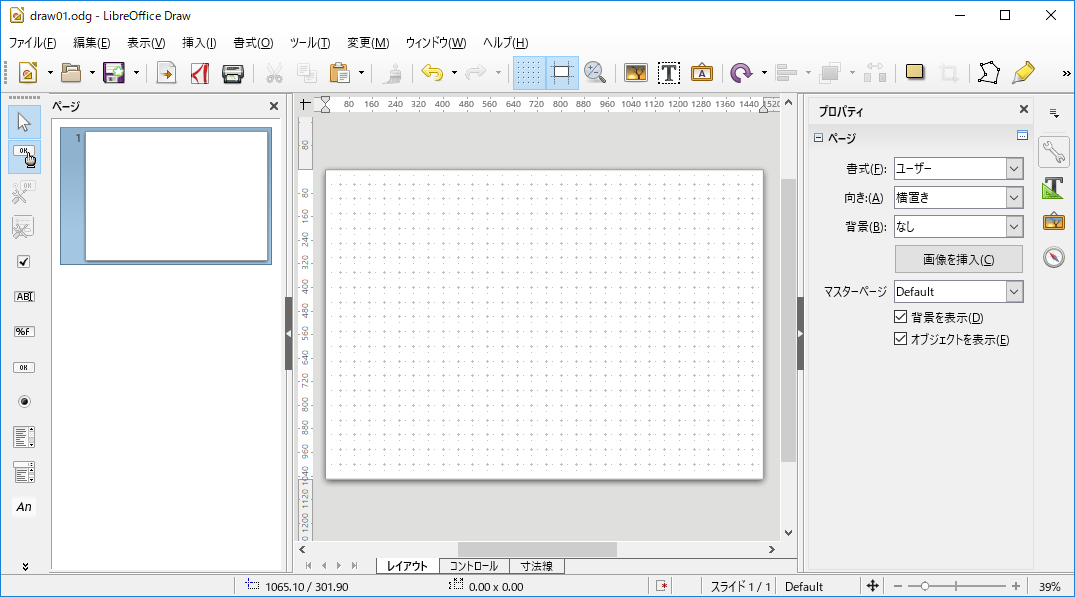
用紙設定も終わったことですので保存してみましょう。
In[7]:doc.save('draw01',True)
Windowsのデスクトップに移して開いてみましょう。
$ cp draw01.odg /mnt/c/Users/username/Desktop
Windows上で開いてみましょう。
うまく用紙設定ができたようです。
テキストを追加
あの長い命令を書くよりももう出来上がったDrawドキュメントを取り込んだ方が速いでしょう。
なのでこうします。
In [1]:from odf.opendocument import OpenDocumentDrawing,load
In [2]:doc=load('draw01.odg')
In [3]:doc.getMediaType()
Out[3]: 'application/vnd.oasis.opendocument.graphics'
ここからテキストを追加していきます。
テキストを追加するためには
- Textを作成
- TextBoxに挿入
- TextBoxをFrameに挿入
- Pageを取り出す
- PageにFrameを挿入
といった手順で行います。
実はTextは単独ではPageに挿入できません。
FrameかRectなどの図形描画に追加して挿入しないといけません。
コードは下記のようになります。
In [4]:from odf.draw import Page,TextBox,Frame
# Page取得
In [5]: page=doc.getElementByType(Page)
In [6]: page=page[0]
In [7]: from odf.text import P
# Text生成
In [8]: text=P()
In [9]: text.addText('こんにちは')
# TextBoxにTextを追加
In [10]: tb=TextBox()
In [11]: tb.addElement(text)
# FrameにTextBoxを追加
# widhtはframeの幅、heightは高さ、x,yはどの場所に置くのかという座標指定
In [12]: frame=Frame(width='100mm',height='20mm',x='2cm',y='2cm'
    ...: )
In [13]: frame.addElement(tb)
# PageにFrameを追加
In [14]: page.addElement(frame)
# 保存
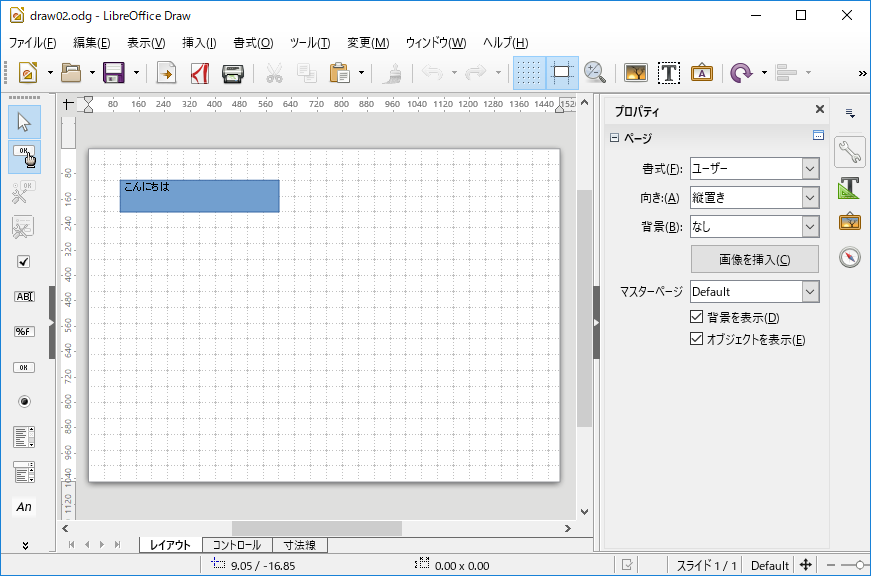
In [15]: doc.save('draw02',True)
文字を大きくしたり背景色を無しにしたいですね。
TextPropertiesとGraphicProperties
Textの文字の大きさはTextProperties、Frameの背景色はGraphicPropertiesで変えます。
それらをSytleに入れて使います。
In [1]: from odf.opendocument import load
In [2]: from odf.draw import Page,Frame,TextBox
In [3]: from odf.style import Style,TextProperties,GraphicProper
   ...: ties
In [4]: from odf.text import P
# ファイル読込み
In [5]: doc=load('draw02.odg')
# FrameとText.Pを取り出す
In [6]: page=doc.getElementsByType(Page)
In [7]: page=page[0]
In [8]: frame=page.getElementsByType(Frame)
In [9]: frame=frame[0]
In [10]: tb=frame.getElementsByType(TextBox)
In [11]: tb=tb[0]
In [12]: text=tb.getElementsByType(P)
In [13]: text=text[0]
# Style作成
In [14]: s=Style(name='P1',family='paragraph')
# fontsizeは英文フォントのサイズ、fontsizeasianは和文フォントのサイズ
# 「こんにちは」という文字=和文フォント
In [15]: tp=TextProperties(fontsize='32pt',fontsizeasian='32pt')
In [16]: gs=Style(name='GR1',family='graphic')
# fillが塗りつぶし、strokeは枠線 両方ともnone(なし)に設定
In [17]: gp=GraphicProperties(fill='none',stroke='none')
# FrameとTextにStyleを追加
In [18]: text.setAttribute('stylename',s)
In [19]: frame.setAttribute('stylename',gs)
# DrawドキュメントにStyleを追加
In [20]: doc.automaticstyles.addElement(s)
In [21]: doc.automaticstyles.addElement(gs)
# 保存
In [22]: doc.save('draw03',True)
うまく行きました。
次は画像を追加してみたいですね。
画像の追加
画像の入手
- Wikimeda CommonからLibreOffice Drawのアイコンpngを取得
- drawicon.pngにリネーム
- 取得したファイルをWSLのhomeフォルダに移動
$ pwd
/home/username/odfpy
# Windows側で取得した画像をコピー
$ cp /mnt/c/Users/username/Downloads/drawicon.png .
$ ls drawicon.png
drawicon.png
これで画像を取得できました。
画像の貼り付け
# ファイルの読み込み
In [1]: from odf.opendocument import load
In [2]: doc=load('draw01.odg')
# 必要なオブジェクトの呼び出し
In [3]: from odf.draw import Page,Image,Frame
# Pageの取り出し
In [4]: page=doc.getElementsByType(Page)
In [5]: page=page[0]
# PhotoFrameの作成、x,yで場所,height width で大きさを指定
# 今回は正方形の画像なので縦横は同じ比率
In [6]: photoframe=Frame(x='10mm',y='40mm',height='26mm',width='26mm')
# drawドキュメントに画像の追加
In [7]: href=doc.addPicture('drawlogo.png')
# photoframeに画像を追加
In [8]: photoframe.addElement(Image(href=href))
# pageにphotoframeを追加
In [9]: page.addElement(photoframe)
# 保存
In [10]: doc.save('draw04',True)
さて追加されているか見てみましょう。
成功です!
終わりに
- 用紙指定
- テキストを置く
- 画像や図形描画を置く
- 保存
と基本的な動作は理解できたと思います。
odfpyの Getting Started を作るという僕の野望は実現できたと信じてます。
if you want to English version, Please check under link.
make libreoffice draw document to use odfpy - dev.to
リファレンス
API for Odfpy - odtファイル
各オブジェクトのAttributesとMethodが書かれている。
Sampleプログラムの解説も少しだけ書かれている。
odfpy - example
使用例のサンプルプログラム
公式ではこの2つしか参照するものはない。
Search and replace text odfpy - StackOverflow
全くStyleを指定していないText.PにsetAttributeでstyleを指定できることが分かった。


