Blocklyの導入は済んでいるものとします。
1. Blocklyワークスペースを表示させる
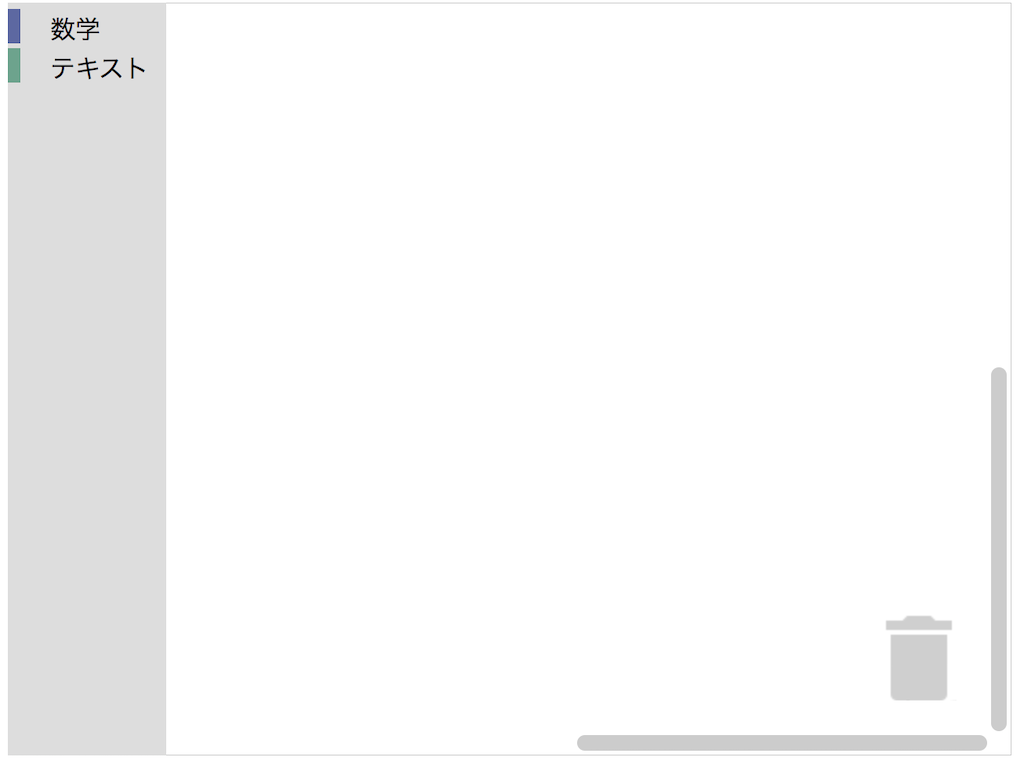
まずはシンプルに数字ブロックと文字列ブロックのみのBlocklyワークスペースを表示させてみます。
<!DOCTYPE html>
<html lang="ja">
<head>
	<meta charset="UTF-8">
	<title>Blockly variables</title>

	<script src="google-blockly/blockly_compressed.js"></script>
	<script src="google-blockly/blocks_compressed.js"></script>
	<script src="google-blockly/msg/js/ja.js"></script>
</head>
<body>
	<h1>Blockly variables</h1>
	<div id="blocklyDiv" style="width: 640px; height: 480px"></div>

	<xml id="toolbox" style="display: none">
		<category name="数学" colour="%{BKY_MATH_HUE}">
			<block type="math_number">
				<field name="NUM">123</field>
			</block>
		</category>
		<category name="テキスト" colour="%{BKY_TEXTS_HUE}">
			<block type="text"></block>
		</category>
	</xml>

	<script>
		let toolbox = document.getElementById ("toolbox");
		let workspace = Blockly.inject ('blocklyDiv', {toolbox: document.getElementById ('toolbox')});
	</script>
</body>
</html>

Blocklyはどんな命令ブロックをどう並べるかをコード内のxmlタグで定義します。今回の場合は数学カテゴリの中に数字ブロック、テキストカテゴリの中に文字列ブロックが配置されます。
2. 変数カテゴリを追加する
今作ったワークスペースに変数操作関連のブロックが入ったカテゴリを追加したいのですが、変数カテゴリと変数操作ブロックの追加はとても簡単です。xmlタグの中に以下の文を追加するだけです。
<category name="変数" colour="330" custom="VARIABLE"></category>

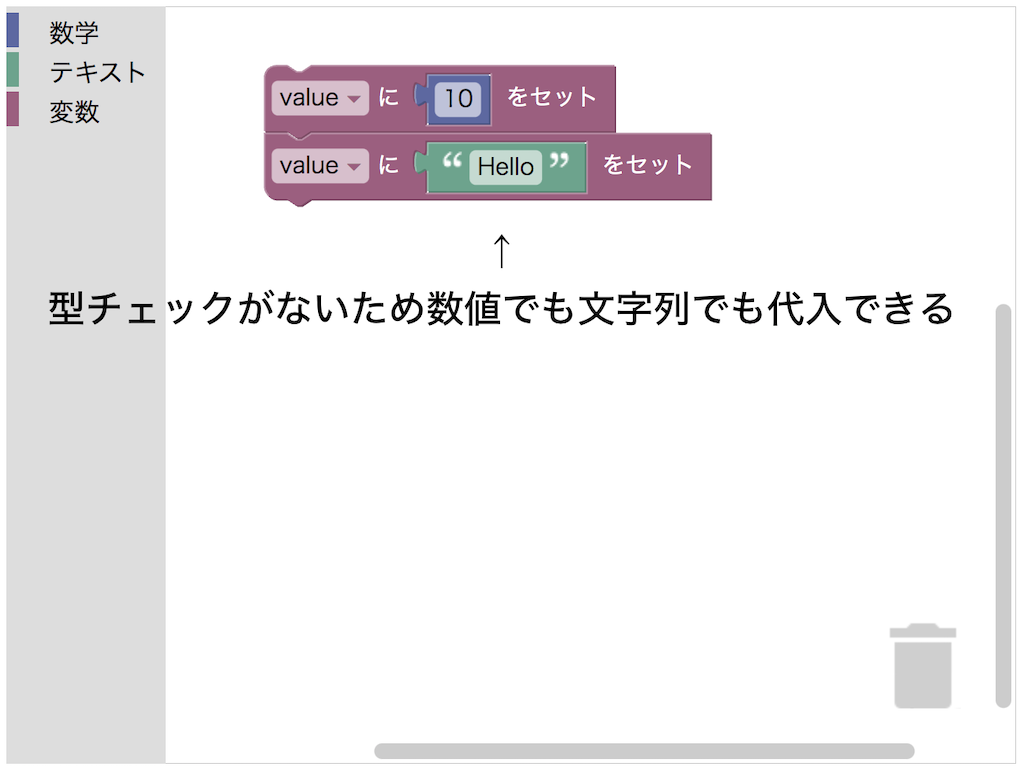
「変数の作成」ボタンをクリックし、追加する変数の名前を入れると新しい変数が作成され、各種変数操作ブロックも表示されます。

ここで追加した変数機能は型チェックされないため、JavaScriptやPythonといった動的型付け言語的な使い心地になります。

3. 型チェック付き変数を作る
今回は数値型変数を作ってみたいと思います。
流れはこんな感じです。
- 数値型変数のcategoryを追加する
- 数値型変数操作のブロック(getterとsetter)を定義
- 数値型変数作成ボタンの定義と登録
- 数値型変数カテゴリの詳しい挙動の定義と登録
3-1. 数値型変数のcategoryを追加する
以下のcategoryタグを追加します。
<category name="数値型変数" colour="330" custom="NUMBER_VARIABLE"></category>
3-2. 数値型変数操作のブロック(getterとsetter)を定義
数値型変数操作のカスタムブロックを定義する以下のコードを追加します。
Blockly.defineBlocksWithJsonArray ([
    {
        // getterの定義
        "type": "variables_get_number",
        "message0": "%1",
        "args0": [
            {
                "type": "field_variable",
                "name": "VAR",
                "variable": "%{BKY_VARIABLES_DEFAULT_NAME}",
                "variableTypes": ["Number"],
                "defaultType": "Number"
            }
        ],
        "output": "Number", // ブロックの出力をNumber型にする
        "style": "variable_blocks",
        "helpUrl": "%{BKY_VARIABLES_GET_HELPURL}",
        "tooltip": "%{BKY_VARIABLES_GET_TOOLTIP}",
        "extensions": ["contextMenu_variableSetterGetter"]
    },
    {
        // setterの定義
        "type": "variables_set_number",
        "message0": "%{BKY_VARIABLES_SET}",
        "args0": [
            {
                "type": "field_variable",
                "name": "VAR",
                "variable": "%{BKY_VARIABLES_DEFAULT_NAME}",
                "variableTypes": ["Number"],
                "defaultType": "Number"
            },
            {
                "type": "input_value",
                "name": "VALUE",
                "check": "Number" // Number型しか受け付けないようにする
            }
        ],
        "previousStatement": null,
        "nextStatement": null,
        "style": "variable_blocks",
        "tooltip": "%{BKY_VARIABLES_SET_TOOLTIP}",
        "helpUrl": "%{BKY_VARIABLES_SET_HELPURL}",
        "extensions": ["contextMenu_variableSetterGetter"]
    }
]);
3-3. 数値型変数作成ボタンの定義と登録
カテゴリ内に表示する「変数を作成...」ボタンの定義と登録をします。
workspace.registerButtonCallback ("createNumberVariableButtonPressed", () => {
    const name = window.prompt ("変数名を入力");
    if (name && name !== "") {
        workspace.createVariable (name, "Number");
    }
});
3-4. 数値型変数カテゴリの詳しい挙動の定義と登録
Blocklyデフォルトの変数カテゴリは以下のような機能が備わっています。

作った変数の数によってカテゴリ内に表示される内容が動的に変わるため、型付き変数カテゴリでも同じものを実現するためにDynamic category機能を使います。
先ほど3-1で定義したカテゴリのcustomプロパティに指定した"NUMBER_VARIABLE"という文字列を使ってカテゴリと挙動を結びつけます。
workspace.registerToolboxCategoryCallback ("NUMBER_VARIABLE", (workspace) => {
    const xmlStringList = ["<button text=\"数値型変数の作成...\" callbackKey=\"createNumberVariableButtonPressed\"></button>"];

    // 既存の数値型変数をリストアップ
    const numberVariables = workspace.getVariablesOfType ("Number");

    // 既存の数値型変数があったら代入ブロックとそれぞれの取得ブロックを追加
    if (numberVariables.length > 0) {
        let field = "<field name=\"VAR\" id=\"" + numberVariables[0].getId () + "\" variabletype=\"Number\"></field>";
        xmlStringList.push ("<block type=\"variables_set_number\">" + field + "</block>");
        for (const numberVariable of numberVariables) {
            field = "<field name=\"VAR\" id=\"" + numberVariable.getId () + "\" variabletype=\"Number\"></field>";
            xmlStringList.push ("<block type=\"variables_get_number\">" + field + "</block>");
        }
    }

    // xmlStringListをElement型にする
    const xmlElementList = xmlStringList.map ((item) => {
        return Blockly.Xml.textToDom (item);
    });
    return xmlElementList;
});
関数内でやってることは、現在のworkspaceを受け取り、数値型変数の一覧を取得し、xmlのElement型配列でカテゴリに表示する内容(変数作成ボタン×1、変数setter×1、変数getter×変数の数)を返しています。
例えばtestとvalueという2つの数値型変数がある場合、こんな感じの配列を返すことになります。
[
    <button text="数値型変数の作成..." callbackKey="createNumberVariableButtonPressed"></button>,
    <block type="variables_set_number"><field name="VAR" id="y.bEo/`hSxiO:^,@-zT4" variabletype="Number"></field></block>,
    <block type="variables_get_number"><field name="VAR" id="y.bEo/`hSxiO:^,@-zT4" variabletype="Number"></field></block>,
    <block type="variables_get_number"><field name="VAR" id="t-~z;!)lK;X*}1NHjtH0" variabletype="Number"></field></block>
]
4. 完成
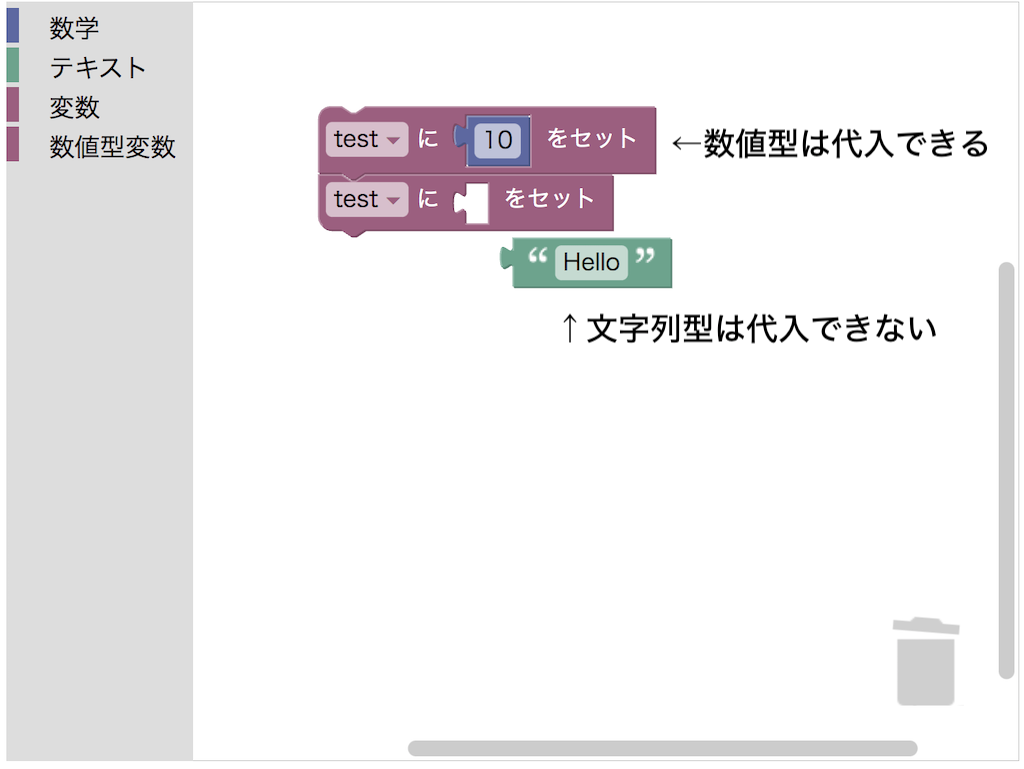
「数値型変数の作成」ボタンを押すと新しい変数を作ることができ、変数を作ると各種変数操作ブロックが表示されるようになります。(Blocklyデフォルトの変数カテゴリにある「変数の値を増やす」ブロックは省略しています)

ちゃんと型チェックが行われるようになりました。

まとめ
Blocklyデフォルトの型チェックなし変数に比べると型チェックありの変数を作るのは手間が多く感じますね。一応公式のガイドを参考にしてやってみましたが、もっと簡単な方法を知っている方がいましたらぜひ教えていただけると幸いです。
最後にコード全文を貼っておきます。
<!DOCTYPE html>
<html lang="ja">
<head>
	<meta charset="UTF-8">
	<title>Blockly variables</title>

	<script src="google-blockly/blockly_compressed.js"></script>
	<script src="google-blockly/blocks_compressed.js"></script>
	<script src="google-blockly/msg/js/ja.js"></script>
</head>
<body>
	<h1>Blockly variables</h1>
	<div id="blocklyDiv" style="width: 640px; height: 480px"></div>

	<xml id="toolbox" style="display: none">
		<category name="数学" colour="%{BKY_MATH_HUE}">
			<block type="math_number">
				<field name="NUM">123</field>
			</block>
		</category>
		<category name="テキスト" colour="%{BKY_TEXTS_HUE}">
			<block type="text"></block>
		</category>
		<category name="変数" colour="330" custom="VARIABLE">
		</category>
		<category name="数値型変数" colour="330" custom="NUMBER_VARIABLE"></category>
	</xml>

	<script>
		Blockly.defineBlocksWithJsonArray ([
			{
				// getterの定義
				"type": "variables_get_number",
				"message0": "%1",
				"args0": [
					{
						"type": "field_variable",
						"name": "VAR",
						"variable": "%{BKY_VARIABLES_DEFAULT_NAME}",
						"variableTypes": ["Number"],
						"defaultType": "Number"
					}
				],
				"output": "Number", // ブロックの出力をNumber型にする
				"style": "variable_blocks",
				"helpUrl": "%{BKY_VARIABLES_GET_HELPURL}",
				"tooltip": "%{BKY_VARIABLES_GET_TOOLTIP}",
				"extensions": ["contextMenu_variableSetterGetter"]
			},
			{
				// setterの定義
				"type": "variables_set_number",
				"message0": "%{BKY_VARIABLES_SET}",
				"args0": [
					{
						"type": "field_variable",
						"name": "VAR",
						"variable": "%{BKY_VARIABLES_DEFAULT_NAME}",
						"variableTypes": ["Number"],
						"defaultType": "Number"
					},
					{
						"type": "input_value",
						"name": "VALUE",
						"check": "Number" // Number型しか受け付けないようにする
					}
				],
				"previousStatement": null,
				"nextStatement": null,
				"style": "variable_blocks",
				"tooltip": "%{BKY_VARIABLES_SET_TOOLTIP}",
				"helpUrl": "%{BKY_VARIABLES_SET_HELPURL}",
				"extensions": ["contextMenu_variableSetterGetter"]
			}
		]);

		let toolbox = document.getElementById ("toolbox");
		let workspace = Blockly.inject ('blocklyDiv', {toolbox: document.getElementById ('toolbox')});

		// 数値型変数作成ボタン
		workspace.registerButtonCallback ("createNumberVariableButtonPressed", () => {
			const name = window.prompt ("変数名を入力");
			if (name && name !== "") {
				workspace.createVariable (name, "Number");
			}
		});

		// Dynamic categoryの挙動
		workspace.registerToolboxCategoryCallback ("NUMBER_VARIABLE", (workspace) => {
			const xmlStringList = ["<button text=\"数値型変数の作成...\" callbackKey=\"createNumberVariableButtonPressed\"></button>"];

			// 既存の数値型変数をリストアップ
			const numberVariables = workspace.getVariablesOfType ("Number");

			// 既存の数値型変数があったら代入ブロックとそれぞれの取得ブロックを追加
			if (numberVariables.length > 0) {
				let field = "<field name=\"VAR\" id=\"" + numberVariables[0].getId () + "\" variabletype=\"Number\"></field>";
				xmlStringList.push ("<block type=\"variables_set_number\">" + field + "</block>");
				for (const numberVariable of numberVariables) {
					field = "<field name=\"VAR\" id=\"" + numberVariable.getId () + "\" variabletype=\"Number\"></field>";
					xmlStringList.push ("<block type=\"variables_get_number\">" + field + "</block>");
				}
			}

			// xmlStringListをElement型にする
			const xmlElementList = xmlStringList.map ((item) => {
				return Blockly.Xml.textToDom (item);
			});
			return xmlElementList;
		});
	</script>
</body>
</html>
参考文献
- Variables | Blockly | Google Developers
https://developers.google.com/blockly/guides/create-custom-blocks/variables - Toolbox | Blockly | Google Developers
https://developers.google.com/blockly/guides/configure/web/toolbox