はじめに
はじめまして、橋田至です。
この記事では、RPG風のポートフォリオサイトを作成した制作過程を紹介します。
ReactやVite、Tailwind CSS、TanStack Routerなどの技術を使用して、アニメーションやキーボード入力による選択機能、会話表示機能などを実装しました。
また、ローカルフォントや音楽ファイルの組み込み方法、デプロイ手順についても説明します。
作成したサイトは以下のリンクから確認できます。
GitHub
モチベーション
現在私はエンジニア3年目で、普段は受託開発の会社でWebアプリケーションの開発を行っています。
リモートワークで勤務しており、最近業務でしかコードを書いていないなと感じたことがきっかけで、自分のスキルアップのため、新しい技術を学びたいと感じました。
せっかくなら自分がワクワクするような内容かつ、他にはあまり見ないようなサイトを作りたいなと感じ、RPG風のポートフォリオサイトを作成することにしました。
自分自身がドラクエが大好きでほとんどのナンバリングタイトルをプレイしています。
その世界観を再現したいなと感じたことが一番の理由です。
ちなみに一番好きな作品はドラクエ5です。
モンスターを仲間にできるシステムや、主人公の成長にはしびれました。
使用したライブラリや技術
- React: UIを作成するためのライブラリ
- Vite: 高速な開発サーバーとバンドルツール
- tanstack-router: シングルページアプリケーションのルーティングを管理するためのライブラリ
- tailwind-css: RPG風のスタイリングを行うために使用
- react-icons: アイコンセットの使用
- framer-motion: アニメーションを実装するためのライブラリ
- react-howler:音楽再生、音量調節
- react-simple-typewriter: タイピングアニメーションを実装するためのライブラリ
デプロイにはVercelを使用し、OGP画像なども設定しています。
バージョン管理にはGitを使用し、GitHubにリモートリポジトリを作成しています。
本来はGit flow1を使って開発を進めるべきですが、今回は自分しかコミットしないのでmainブランチで開発を進めました。
ディレクトリ構成
├── README.md                   # プロジェクトの概要やセットアップ手順を記載したファイル
├── eslint.config.js            # ESLintの設定ファイル。コードスタイルや品質をチェックするためのルールを定義
├── index.html                  # アプリケーションのエントリーポイントとなるHTMLファイル
├── package-lock.json           # npmの依存関係を固定するためのファイル。インストールされるパッケージのバージョンを管理
├── package.json                # プロジェクトのメタデータや依存パッケージの情報を記載したファイル
├── postcss.config.js           # PostCSSの設定ファイル。CSSの処理やプラグインを設定
├── public                      # 公開される静的ファイルを配置するディレクトリ
├── src                         # アプリケーションのソースコードを格納するディレクトリ
│   ├── assets                  # 画像、フォント、その他の静的アセットを格納するディレクトリ
│   ├── components              # 再利用可能なReactコンポーネントを格納するディレクトリ
│   ├── constants.ts            # アプリケーション内で使用される定数を定義したファイル
│   ├── hooks                   # Reactカスタムフックを格納するディレクトリ
│   ├── index.css               # グローバルCSSスタイルを定義したファイル
│   ├── main.tsx                # アプリケーションのエントリーポイントとなるTypeScriptファイル
│   ├── routeTree.gen.ts        # ルーティングの定義を自動生成したファイル
│   ├── routes                  # 各ページのコンポーネントを格納するディレクトリ
│   │   ├── __root.tsx              # アプリケーション全体のルートコンポーネント。全体のレイアウトや共通要素を定義
│   │   ├── index.lazy.tsx          # トップページのルートコンポーネント。遅延読み込みされる設定
│   │   ├── profile                 # プロファイルページに関するコンポーネントを格納するディレクトリ
│   │   │   └── index.lazy.tsx          # プロファイルページのルートコンポーネント。遅延読み込みされる設定
│   │   ├── room                    # "room" 関連の機能やページを格納するディレクトリ
│   │   |   ├── -hooks              # Roomページ専用のカスタムフックを格納するディレクトリ
│   │   |   └── -components
|   |   |       ├── Tile.tsx            # Room内で表示されるタイルコンポーネント
│   │   |       └── TileContent.tsx     # Tileコンポーネント内で使用されるコンテンツを表示するコンポーネント
│   │   └── index.lazy.tsx      # Roomページのルートコンポーネント。遅延読み込みされる設定
│   └── vite-env.d.ts           # Viteの環境変数や型補完を設定するファイル
├── tailwind.config.js          # Tailwind CSSの設定ファイル。カスタムテーマやユーティリティクラスの設定を行う
├── tsconfig.app.json           # アプリケーションのTypeScriptコンパイル設定ファイル
├── tsconfig.json               # プロジェクト全体のTypeScriptコンパイル設定ファイル
├── tsconfig.node.json          # Node.js関連のTypeScriptコンパイル設定ファイル
├── vercel.json                 # Vercelにデプロイする際の設定ファイル
└── vite.config.ts              # Viteの設定ファイル。ビルドや開発サーバーの設定を行う
工夫点としては、routesがpagesの代わりに使われているのですがここにcomponentsとhooksを配置しています。
これによりそのページでしか使用しないコンポーネントやカスタムフックを分けて管理できます。
個人的にはこの構成が気に入っており、コンポーネントをすべてcomponentsディレクトリに配置するよりも、より高凝縮なディレクトリ構成になると感じています。
tanstack-routerでは、routesディレクトリ内のフォルダーをルーティングに含めないようにするには先頭に-をつけることで実現できるようです。
サイトデザイン
このサイトでは、PRG風のデザインにするために、以下のような要素を取り入れました。
- タイトル画面
- プロファイル画面
- キャラクターの会話表示
- ページ遷移のアニメーション
- カスタムフォントの組み込み
- ローカルフォントと音楽の組み込み
工夫して実装した点を以下で紹介します。
会話画面の実装
RPG風の会話画面を実装するために、react-simple-typewriterを使用しました。
このライブラリを使うことで、簡単にタイピングアニメーションを実装できます。
このコンポーネントは使いまわしたいので、共通のChatMessageコンポーネントを作成しました。
import { Typewriter } from 'react-simple-typewriter';

interface ChatMessageProps {
  message: string;
}

export function ChatMessage({ message }: ChatMessageProps) {
  return (
    <div style={{ whiteSpace: 'pre-line' }}>
      <Typewriter
        key={message}
        words={[message]}
        cursor
        cursorStyle="_"
        typeSpeed={50}
        delaySpeed={1000}
      />
    </div>
  );
}

export default ChatMessage;
そのままでは文字を改行することができなかったため、whiteSpace: 'pre-line'を指定して改行できるようにしています。
また、keyにmessageを指定していますが、これはmessageの内容が変わってもTypewriterコンポーネントが再レンダリングされるようにするためです。
ページ遷移のアニメーション
ページが遷移する際にアニメーションを実装するために、framer-motionを使用しました。
easeInのイージングを使って、1秒かけてフェードインするアニメーションを実装しています。
import { motion } from 'framer-motion';

const pageVariants = {
  initial: {
    opacity: 0,
  },
  in: {
    opacity: 1,
  },
};

const pageTransition = {
  duration: 1,
  ease: 'easeIn',
};

interface PageTransitionProps {
  children: React.ReactNode;
}

export function PageTransition({ children }: PageTransitionProps) {
  return (
    <motion.div
      initial="initial"
      animate="in"
      variants={pageVariants}
      transition={pageTransition}
    >
      {children}
    </motion.div>
  );
}
すべてのページコンポーネントをPageTransitionコンポーネントでラップすることで、ページ遷移時にアニメーションが適用されるようにします。
import { BgmPlayer } from '@/components/BgmPlayer';
import { PageTransition } from '@/components/PageTransition';
import { createRootRoute, Link, Outlet } from '@tanstack/react-router';
import { TanStackRouterDevtools } from '@tanstack/router-devtools';
import { AnimatePresence } from 'framer-motion';
import { useLocation } from '@tanstack/react-router';

const RootComponent = () => {
  const location = useLocation();

  return (
    <>
      <div className="p-2 flex gap-2 justify-between">
        <div className="flex gap-2">
          <Link to="/" className="[&.active]:font-bold">
            Home
          </Link>{' '}
          <Link to="/profile" className="[&.active]:font-bold">
            Profile
          </Link>
        </div>
        <BgmPlayer src="/bgm/8bit-jo-jokyoku.mp3" />
      </div>
      <hr />
      <AnimatePresence mode="wait">
        <PageTransition key={location.pathname}>
          <Outlet />
        </PageTransition>
      </AnimatePresence>
      {import.meta.env.MODE === 'development' && <TanStackRouterDevtools />}
    </>
  );
};

export const Route = createRootRoute({
  component: RootComponent,
});
プロファイルページの実装
プロファイルページでは、RPG風の選択肢を表示し、選択肢に応じて会話文が表示されるようにしました。
スマホとPCどちらにも対応するために、PCではキーボード入力、スマホではタッチ入力を受け付けるようにしました。
実装詳細
import ChatMessage from '@/components/ChatMessage';
import { useArrowNavigation } from '../../hooks/useArrowNavigation';
import { createLazyFileRoute } from '@tanstack/react-router';
import { useRef, useState } from 'react';
import { FaUser } from 'react-icons/fa';
import { useKey } from 'react-use';

export const Route = createLazyFileRoute('/profile/')({
  component: Profile,
});

function Profile() {
  const fields = [
    '名前: 橋田至',
    'Lv: 28',
    '職業: エンジニア',
    '趣味: スマブラ・ピアノ',
    '好きな食べ物: ラーメン二郎・天下一品・麻婆豆腐',
  ];
  const messages = [
    '橋田至はペンネームです',
    '誕生日は6/9です。ロックの日とおぼえてください',
    'エンジニアとしてフロントエンドをメインに活動しています。',
    'スマブラの持ちキャラはドンキーコング。ピアノで好きな曲は久石譲のSummerです',
    '味の濃い食べ物はだいたいなんでも好きです',
  ];

  const { selectedIndex, updateIndex } = useArrowNavigation(fields.length);
  const selectedIndexRef = useRef(selectedIndex);
  selectedIndexRef.current = selectedIndex;
  const [selectedMessage, setSelectedMessage] = useState('');

  const handleSelect = (index: number) => {
    updateIndex(index);
    setSelectedMessage(messages[index]);
  };

  useKey('Enter', () => {
    handleSelect(selectedIndexRef.current);
  });

  return (
    <div className="min-h-screen flex flex-col items-center justify-center">
      <div className="bg-black border-2 border-white rounded-md p-6 w-72">
        <div className="flex items-center justify-center mb-4">
          <FaUser className="w-8 h-8" />
          <h2 className="text-xl font-bold ml-2">Profile</h2>
        </div>
        <div className="text-left">
          {fields.map((field, index) => (
            <p
              key={index}
              className="flex items-center"
              onClick={() => handleSelect(index)}
              tabIndex={0}
            >
              {selectedIndex === index && (
                <span className="mr-2 animate-blink">{'▶️'}</span>
              )}
              {field}
            </p>
          ))}
        </div>
      </div>
      {selectedMessage && (
        <div className=" border-2 border-white rounded p-4 w-72 mt-6">
          <ChatMessage message={selectedMessage} />
        </div>
      )}
    </div>
  );
}
import { useState, useRef } from 'react';
import { useKey } from 'react-use';

/**
 * useRefを使用して、矢印キーで選択中のインデックスを更新するカスタムフック
 * @param length 選択肢の数
 * @returns 選択中のインデックス
 */
export function useArrowNavigation(length: number) {
  const [selectedIndex, setSelectedIndex] = useState(0);
  const selectedIndexRef = useRef(selectedIndex);

  const updateIndex = (newIndex: number) => {
    setSelectedIndex(newIndex);
    selectedIndexRef.current = newIndex;
  };

  useKey('ArrowUp', () => {
    updateIndex(
      selectedIndexRef.current > 0 ? selectedIndexRef.current - 1 : length - 1
    );
  });

  useKey('ArrowDown', () => {
    updateIndex(
      selectedIndexRef.current < length - 1 ? selectedIndexRef.current + 1 : 0
    );
  });

  return { selectedIndex, updateIndex };
}
useRefを使用しないと、useKeyのコールバック関数内でのselectedIndexの値が常に0になってしまうため、useRefを使用してselectedIndexの値を保持しています。
ここはより良い方法があるかもしれませんが、今回はこの方法で実装しました。
フォントと音楽の組み込み
ローカルフォントの使用方法と、音楽ファイルの埋め込み方法について書きます。
まずは、ローカルフォントですが、今回RPG風のフォントかつ日本語に対応しているフリーフォントとして、PixelMplus2を使用しました。
こちらを解凍して、assets/fontsディレクトリに配置します。
そして、src/index.cssでローカルフォントを読み込みます。
これで、テキストがドラクエ風のフォントで表示されるようになります。
src/index.cssの詳細
/* src/index.css */
@font-face {
  font-family: 'PixelMplus10';
  src: url('/src/assets/fonts/PixelMplus10-Bold.ttf') format('truetype');
  font-weight: bold;
  font-style: normal;
}

@font-face {
  font-family: 'PixelMplus10';
  src: url('/src/assets/fonts/PixelMplus10-Regular.ttf') format('truetype');
  font-weight: normal;
  font-style: normal;
}

@font-face {
  font-family: 'PixelMplus12';
  src: url('/src/assets/fonts/PixelMplus12-Bold.ttf') format('truetype');
  font-weight: bold;
  font-style: normal;
}

@font-face {
  font-family: 'PixelMplus12';
  src: url('/src/assets/fonts/PixelMplus12-Regular.ttf') format('truetype');
  font-weight: normal;
  font-style: normal;
}

body {
  @apply bg-black text-white;
}

@tailwind base;
@tailwind components;
@tailwind utilities;

body {
  font-family: 'PixelMplus10', cursive;
}
音声の再生には、react-howlerを使用しました。
react-howlerは、Howler.jsのReactラッパーで、音声ファイルの再生、一時停止、音量調節などが簡単に行えます。
BGMはフリーのサイト3からダウンロードしたものを使用しています。
src/components/BgmPlayer.tsxにBGMの再生機能を実装し、src/routes/__root.tsxに配置して、レイアウトの右上に表示されるようにしました。
BgmPlayer.tsxの詳細
import { useState } from 'react';
import ReactHowler from 'react-howler';
import { FaVolumeUp, FaVolumeMute } from 'react-icons/fa';

export function BgmPlayer({ src }: { src: string }) {
  const [isPlaying, setIsPlaying] = useState(false);
  const volume = 0.3;

  const toggleBGM = () => {
    setIsPlaying(!isPlaying);
  };

  return (
    <div className="flex flex-col items-center mt-4">
      <button
        onClick={toggleBGM}
        className="bg-gray-200 p-2 rounded text-center text-black"
      >
        {isPlaying ? <FaVolumeUp /> : <FaVolumeMute />}
      </button>
      <ReactHowler src={src} playing={isPlaying} loop={true} volume={volume} />
    </div>
  );
}
RPG風のゲーム画面の実装
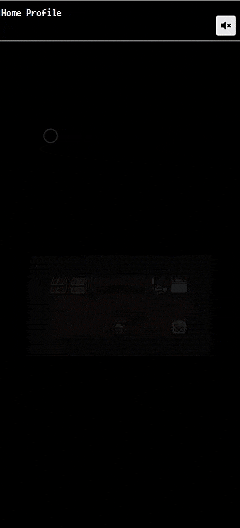
こちらが一番工夫した実装になります。
やっぱりRPG風のポートフォリオサイトを作るなら、ゲーム画面を作りたいです。
実装したい機能としては、以下のようなものを考えました。
- 主人公は移動可能に
- ただし壁やオブジェクト、マップ外には移動できない
- マップには宝箱や村人などを配置し、クリックすると会話が表示される
- 宝箱は一度開けると空になり、メッセージが切り替わる
- 壁以外のオブジェクトの背景は床タイルになる
まずは勇者の部屋が表示されるページを作成するために、以下の手順で実装しました。
- 部屋のマップデータを作成: マップを構成するためのデータを2D配列で作成
-
各オブジェクトを表示するためのTile, TileContentコンポーネントを作成: キャラクター、壁、床、宝箱などのオブジェクトを表示するための
Tileコンポーネントを作成 -
部屋全体を表示するRoomコンポーネントを作成: マップデータに基づいて部屋をレンダリングする
Roomコンポーネントを作成
1. 部屋のマップデータを作成
まず、部屋のマップデータを2D配列として定義しました。
const roomMap = [
  [9, 9, 9, 9, 9, 9, 9, 9, 9],
  [9, 4, 5, 8, 8, 8, 0, 6, 9],
  [9, 8, 8, 8, 8, 8, 8, 8, 9],
  [9, 8, 8, 8, 1, 8, 8, 2, 9],
  [9, 9, 9, 9, 9, 9, 9, 9, 9],
];
2. 各オブジェクトを表示するための TileContent, Tile コンポーネントを作成
各オブジェクトに対応する画像素材はDOT ILLUSTというサイト4からダウンロードしました。
マップデータの値に応じて、キャラクター、壁、床、宝箱などのオブジェクトをswitch文で分岐させ、それぞれの画像を表示するTileコンポーネントを作成しました。
オブジェクトの背景には部屋の床が表示されるように、壁以外のタイルには床画像が表示されるようにして、z-indexを指定して重なりを調整しています。
また、できるだけ条件分岐ではマジックナンバーを使用しないために定数ファイルを作成し、それを参照するようにしています。
実装の詳細
export const TILES = {
  HERO: 0, // 勇者タイル
  MURABITO: 1, // 村人タイル
  CAT: 2, // 猫タイル
  OUT_OF_MAP: 3, // マップ外タイル
  TREASURE_RED_GOLD: 4, // 宝箱オブジェクト①
  TREASURE_GREEN_GOLD: 5, // 宝箱オブジェクト②
  BED: 6, // ベッドタイル
  FLOOR: 8, // 床タイル
  WALL: 9, // 壁タイル
} as const;
import Hero from '@/assets/img/character/hero.svg';
import Murabito from '@/assets/img/character/murabito.svg';
import Cat from '@/assets/img/character/cat.svg';
import Bed from '@/assets/img/object/bed.svg';
import TreasureRedGold from '@/assets/img/treasure/treasure_red_gold.svg';
import TreasureRedGoldEmpty from '@/assets/img/treasure/treasure_red_gold_empty.svg';
import TreasureGreenGold from '@/assets/img/treasure/treasure_green_gold.svg';
import TreasureGreenGoldEmpty from '@/assets/img/treasure/treasure_green_gold_empty.svg';
import Wall from '@/assets/img/tile/wall.svg';
import Floor from '@/assets/img/tile/floor.svg';
import { TILES } from '@/constants';
import { createFileRoute } from '@tanstack/react-router';

interface TileContentProps {
  type: number;
  onClick: () => void;
  isTreasureRedGoldTaken: boolean;
  isTreasureGreenGoldTaken: boolean;
}

const TileContent = ({
  type,
  isTreasureRedGoldTaken,
  isTreasureGreenGoldTaken,
  onClick,
}: TileContentProps) => {
  switch (type) {
    case TILES.HERO:
      return (
        <img
          src={Hero}
          alt="Hero"
          onClick={onClick}
          className="w-full h-full absolute z-10"
        />
      );
    case TILES.MURABITO:
      return (
        <img
          src={Murabito}
          alt="Murabito"
          onClick={onClick}
          className="w-full h-full absolute z-10"
        />
      );
    case TILES.CAT:
      return (
        <img
          src={Cat}
          alt="Cat"
          onClick={onClick}
          className="w-full h-full absolute z-10"
        />
      );
    case TILES.TREASURE_RED_GOLD:
      return (
        <img
          src={isTreasureRedGoldTaken ? TreasureRedGoldEmpty : TreasureRedGold}
          alt="Treasure Red Gold"
          onClick={onClick}
          className="w-full h-full absolute z-10"
        />
      );
    case TILES.TREASURE_GREEN_GOLD:
      return (
        <img
          src={
            isTreasureGreenGoldTaken
              ? TreasureGreenGoldEmpty
              : TreasureGreenGold
          }
          alt="Treasure Green Gold"
          onClick={onClick}
          className="w-full h-full absolute z-10"
        />
      );
    case TILES.BED:
      return (
        <img src={Bed} alt="Bed" className="w-full h-full absolute z-10" />
      );
    case TILES.WALL:
      return <img src={Wall} alt="Wall" />;
    default:
      return <img src={Floor} alt="Floor" className="w-full h-full absolute" />;
  }
};

export default TileContent;
import { createFileRoute } from '@tanstack/react-router';
import Floor from '@/assets/img/tile/floor.svg';
import { TILES } from '@/constants';
import TileContent from './TileContent';

interface TileProps {
  type: number;
  onClick: () => void;
  isTreasureRedGoldTaken: boolean;
  isTreasureGreenGoldTaken: boolean;
}

export function Tile({
  type,
  onClick,
  isTreasureRedGoldTaken,
  isTreasureGreenGoldTaken,
}: TileProps) {
  return (
    <div className="relative w-full h-full" onClick={onClick}>
      <TileContent
        type={type}
        isTreasureRedGoldTaken={isTreasureRedGoldTaken}
        isTreasureGreenGoldTaken={isTreasureGreenGoldTaken}
        onClick={onClick}
      />
      {type !== TILES.WALL && (
        <img src={Floor} alt="Floor" className="w-full h-full absolute z-0" />
      )}
    </div>
  );
}
3. 部屋全体を表示する Room コンポーネントを作成
このコンポーネントで行っている処理内容は以下になります。
- 主人公の初期位置の設定
- 主人公の移動処理(壁やオブジェクトは移動不可に)
- メッセージとタイルクリックの管理
- マップの描画
実装の詳細
import { createLazyFileRoute } from '@tanstack/react-router';
import { Tile } from './Tile';
import ChatMessage from '@/components/ChatMessage';
import { useHeroMovement } from '@/hooks/useHeroMovement';
import { useMessage } from './-hooks/useMessage';
import { TILES } from '@/constants';

export const Route = createLazyFileRoute('/room/')({
  component: Room,
});

export function Room() {
  const roomMap = [
    [9, 9, 9, 9, 9, 9, 9, 9, 9],
    [9, 4, 5, 8, 8, 8, 0, 6, 9],
    [9, 8, 8, 8, 8, 8, 8, 8, 9],
    [9, 8, 8, 8, 1, 8, 8, 2, 9],
    [9, 9, 9, 9, 9, 9, 9, 9, 9],
  ];

  const initialPosition = { row: 1, col: 6 };

  const heroPosition = useHeroMovement(initialPosition, roomMap);
  const {
    message,
    handleTileClick,
    treasureRedGoldTaken,
    treasureGreenGoldTaken,
  } = useMessage();

  return (
    <div className="min-h-screen bg-black text-white flex flex-col items-center justify-center">
      <div className="grid grid-cols-9 bg-black p-4">
        {roomMap.flatMap((row, rowIndex) =>
          row.map((tile, colIndex) => {
            const isHeroPosition =
              rowIndex === heroPosition.row && colIndex === heroPosition.col;
            const isPreviousHeroPosition = roomMap[rowIndex][colIndex] === 0;

            const type = isHeroPosition
              ? TILES.HERO
              : isPreviousHeroPosition
                ? TILES.FLOOR
                : tile;

            return (
              <div
                key={`${rowIndex}-${colIndex}`}
                className="flex items-center justify-center w-8 h-8 bg-gray-800 border border-gray-700"
              >
                <Tile
                  type={type}
                  onClick={() => handleTileClick(type)}
                  isTreasureRedGoldTaken={treasureRedGoldTaken}
                  isTreasureGreenGoldTaken={treasureGreenGoldTaken}
                />
              </div>
            );
          })
        )}
      </div>
      {message && (
        <div className="mt-4 p-4 border-2 rounded">
          <ChatMessage message={message} />
        </div>
      )}
    </div>
  );
}
工夫した点
宝箱を空にすると、画像が切り替わるようにしました。
ただ、素材サイトには空の宝箱の画像がなかったため、宝箱の画像のsvgを編集して空の宝箱の画像を作成しました。
これはsvgファイルを直接編集したので、けっこう大変でした。
ハマったポイント
- tanstack-routerを使用してVercelにデプロイすると、ページリロード時に404 not foundエラーが発生する
vercel.jsonを設定して解決
{
  "rewrites": [{ "source": "/(.*)", "destination": "/" }]
}
今後追加したい機能
- マップの拡張
- オブジェクトの追加
- ユーザーメニューの追加
- 経歴やスキルの表示
- 今までの実績や作品の紹介
- イベントをDBに保存し、データのSave機能を実装
などを追加していきたいです。
基本的なコンポーネントは作成できているので、あとはこれらを使い回すことでコンテンツを追加していくことが可能だと考えています。
改善点
-
tanstack-routerでのページ遷移時のアニメーションがうまくいかない
- framer-motionでfade-outアニメーションが遷移前のページに適用されず、遷移後のページに適用されてしまう問題がある
- 原因は古いツリーをレンダリングし続けるためのバージョン管理された状態が必要だが、ReactのuseSyncExternalStoreではこれが実現できないために起きているようです
-
howler.jsでwarningが発生する
- ブラウザでの音声再生には制限があるため、howler.jsを使って音声再生を行っているが、howler.jsがうまく制限を回避できていない可能性がある
-
react-simple-typewriterでのアニメーションが同じメッセージ内容だと再生されない
- keyに設定する値をuuidにしてみましたが、解決しませんでした
- useEffectで再レンダリングを強制すれば解決できたかもしれませんが、良い方法ではないかなと思い実装していないです。
-
マップを配列で持たせてswitch文で分岐させているが、今後マップを拡張させたり、オブジェクトを追加した場合にswitch文が膨大になる可能性がある
- マップデータをJSONファイルで管理するなどして、switch文を使わずにマップデータを取得するようにすれば良い?
- 実際にブラウザでのゲーム開発ではどのようにマップデータを管理しているのか調査する必要あり
もしこれらの解決策をご存知の方がいれば、教えていただけると幸いです。
まとめ
今回は、Reactを使ってRPG風のポートフォリオサイトを作成しました。
せっかくならReactであることを活かした動的な機能を取り入れたいと思い、タイピングアニメーションやページ遷移のアニメーション、ゲーム画面の実装などを取り入れました。
また、TODOリストなどのよくある見た目ではなくオリジナリティのある内容にしたかったため宝箱の開閉など細かい挙動などを作り込みました。
RPG風のポートフォリオ自体を作るような記事は他にもいくつかあるかと思いますが、独自の機能を実装することができたことは嬉しいです。
今後より機能やコンテンツを充実させ、見た人に興味を持ってもらえるようなポートフォリオサイトに作り込んでいこうかなと考えています。
良ければ記事の感想や、コードの改善点などを教えていただけると嬉しいです。
ここまでお読みいただきありがとうございました。
その2
その3