はじめに
こちらは エーピーコミュニケーションズ Advent Calendar 2024 の 11 日目の記事となります。
業務上でMigration Serviceに関わる機会があり、理解を深めるため動作検証をしてみることにしました。
今回は一台だけの移行テストでしたが、想像よりも時間がかかるため、あらかじめ時間が取れるタイミングでの検証をお勧めします。
また、作業中は複数台のインスタンスが立ち上がったままになります。
処理待ちの時間が想像以上に長く一晩跨いでしまうことになりました。
作業中断時のコストなどを考慮して一度削除し、改めて実施することになりましたので皆様はご注意ください。
また、以下の公式ドキュメントや記事を参考にさせていただきました。
Application Migration Service
AWS Skill Builder
AWS MGN(application migration service)を使ってみた
テスト環境の準備
移行元環境
移行サーバーとしてはVMware Workstationを利用して仮想環境を用意しました。
OSは次の通りです。
- Ubuntu 24.04 LTS
事前調査もろくにせず、手元環境にあったKaliLinuxで試したところ結果的にサポートOSではなく移行ができませんでした。
移行先環境
ドキュメントなどを参考にしつつ、基本的なテスト用の環境はAWS CDKで作成しました。
事前の環境準備だけでも地味な操作が多く手間に感じられました。
GUI上ではあっちにいったりこっちにいったりしながら操作する必要がある際に、CDKはパッとまとめて作れるため非常に強力です。
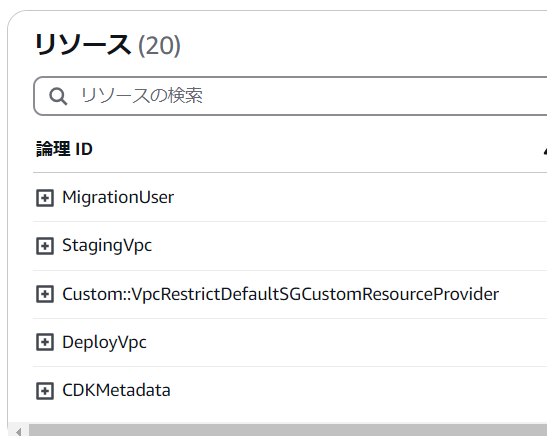
- テスト用のIAMユーザー
- ステージング環境用のVPC
- デプロイ環境用のVPC
import * as cdk from 'aws-cdk-lib';
import * as iam from 'aws-cdk-lib/aws-iam';
import * as ec2 from 'aws-cdk-lib/aws-ec2';
import { Construct } from 'constructs';

export class MigrationTestStack extends cdk.Stack {
  constructor(scope: Construct, id: string, props?: cdk.StackProps) {
    super(scope, id, props);

    // IAMユーザーの作成
    const migrationUser = new iam.User(this, 'MigrationUser', {
      userName: 'migration-test-user',
    });

    // AWS Application Migration Service の管理ポリシーをアタッチ
    migrationUser.addManagedPolicy(
      iam.ManagedPolicy.fromAwsManagedPolicyName('AWSApplicationMigrationAgentPolicy')
    );

    // ステージング用VPCの作成
    const stagingVpc = new ec2.Vpc(this, 'StagingVpc', {
      ipAddresses: ec2.IpAddresses.cidr('10.0.0.0/16'),
      maxAzs: 1,
      subnetConfiguration: [
        {
          cidrMask: 24,
          name: 'Public',
          subnetType: ec2.SubnetType.PUBLIC,
        },
      ],
    });

    // デプロイ用VPCの作成
    const deployVpc = new ec2.Vpc(this, 'DeployVpc', {
      ipAddresses: ec2.IpAddresses.cidr('10.2.0.0/16'),
      maxAzs: 1,
      subnetConfiguration: [
        {
          cidrMask: 24,
          name: 'Public',
          subnetType: ec2.SubnetType.PUBLIC,
        },
      ],
    });

    // タグの追加
    cdk.Tags.of(stagingVpc).add('Environment', 'Staging');
    cdk.Tags.of(deployVpc).add('Environment', 'Deploy');
  }
}
デプロイ後の状態。
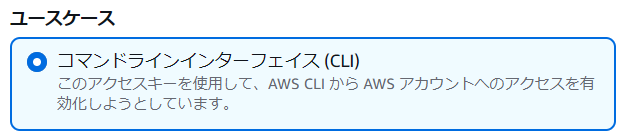
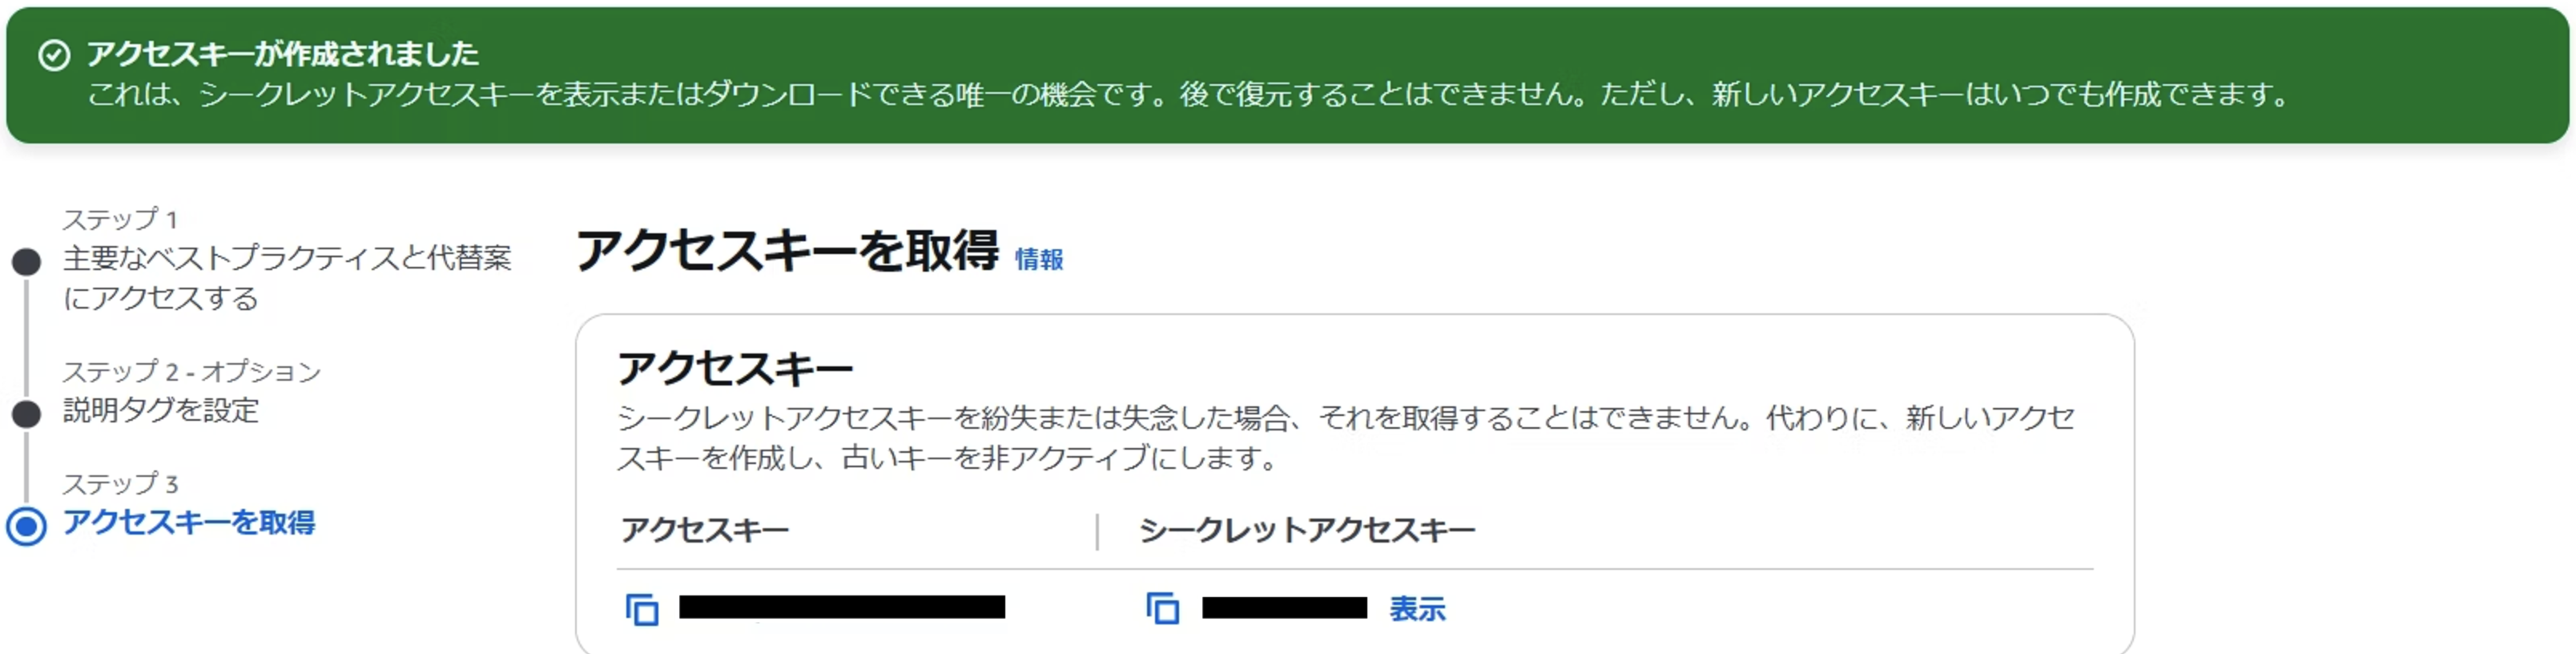
移行VMのセットアップに利用するため、アクセスキーを作成し控えておきます。
移行作業
Application Migration Service初期設定
初回利用のため初期化が求められました。
サービスをセットアップをクリックする。
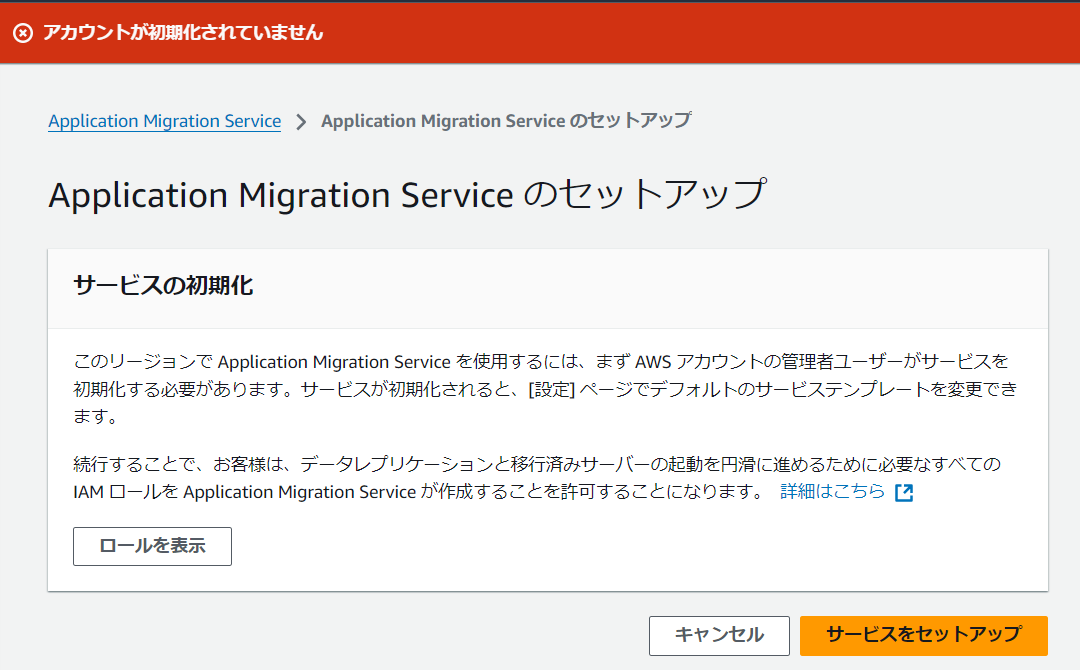
デフォルトテンプレートが作成されたようです。

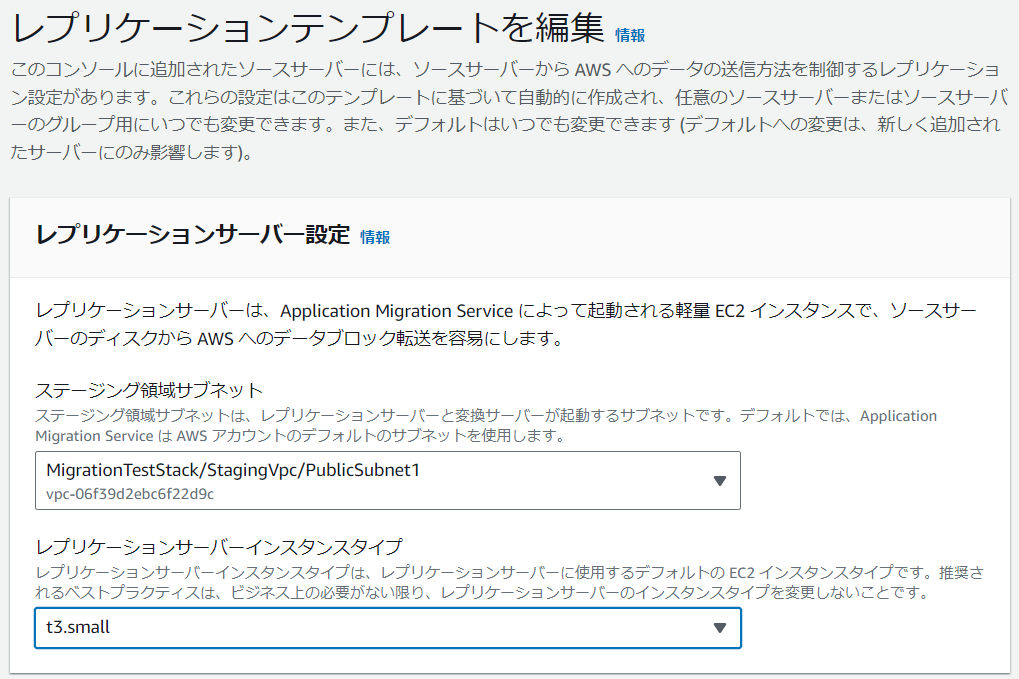
CDKにてテスト用の環境をデプロイ後、レプリケーション用のテンプレートを編集します。
こちらの操作についても合わせてCDKでうまく編集できないかと思ったのですが、すぐには解決が難しそうだったためマネコンからの作業としました。
レプリケーション用テンプレートを編集し、用意したステージング環境用のサブネットを選択します。
移行対象マシン準備
以下を参考にしました。
Installing the AWS Replication Agent on Linux servers
端的にはwgetコマンドでインストールモジュールをダウンロードして実行する形となります。
リージョンごとに取得元が違うのですが、ap-northeast-1の場合は以下の様なコマンドになりました。
wget -O ./aws-replication-installer-init https://aws-application-migration-service-ap-northeast-1.s3.ap-northeast-1.amazonaws.com/latest/linux/aws-replication-installer-init
こちら実行方法で少し迷うことがありましたが、以下のようなコマンドを実行するとインストーラーが動作します。
sudo chmod +x aws-replication-installer-init; sudo ./aws-replication-installer-init --region ap-northeast-1 --aws-access-key-id ******** --aws-secret-access-key ********
ubuntu@ubuntu2404:~$ wget -O ./aws-replication-installer-init https://aws-application-migration-service-ap-northeast-1.s3.ap-northeast-1.amazonaws.com/latest/linux/aws-replication-installer-init
--2024-11-27 01:09:31--  https://aws-application-migration-service-ap-northeast-1.s3.ap-northeast-1.amazonaws.com/latest/linux/aws-replication-installer-init
Resolving aws-application-migration-service-ap-northeast-1.s3.ap-northeast-1.amazonaws.com (aws-application-migration-service-ap-northeast-1.s3.ap-northeast-1.amazonaws.com)... 52.219.162.122, 52.219.8.222, 52.219.151.30, ...
Connecting to aws-application-migration-service-ap-northeast-1.s3.ap-northeast-1.amazonaws.com (aws-application-migration-service-ap-northeast-1.s3.ap-northeast-1.amazonaws.com)|52.219.162.122|:443... connected.
HTTP request sent, awaiting response... 200 OK
Length: 11595224 (11M) [binary/octet-stream]
Saving to: ‘./aws-replication-installer-init’

./aws-replication-installer-i 100%[=================================================>]  11.06M  30.4MB/s    in 0.4s

2024-11-27 01:09:32 (30.4 MB/s) - ‘./aws-replication-installer-init’ saved [11595224/11595224]

ubuntu@ubuntu2404:~$
sudo chmod +x aws-replication-installer-init; sudo ./aws-replication-installer-init --region ap-northeast-1 --aws-access-key-id <AccessKey> --aws-secret-access-key <SecretKey>
The installation of the AWS Replication Agent has started.
Identifying volumes for replication.
Choose the disks you want to replicate. Your disks are: /dev/sda
To replicate some of the disks, type the path of the disks, separated with a comma (for example, /dev/sda,/dev/sdb). To replicate all disks, press Enter:
Identified volume for replication: /dev/sda of size 124 GiB
All volumes for replication were successfully identified.
Downloading the AWS Replication Agent onto the source server...
Finished.
Installing the AWS Replication Agent onto the source server...
Finished.
Syncing the source server with the Application Migration Service Console...
Finished.
The following is the source server ID: s-657e319eca07e282f.
You now have 1 active source server out of a total quota of 150.
Learn more about increasing source servers limit at https://docs.aws.amazon.com/mgn/latest/ug/MGN-service-limits.html
The AWS Replication Agent was successfully installed.
ubuntu@ubuntu2404:~$
このインストール処理内でも同期処理の様なものがいるようで完了までしばらく時間がかかります。
セットアップ完了後、AWS画面を確認すると画面表示が変わりました。
Application Migration Service側状態確認
ソースサーバーの欄に移行元サーバーが表示されます。
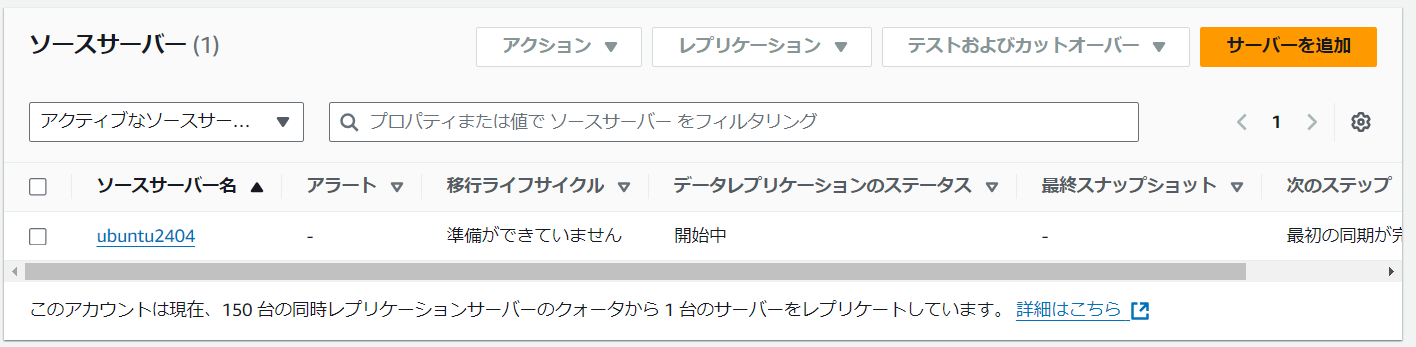
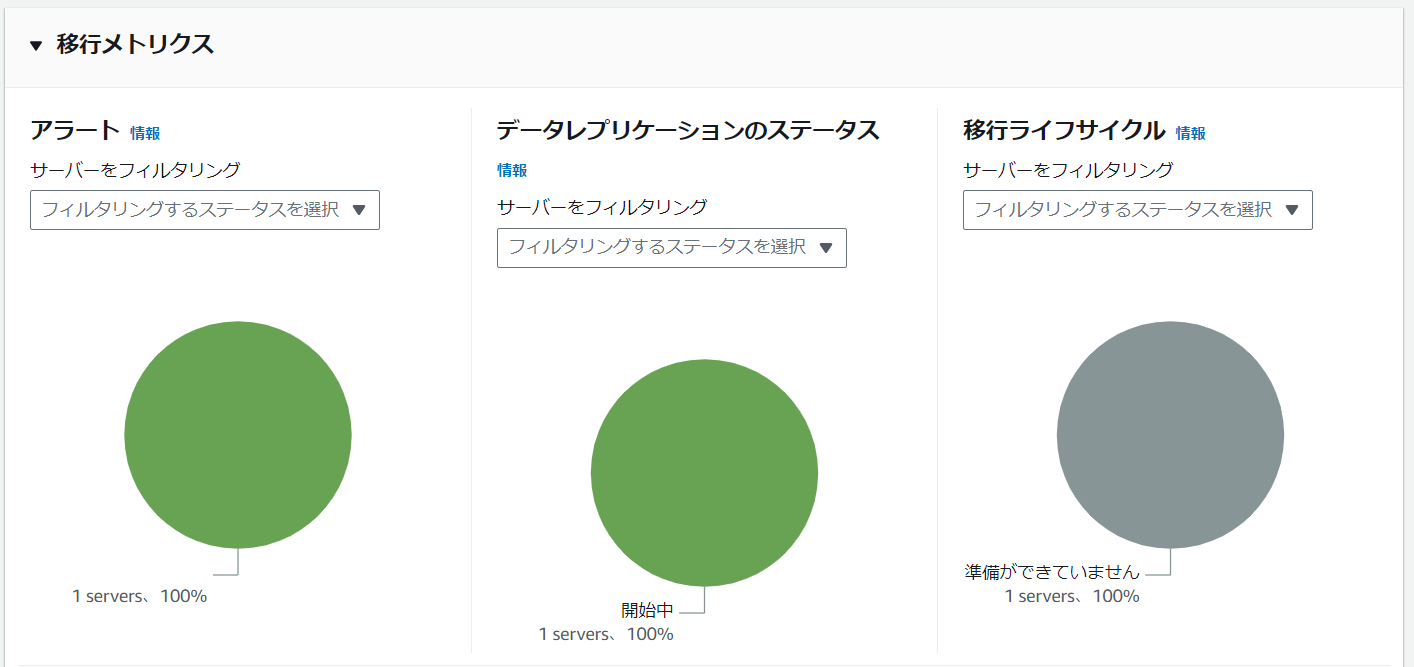
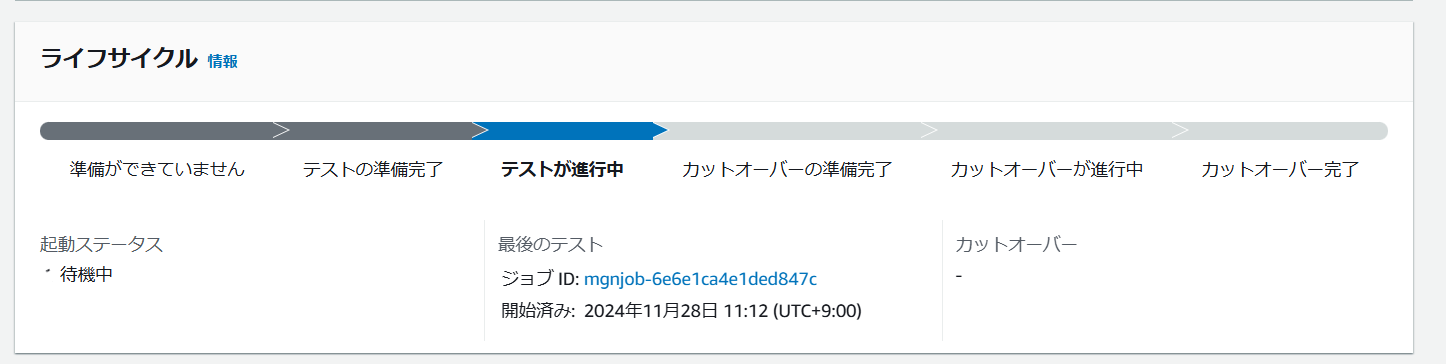
サーバーをクリックし詳細画面を表示すると、準備ができていませんとのステータスとなっています。
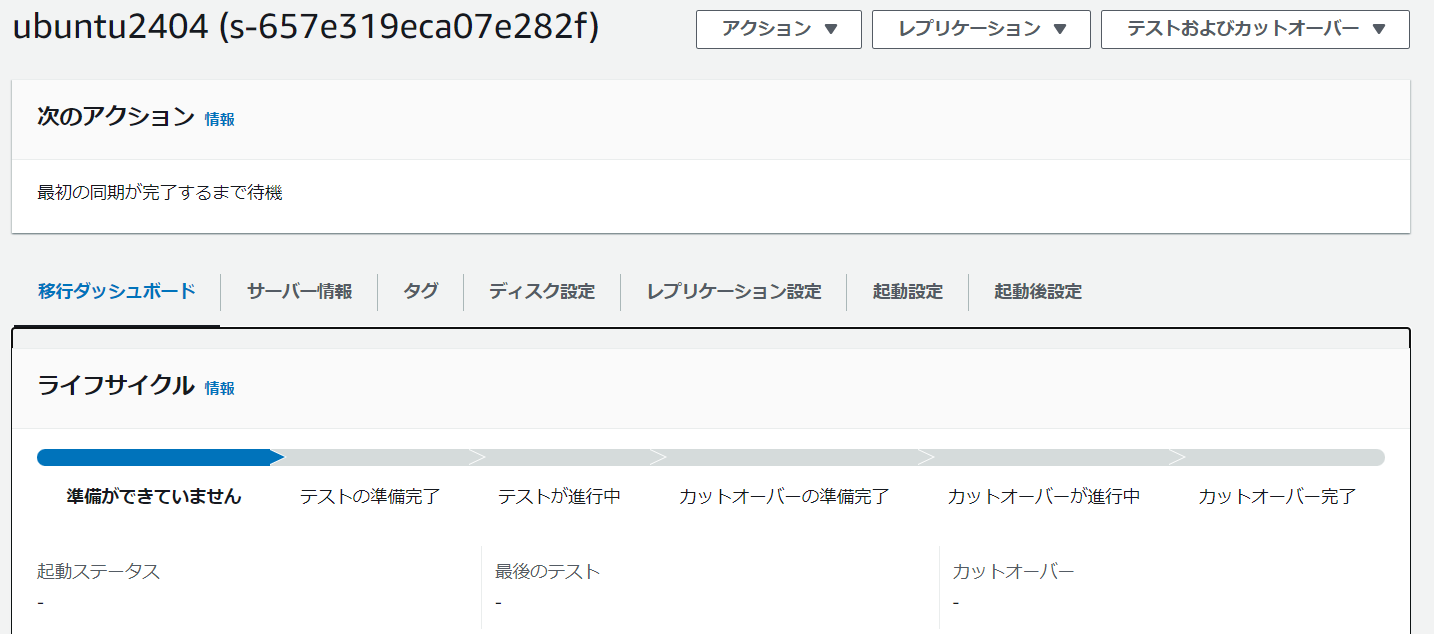
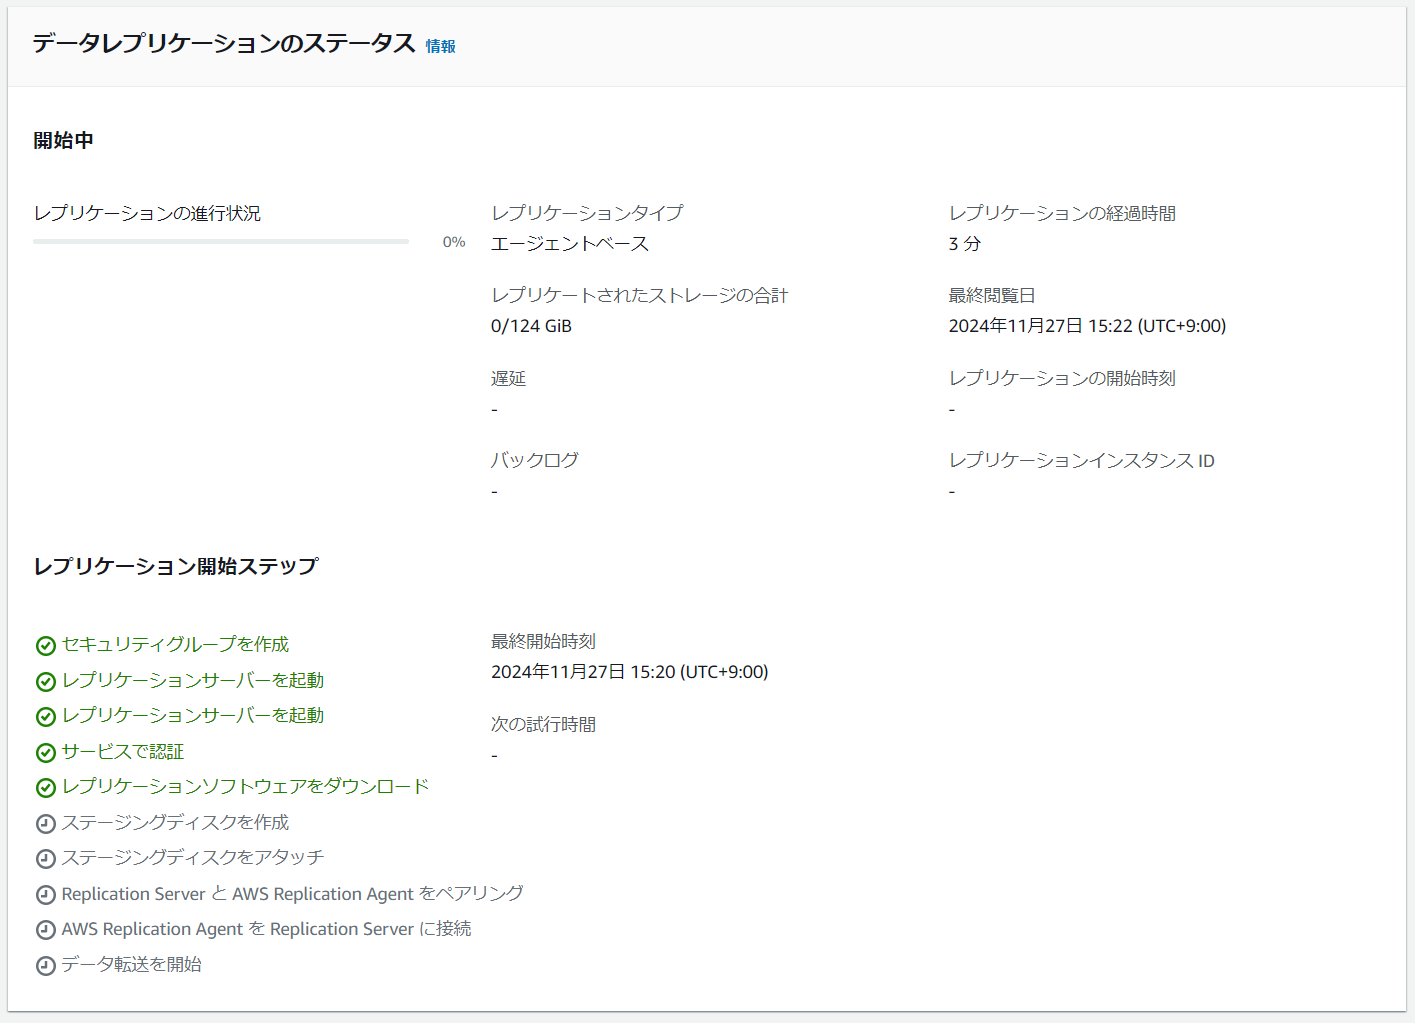
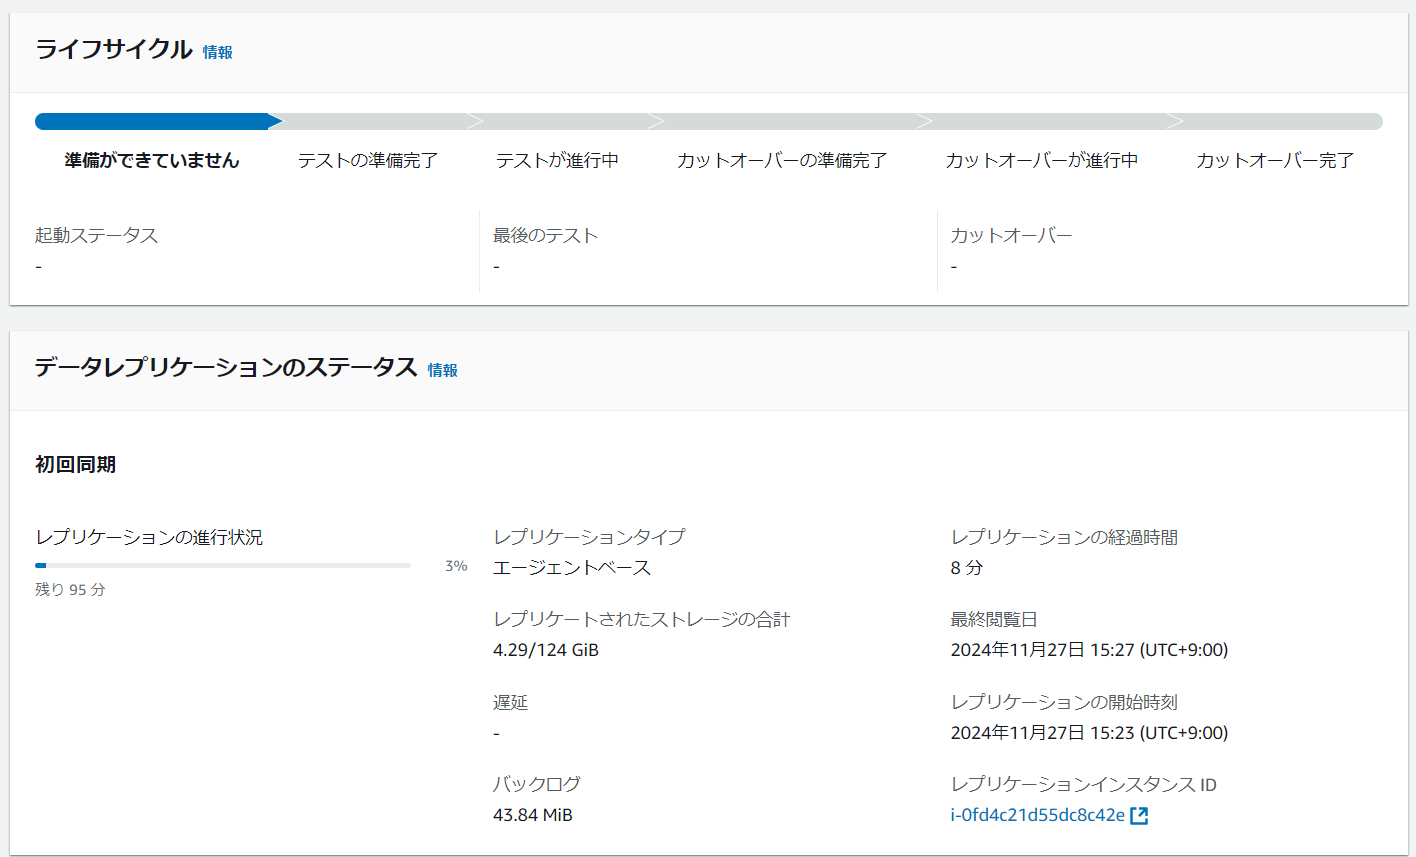
しばらくすると同期処理とスナップショットの作成処理が始まります。
初回実行時は同期後のスナップショット作成が想像以上に長く感じられたため、前述した通り一度中断してしまいました。(アーカイブ化)
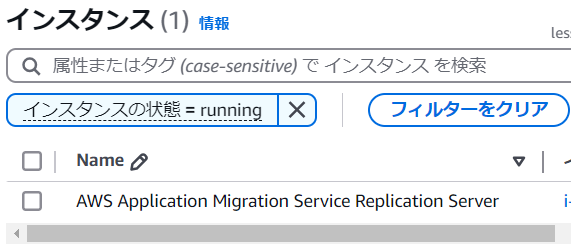
裏では移行用にEC2インスタンスが立ち上がっています。
初期同期の完了後、スナップショットの作成が始まります。
こちらスナップショット自体の作成がされていることを確認しましたが、ステータスの遷移が非常に遅かったです。
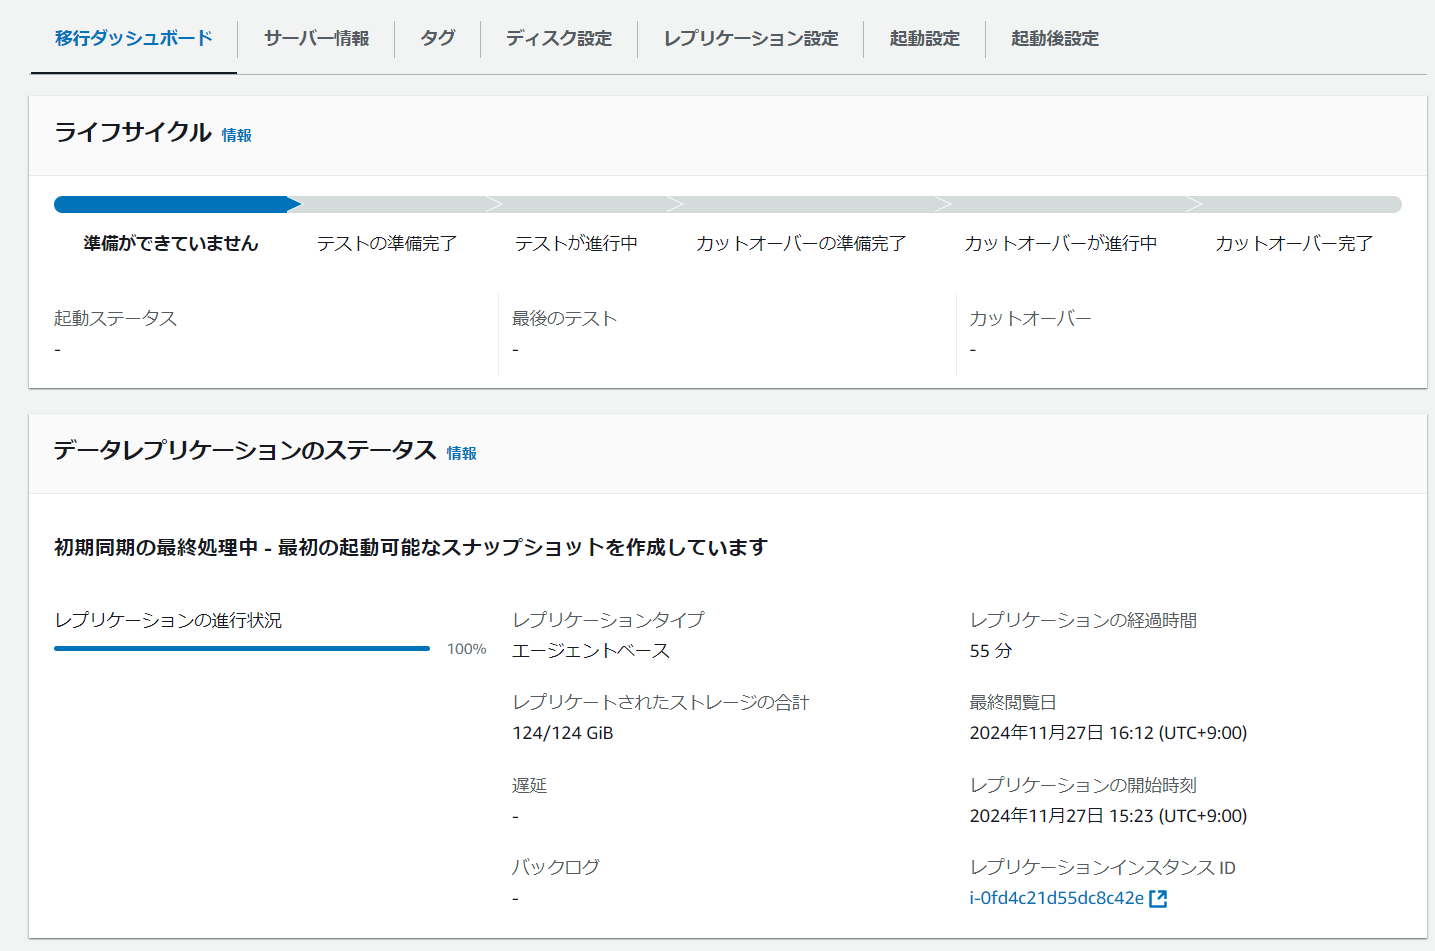
やっとのことで初期レプリケーション完了です。
概ね1時間〜1.5時間ほどの時間がかかったと思います。


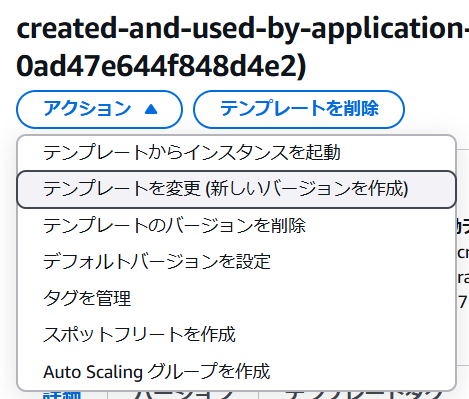
起動テンプレートの修正
起動テンプレートが作成されているため、テンプレートを開いて新しいバージョンを作成します。
デプロイ環境用のサブネットを指定します。

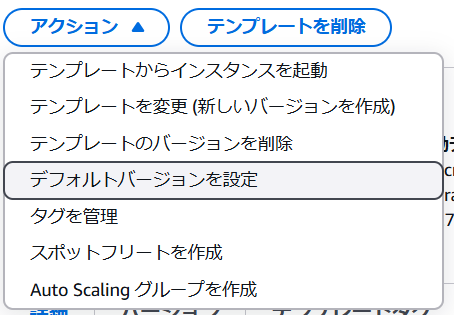
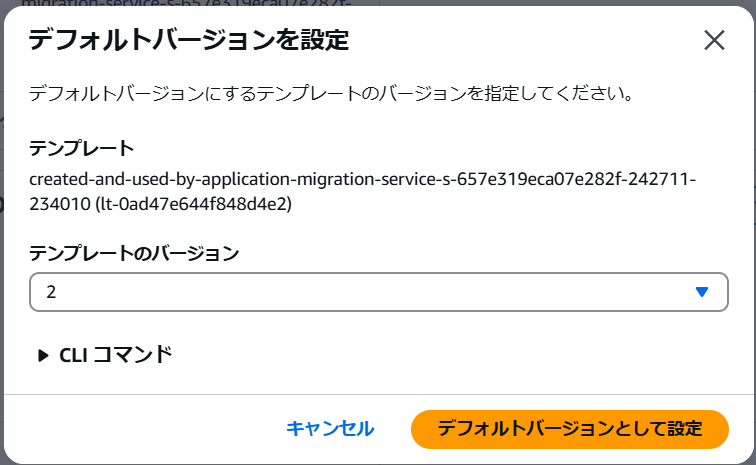
デフォルトバージョンを作成したテンプレートに変更します。
テスト環境の起動・接続確認
しばらくここでも起動待ちになります。
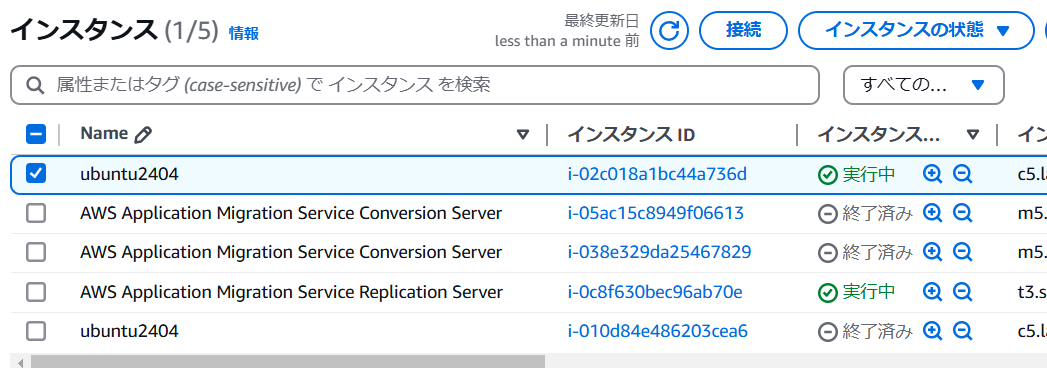
まずAWS Application Migration Service Conversion Serverが上がります。

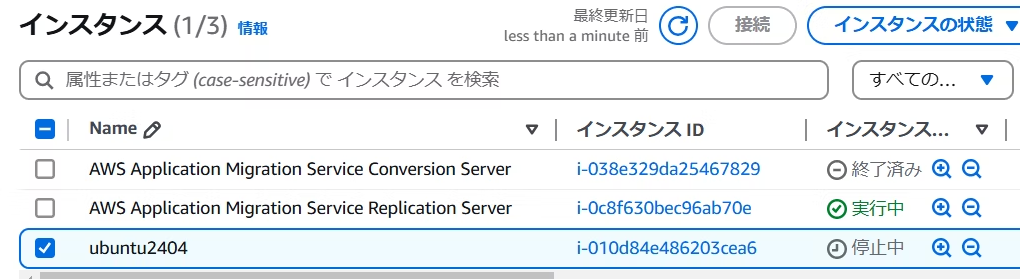
AWS Application Migration Service Conversion Serverが停止済みとなり、移行対象のインスタンスが作成され起動されます。
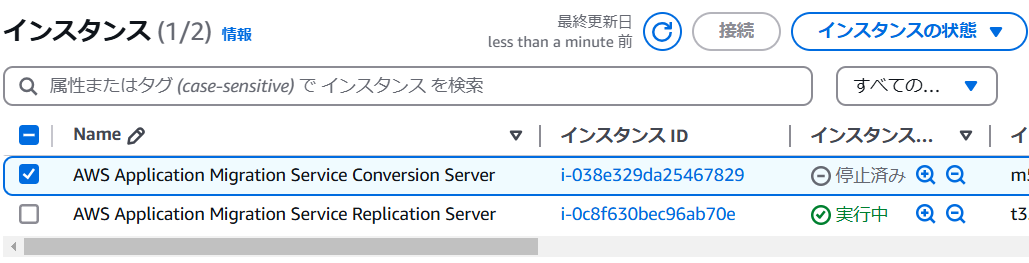
しばらくすると移行元ホストと同名のインスタンスが作成され、またしばらくすると起動しました。
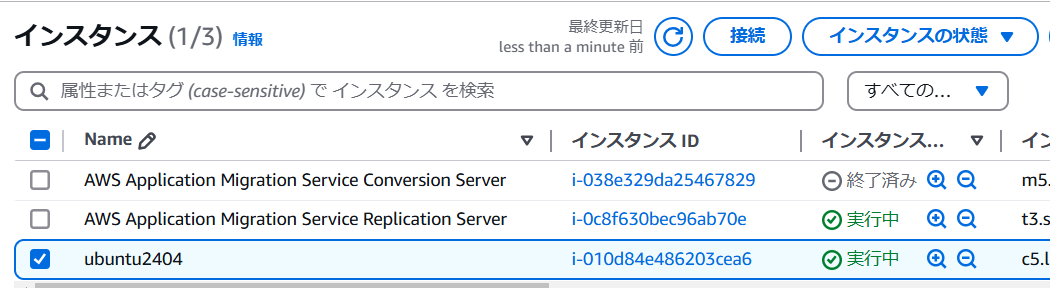
アクセステストを試みようとしたところEIPが作成されていなかったため、EIPの作成と関連付けをし、セキュリティグループで22番ポートも許可しました。
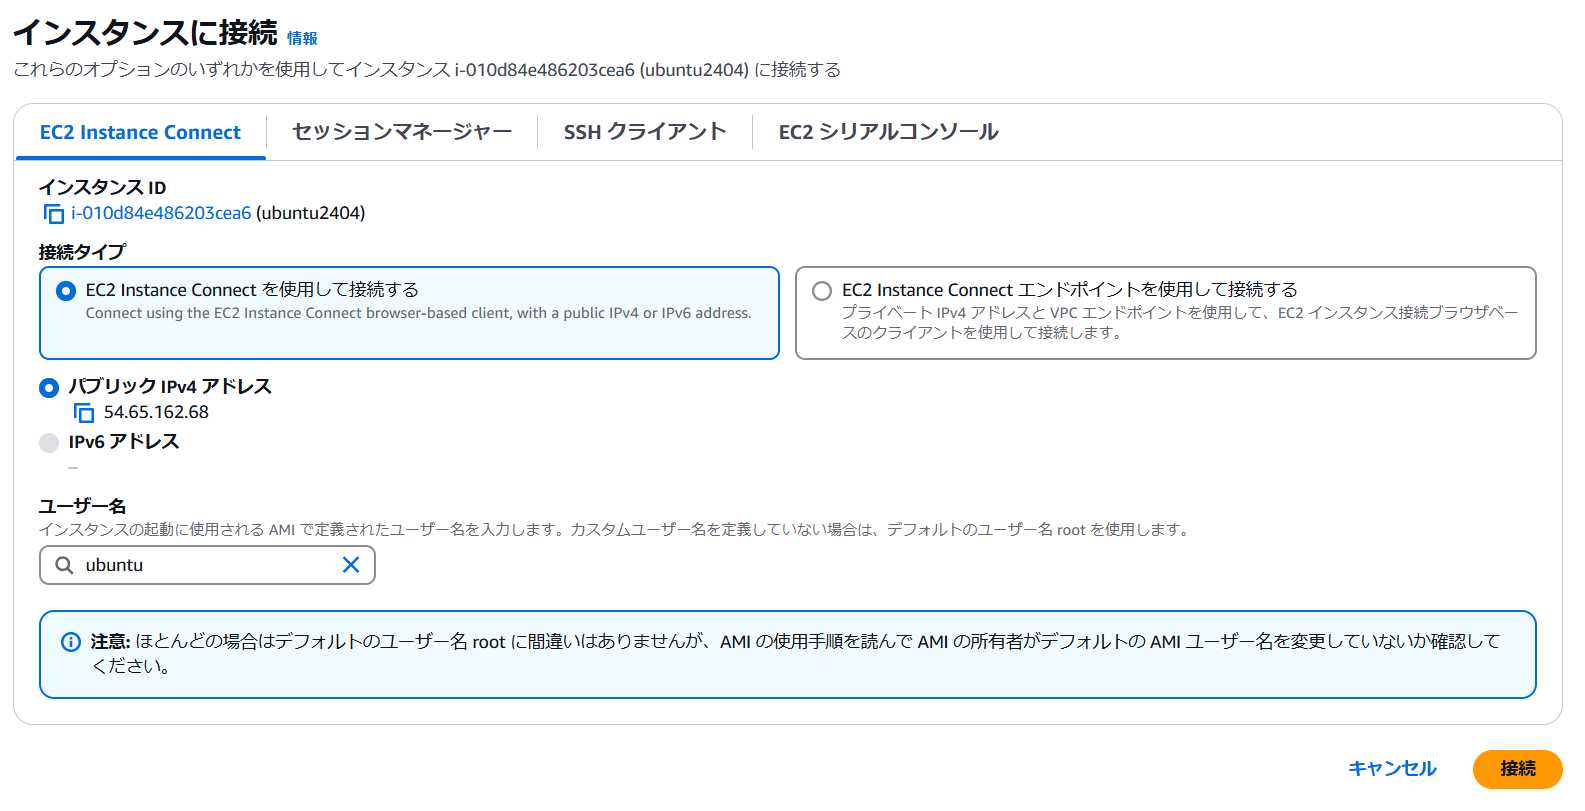
以下のように問題なく接続の確認ができました。
@ssh ubuntu@54.65.162.68
ubuntu@54.65.162.68's password:
Welcome to Ubuntu 24.04 LTS (GNU/Linux 6.8.0-49-generic x86_64)

 * Documentation:  https://help.ubuntu.com
 * Management:     https://landscape.canonical.com
 * Support:        https://ubuntu.com/pro

Expanded Security Maintenance for Applications is not enabled.

213 updates can be applied immediately.
3 of these updates are standard security updates.
To see these additional updates run: apt list --upgradable

Enable ESM Apps to receive additional future security updates.
See https://ubuntu.com/esm or run: sudo pro status

Last login: Wed Nov 27
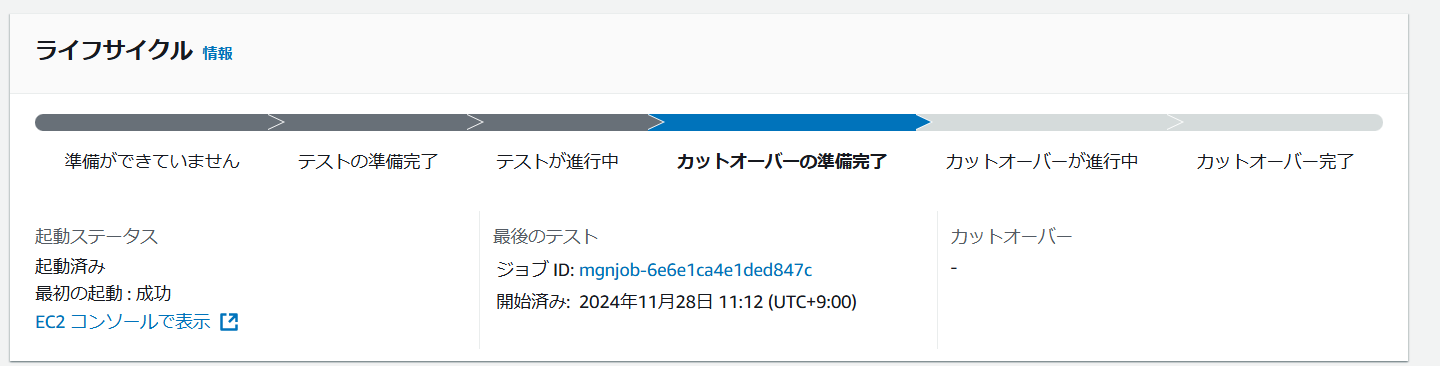
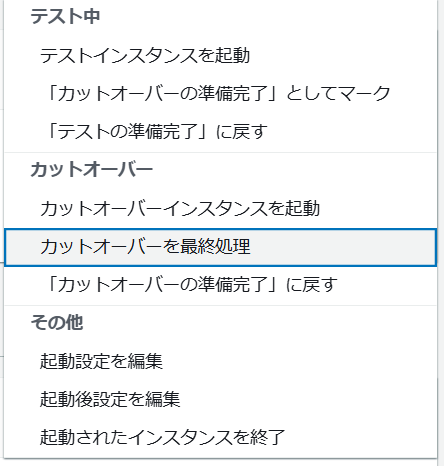
カットオーバーフェーズ
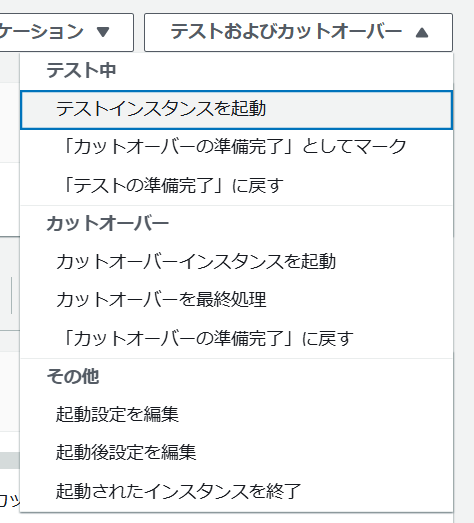
AMSを進めるためには一度カットオーバーの準備完了ステータスにする必要があります。

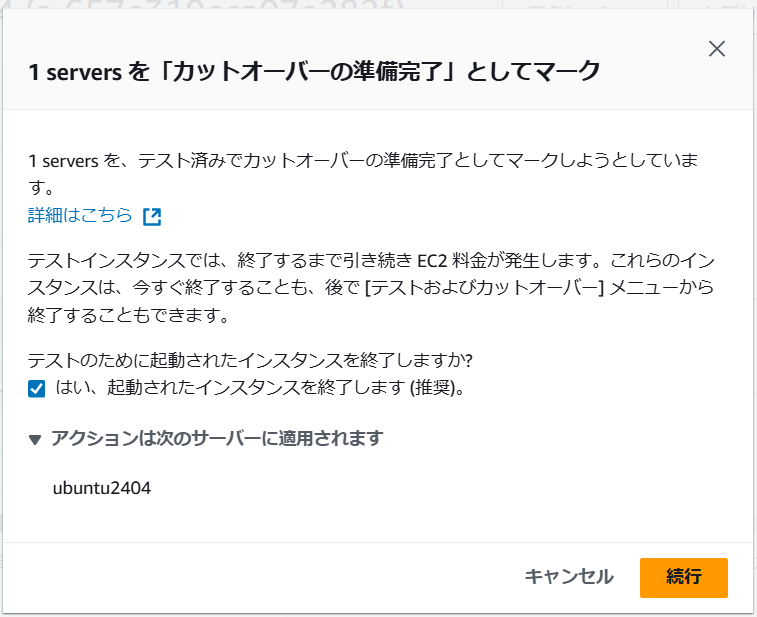
カットオーバー準備完了となったら、カットオーバーインスタンスを起動します。
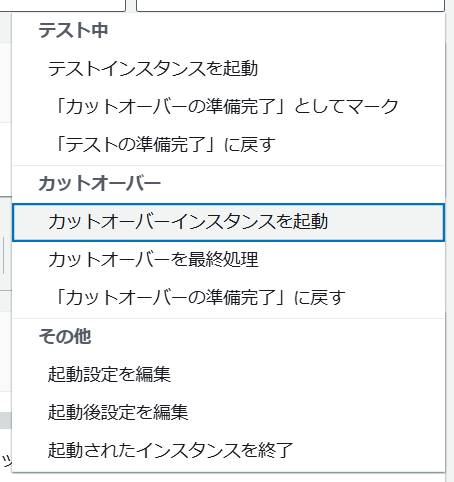
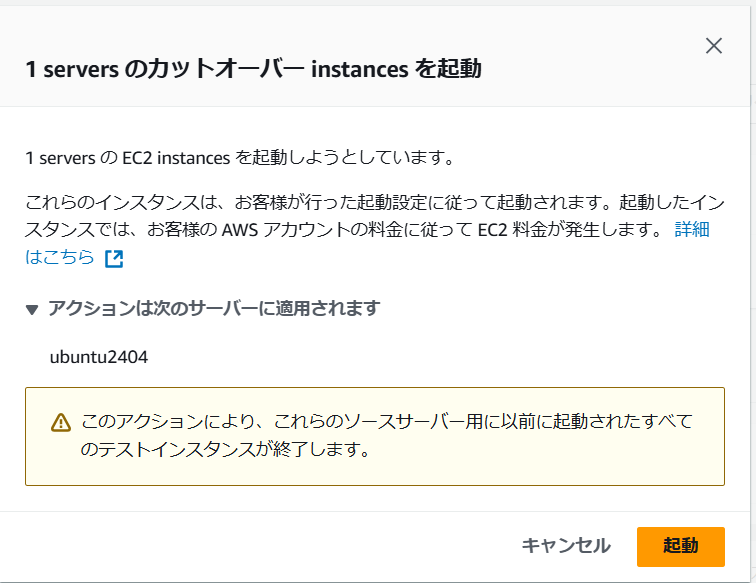
新しくカットオーバーインスタンスが立ち上がりました。
これで本番用のインスタンスが完成します。
起動確認ができたら、カットオーバーを最終処理として不要なインスタンスなどの削除となります。
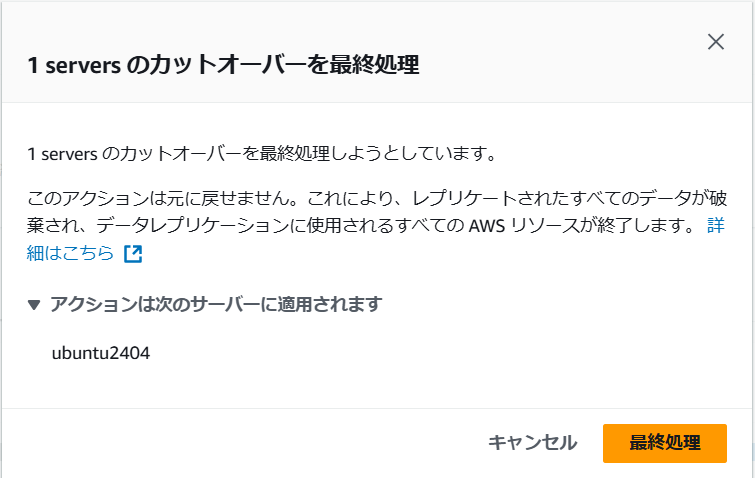
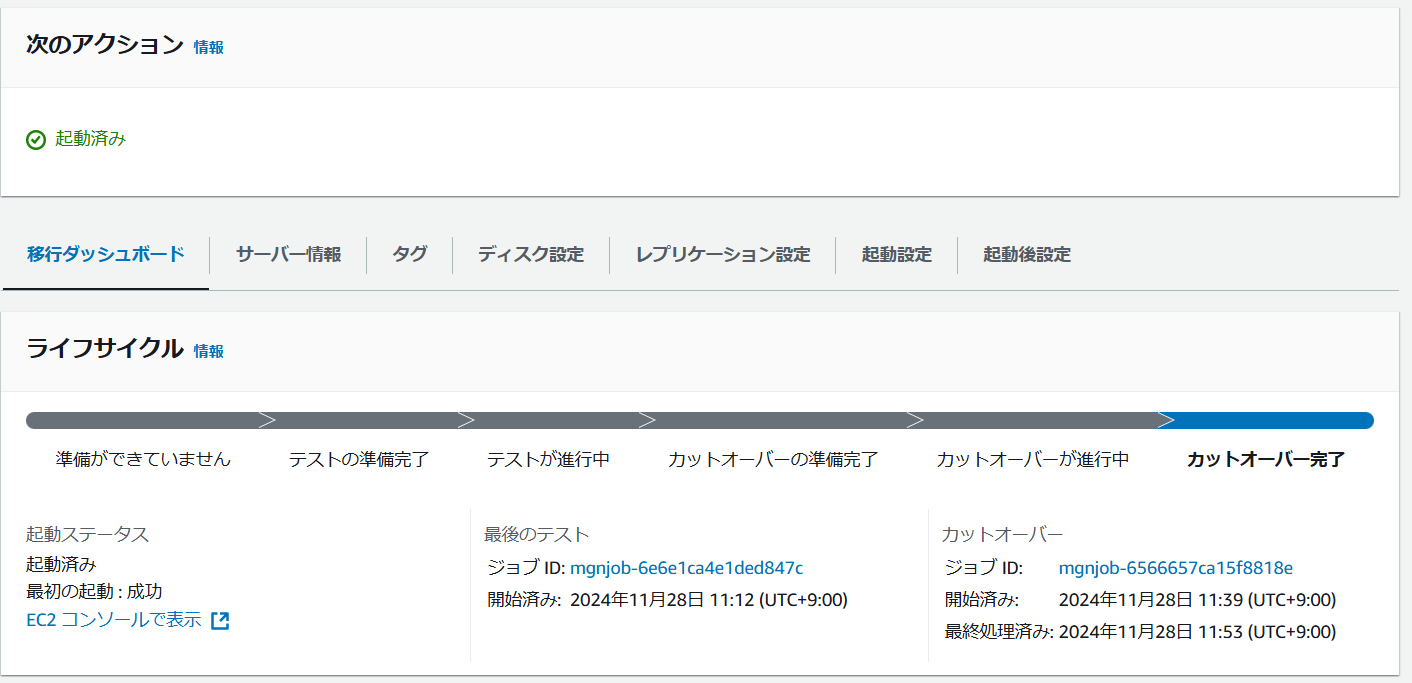
カットオーバー完了のステータスとなり、これで移行が完了です。
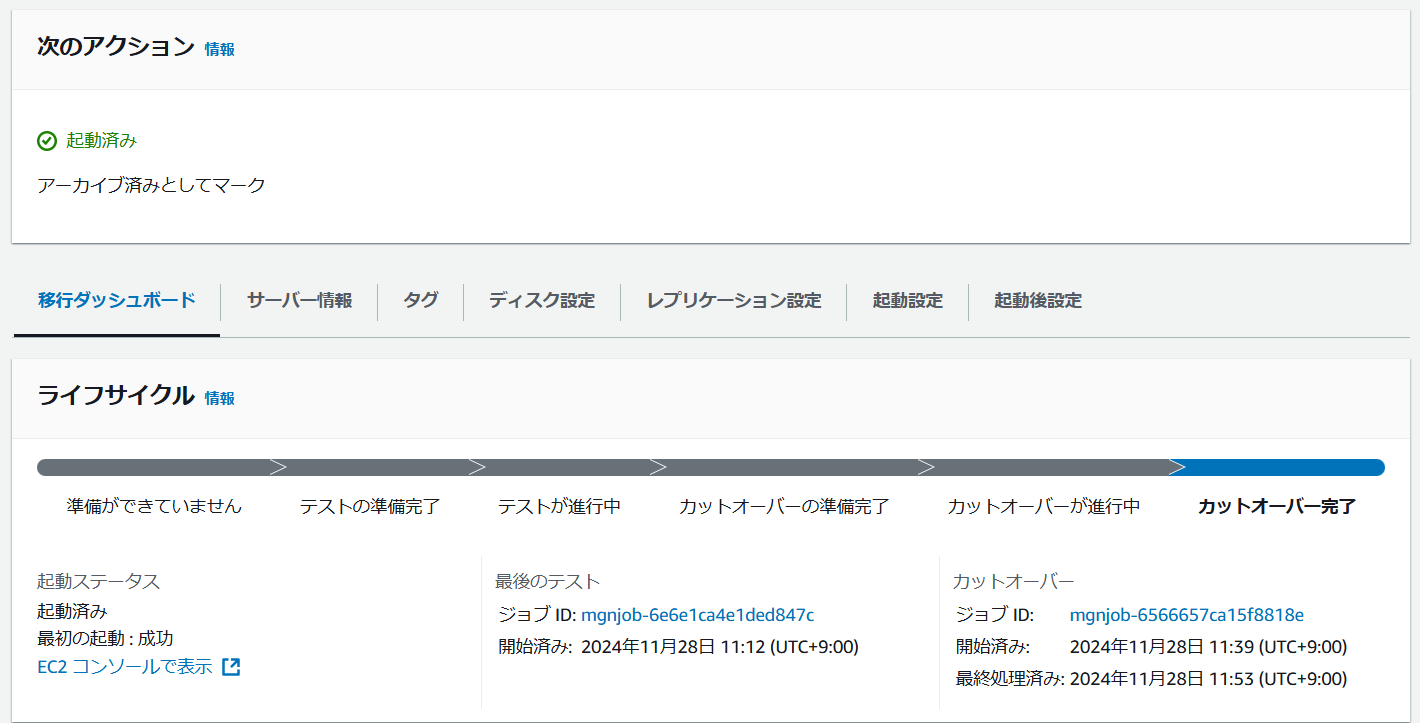
完了後AWS Application Migration Service Replication Serverが自動で終了しませんでした。
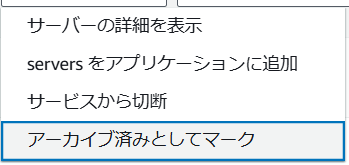
アーカイブ済みとすることでインスタンスが終了するようです。
おわりに
面倒な移行の手間を考えずに単純なクラウドリフトするだけであれば、とても有効に利用できるサービスです。
個人的には1台の移行でも思ったよりも時間がかかること、操作が少しだけ煩雑なことを感じました。
もちろんインスタンスを立ち上げてから中身を個別に移行していく場合などに比べると手間は非常に少ないものの、コマンドを有効活用することでさらに効率的な方法を模索したいと感じました。
今回は1台だけの移行での話でしたが、台数の多い大規模サービスなどでひとまずクラウドリフトだけするようなケースではとても強力に働き、手間もかからないと思いました。