記事の目的
- opensearchpyを使ってAWSのOpenSearchサービスへデータを送る作業に手間取ったので、備忘録として手順書を残します。
- 公式ドキュメントを参考に試行錯誤することがあったので、同じような初心者の方の助けになったら良きです。
記事の特徴
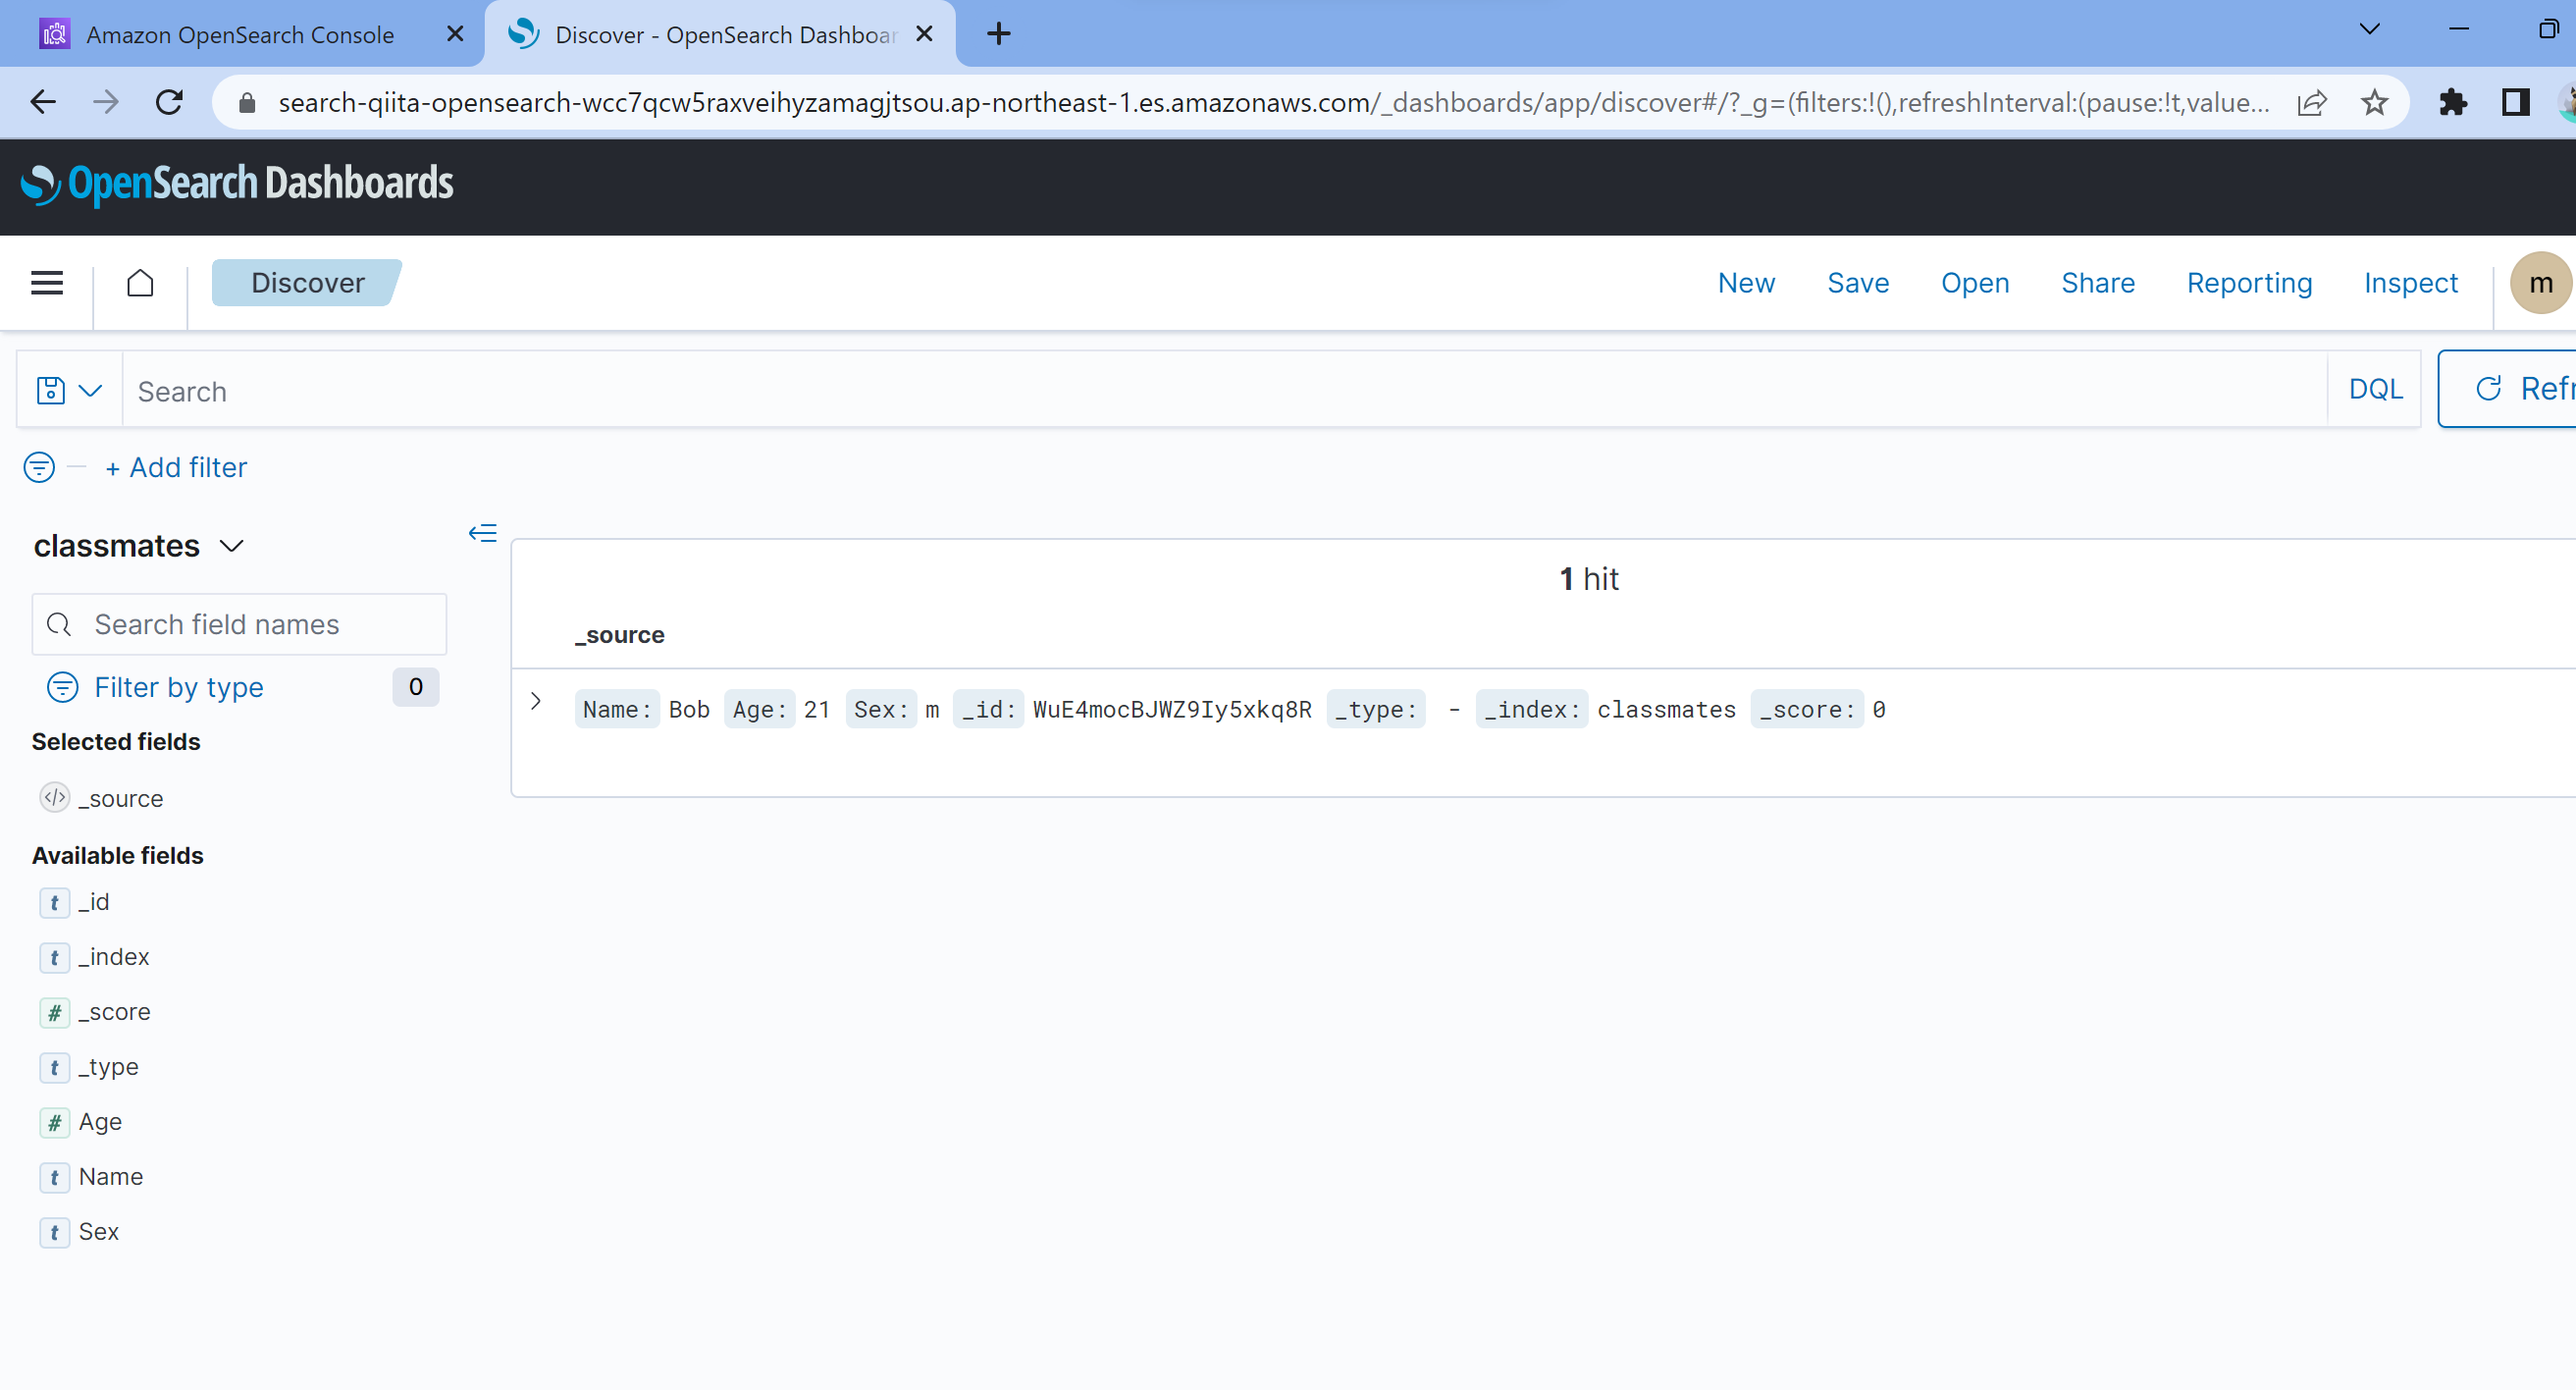
- これの続編。今回は手元のPCにあるデータをダッシュボード側へ送り、discoverで表示するところまでします。
opensearchpyを入れてなければ、pipを使って入れておきます。
pip install opensearch-py
try_connect.pyを使って、opensearch側へデータを送ります。
いくつかのドキュメントを参考に書いています。
try_connect.py
from opensearchpy import OpenSearch

host = "search-qiita-opensearch-wcc7qcw5raxveihyzamagjtsou.ap-northeast-1.es.amazonaws.com"
port = 443

auth = ("master", "Master@2023")

client = OpenSearch(
    hosts = [{'host': host, 'port': port}],
    http_auth = auth,
    use_ssl = True,
    verify_certs = True,
    ssl_assert_hostname = False,
    ssl_show_warn = False,
)

index_name = "classmates"
data = {
  "Name":"Bob",
  "Age":21,
  "Sex":"m"
}

response = client.index(index_name, body=data)
authの値は、ドメイン作成時に設定したマスターユーザのユーザ名とパスワードを代入します。
hostの値は、ドメインエンドポイントを参考にして代入します。
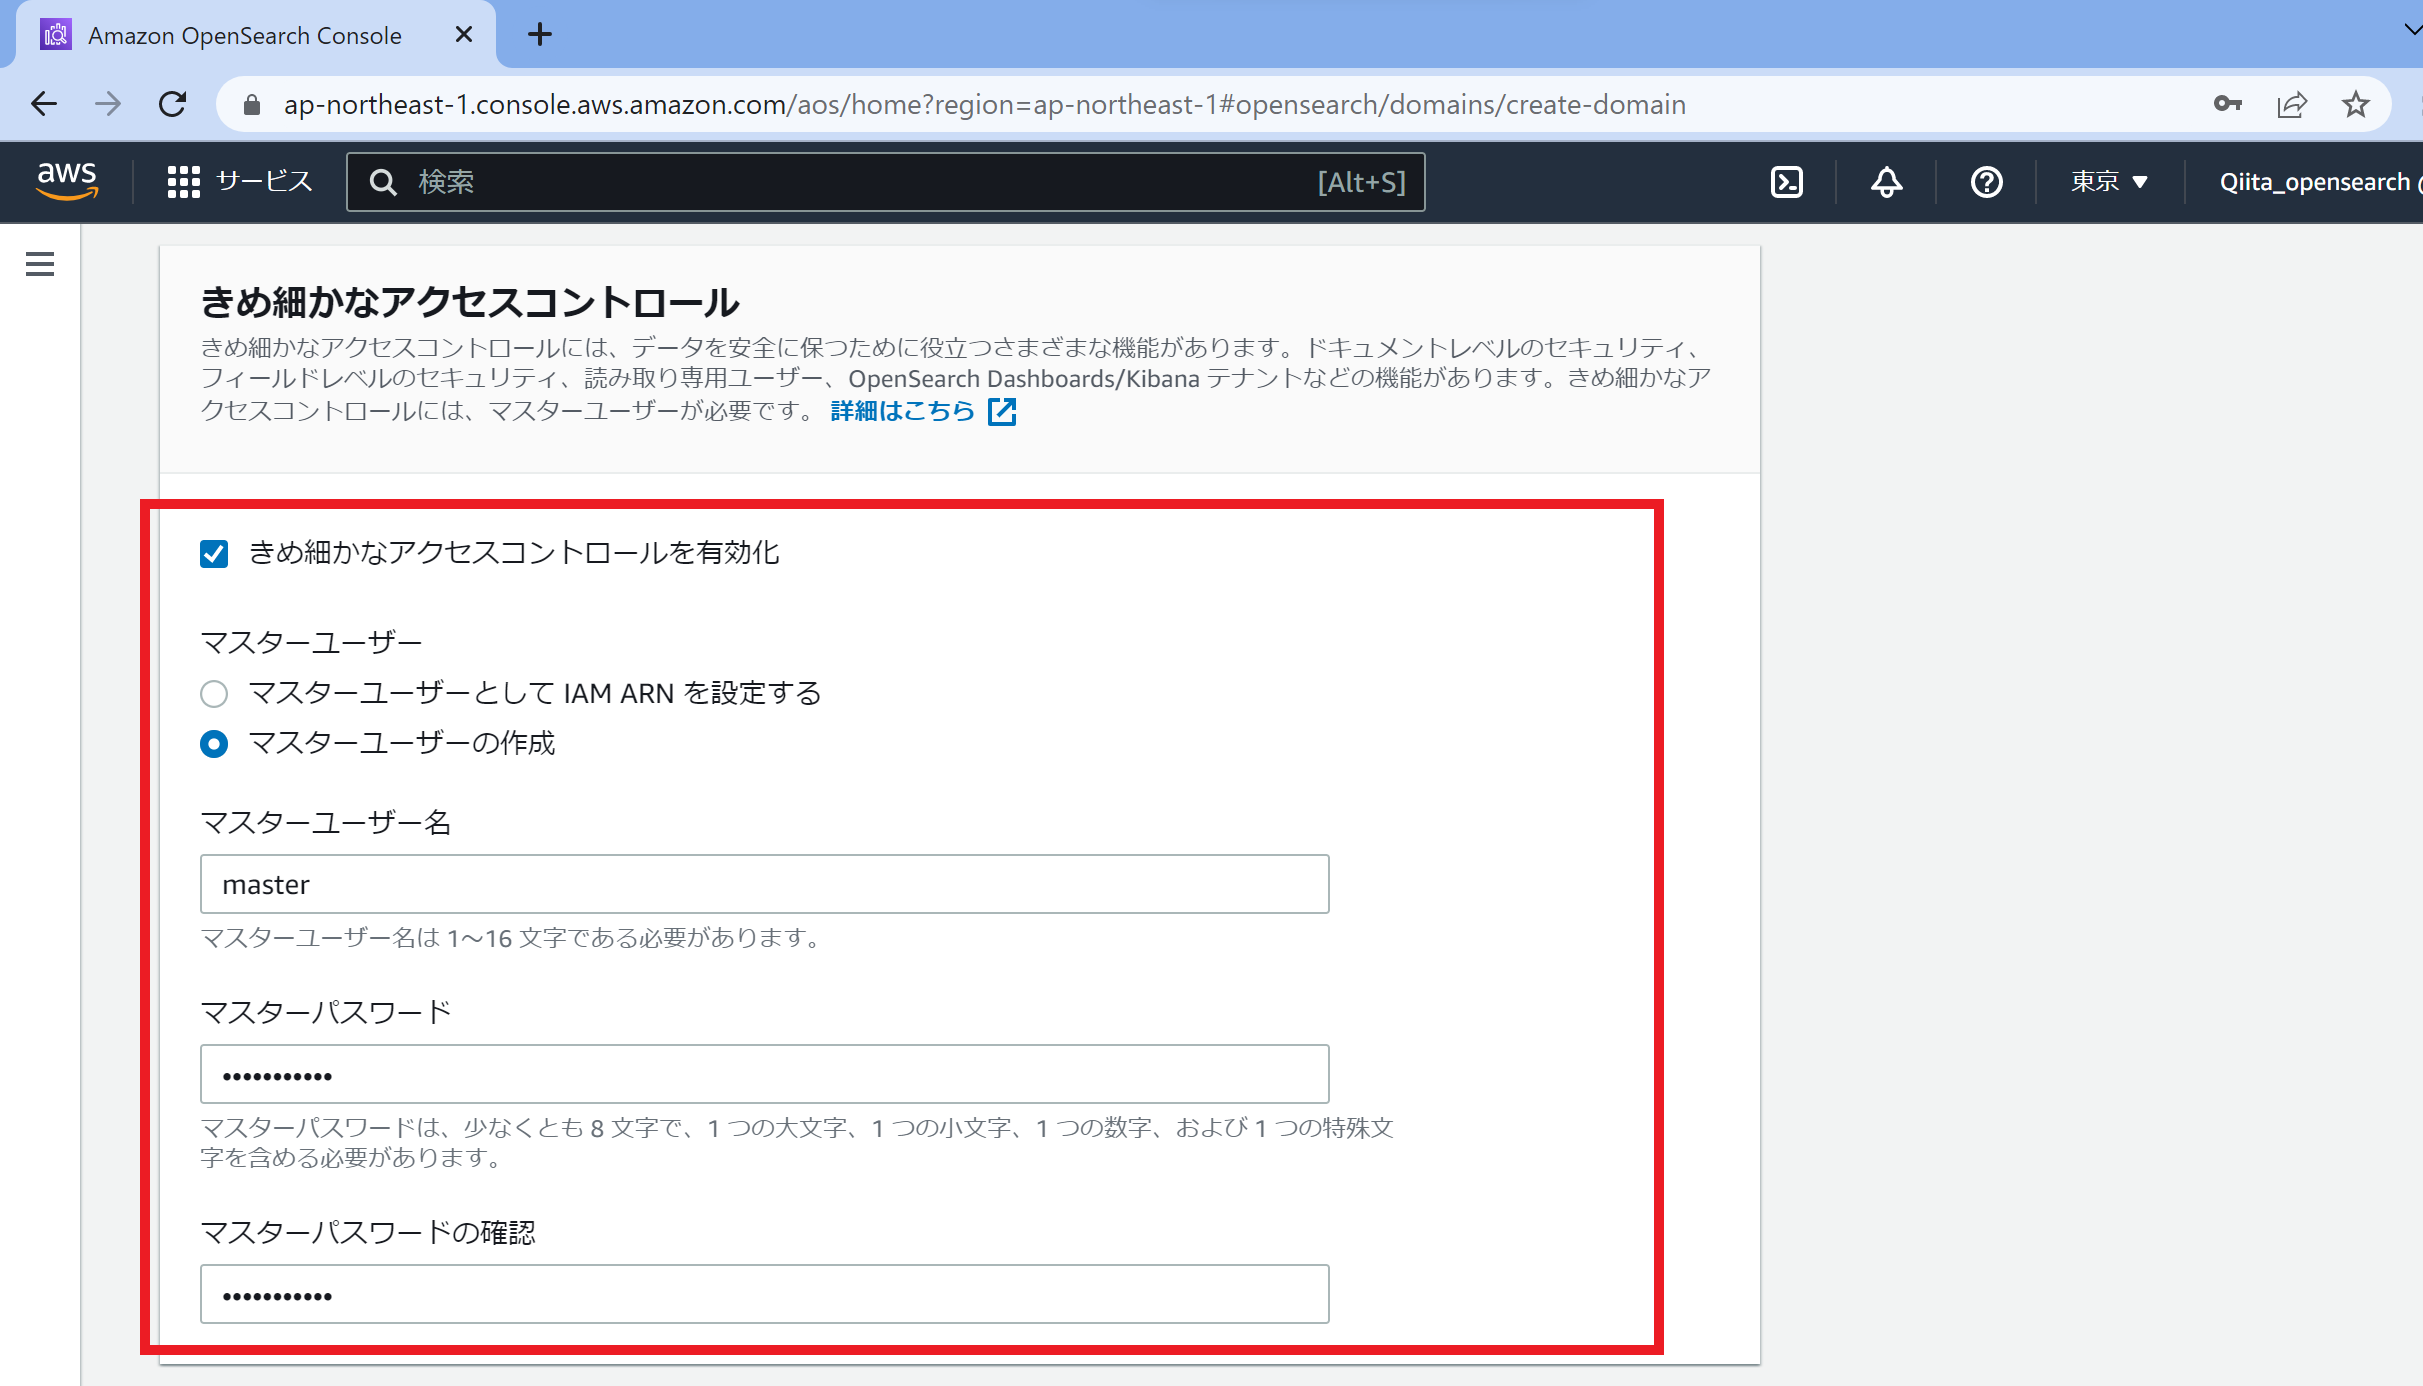
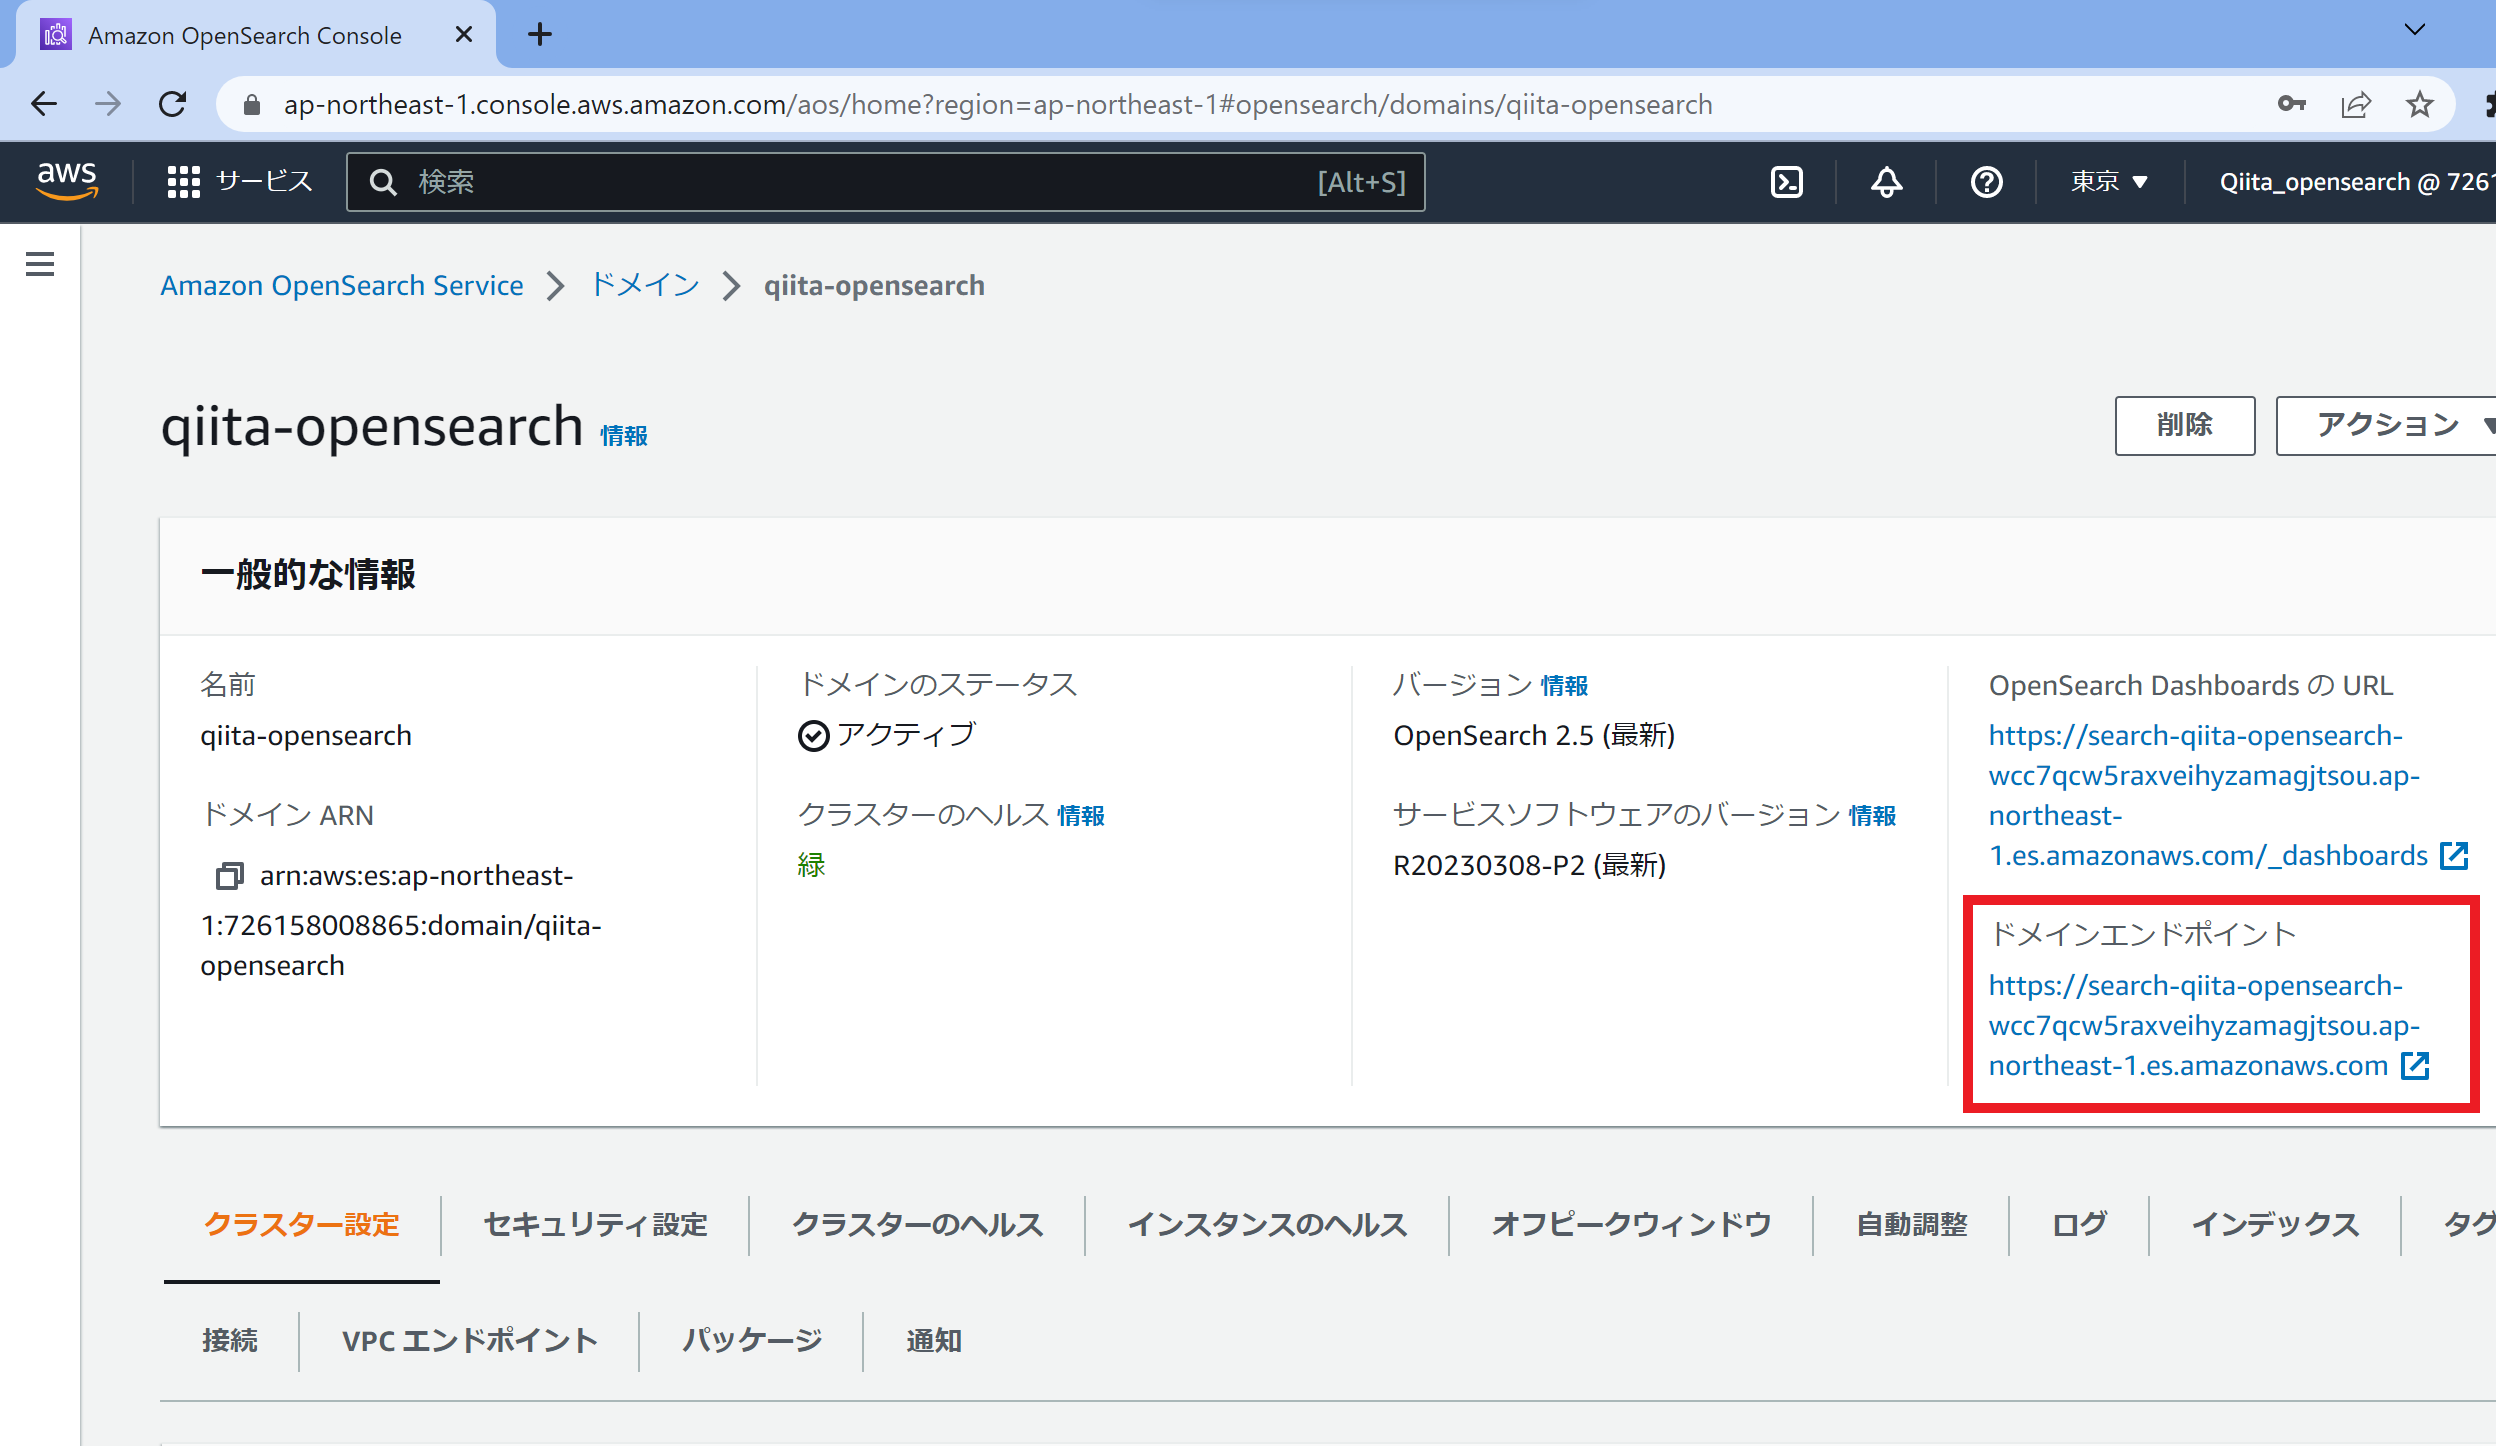
画像の赤枠に注意しながら、ダッシュボード側で作業を進めます。
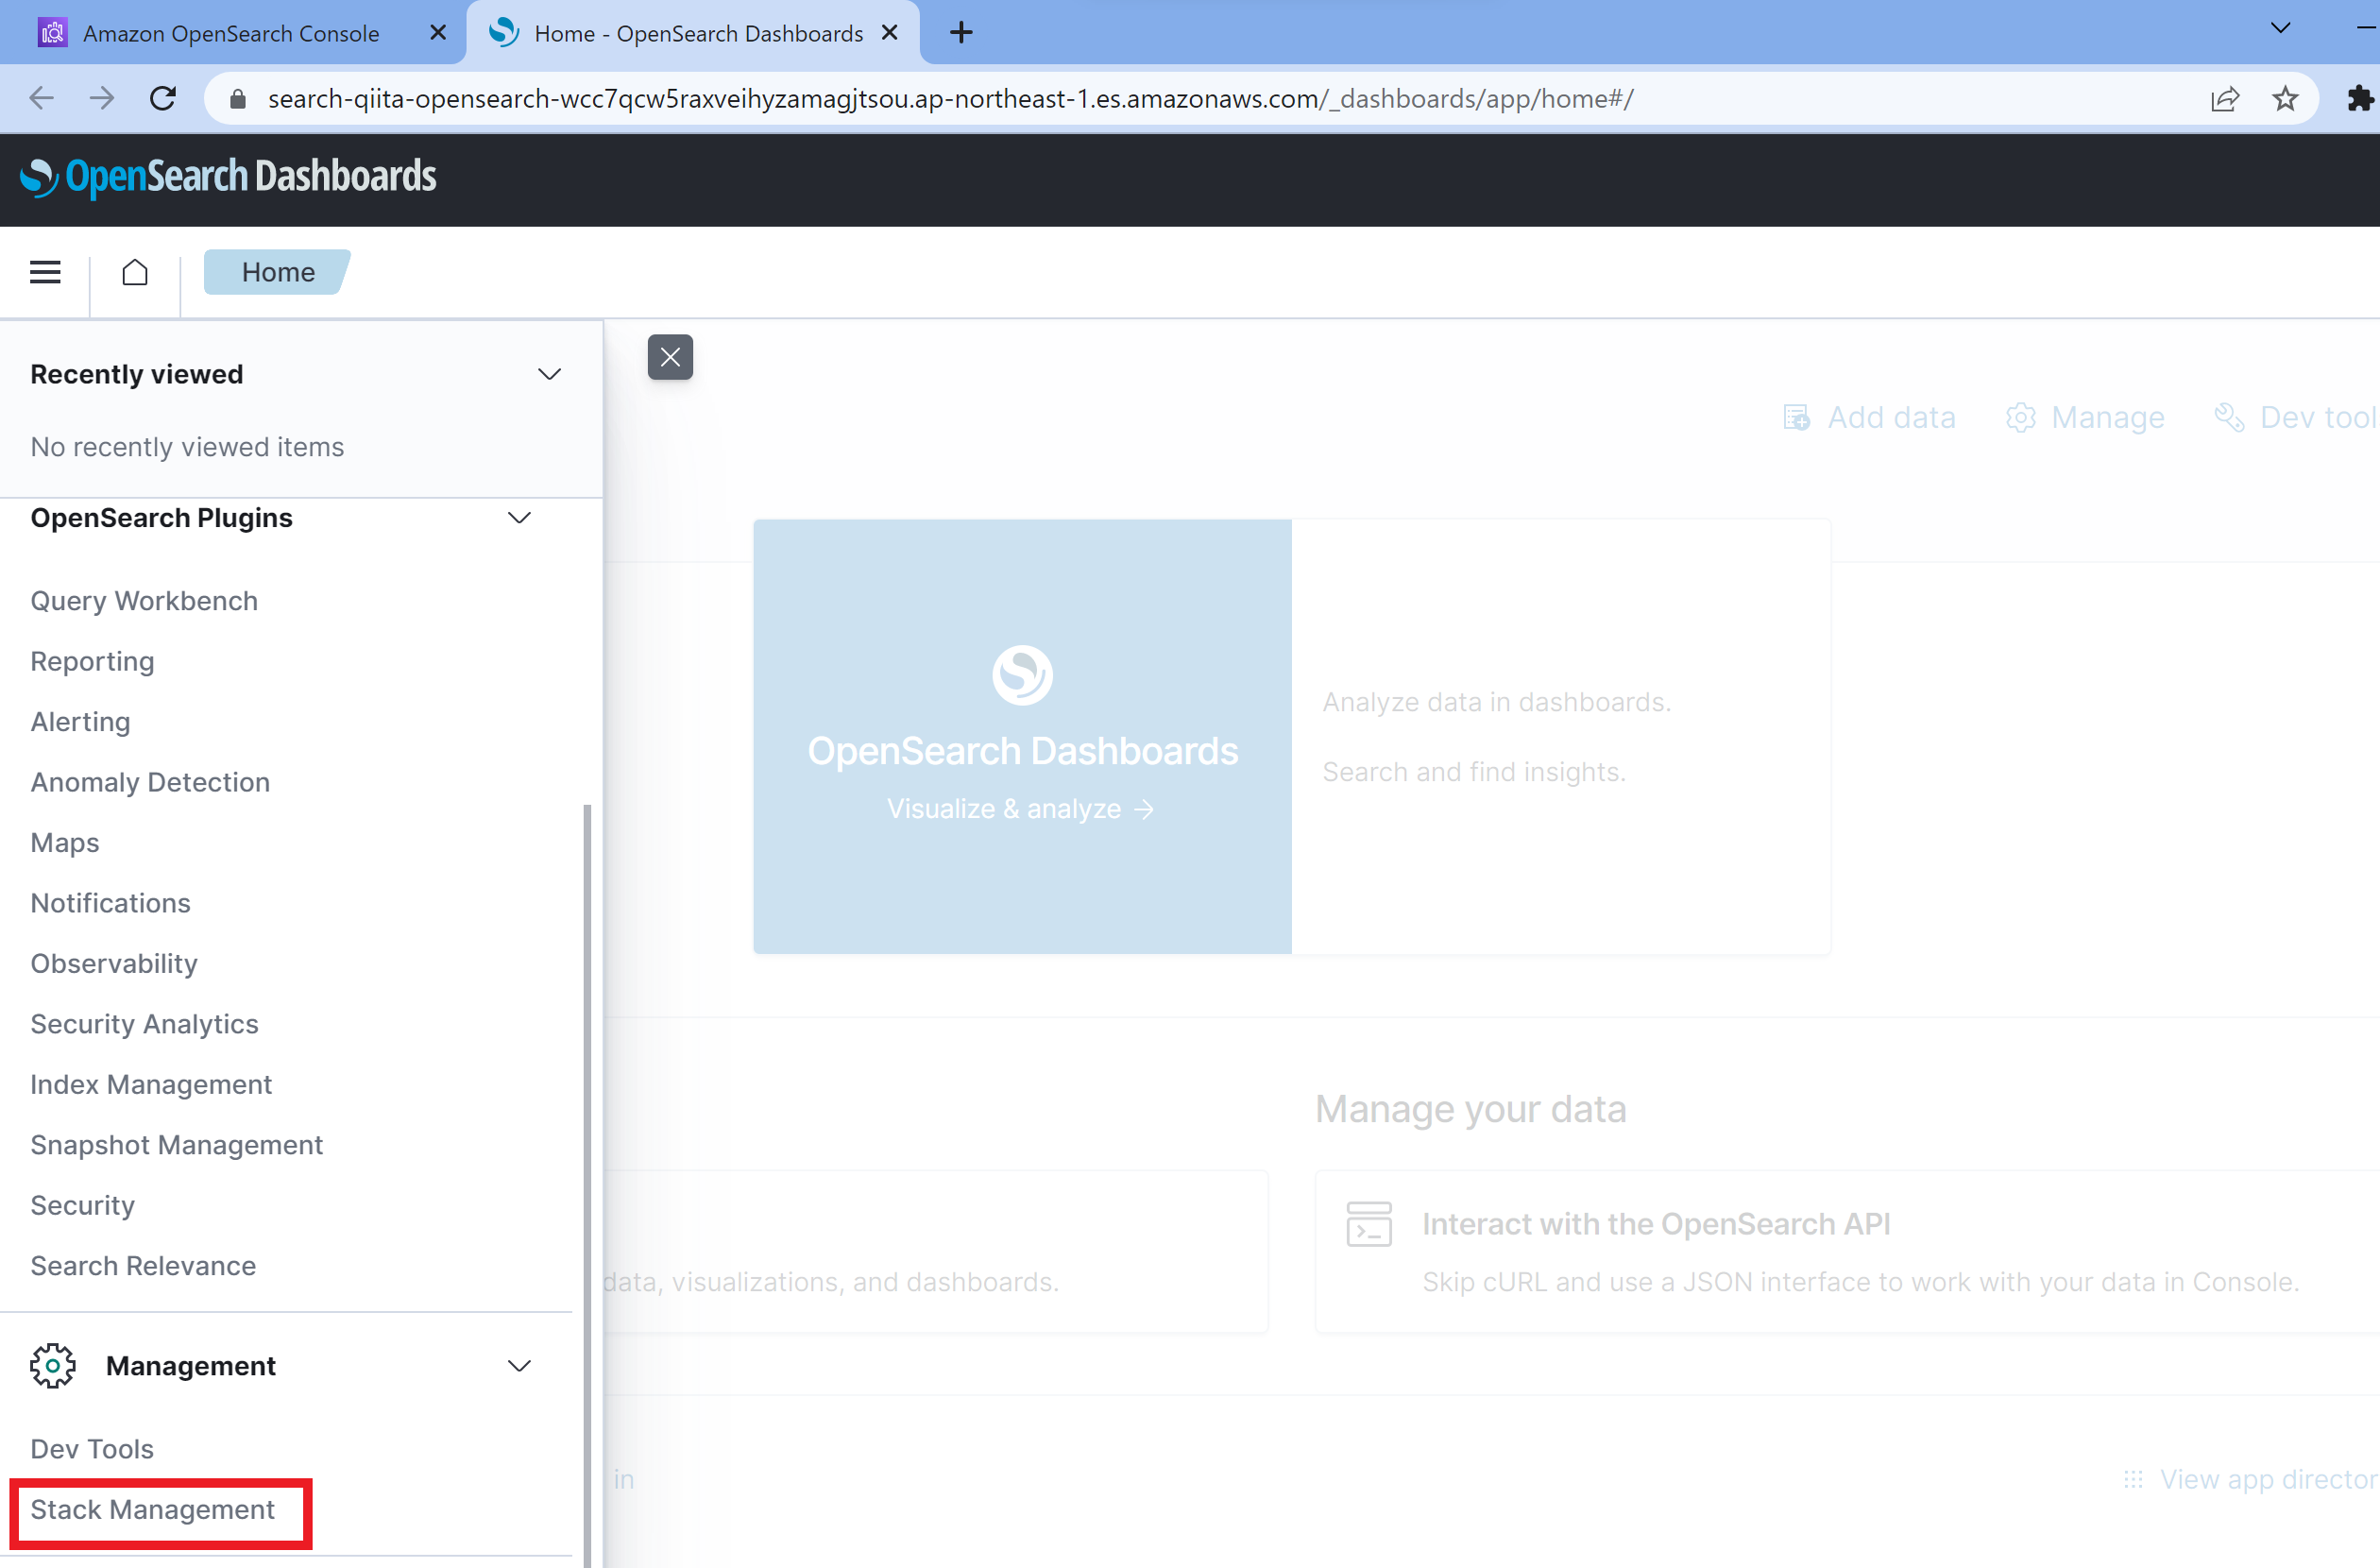
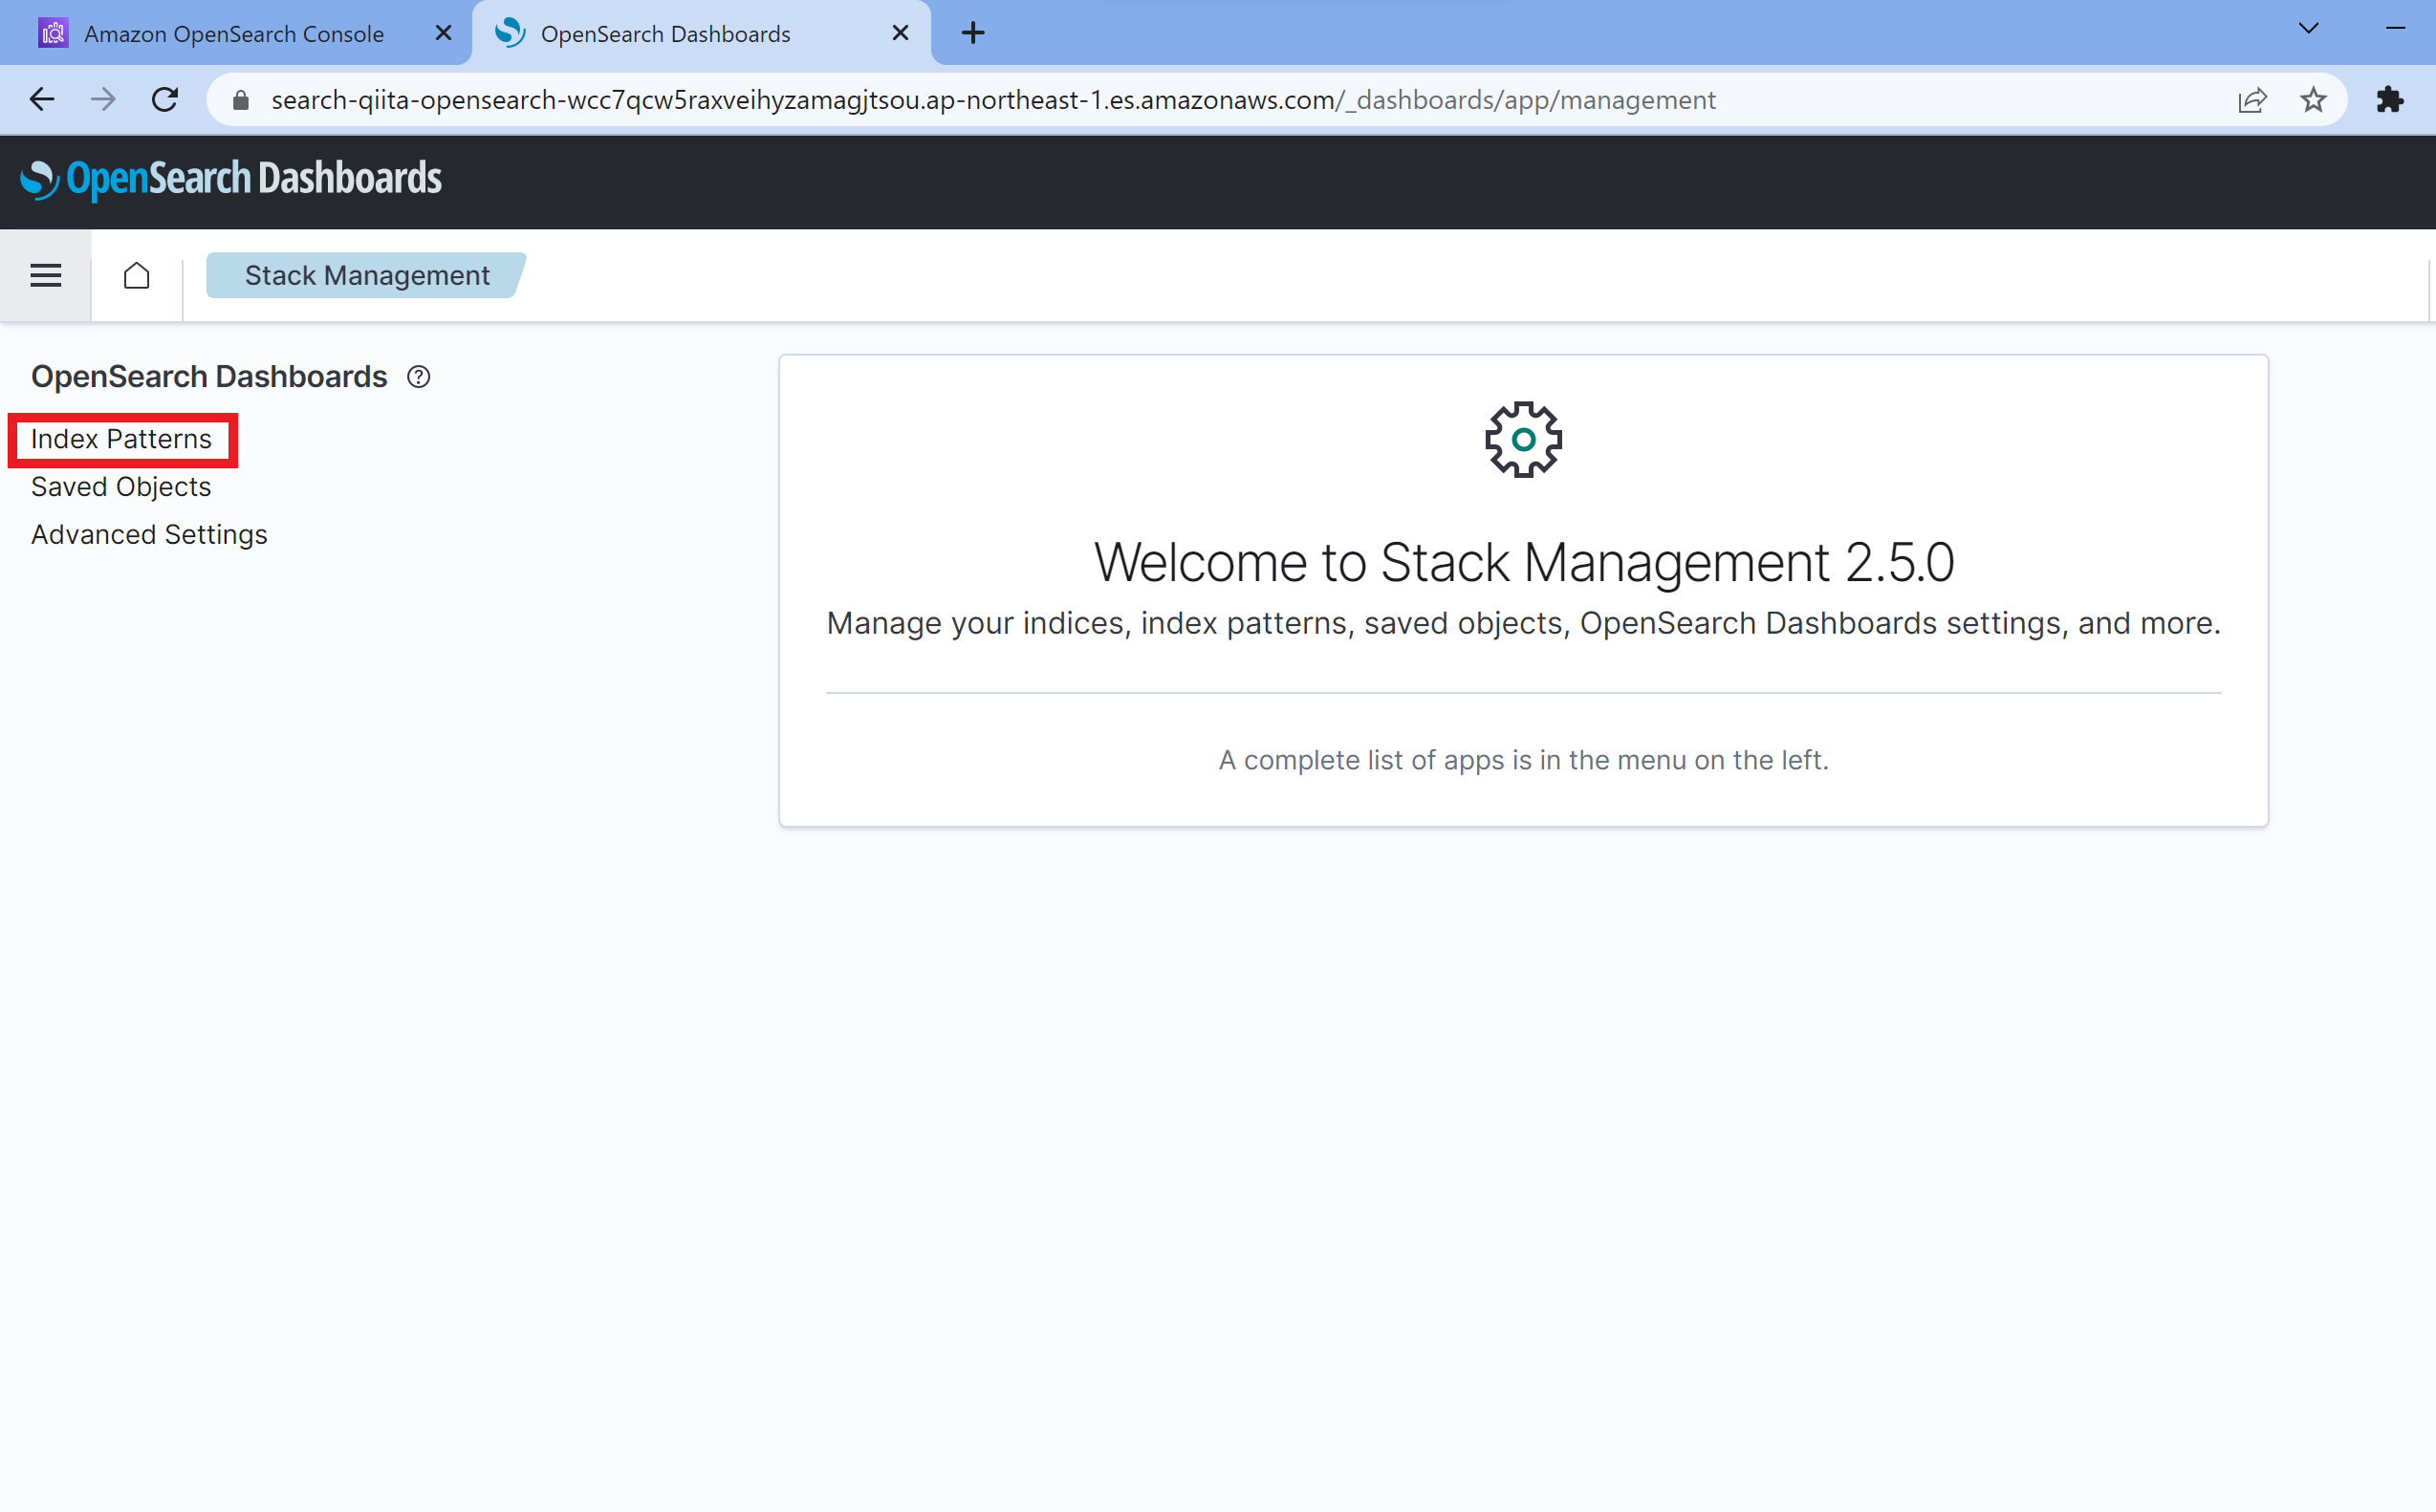
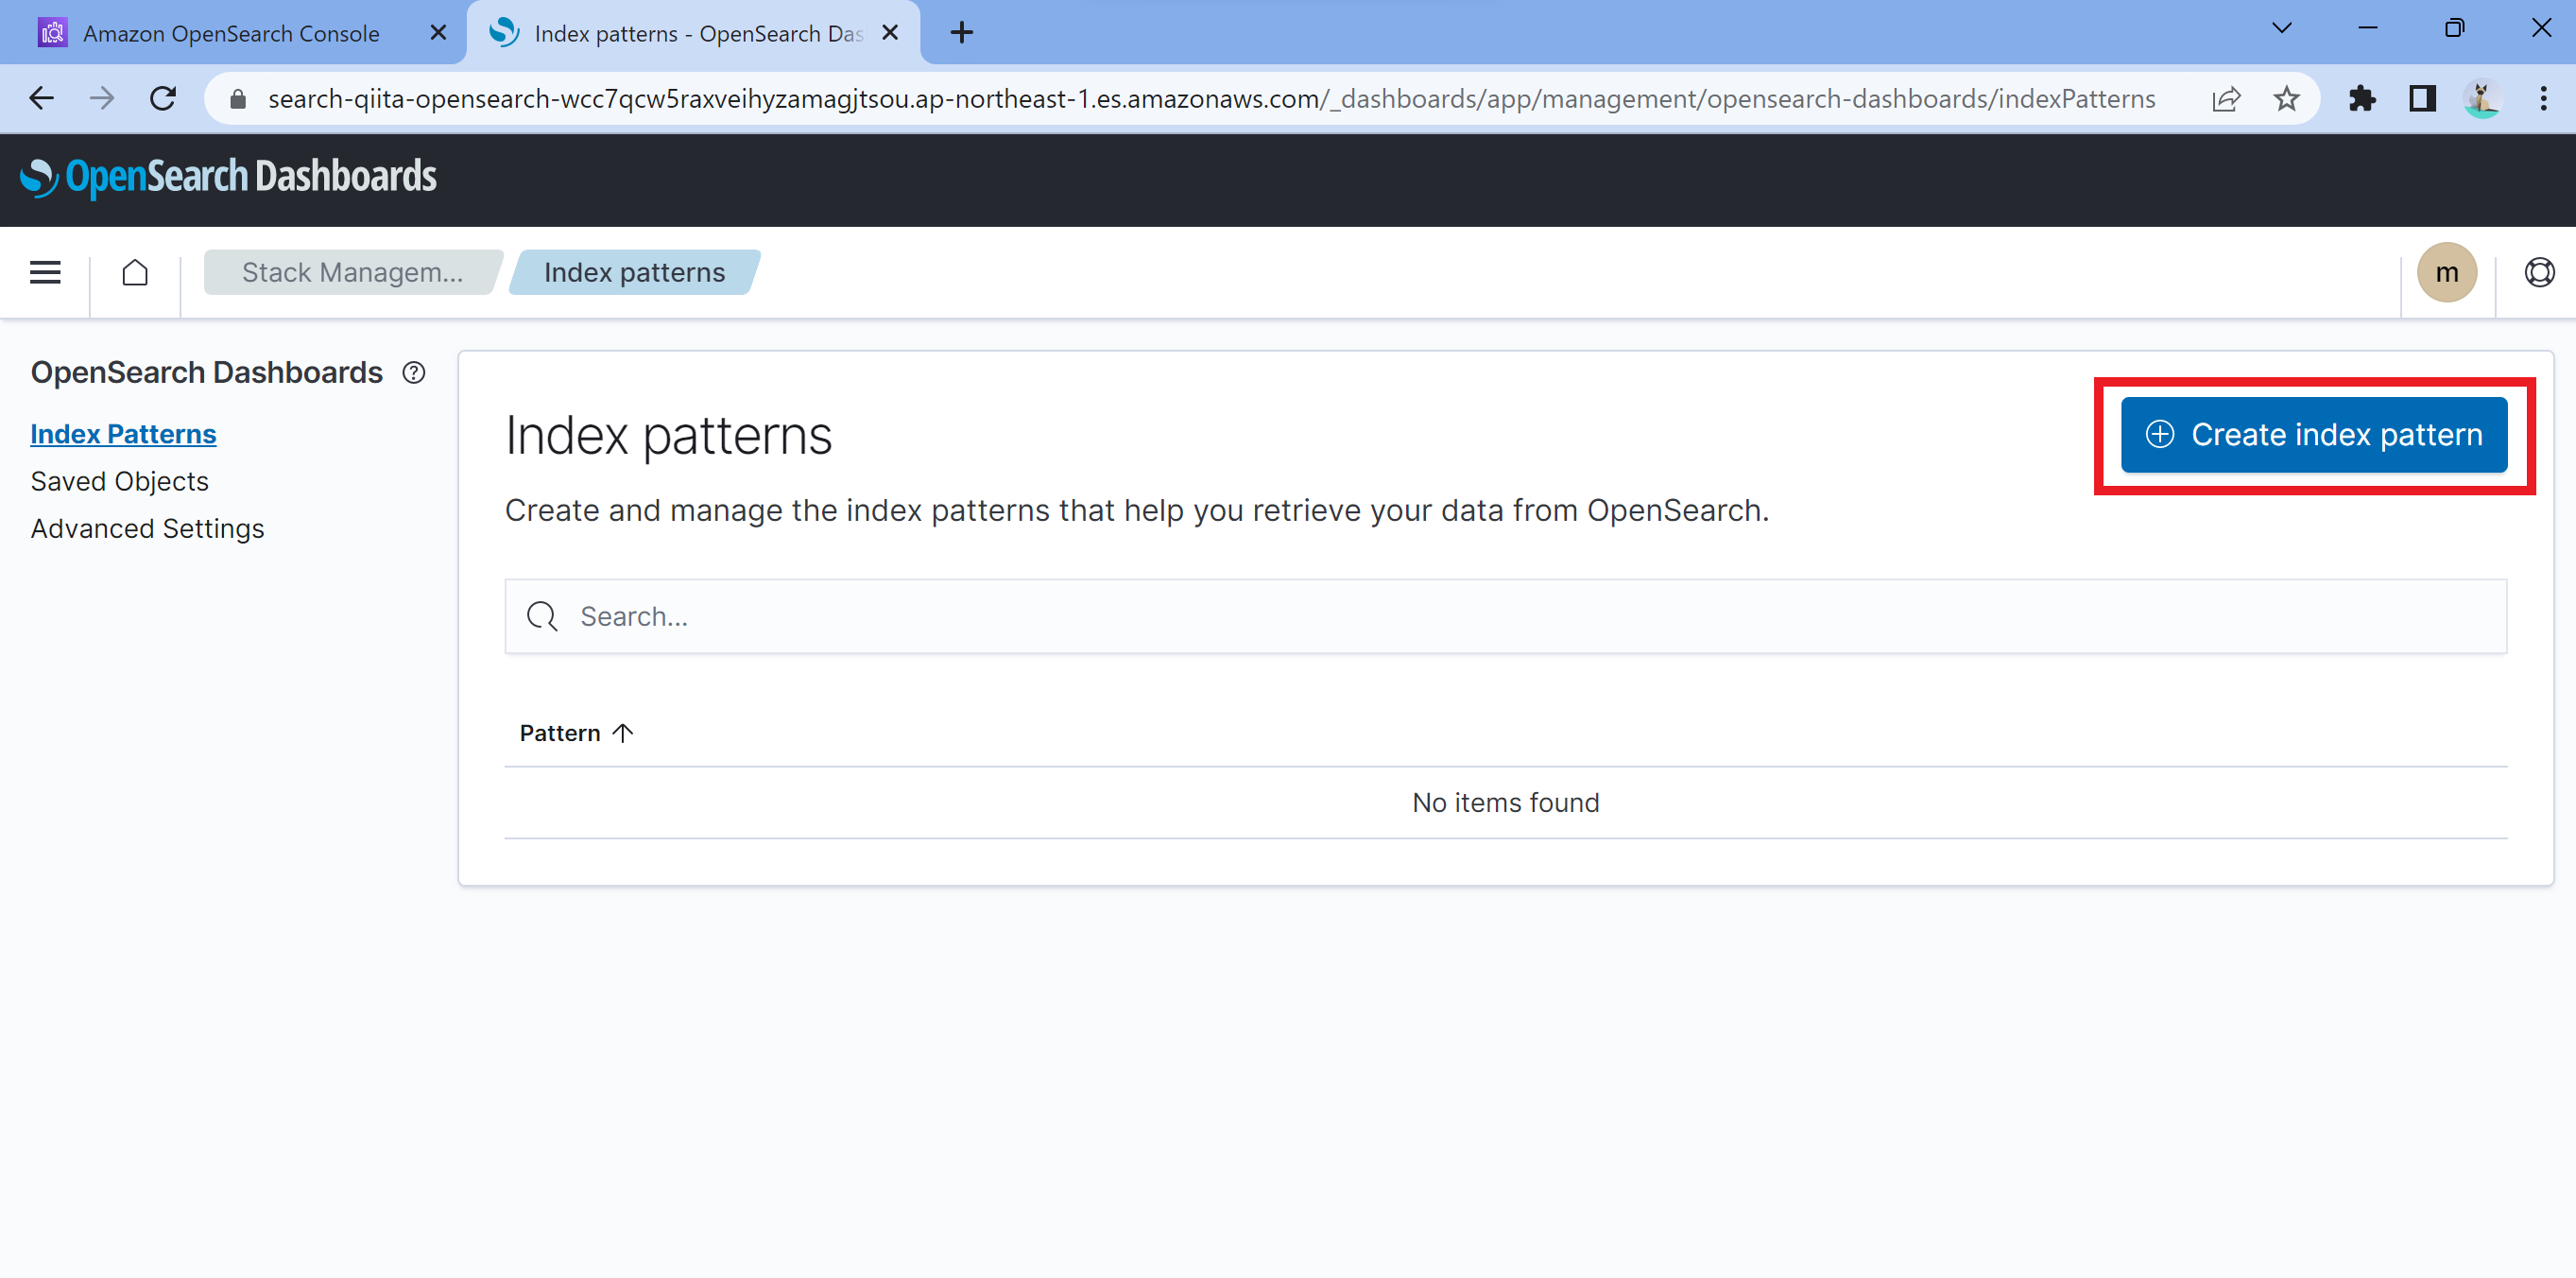
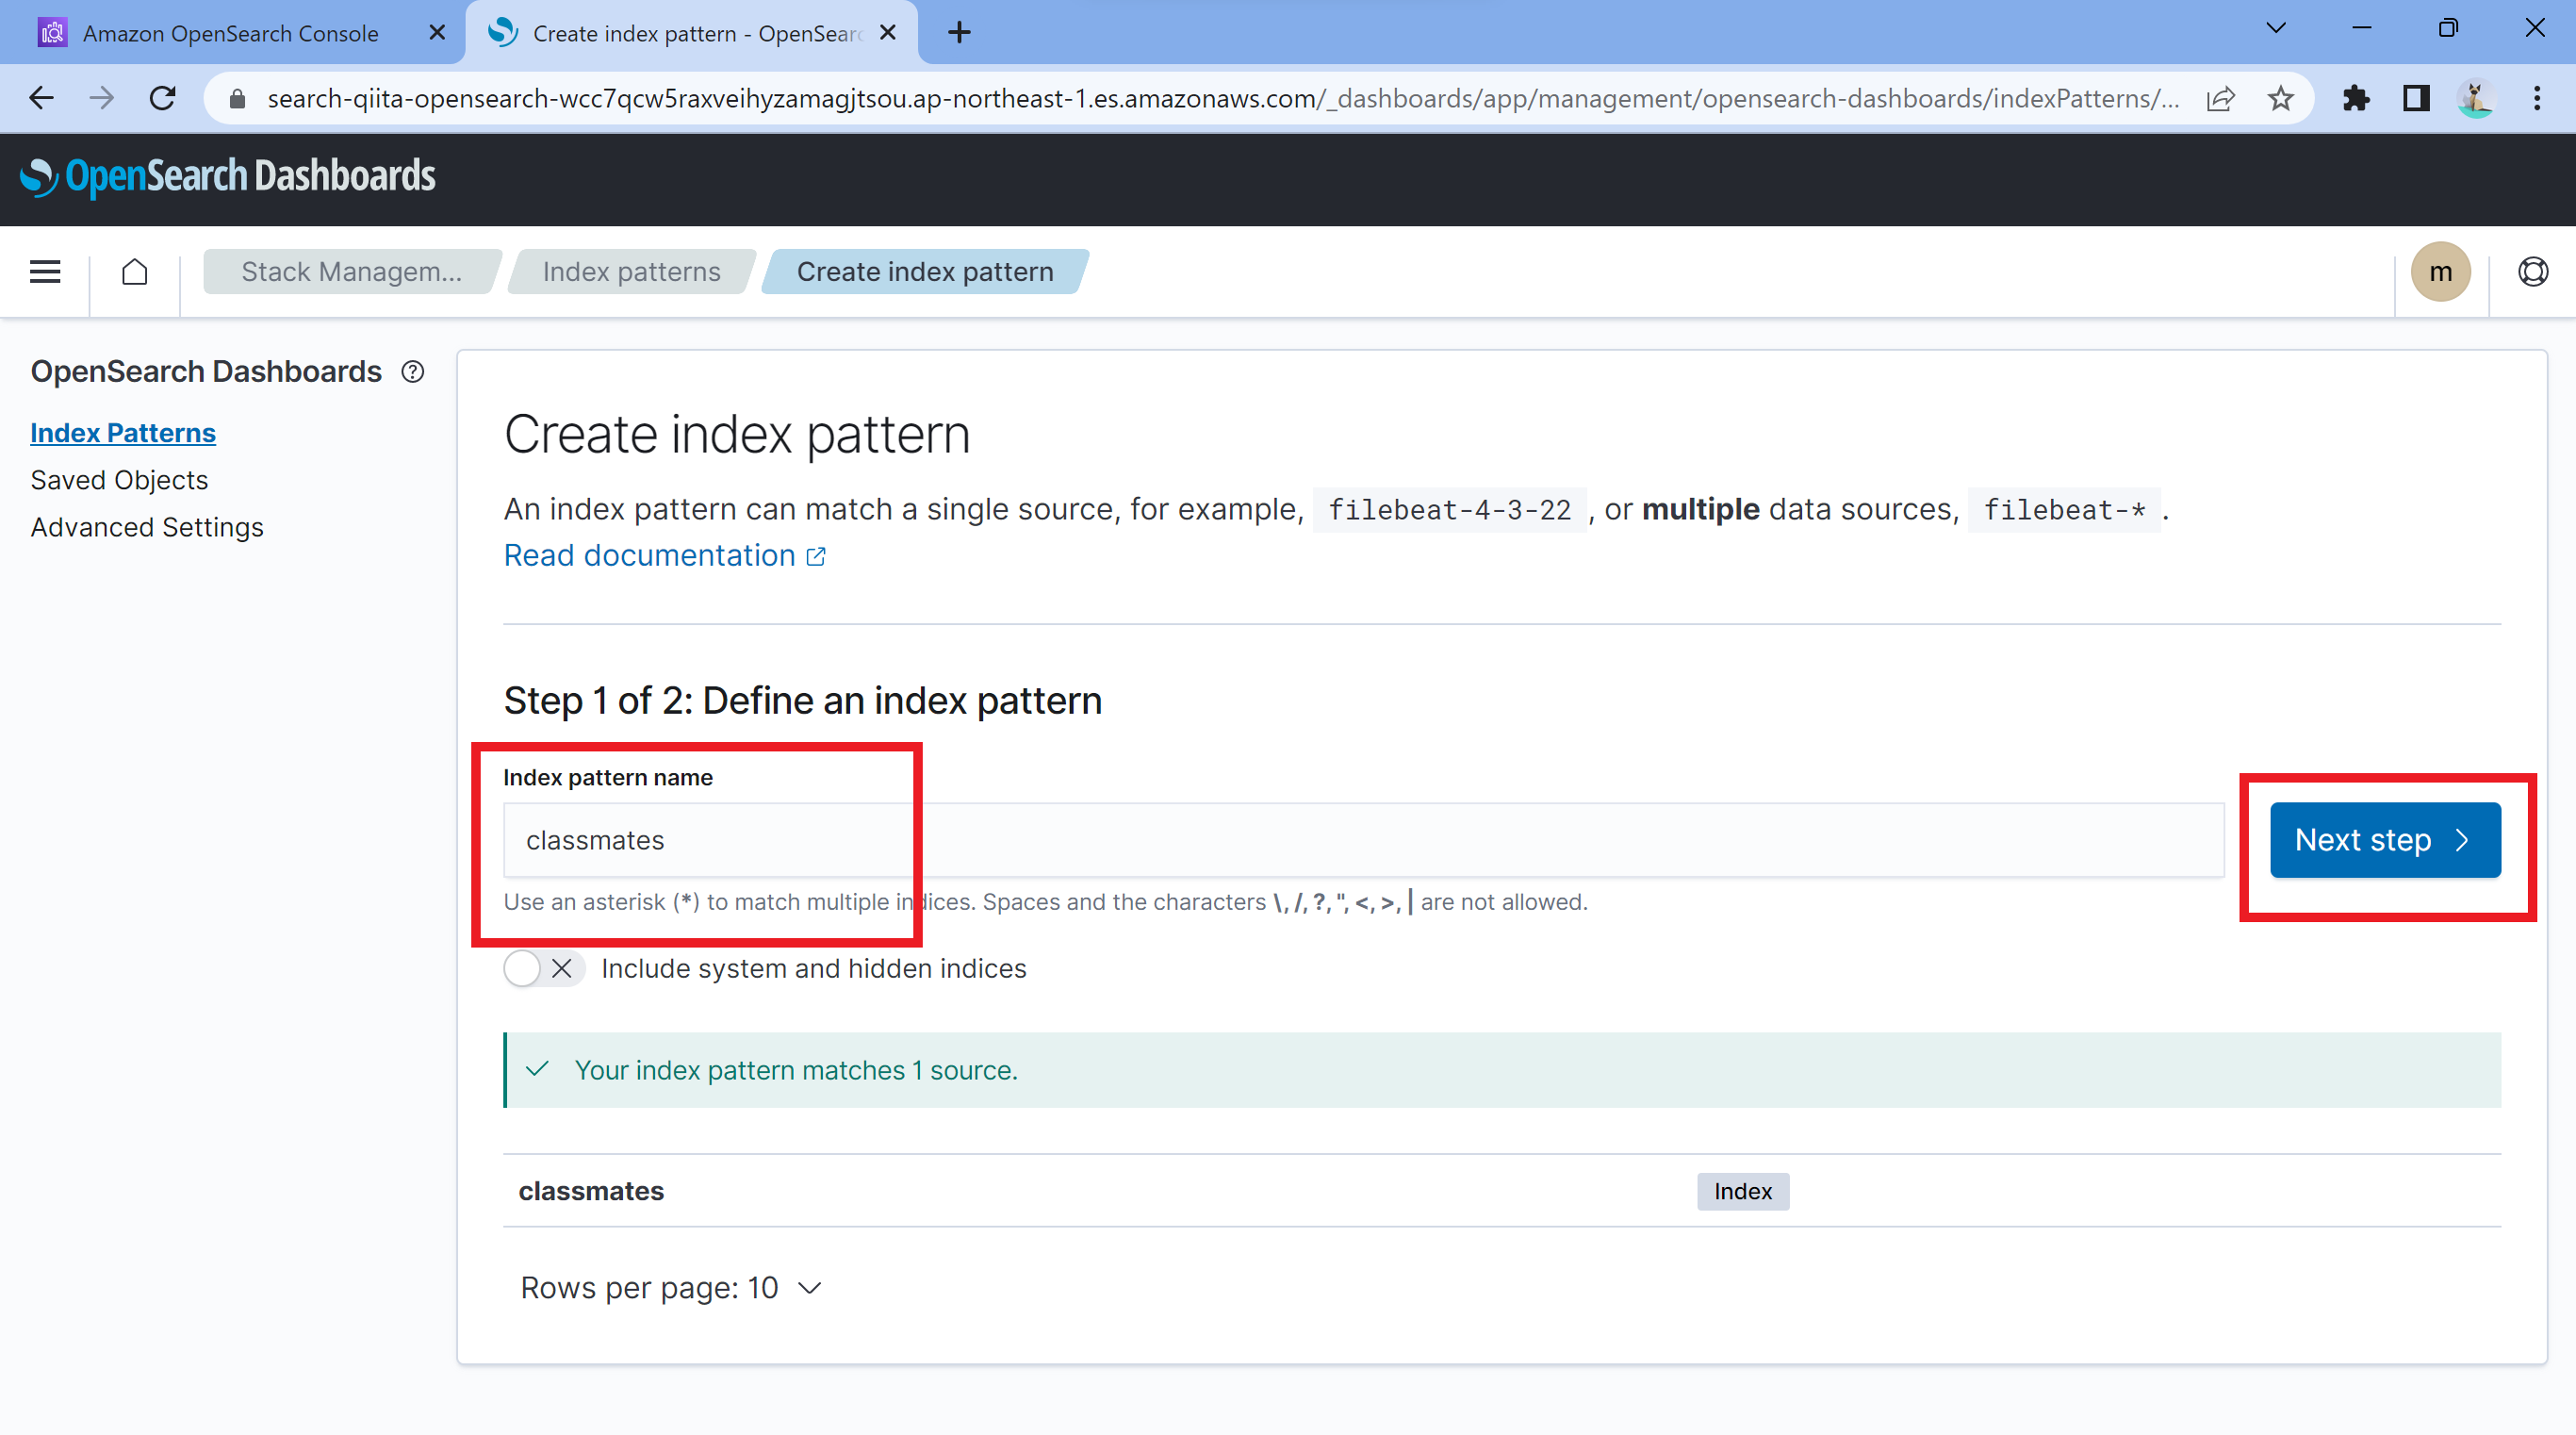
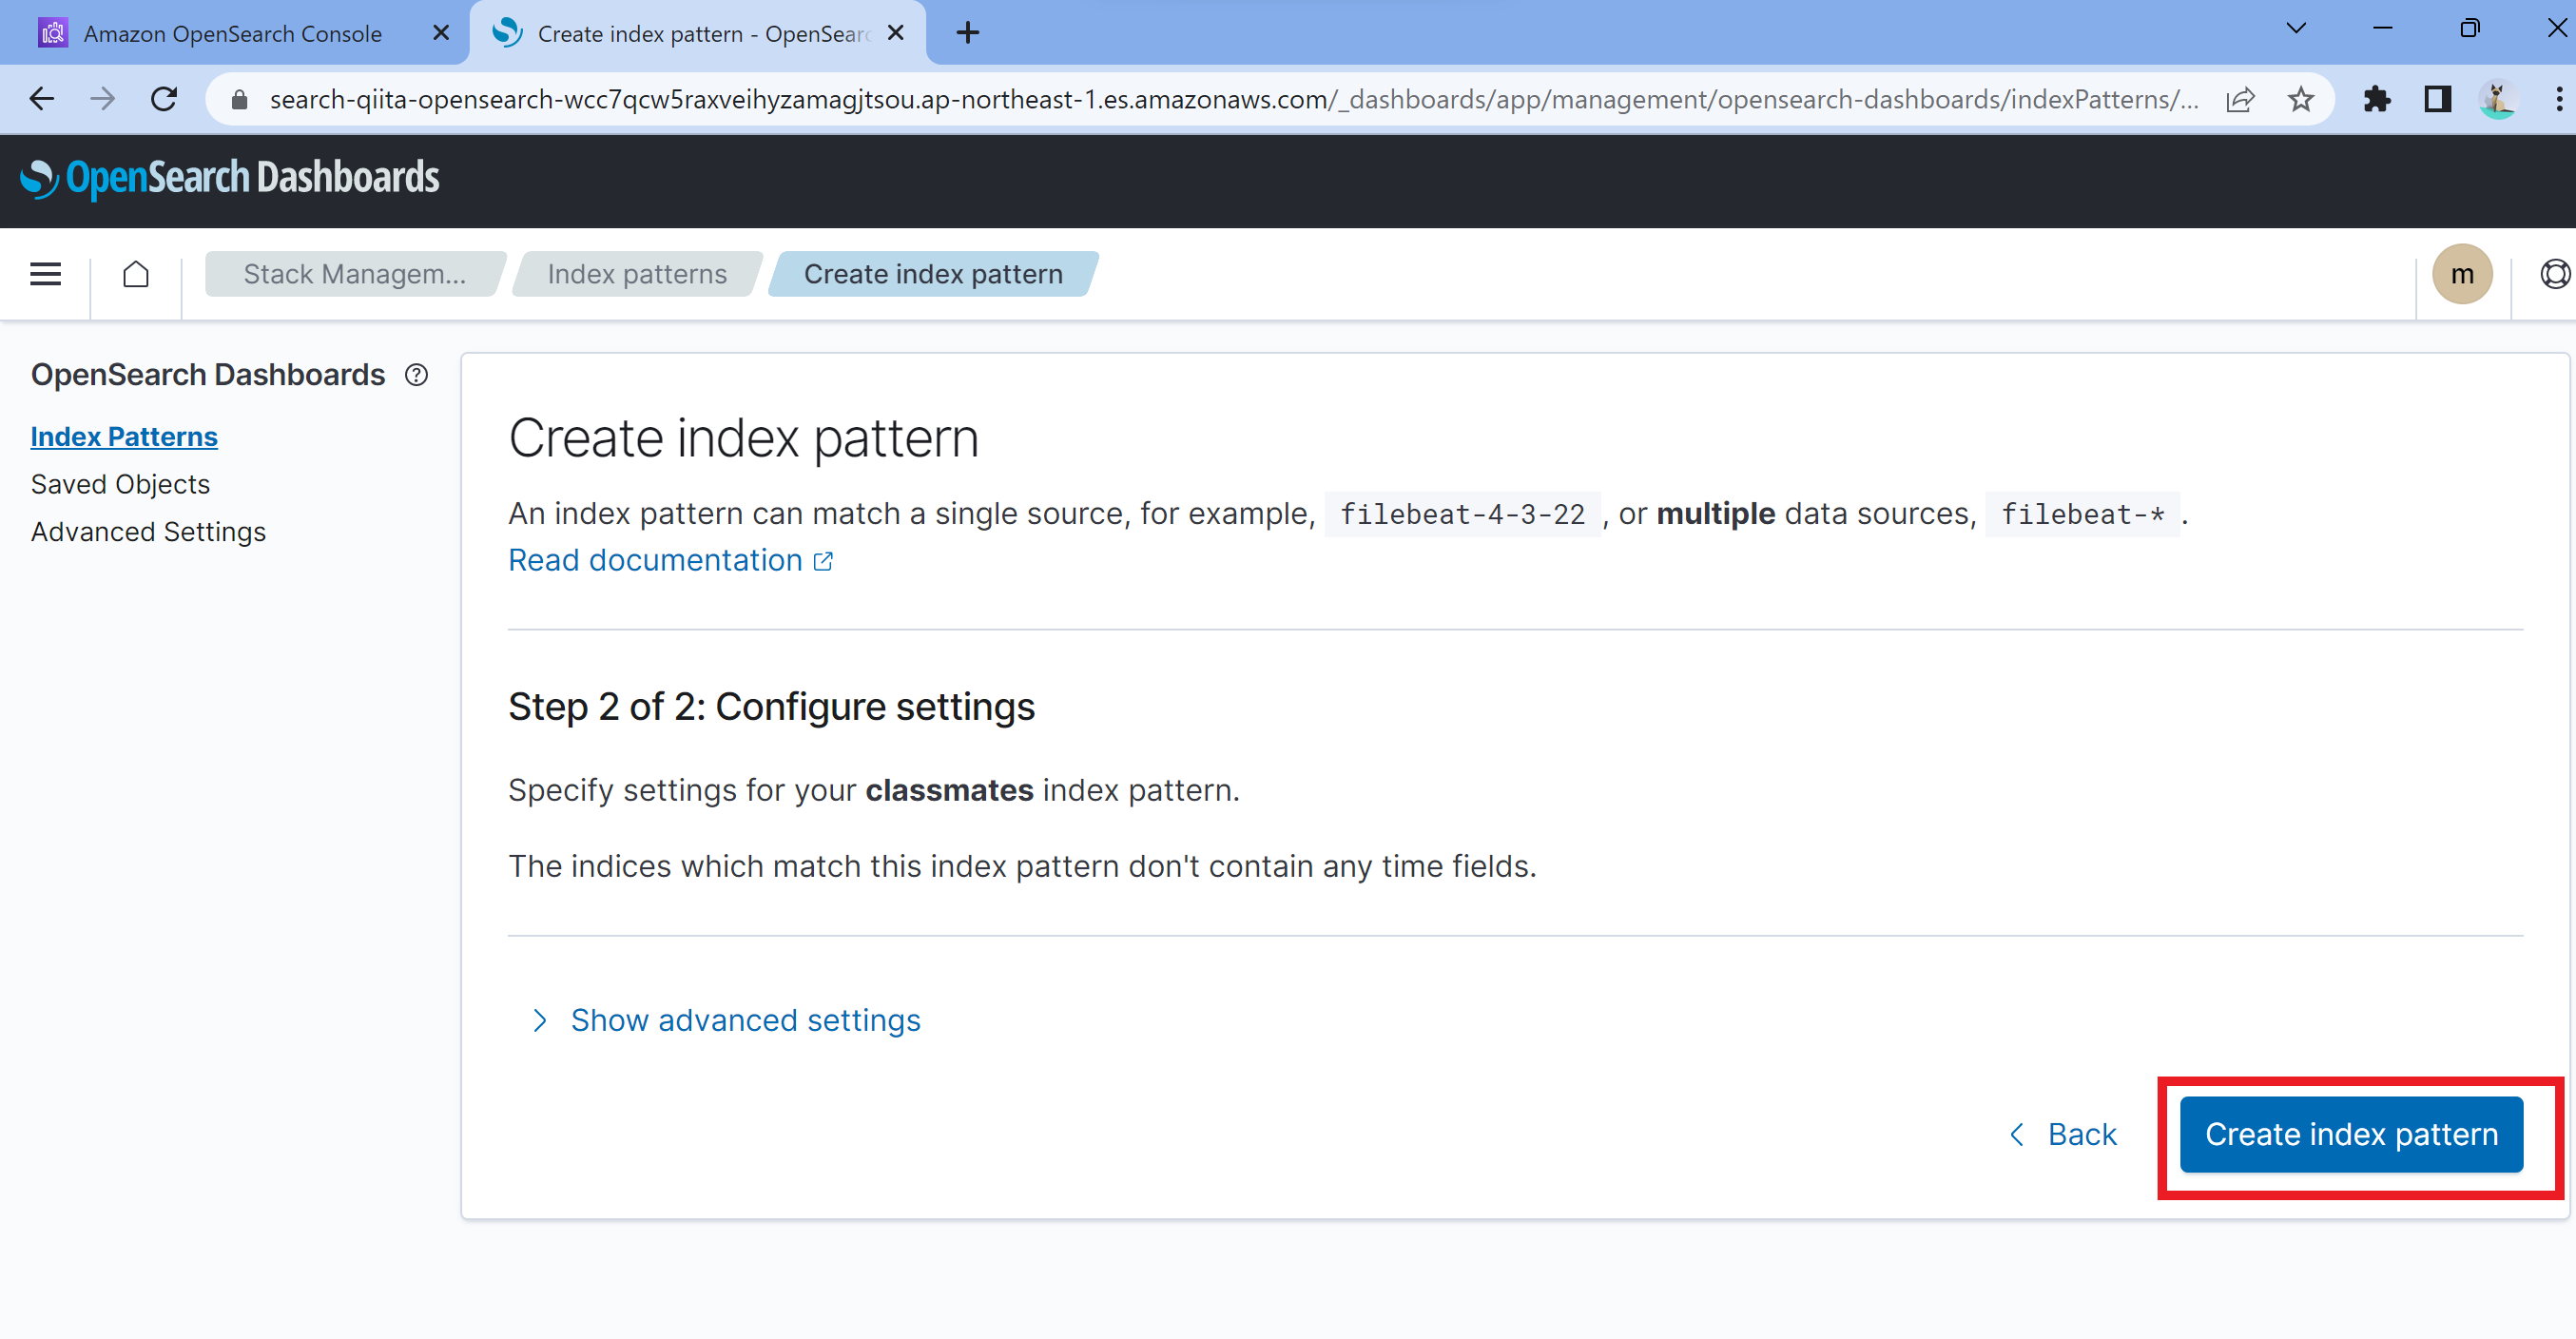
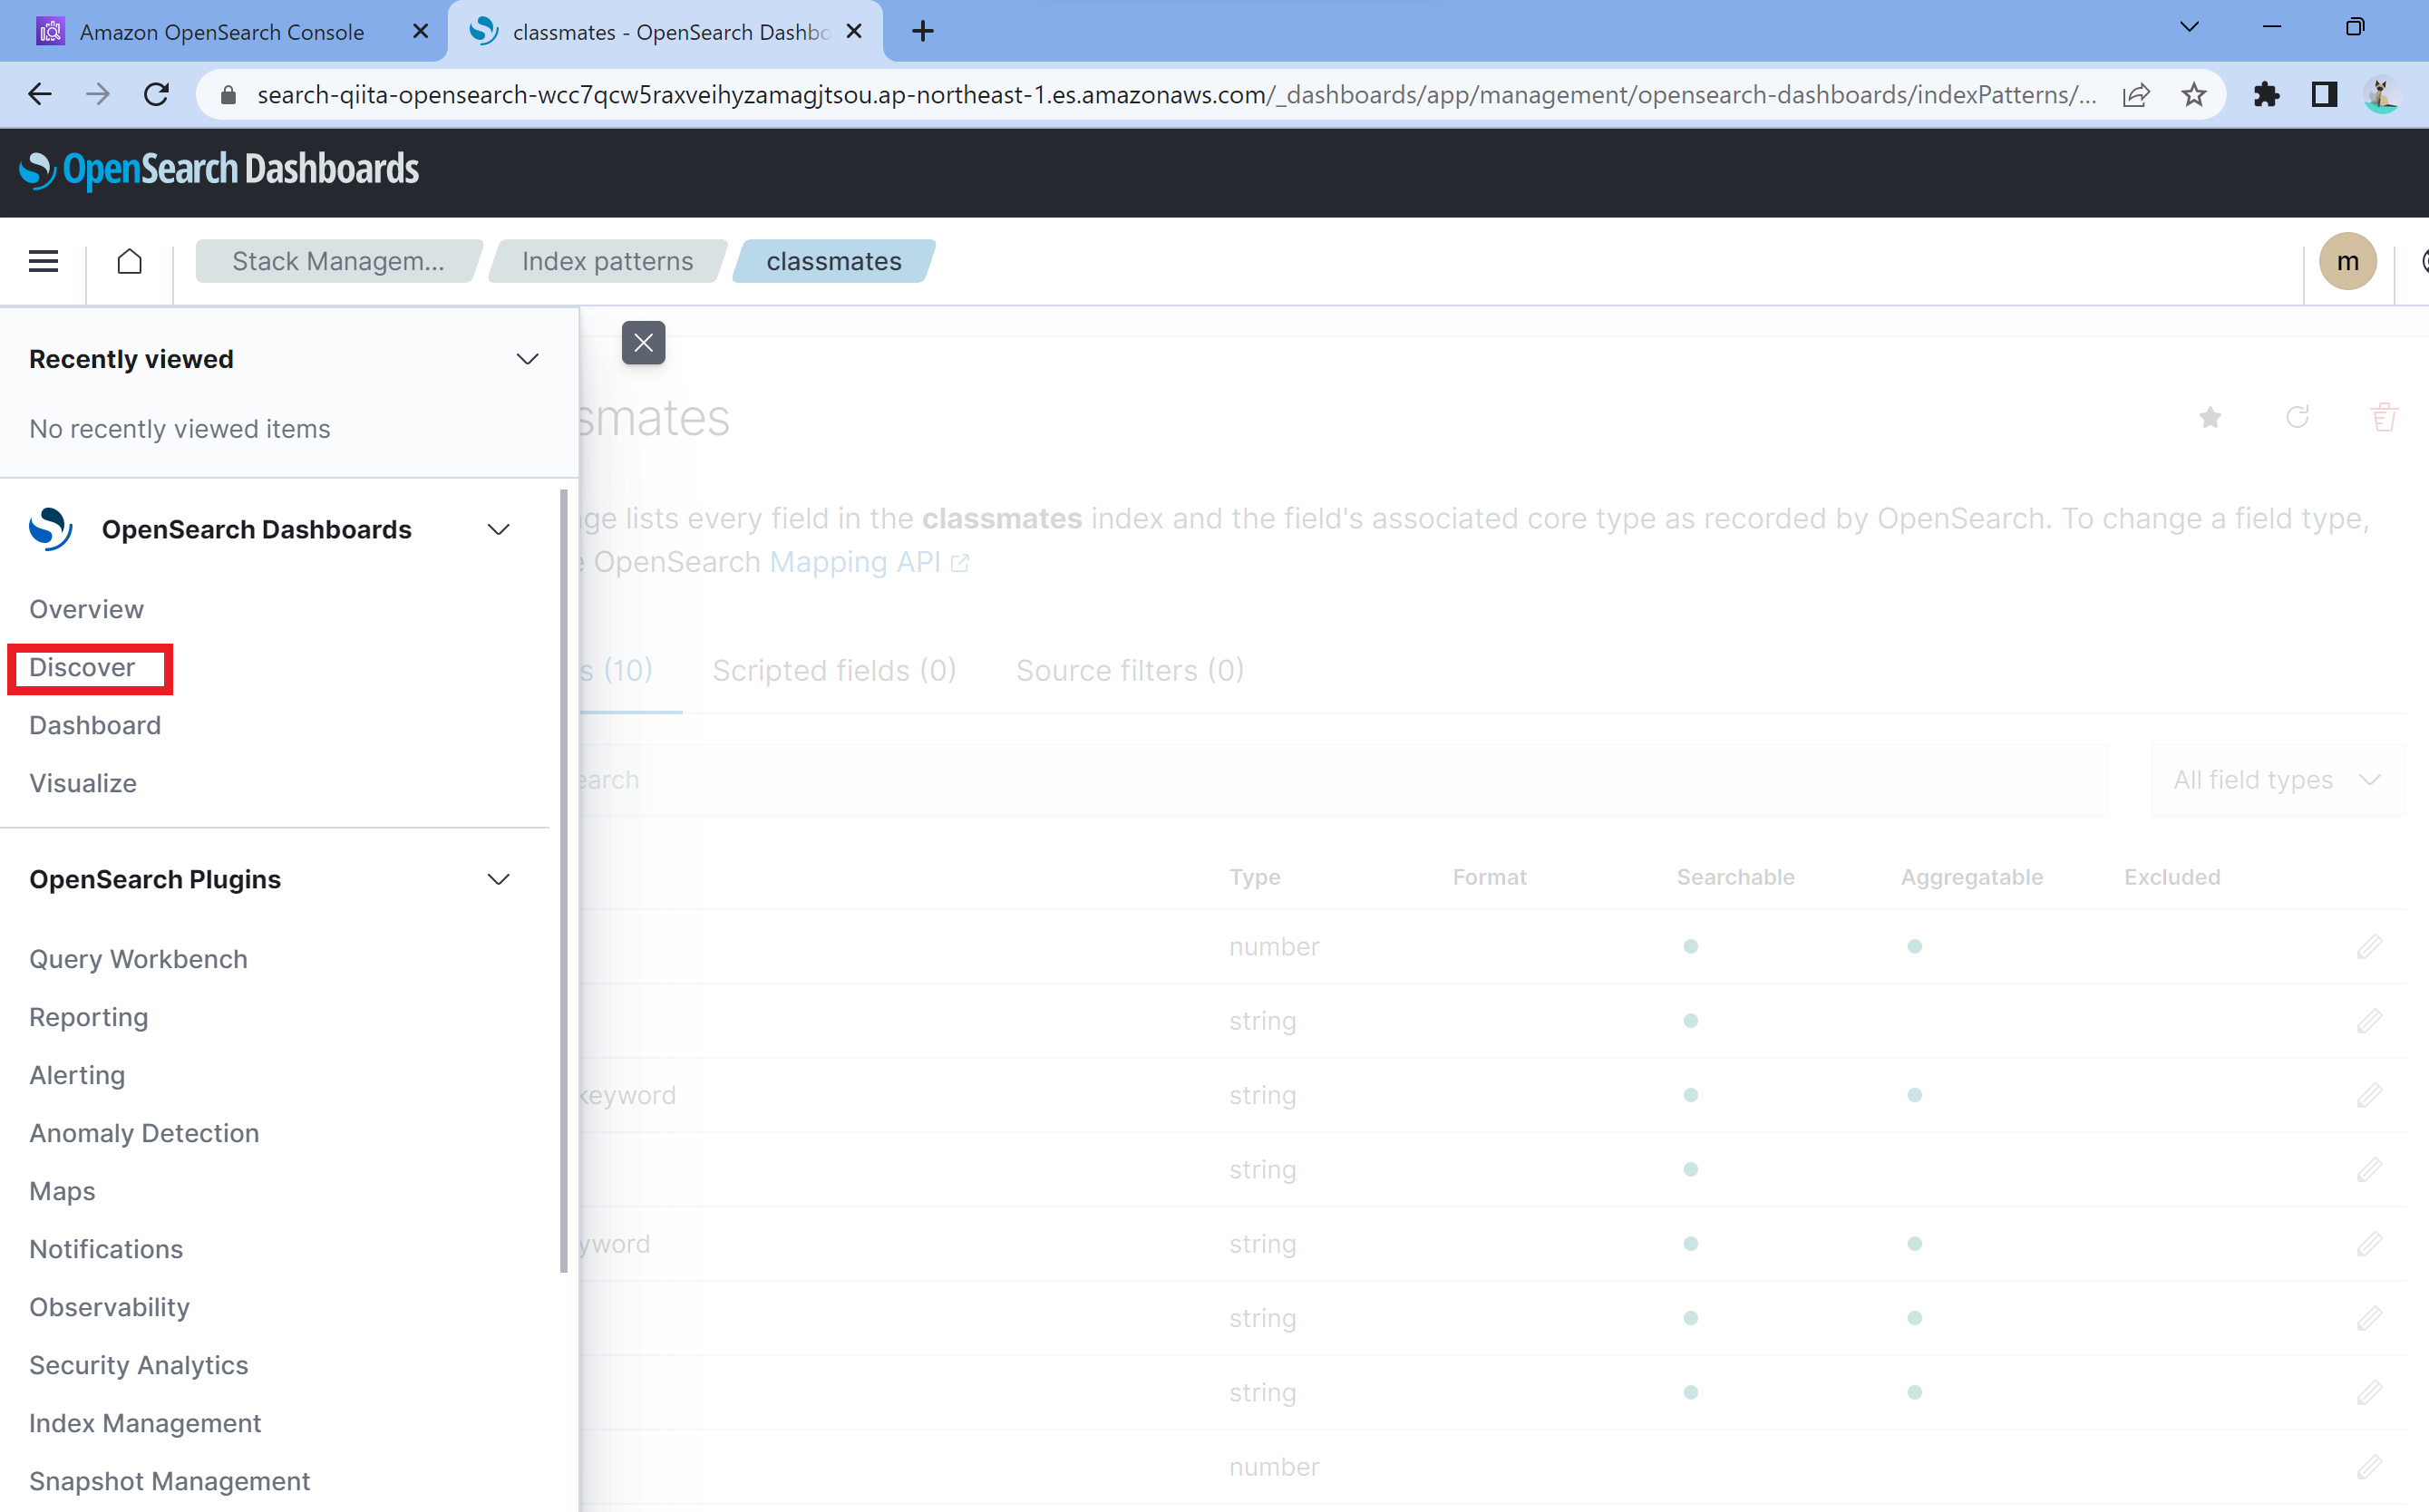
ここまでの作業を行うと、ダッシュボード側で送信したデータを見れる準備が整います。
あとはDiscoverで確認!
補足
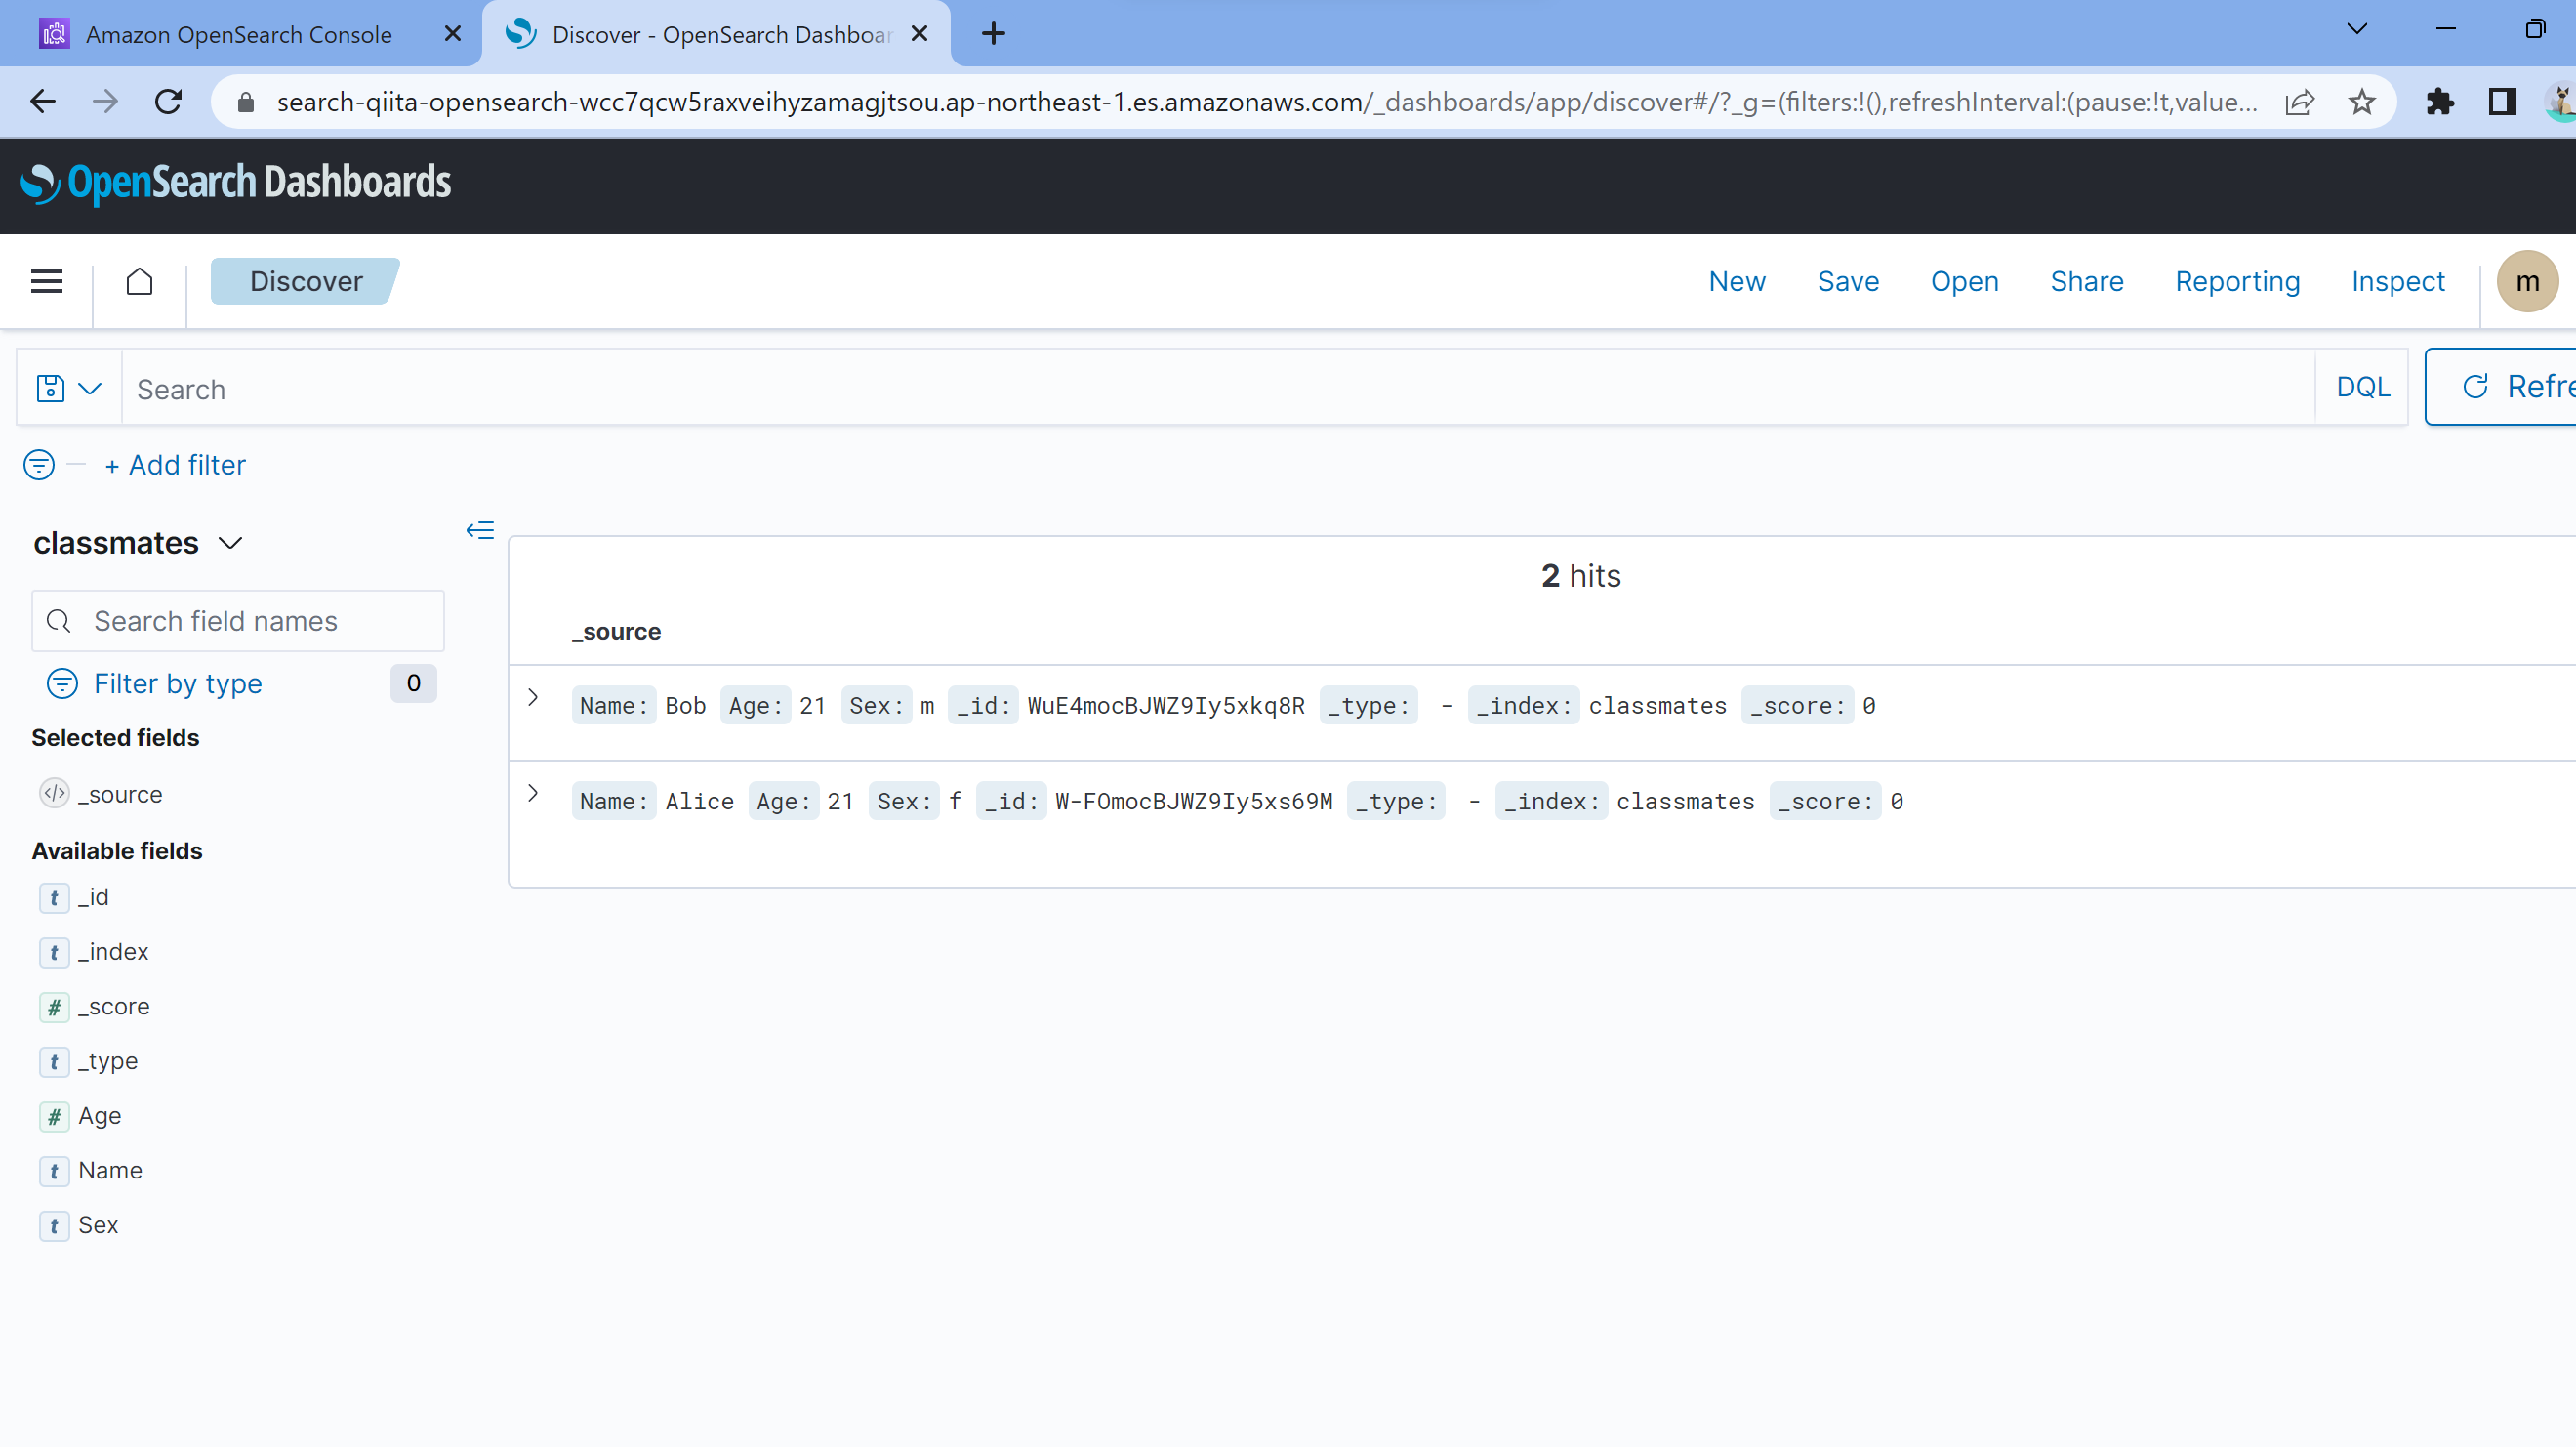
try_connect.pyをもう一度実行すると追記されます。
(分かりやすいように、NameをAliceに変えました。)
try_connect.py
from opensearchpy import OpenSearch

host = "search-qiita-opensearch-wcc7qcw5raxveihyzamagjtsou.ap-northeast-1.es.amazonaws.com"
port = 443

auth = ("master", "Master@2023")

client = OpenSearch(
    hosts = [{'host': host, 'port': port}],
    http_auth = auth,
    use_ssl = True,
    verify_certs = True,
    ssl_assert_hostname = False,
    ssl_show_warn = False,
)

index_name = "classmates"
data = {
  "Name":"Alice",
  "Age":21,
  "Sex":"f"
}

response = client.index(index_name, body=data)

