FullCalendarについて
カレンダー機能付きのアプリを作りたく調べてみました。
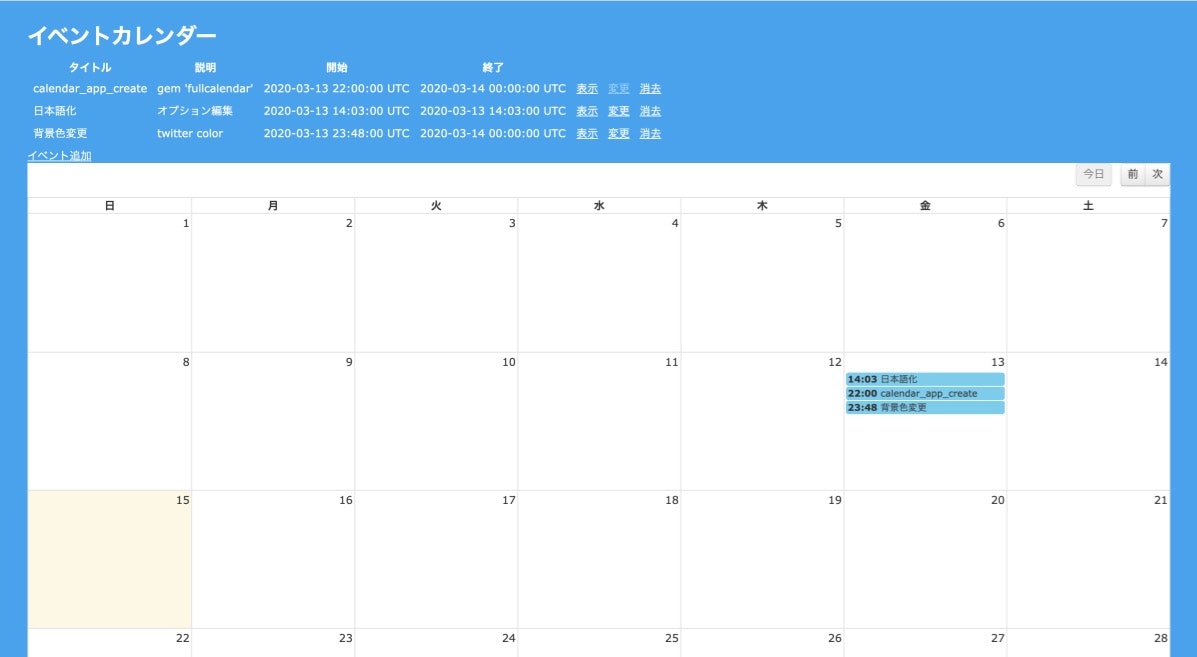
こんな感じのが出来ます。

FullCalendarはjQueryのプラグインでrailsに導入する際は、gemで導入しました。
今回はScaffoldを使って簡単なEventモデルを作り、カレンダーに反映出来るところまでやります。
では、
1.Gemの追加
gem 'jquery-rails', '4.3.3'
gem 'fullcalendar-rails'
gem 'momentjs-rails'
そして、
bundle install
2.application.jsに記述
//= require jquery
//= require moment
//= require fullcalendar

$(function () {
    // 画面遷移を検知
    $(document).on('turbolinks:load', function () {
        // lengthを呼び出すことで、#calendarが存在していた場合はtrueの処理がされ、無い場合はnillを返す
        if ($('#calendar').length) {
            function eventCalendar() {
                return $('#calendar').fullCalendar({
                });
            };
            function clearCalendar() {
                $('#calendar').html('');
            };

            $(document).on('turbolinks:load', function () {
                eventCalendar();
            });
            $(document).on('turbolinks:before-cache', clearCalendar);

            $('#calendar').fullCalendar({
                events: '/events.json'
            });
        }
    });
});
一つ目の関数ではFullCalendarの設定を読み込み、二つ目の関数ではFullCalendarを削除します。
その下に呼び出すコードを2行書き最後にイベントを表示させるためのコードを書きます。
その他、説明は少しはしょります。
3.application.cssに記述
...
 *= require_tree .
 *= require_self
 *= require fullcalendar
 */
これで、あとはviewのerbファイルに
<div id="calendar"></div>
と書き込むとカレンダーが表示されます。
4.イベントを表示する
Fullcalendarにイベントの情報を表示するには、JSONファイルを使ってあげます。
イベントにはタイトル、説明、開始日、終了日が必要です。今回はscaffoldで作りました。
rails generate scaffold Event title:string description:text start_date:datetime end_date:datetime
そして、
rails db:migrate
JSONを渡すために、Railsのjbuilderというものを使っていきます。scaffoldによってjson.jbuilderファイルが自動で作られています。
以下のコードを追加
json.array!(@events) do |event|
  json.extract! event, :id, :title, :description
  json.start event.start_date
  json.end event.end_date
  json.url event_url(event, format: :html)
end
こうすることで、{"id":"1", "title":"タイトル", "description":"説明", "start":"日付1", "end":"日付2", "url":"some_address"}のようにjsonファイルが作られ、カレンダーが読み込めるデータになります。
url項目があることで、カレンダーの予定にurlが埋め込まれ、クリックすると予定の詳細に飛ぶことができます。
現状、ルーティングはこのようになっています。
Rails.application.routes.draw do
  resources :events
  # For details on the DSL available within this file, see http://guides.rubyonrails.org/routing.html
  root 'events#index'
end
一旦、これで表示は出来るようになりました。
あとは、カレンダーのオプションで色々触ってみて下さい。
$('#calendar').fullCalendar({ });の{ }内にオプションを加えることで、カレンダーのタイトルをYYYY年MM月のようにしたり、レイアウト、時間の表示を設定できます。
公式ドキュメントには色々な使い方、機能が載っていますので確認してみて下さい。
FullCalendarの使い方