はじめに
最近、様々なチャットツールがありますね。
(多機能なのでチャットツールという表現には不適切かもしれませんが)
JavaScriptでチャットにメッセージを送るプログラムかいていたので、スニペットとして残すために書いてきたソースコードからピックアップしました。
仕事関係なく「とりあえず動かして試すぞ!遊ぶぞ!」といった気持ちでつくってきたものなので、コードの汚さはご容赦ください。
今回の対象のチャットツール
- Teams
- Chatwork
- slack
- discord
- LINE Notify
TeamsとChatworkは会社で利用していたので無料で試せて(試させてもらって)いますが、
他のは基本的に無料で好きに試せますのでおすすめ。
準備
- WindowsでもMacでもLinuxでも、Nodeが準備できていれば
- Node.js 10.16.x or 12.16.x で確認
Teamsのチャネルに自作プログラムから飛ばす。
1つ目の紹介なのでちょっとだけ丁寧に説明します。
流れ
1. 送りたいチャネルを用意(既存のチャネルでもOK)
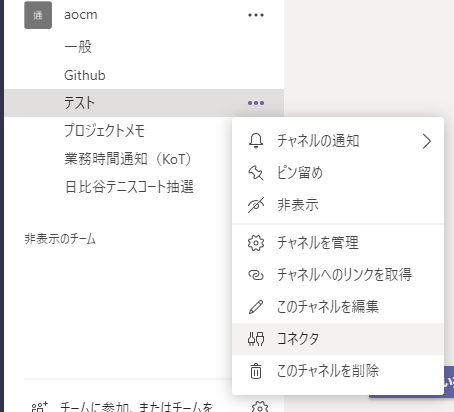
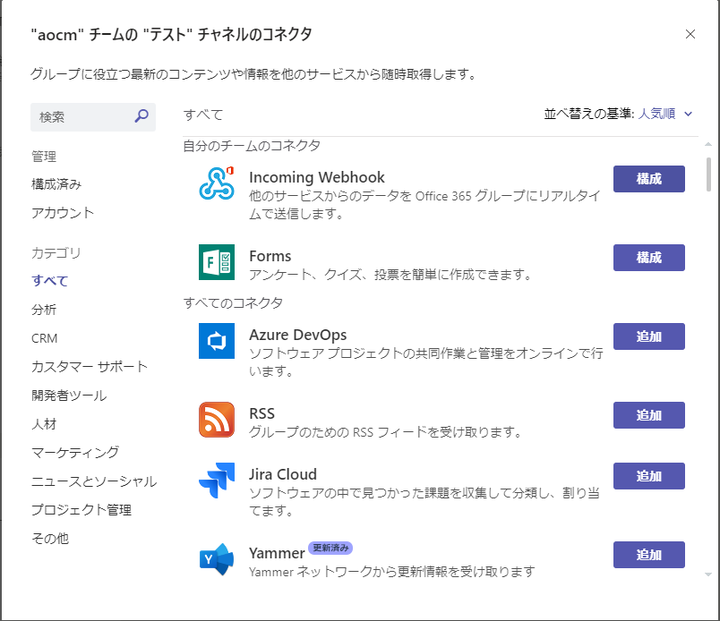
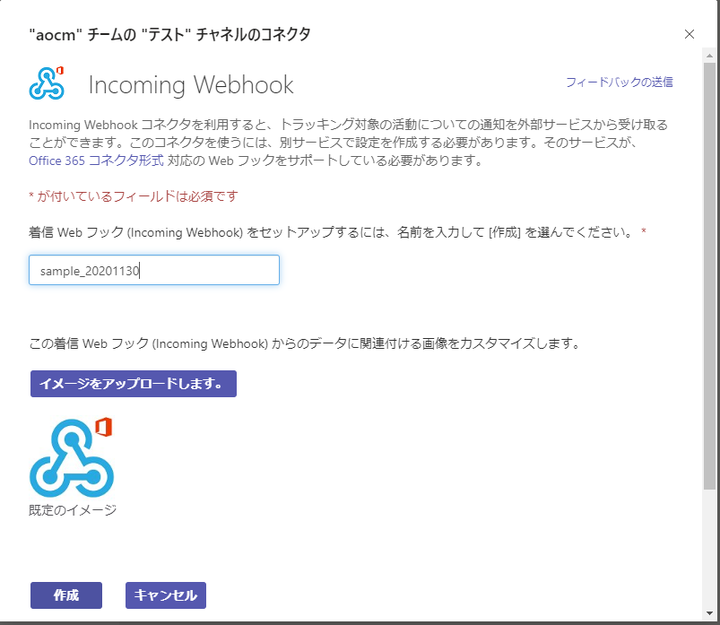
2. チャネルにWebhookコネクタを追加
3. コーディング準備
4. Teamsのプログラムを用意
5. つくったら実行
実装
1. 送りたいチャネルを用意(既存のチャネルでもOK)
アカウント作成とかそのあたりは割愛。ちなみにプライベートチャネルでも大丈夫ですので試す場合はまず鍵かけたところがよいかも。
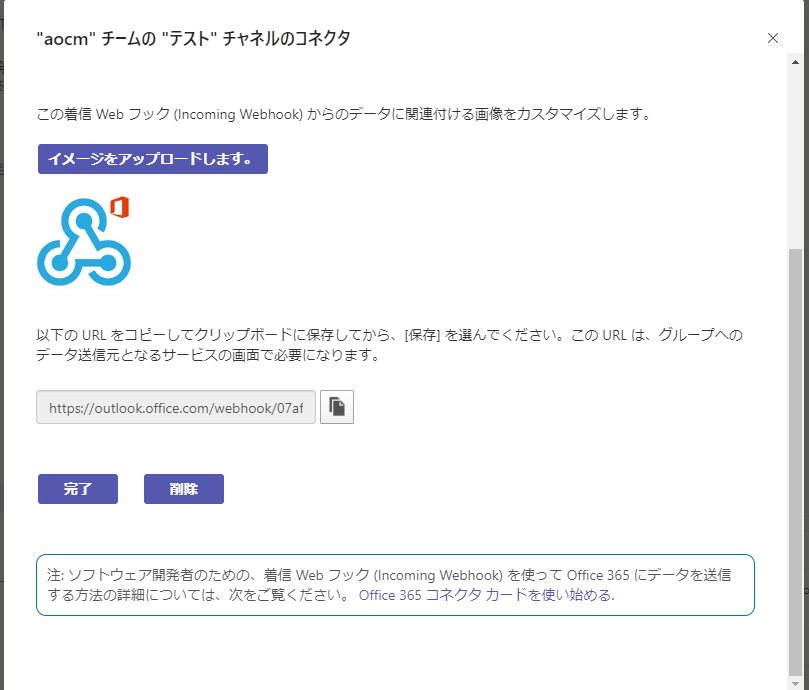
2. チャネルにWebhookコネクタを追加
こんな風に作成されます
https://outlook.office.com/webhook/xxxxxxxxxxxxxxxxxxxx@0xxxxxxxxxxxxxxxxxxxxxxxxxx/IncomingWebhook/xxxxxxxxxxxxxxxxxxxxxxxxxxxxxxxxxxxxxxxxxxxxxxxxx
3. コーディング準備
下のコマンドをうって準備します(0からコードを書く場合)
> git init
略
> npm init
略
> npm install --save axios
略
4. Teamsのプログラムを用意
    PS C:\work\repository\aocm\samples\chat-webhooks> tree /F
C:.
│  .gitignore
│  index.js
│  package-lock.json
│  package.json
│  teams.js
│
└─node_modules
    ├─axios
node_modules
git管理する必要ないので除外
const axios = require('axios');
/**
 * Teamsに通知する
 * @param {*} message 投稿するメッセージ
 * @param {*} teams_url Incoming WebhookのURL
 */
exports.teamsPost = (message, teams_url)=>{
    axios(
        {
        method: 'post',
        url: teams_url,
        headers: {
            'Content-Type': 'application/json',
        },
        data: {
            "type": "message",
            "text": message
        },
    }).then(response => {
        console.log('res:', response.data);
    }).catch(error => {
        console.log('err:', error);
    });

}
const teamsUrl = さっきのURL
teamsPost("test", teamsUrl)
5. つくったら実行
> node .\index.js
(※これはWindowsでためしてたのでPSのコマンド)
Chatworkに通知する
※tokenの取得はちょっと特殊なので割愛
流れ
1. 通知するには、チャットワークのtokenとroom_idが必要。
2. とりあえずroom_idわからないので新しく部屋をつくりつつ、一覧を取得
3. room_idを特定したらpost
実装(ざっくりしたメモ)
リファクタ時にクラスつくるので、一旦てきとうな名前で。
exports.chatworkGetRooms=(token)=>{
    try{
    const url ="https://api.chatwork.com/v2/rooms"
    axios(
        {
        method: 'get',
        url,
        headers: {
            'Content-Type': 'application/json',
            'X-ChatWorkToken': token
        }
    }).then(response => {
        console.log('res:', response.data);
    }).catch(error => {
        console.log(error)
        const {
        status,
        statusText
        } = error.response;
        console.log(`Error! HTTP Status: ${status} ${statusText}`);
    });
    }catch(e){
    console.log(e)
    }
}
(全部出てきちゃうので抜粋)
  {
    room_id: xxxxxxxxx,
    name: 'sample_20201130',
    type: 'group',
    role: 'admin',
    sticky: false,
    unread_num: 0,
    mention_num: 0,
    mytask_num: 0,
    message_num: 1,
    file_num: 0,
    task_num: 0,
    icon_path: 'https://appdata.chatwork.com/icon/ico_group.png',
    last_update_time: 1606694822
  },
Postするコードの準備
exports.chatworkPost = (room_id, token, message)=>{
    const url = `https://api.chatwork.com/v2/rooms/${room_id}/messages`
    console.log(url)
    axios(
        {
        method: 'post',
        url,
        headers: {
            'X-ChatWorkToken': token
        },
        data: `body=${message}`
    }).then(response => {
        console.log('res:', response.data);
    }).catch(error => {
        console.log(error)
    });
}
さっきのtokenを渡すようにして実行すればとびます。
ちなみにテキストをChatwork固有の書き方をすれば、送信後にちゃんと反映されます。
https://developer.chatwork.com/ja/messagenotation.html
Slackに通知する
流れ
いっぱい参考記事あるので割愛
実装(ざっくりしたメモ)
slackbotとチャンネルとtokenを用意して、通知したいメッセージをつめて実行すればとびます。
(package.jsonは割愛)
/**
 * slack にメッセージをpostする
 */
exports.slackMessage = (message="test!")=>{
  try{
    console.log(message)
    const querystring = require('querystring');
    const url = 'https://slack.com/api/chat.postMessage'
    const token = process.env.slack_token||"non_token"
    const text = message
    const channel = "#"+ process.env.slack_channel||"non_ch"
    console.log(channel)
    if(token==="non_token") throw new Error("slack bot tokenがありません")
    if(token==="non_ch") throw new Error("チャンネルを指定してください")
    axios(
      {
        method: 'post',
        url,
        headers: {
          'Content-Type': 'application/x-www-form-urlencoded',
        },
        data: querystring.stringify({
          text,
          token,
          channel
        }),
    }).then(response => {
        console.log('res:', response.data);
    }).catch(error => {
      console.log(error)
      const {
        status,
        statusText
      } = error.response;
      console.log(`Error! HTTP Status: ${status} ${statusText}`);
    });

  }catch(e){
    console.log(e)
  }
}
Discordに、他のAPIから取得したデータをフォーマットして通知
概要
https://github.com/aki-lua87/PSO2API
こちらの方が公開しているAPIからデータをもらってDiscordに送るプログラムを書きます。
この場を借りてお礼申し上げます。本当にありがとうございます。
この記事を参考にする場合はAPI作成者に迷惑にならないようにおねがいします
流れ
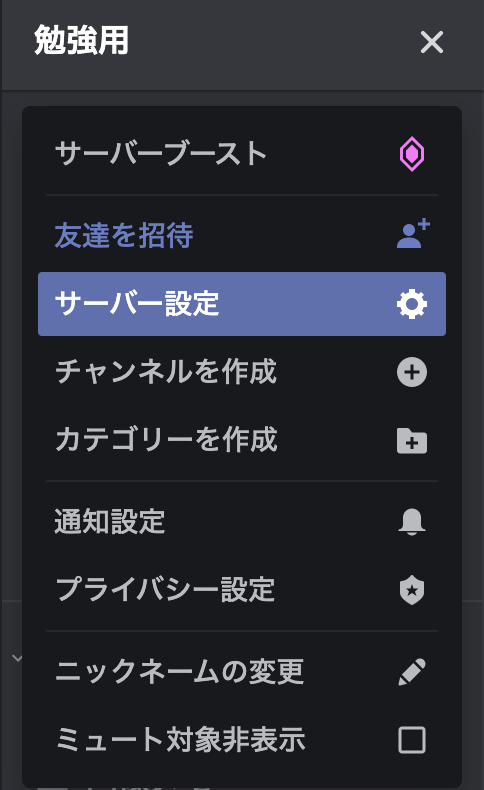
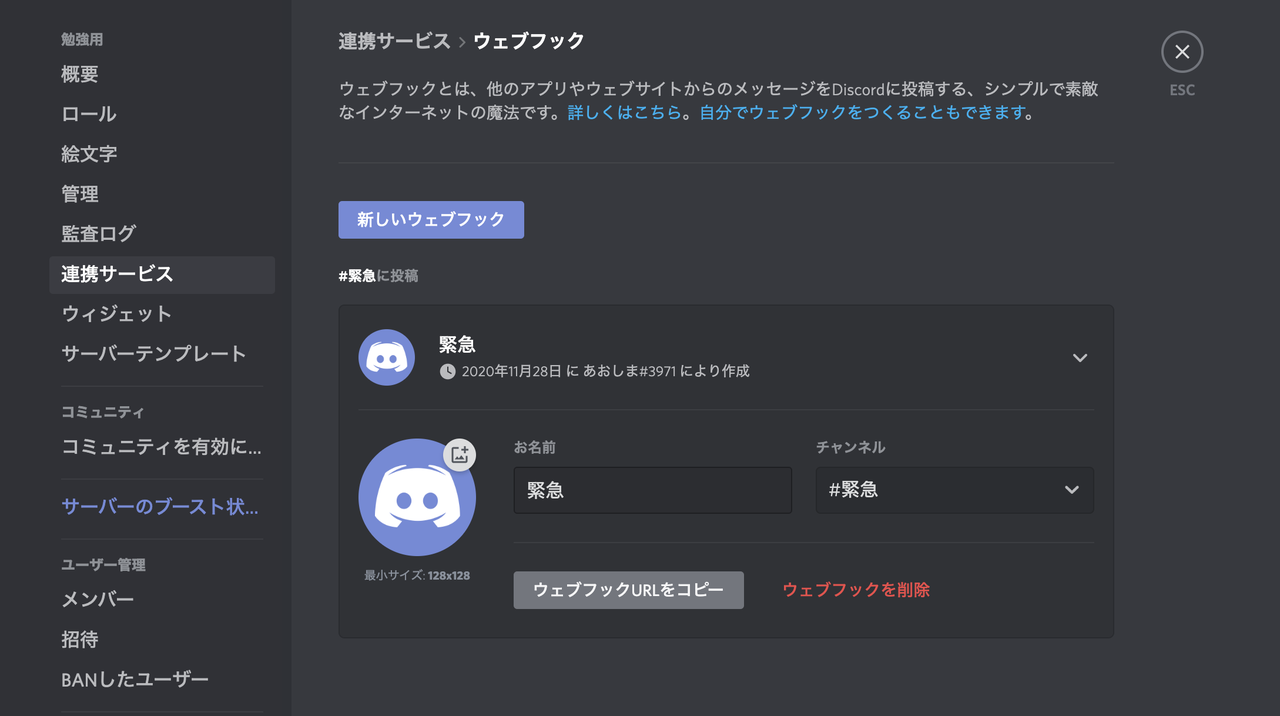
- 通知したいサーバーにWebhookの設定をして、urlを取得
- コードをかいてAPIからデータを取得する
- そのデータを整形してurlにpostする
- せっかくなのでcronに仕込んで毎日おくる
実装(ざっくりしたメモ)
今回はざつに1つのファイルにコーディングします。
APIコールして取得したデータを整形してDiscordのWebhookURLにPostします。
(1時間くらいでさらっと書いたのでインデント一部崩れている、リファクタ前のものです)
const axios = require('axios');

try{
    const url = "https://pso2.akakitune87.net/api/emergency"
    const today= getNowYMD()
    axios(
    {
        method: 'post',
        url,
        headers: {
            'Content-Type': 'application/json',
        },
        data: {
            "EventDate":today,
            "EventType":"緊急"
        },
    }).then(response => {
        const webHookURL = 略
        discord(webHookURL, apiToMessage(response.data, today))
    }).catch(error => {
    console.log(error)
    const {
        status,
        statusText
    } = error.response;
    console.log(`Error! HTTP Status: ${status} ${statusText}`);
    });
}catch(e){
    console.log(e)
}

function discord(webHookURL, message){
    try{
    axios(
        {
        method: 'post',
        url:webHookURL,
        headers: {
            'Content-Type': 'application/json',
        },
        data: {
            "content":message
        },
    }).then(response => {
        console.log('res:', response.data);
    }).catch(error => {
        const {
            status,
            statusText
        } = error.response;
        console.log(`Error! HTTP Status: ${status} ${statusText}`);
    });

    }catch(e){
        console.log(e)
    }
}

function getNowYMD(){
    let dt = new Date();
    let y = dt.getFullYear();
    let m = ("00" + (dt.getMonth()+1)).slice(-2);
    let d = ("00" + dt.getDate()).slice(-2);
    let result = y + m + d;
    return result;
}
function apiToMessage(array, date){
    let message = date + "\n"
    for (let i = 0; i<array.length; i++){
    message = message + format(array[i])
    }
    return message
}
function format(object){
    let text = object.Hour + "時: "
    text = text + object.EventName + "\n"
    return text
}
コードをかいて試したら、つけっぱなしのiMacのcrontabにセットしてます。
$ crontab -l
## pso2
3 0 * * * ~/.anyenv/envs/nodenv/shims/node ~/repository/aocm/pso2api-to-discord/index.js >> ~/repository/aocm/pso2api-to-discord/cron.log

LINE Notify
LINE NotifyはLINEの中でも非常にシンプルに通知を飛ばせるので、ちょっと通知で遊びたいというときにおすすめです。
チャットボットとかもいつか作ってみたいですけどやってないです。
https://notify-bot.line.me/ja/
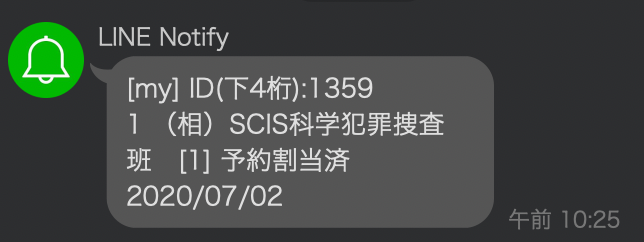
LINE Notifyについては、母向けに「図書館のサイトにPuppeteerでログインしてスクレイピングして、予約してた本が受け取れる状態になっていたらLINEで通知する」というプログラムの一部として利用しました。
仕事で身に付けたことで親孝行するの、ちょっと自分の成長を感じられていいです。 9割自己満ですけども。
流れ
- LINEのアカウントでhttps://notify-bot.line.me/ja/ にログインしてNotifyを有効化
- アクセストークンの発行・通知するNotifyと母とぼくだけが参加するトークルームを作成
- プログラムを作る
- tokenとプログラムをcrontabでセットして毎朝実行する
実装(ざっくりしたメモ)
呼び出しコードは割愛。
スクレイピングの方は割愛しまして、通知部分だけ転記します。
const token = process.env.token;

exports.lineNotice = (message="test!")=>{
  try{
    console.log(message)
    const axios = require('axios');
    const querystring = require('querystring');
    const text = message

    axios(
      {
        method: 'post',
        url: 'https://notify-api.line.me/api/notify',
        headers: {
          Authorization: `Bearer ${token}`,
          'Content-Type': 'application/x-www-form-urlencoded',
        },
        data: querystring.stringify({
          message: text,
        }),
    }).then(response => {
        console.log('res:', response.data);
    }).catch(error => {
      console.log(error)
      const {
        status,
        statusText
      } = error.response;
      console.log(`Error! HTTP Status: ${status} ${statusText}`);
    });

  }catch(e){
    console.log(e)
  }
}
おわりに
私生活に使えるプログラムかくのは楽しいです。
余談ですが、今回はMacだったりWindowsだったりDockerコンテナだったりとにかくローカル実行しているので、そのうちAWSLambdaとかに組み込んでみようかなと思います。
チームで管理するときとかはローカルで管理したら属人的で良くないですしね。
あと・・・見直してみると、eslintでめっちゃ怒られそうなプログラム並んでますね。お目汚し失礼しました。
いつか整理できたらGithubでも公開します。
