DiscordBotを作ろう
いまやコミュニケーションツールとして大きなシェアを誇るDiscord。
私も知り合いとの主なコミュニケーションの場として毎日活用しています。
普通に利用しているだけで便利だなぁと感じていますが、DiscordBotというもっと便利なものがあると聞いたので作ってみることにしました。
無料で公開されているBotにはyoutubeの音楽をボイスチャンネルで再生したり、
サーバーの管理を行ってくれるBotなど、
かなりの柔軟性があるみたいです。
すごい
今回作成するもの
/コマンドを使用して、
モーダルウィンドウを出して、入力したテキストを発言させるコマンドと、pingを返してくれるコマンドを作成したいと思います。
使用するもの
DiscordBotの作成に関しては色々やり方がありますが、
今回はGlitchを使用してみたいと思います。
Glitchとは
Node.js を使ったウェブアプリを作成・公開することができるサービス。
制限事項はあるものの、無料で使えるので
気軽に色々試すことができる。
環境
Node.js v16.14.0
Discord.js v14.14.1
Glitch(ビルド環境)
作業の流れ
①DiscordBot(bot本体)作成
②Glitchサーバーを作成
③処理の実装
①DiscordBot(bot本体の作成)
DiscordBotを作成するためにはまず、
Discord DEVELOPER PORTAL
にアクセスします。
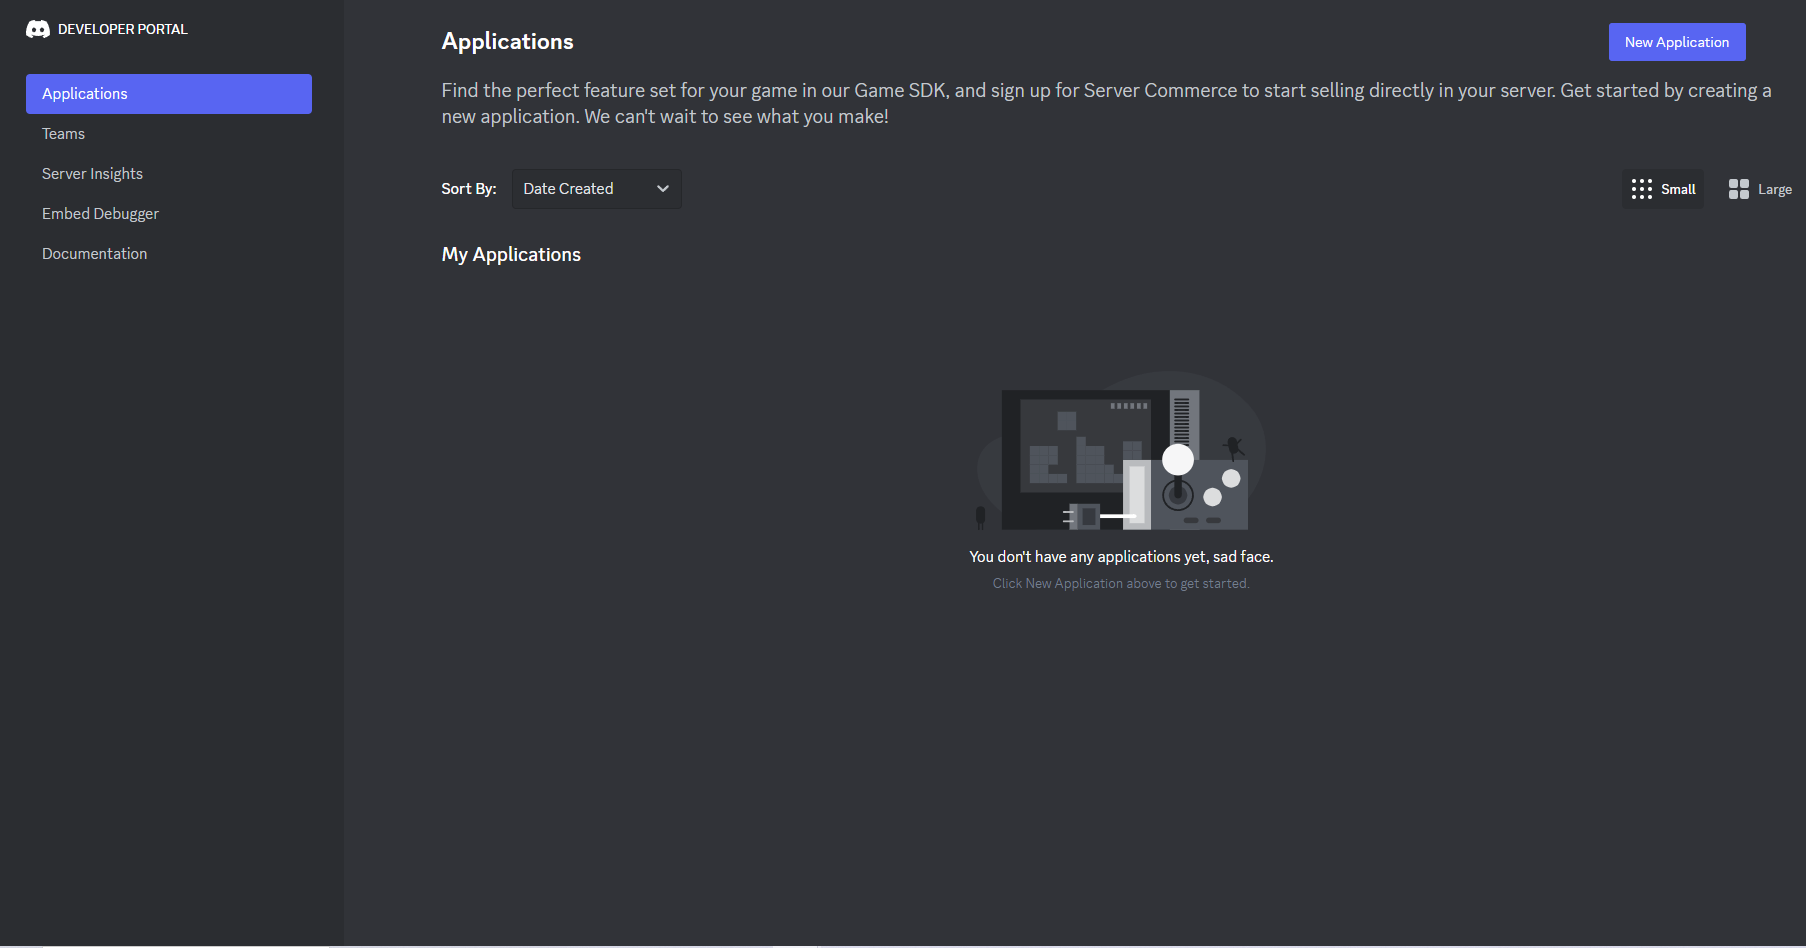
左ペインのApplicationsタブに移動し、右上の NewApplicationsをクリックします。
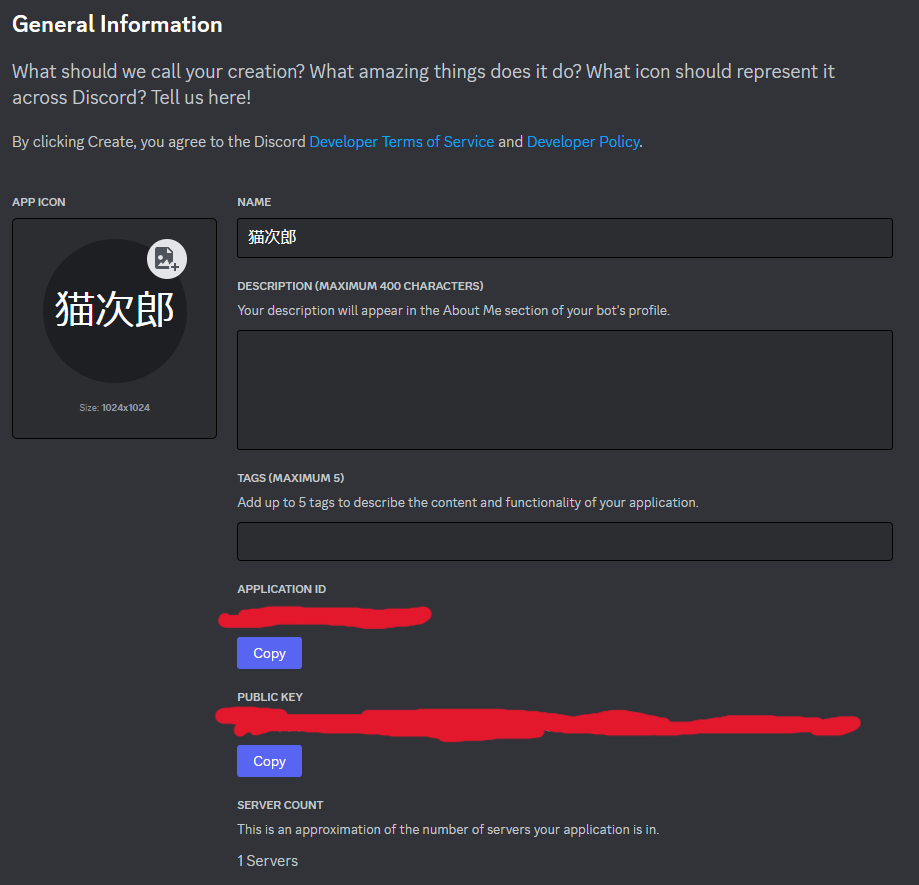
作成するアプリの名前を入力し、ポリシーの確認にチェックを入れて作成しましょう。
このような画面に遷移すると思います。
次に左ペインのBotタブを選択し次にBotの設定をいじっていきます。
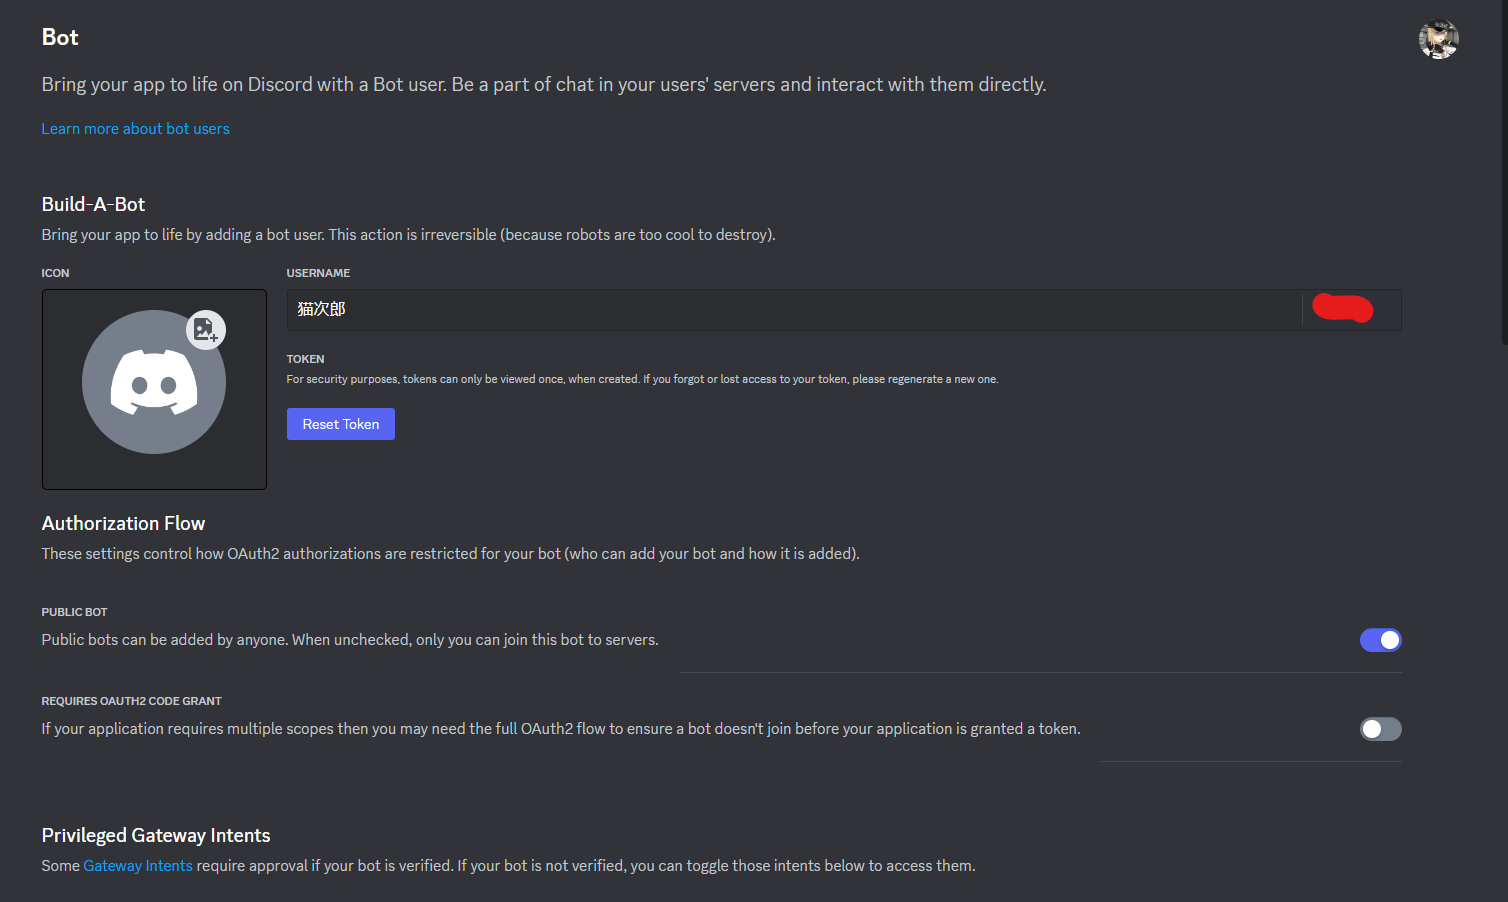
設定は以下の画像を参考にしてください。
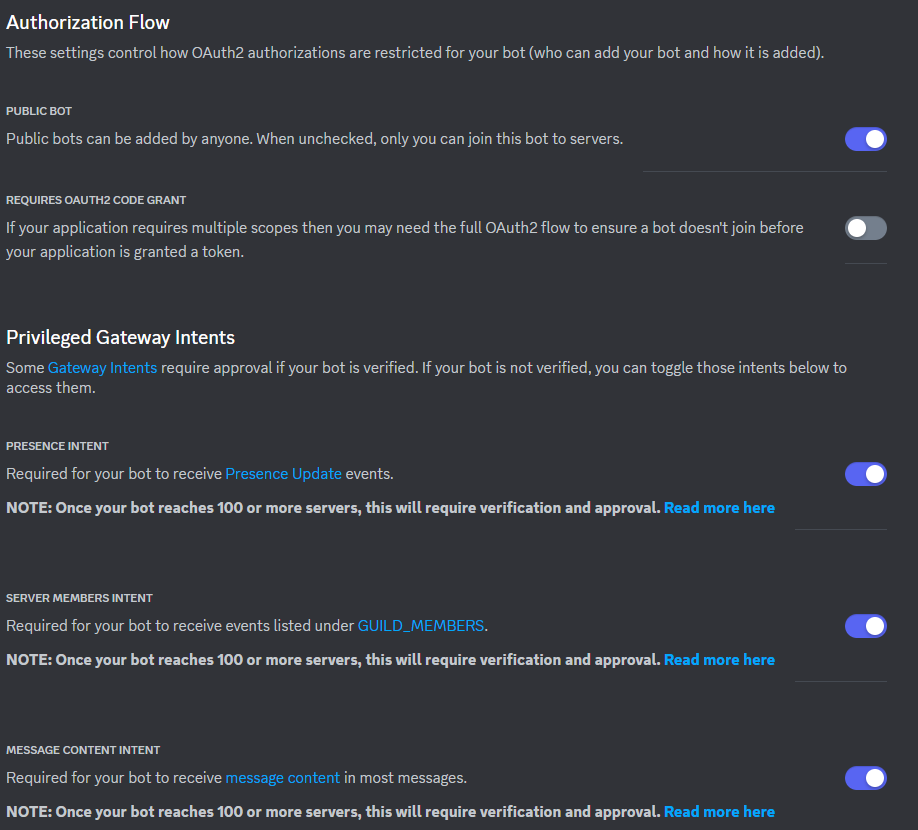
これで設定はOKです。今回は実際の利用を想定していないので、アバウトに設定していますが、実際の運用をする場合はここの設定は慎重に行う必要があります。
次に左ペインのOAuth2タブを選択します。
ここではBotに付与する権限を設定できます。
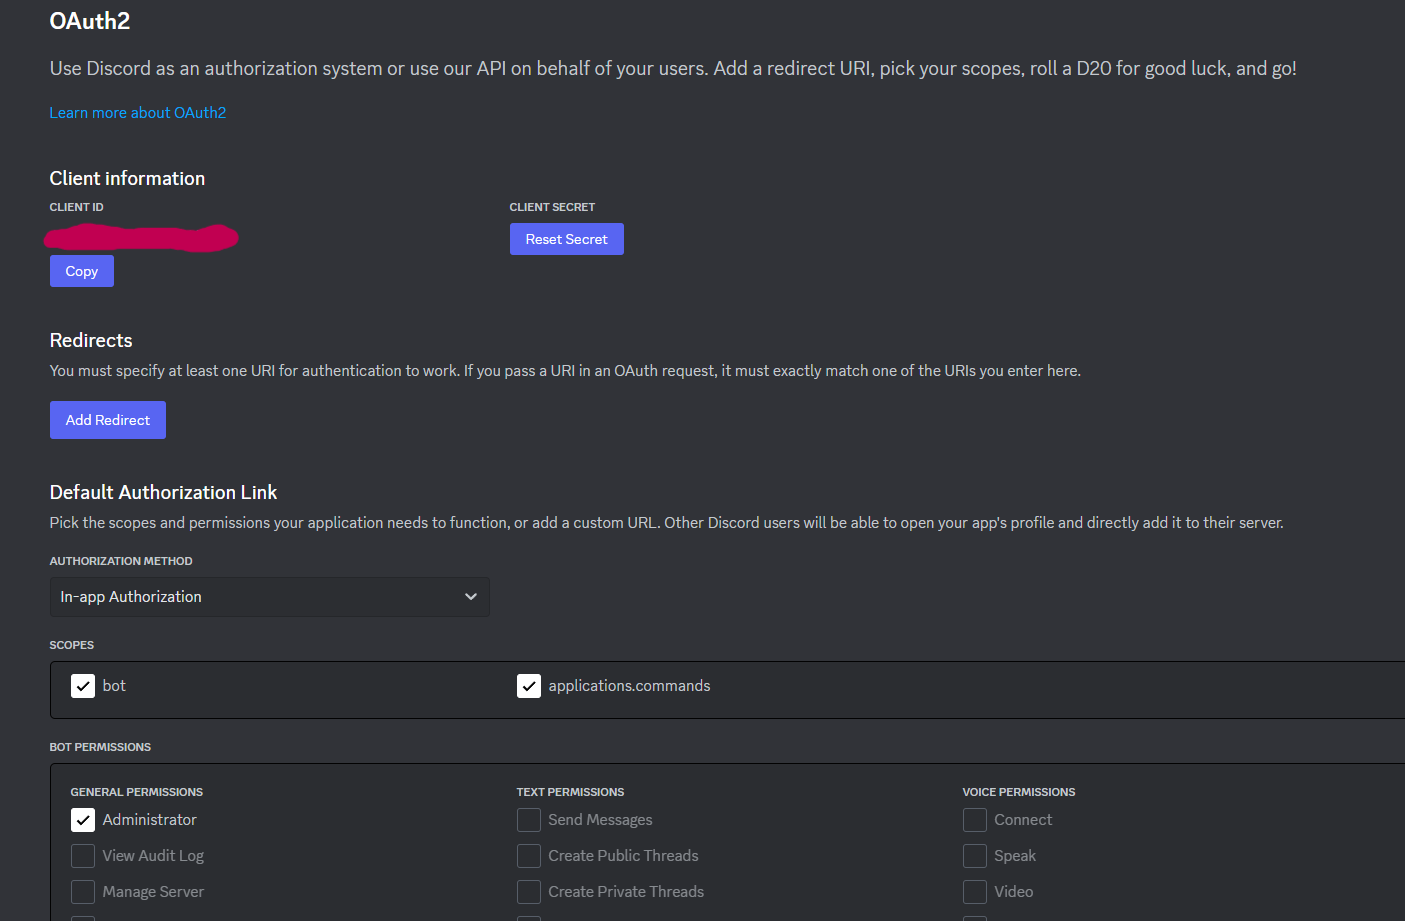
Default Authorization Link
をnoneから In-app Authorrizetionに変更し、
SCOPESを
botとapplications.commandsにチェックを入れます。
その後下にBOT PERMISSIONSが出てくるので必要な個所にチェックを入れます。
非公開botならとりあえずAdministratorを選択しておけば間違いないと思います。
次に、左ペインURL Generatorタブを選択し、ここでもSCOPESとBOT PERMISSIONSにチェックを入れます。(bot,applications.commandsとAdministrator)
チェックを入れ終えたらページ下のGENERATED URLにあるURLをコピーし、アクセスしましょう。
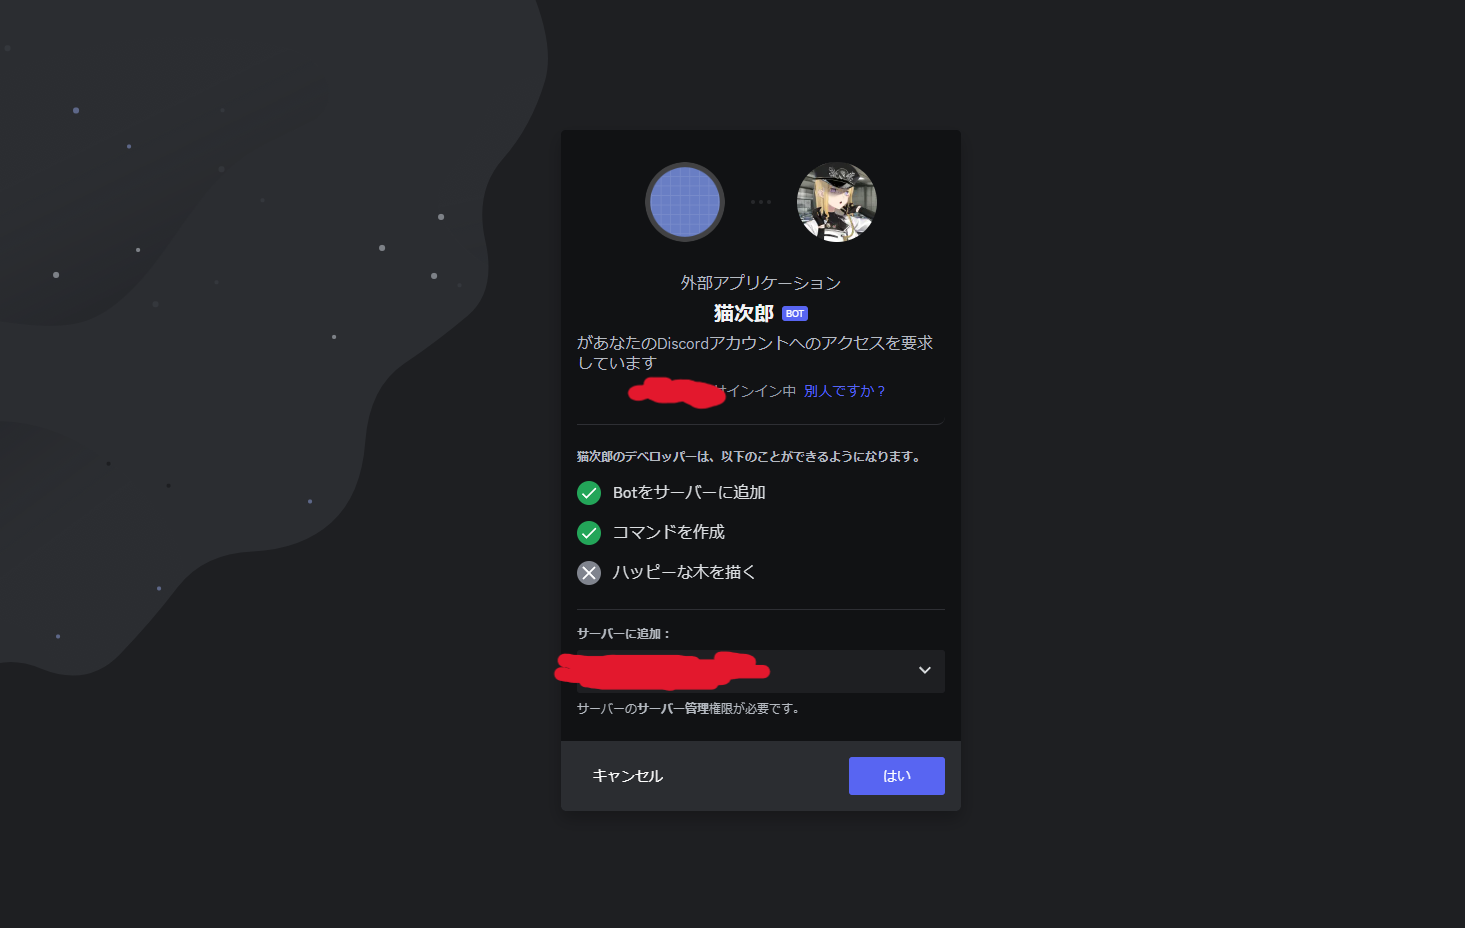
このページが出てきたら認証をクリックし、botをサーバーに追加しましょう。
②Glitchサーバーを作成
glitch.com
アカウントを持っていない場合は新規作成しましょう。
基本無料です。
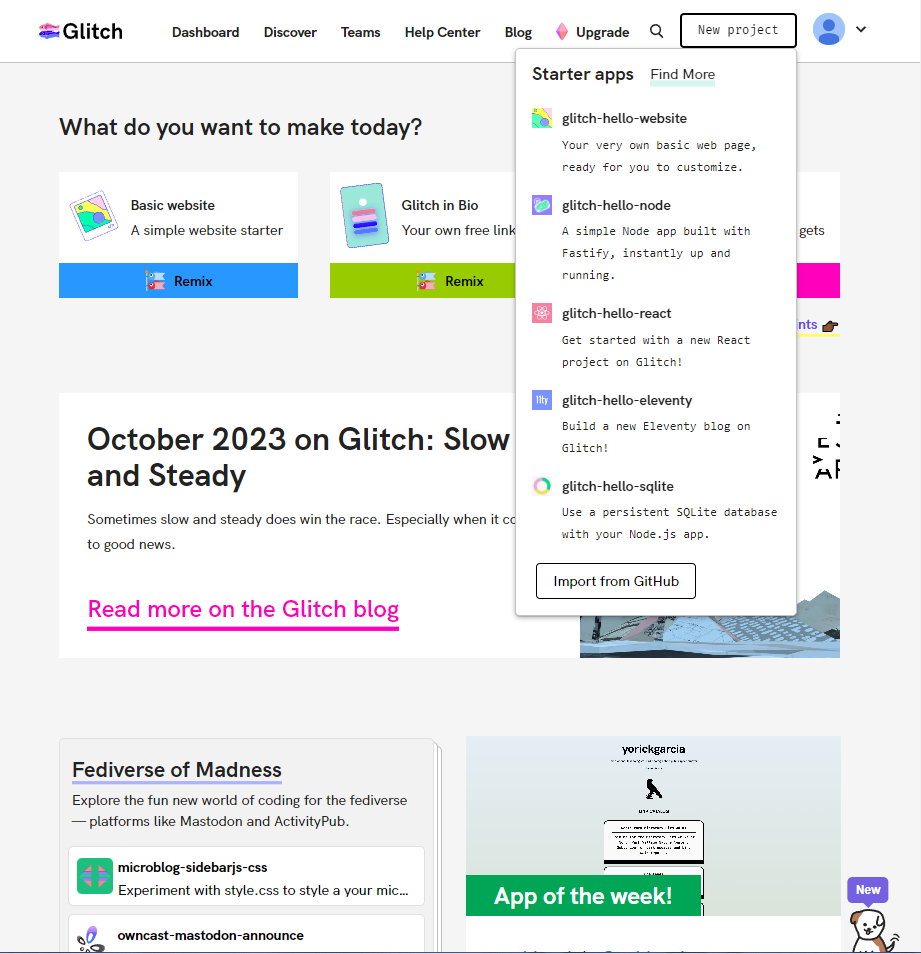
ホーム画面に遷移したら右上のNew projectをクリックし、
その内のglitch-hello-nodeを選択します。
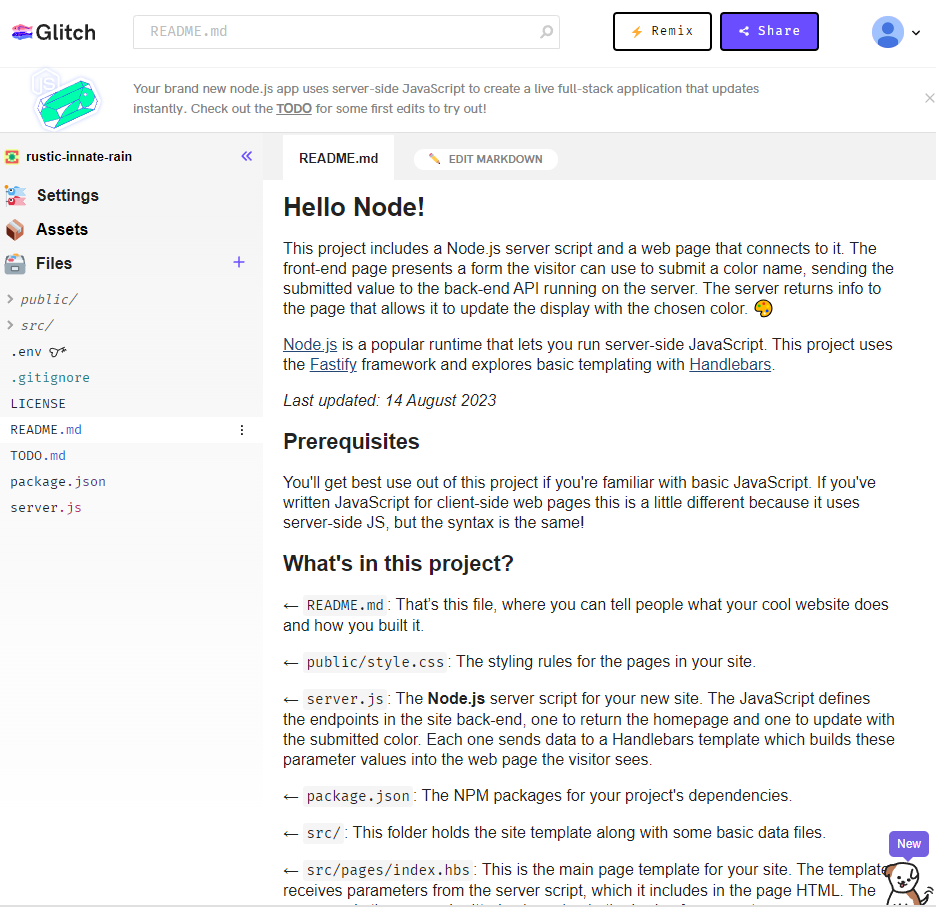
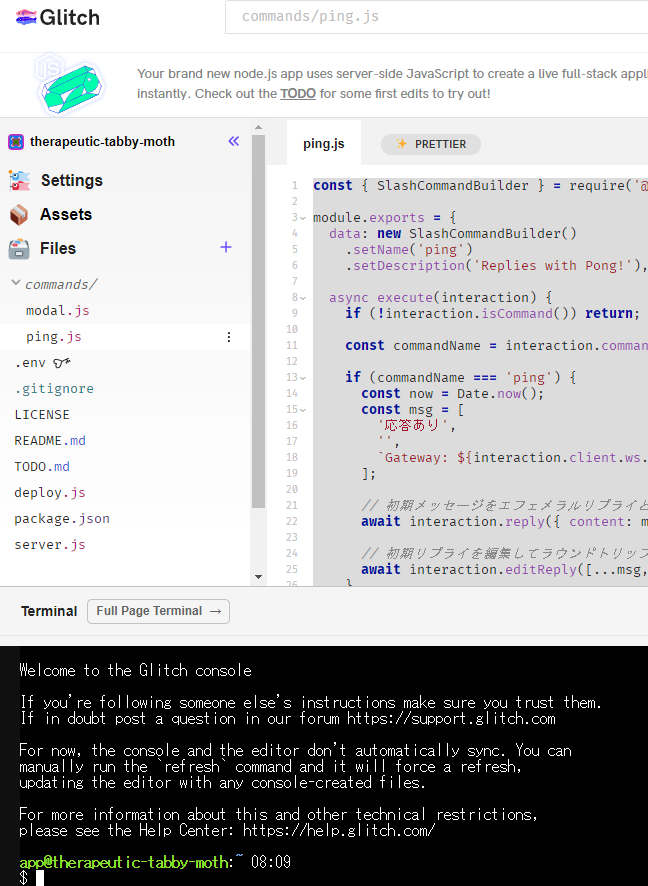
これがGlitchのプロジェクト画面です。
左側のファイルから
public/ src/
を削除しておきましょう。今回のbot開発では使用しません。
次にpackage.jsonを以下のように編集します。
"dependencies": {
    "discord.js": "^14.7.0"
},
"engines": {
    "node": "^16.14.0"
},
※dependencies,enginesの部分を置き換えてください。
次にDiscordbotの
token,CLIENT ID,GUILD IDを取得します。
tokenはDiscord DEVELOPER PORTALのbotタブから

CLIENT IDはOAuth2タブから取得。

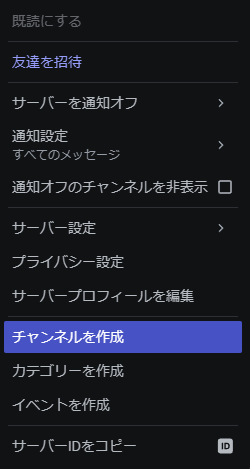
GUILD IDはbotを追加するサーバーアイコンを右クリックし、
一番下のサーバーIDのコピーから取得できます。
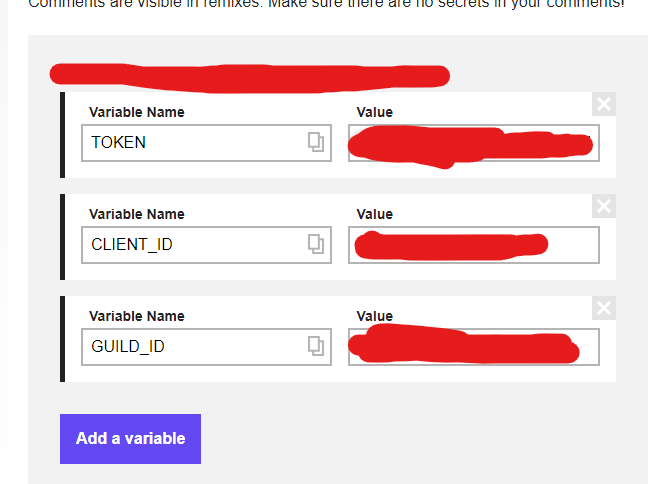
それぞれ取得したものをGlitchの.envファイルに追加します。
環境変数に追加しておくことで後々使いやすくなります。
③処理の実装
次にメイン処理の実装です。
const fs = require("node:fs");
const path = require("node:path");
const { Client, Collection, Events, GatewayIntentBits } = require("discord.js");
const TOKEN = process.env.TOKEN;

const client = new Client({ intents: [GatewayIntentBits.Guilds] });

// コマンドの読み込み
client.commands = new Collection();
const commandsPath = path.join(__dirname, "commands");
const commandFiles = fs
  .readdirSync(commandsPath)
  .filter((file) => file.endsWith(".js"));

for (const file of commandFiles) {
  const filePath = path.join(commandsPath, file);
  const command = require(filePath);
  client.commands.set(command.data.name, command);
}

// BOTの状態確認
client.once(Events.ClientReady, () => {
  console.log("Ready!");
});

// コマンド受け取り処理
client.on(Events.InteractionCreate, async (interaction) => {
  if (!interaction.isChatInputCommand()) return;

  const command = client.commands.get(interaction.commandName);

  if (!command) return;

  try {
    await command.execute(interaction);
  } catch (error) {
    console.error(error);
    await interaction.reply({
      content: "error",
      ephemeral: true,
    });
  }
});
// モーダルで受け取った入力値をDiscordに送信する
client.on(Events.InteractionCreate, async (interaction) => {
  if (!interaction.isModalSubmit()) return;

  const userName = interaction.fields.getTextInputValue("userNameInput");
  const selfIntroduction = interaction.fields.getTextInputValue(
    "selfIntroductionInput"
  );
  console.log({ userName, selfIntroduction });
  await interaction.reply({
    content: "名前:\n" + userName + "\n" + "自己紹介:\n" + selfIntroduction,
  });
});

client.login(TOKEN);
server.jsを上記で書き換えてください。
次にコマンドの実装を行います。
今回は/コマンドを二種実装します。
ファイル構成は
commands/実装するコマンドファイル
としてください。
modal.js
const {
  ActionRowBuilder,
  Events,
  ModalBuilder,
  TextInputBuilder,
  TextInputStyle,
  SlashCommandBuilder,
} = require("discord.js");

module.exports = {
  // スラッシュコマンドの登録
  data: new SlashCommandBuilder()
    .setName("modal")
    .setDescription("モーダルの表示"),
  // スラッシュコマンドを受け取ると以下が実行される
  async execute(interaction) {
    if (!interaction.isChatInputCommand()) return;

    if (interaction.commandName === "modal") {
      const modal = new ModalBuilder()
        .setCustomId("myModal")
        .setTitle("My Modal");

      // モーダルを構成するコンポーネントを定義
      const userNameInput = new TextInputBuilder()
        .setCustomId("userNameInput")
        .setLabel("name")
        .setStyle(TextInputStyle.Short);

      const selfIntroductionInput = new TextInputBuilder()
        .setCustomId("selfIntroductionInput")
        .setLabel("好きなもの")
        .setStyle(TextInputStyle.Paragraph);

      // コンポーネントの登録
      const firstActionRow = new ActionRowBuilder().addComponents(
        userNameInput
      );
      const secondActionRow = new ActionRowBuilder().addComponents(
        selfIntroductionInput
      );
      modal.addComponents(firstActionRow, secondActionRow);

      // モーダルの表示
      await interaction.showModal(modal);
    }
  },
};
ping.js
const { SlashCommandBuilder } = require('@discordjs/builders');

module.exports = {
  data: new SlashCommandBuilder()
    .setName('ping')
    .setDescription('Replies with Pong!'),

  async execute(interaction) {
    if (!interaction.isCommand()) return;

    const commandName = interaction.commandName;

    if (commandName === 'ping') {
      const now = Date.now();
      const msg = [
        '応答あり',
        '',
        `Gateway: ${interaction.client.ws.ping}ms`,
      ];

      // 初期メッセージをエフェメラルリプライとして返す
      await interaction.reply({ content: msg.join('\n'), ephemeral: true });

      // 初期リプライを編集してラウンドトリップ時間を追加
      await interaction.editReply([...msg, `ラウンドトリップ: ${Date.now() - now}ms`].join('\n'));
    }
  },
};
最後にコマンドのデプロイを行って完了です。
deploy.js
const { REST, Routes } = require('discord.js');
const { CLIENT_ID, GUILD_ID, TOKEN } = process.env;
const fs = require('node:fs');

// 各スラッシュコマンドのJSON形式で格納する
const commands = [];
const commandFiles = fs.readdirSync('./commands').filter(file => file.endsWith('.js'));

for (const file of commandFiles) {
	const command = require(`./commands/${file}`);
	commands.push(command.data.toJSON());
}

// スラッシュコマンドを登録するためのAPI
const rest = new REST({ version: '10' }).setToken(TOKEN);

// デプロイ
(async () => {
	try {
		console.log(`Started refreshing ${commands.length} application (/) commands.`);

		const data = await rest.put(
			Routes.applicationGuildCommands(CLIENT_ID, GUILD_ID),
			{ body: commands },
		);

		console.log(`Successfully reloaded ${data.length} application (/) commands.`);
	} catch (error) {
		console.error(error);
	}
})();
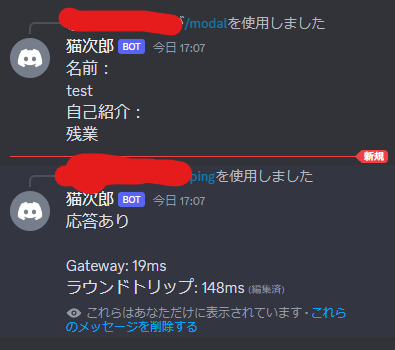
このターミナルでdeploy.jsを実行してみましょう。
ここまでくれば実際に動くようになります。
感想
動かすまでが大変でコマンドの実装は結構あっさり終わった印象です。
知識0から始めたのでglitchとDiscordBotの繋がりの理解が難しく、他の人もここで詰まりそうだと感じました。
今回は簡単な/コマンドを実装しましたが、ゆくゆくはもう少し難易度の高い処理に挑戦したいと思います。