パターン
- ボタンを押したら画面遷移
- 条件で画面遷移
- 変数を渡して画面遷移
追加するかも。
ボタンを押したら画面遷移
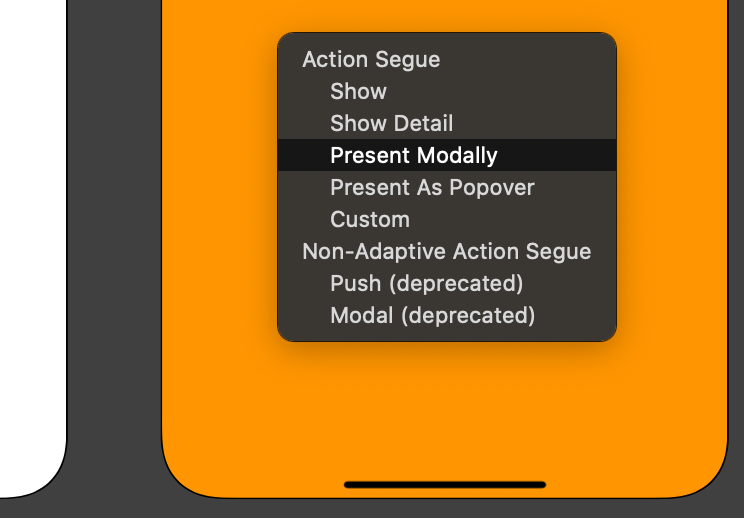
- 『NEXT』とか『次へ』みたいなボタンを設置する。
- ボタンを
controlキーを押しながらクリックして遷移したい画面にドラッグドロップ

- そしたらオプションが出てくるので選択する
条件で画面遷移
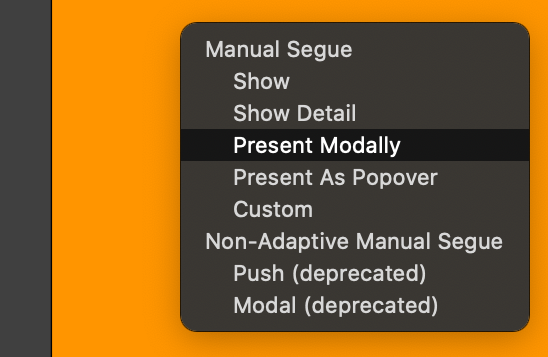
- 上部のアイコンを
controlキーを押しながらクリックして遷移したい画面にドラッグドロップ
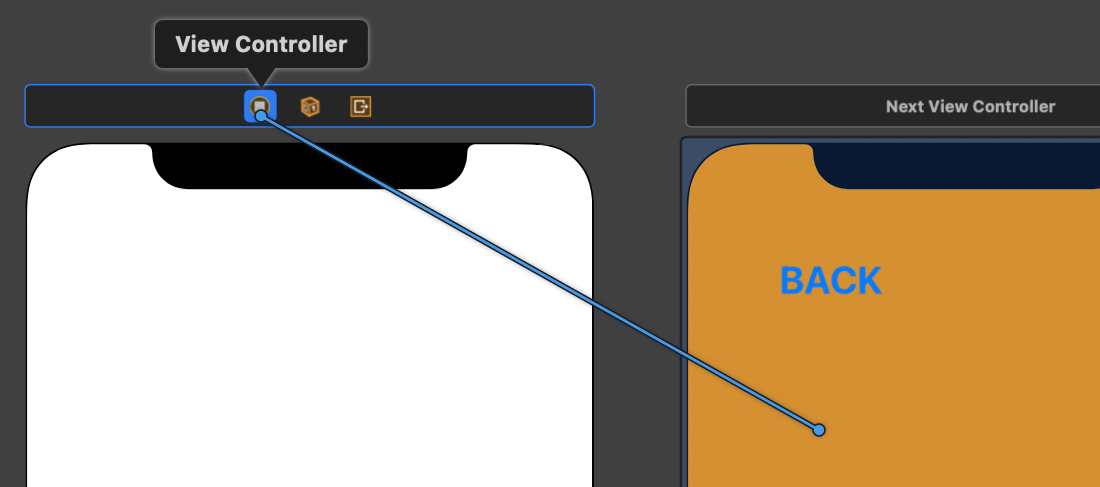
- 上記の『3』と同じくオプションが出てくるので選択する
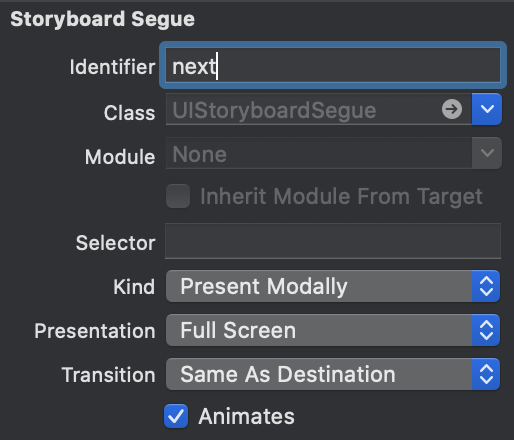
- 画面遷移の矢印("Segue" セグエという)をクリックしてIdentifierで名前(というかID)をつける
-
ifの中でコードを書く
ViewController.swift
    if 条件式 {
      // 『3』で設定したIDを書く
      performSegue(withIdentifier: "next", sender: nil)
    }
変数を渡して画面遷移
-
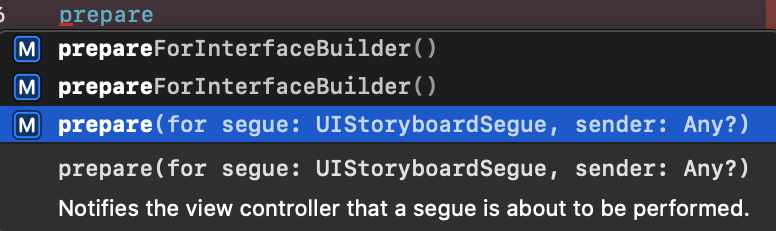
prepareのメソッドを書いて値を渡す準備をする
prepare と書いて出てきたものを選択すると自動補完してくれる。
渡す
ViewController.swift
  // 渡したい変数
  var face = "(´・ω・`)"

  override func prepare(for segue: UIStoryboardSegue, sender: Any?) {

    // 遷移先のコントローラ名を書く。ここではNextViewController
    let nextVC = segue.destination as! NextViewController

    // 受け取る先で定義する変数名(後述)に渡したい変数を代入する
    nextVC.nextFace = face
  }
受け取る
NextViewController.swift
  // 例えばLabelを設置しておいてそこで受け取る
  @IBOutlet weak var nextLabel: UILabel!
  var nextFace = ""

  override func viewDidLoad() {
        super.viewDidLoad()

      nextLabel.text = nextFace
    }
遷移先のLabelに (´・ω・`) が表示される。
実用的なところでは計算した答えとか遷移先に渡すとかがいいと思う。