NuGetからOpenCvSharp4.WindowsおよびOpenCvSharp4.Extensionsをインストールする(執筆時点で最新バージョン4.10.0.20240616)。
またSystem.Drawing.Commonも使用するが、デフォルトではバージョン7.0.0がインストールされる。この場合、OpenCvSharp側とバージョンが合わずビルドに失敗する。OpenCvSharpのバージョンをいくつか落とす、あるいはSystem.Drawing.Commonのバージョンを最新版(執筆時点で8.0.7)へ更新する、などでビルドが通るようになる。
キャリブレーションパターン
キャリブレーションパターンを用意する。
static void ExportAsymmetricCirclesGrid(int w, int h, float spacing, float diameter)
{
    using var printer = MicrosoftPrintToPdf(
        "./asymmetricCirclesGrid.pdf",
        "asymmetric circles grid",
        PaperKind.A4, true);

    printer.PrintPage += (object sender, PrintPageEventArgs e) =>
    {
        var g = e.Graphics ?? throw new Exception();
        g.PageUnit = GraphicsUnit.Millimeter;

        using Pen pen = new(Color.Black, 0.1f);
        using StringFormat sf = new()
        {
            Alignment = StringAlignment.Center,
            LineAlignment = StringAlignment.Center,
        };

        {
            using Font font = new("", 5, GraphicsUnit.Millimeter);
            g.DrawString(
                $"{w}x{h}, {spacing}mm, {diameter}mm",
                font, Brushes.Gray, 10, 10);
        }

        var list = GenerateAsymmetricCirclesGrid(w, h, spacing, diameter);

        g.TranslateTransform(
            297 / 2 - spacing * (w - 0.5f),
            210 / 2 - spacing * (h - 1) / 2);

        foreach (var (x, y) in list)
        {
            g.FillEllipse(
                Brushes.Black,
                x - diameter / 2,
                y - diameter / 2,
                diameter,
                diameter);
        }

        {
            using Font font = new("", diameter / 3, GraphicsUnit.Millimeter);

            foreach (var (i, (x, y)) in list.Select((a, i) => (i, a)))
            {
                g.DrawString($"{i}", font, Brushes.DimGray, x, y, sf);
            }

            foreach (var (x, y) in list)
            {
                g.DrawString($"new({x},{y},0),", font, Brushes.LightGray, x, y + diameter, sf);
            }
        }

        g.ResetTransform();

        g.TranslateTransform(10, 210 - 10);
        {
            var a = 270;
            g.DrawLine(pen, 0, 0, a, 0);

            for (int i = 0; i <= a; i++)
            {
                g.DrawLine(pen, i, 0, i,
                    (i % 10) switch
                    {
                        0 => 3,
                        5 => 2,
                        _ => 1
                    } * -1);
            }
        }
    };

    printer.Print();
}

static (float X, float Y)[] GenerateAsymmetricCirclesGrid(int w, int h, float spacing, float diameter)
{
    List<(float, float)> list = new(w * h);

    for (int y = 0; y < h; y++)
    {
        var v = y * spacing;
        for (int x = 0; x < w; x++)
        {
            var u = x * spacing * 2;
            if ((y & 1) != 0) { u += spacing; }

            list.Add((u, v));
        }
    }

    return [.. list];
}

static PrintDocument MicrosoftPrintToPdf(string printFileName, string documentName, PaperKind paperKind, bool landscape)
=> new()
{
    PrinterSettings = {
        PrinterName = "Microsoft print to PDF",
        PrintFileName = printFileName,
        PrintToFile = true,
    },
    DocumentName = documentName,
    DefaultPageSettings = {
        PaperSize = {
            RawKind = (int)paperKind,
        },
        Landscape = landscape,
    },
};
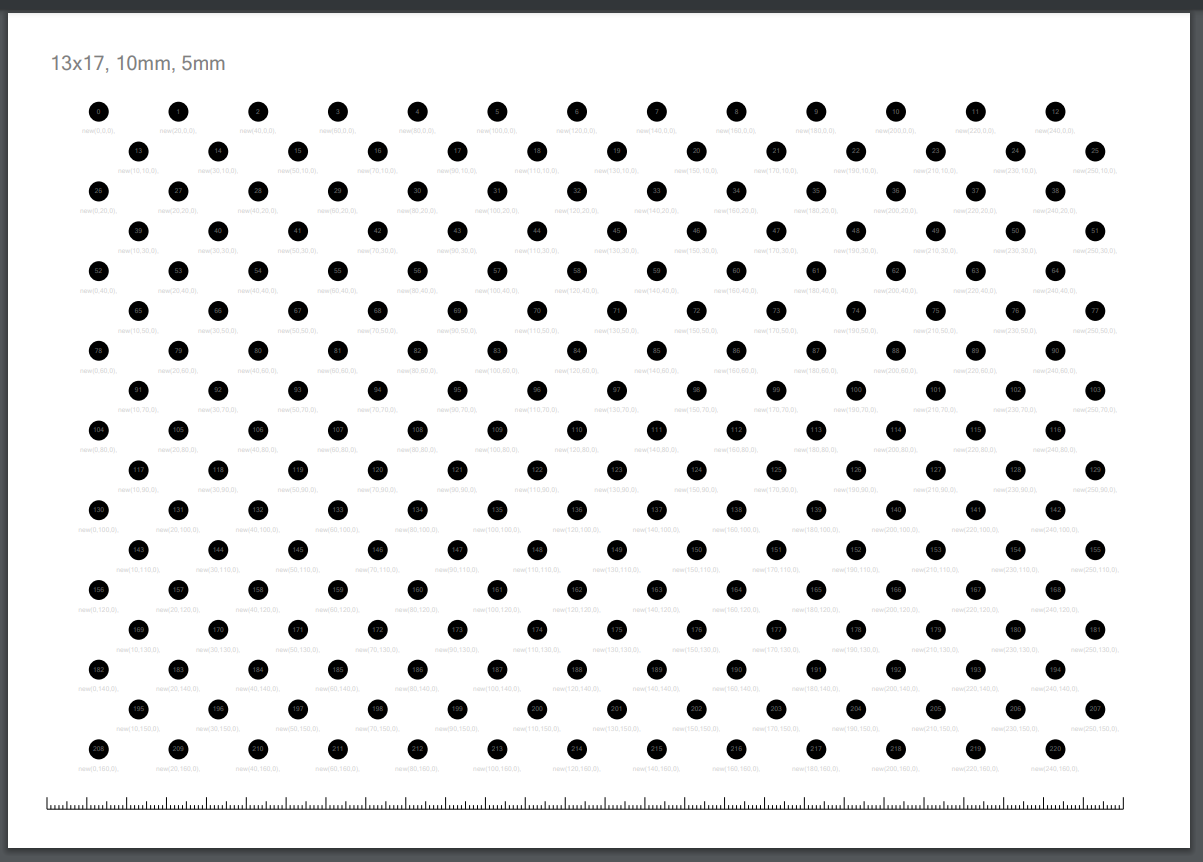
以上のコードを用意してExportAsymmetricCirclesGrid(13, 17, 10, 5);のように呼ぶ。カレントディレクトリにasymmetricCirclesGrid.pdfが出力される。以下のような図になる。
100%で印刷するとおおよそいいくらいの大きさに出力される(キヤノンのプリンタで印刷すると0.3%くらい小さく印刷された)。紙に印刷するほか、PCの画面に表示したりしてもいい。表示面が歪まないように注意。下のバーが1mm、5mm、1cmの目盛りなので、これが正しい大きさになるように表示・印刷する。
h(第2引数)が偶数の場合は回転対称のパターンが出力され、カメラキャリブレーションで適切に処理できない場合があるため、可能な限り奇数を使用する。
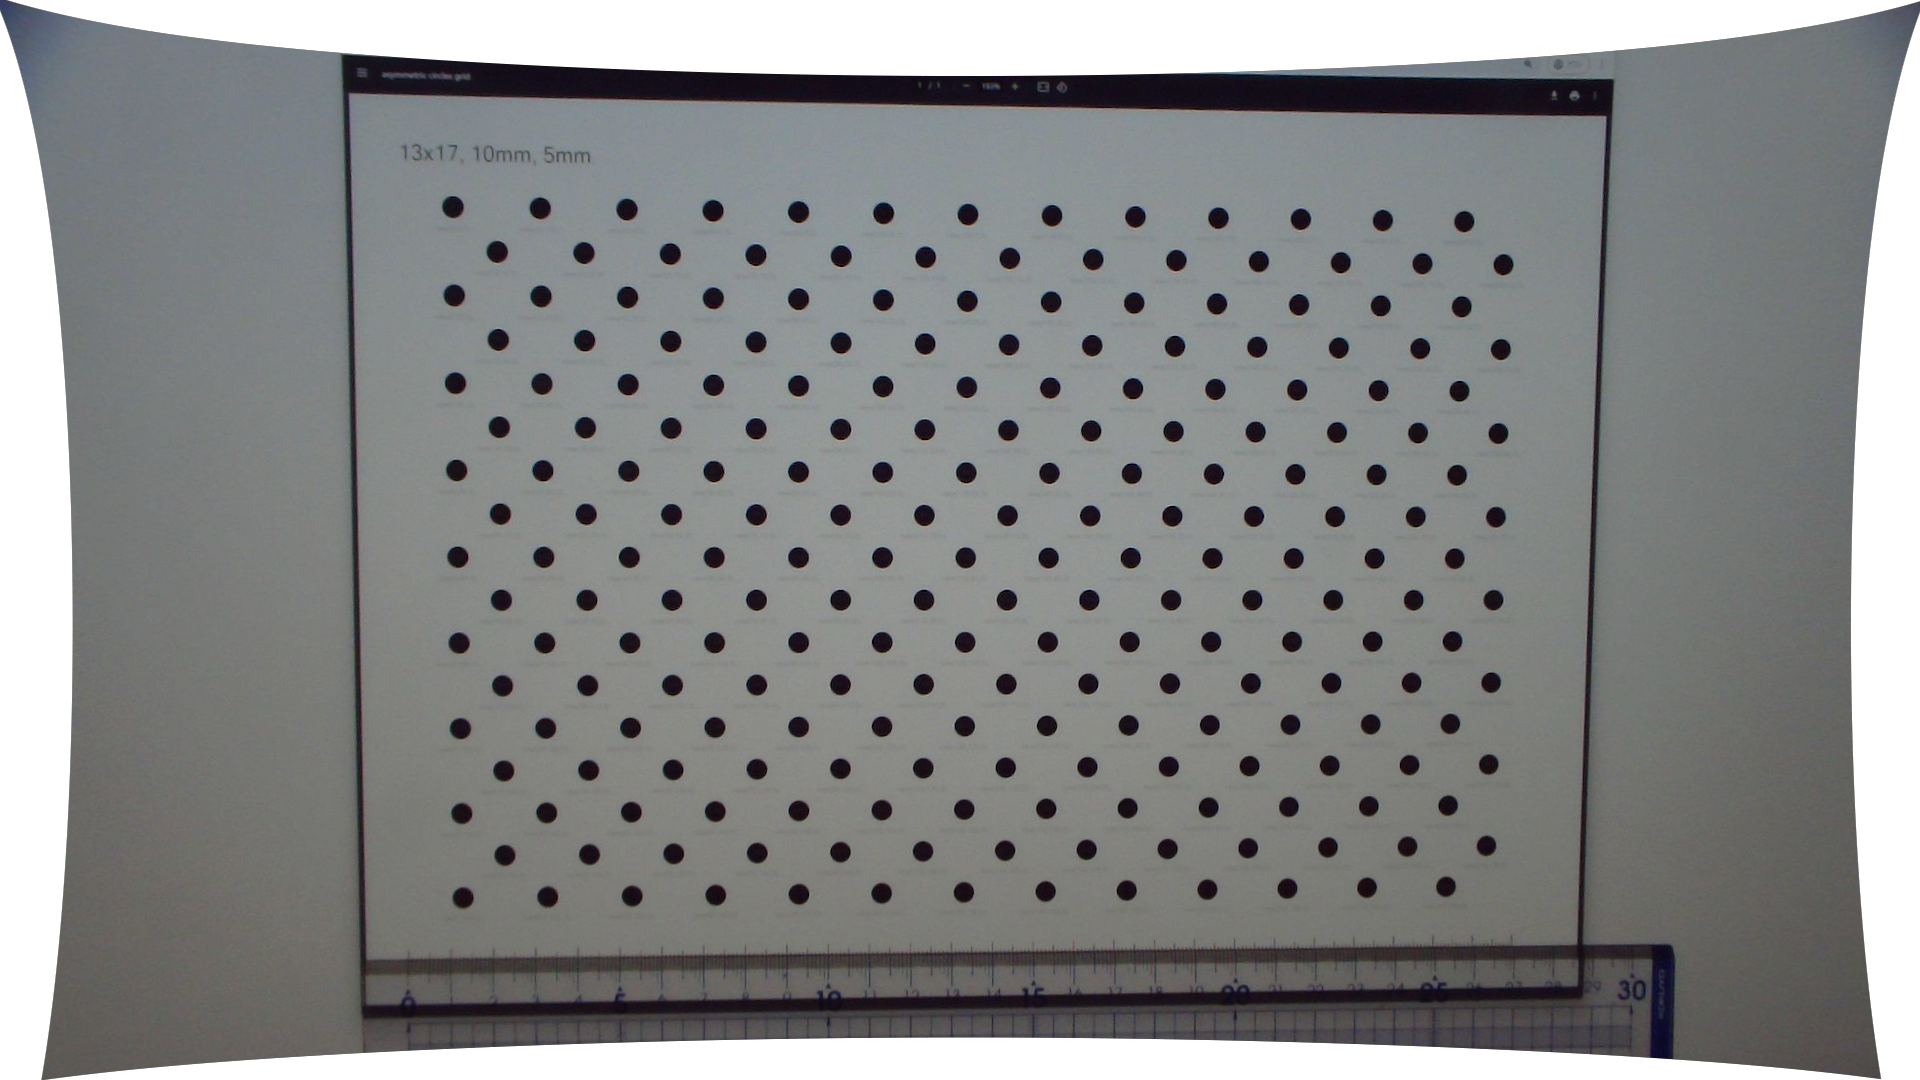
パターンを様々な角度から撮影し、カレントディレクトリのimgsフォルダに保存しておく。パターン全体がある程度の余白を持って画角に収まるように配置する。パターンの法線からある程度の角度を持った画像がほしいが、あまり極端な角度だとパターンを認識できなくなる。
キャリブレーション
static double CameraCalibration(
    OpenCvSharp.Size patternSize, float spacing, out OpenCvSharp.Size imageSize,
    out double[,] cameraMatrix, out double[] distCoeffs,
            CalibrationFlags calibrationFlags = CalibrationFlags.None)
{
    var objp =
        GenerateAsymmetricCirclesGrid(
            patternSize.Width, patternSize.Height, spacing, 0)
        .Select(a => new Point3f(a.X, a.Y, 0))
        .ToArray();

    List<Point2f[]> imgp = [];
    imageSize = default;

    foreach (var file in Directory.GetFiles("imgs"))
    {
        using var bmp = LoadBitmap(file);
        using var mat = bmp.ToMat();

        imageSize = mat.Size();

        try
        {
            if (Cv2.FindCirclesGrid(
                mat, patternSize, out var centers,
                FindCirclesGridFlags.AsymmetricGrid))
            {
                Console.WriteLine($"+ {file}");
                imgp.Add(centers);
            }
            else
            {
                Console.WriteLine($"- {file}");
            }
        }
        catch (Exception ex)
        {
            Console.WriteLine($"e {file} {ex.Message}");
        }
    }

    cameraMatrix = new double[3, 3];
    distCoeffs = new double[5];
    return Cv2.CalibrateCamera(
        Enumerable.Repeat(objp, imgp.Count),
        imgp, imageSize, cameraMatrix, distCoeffs,
        out _, out _, calibrationFlags);
}

static Bitmap LoadBitmap(string filename)
{
    using FileStream fs = new(filename, FileMode.Open, FileAccess.Read);
    using var img = Image.FromStream(fs);
    return new(img);
}
以下のように実行する。
var pixelSize = 2.8e-3;
Console.WriteLine($$"""
    {{CameraCalibration(new(13, 17), 10, out var imageSize, out var cameraMatrix, out var distCoeffs):0.0000}}
    image size
        {{imageSize.Width}}x{{imageSize.Height}}
    camera matrix
        { {{cameraMatrix[0, 0],7:0.00}}, {{cameraMatrix[0, 1],7:0.00}}, {{cameraMatrix[0, 2],7:0.00}} },
        { {{cameraMatrix[1, 0],7:0.00}}, {{cameraMatrix[1, 1],7:0.00}}, {{cameraMatrix[1, 2],7:0.00}} },
        { {{cameraMatrix[2, 0],7:0.00}}, {{cameraMatrix[2, 1],7:0.00}}, {{cameraMatrix[2, 2],7:0.00}} }
    distCoeffs
        [ {{string.Join(", ", distCoeffs.Select(a => $"{a,7:0.0000}"))}} ]

    focal length
        {{cameraMatrix[0, 0] * pixelSize,7:0.000}} {{cameraMatrix[1, 1] * pixelSize,7:0.000}}
    optical center
        {{cameraMatrix[0, 2] / imageSize.Width,7:0.00000}} {{cameraMatrix[1, 2] / imageSize.Height,7:0.00000}}
    """);
以下のような結果が出力される。
0.2460
image size
  1920x1080
camera matrix
  { 2238.89,    0.00,  962.61 },
  {    0.00, 2239.66,  610.27 },
  {    0.00,    0.00,    1.00 }
distCoeffs
  [ -0.4252,  0.7230,  0.0004, -0.0000, -1.9806 ]

focal length
    6.269   6.271
optical center
  0.50136 0.56506
最初の行の数字が小さいほうが良いらしい。
カメラ行列と歪み係数は後で使用する。
カメラ行列では焦点距離はピクセルサイズ単位で出力されるので、実際のピクセルサイズと掛けることで、直感的な単位(例えばミリメートル)で表記した焦点距離となる。
画像補正
static Bitmap Undistort(Bitmap src, double[,] cameraMatrix, double[] distCoeffs, double[,]? newCameraMatrix = null)
{
    using var matCam1 = ToMat(cameraMatrix);
    using var matDist = ToMat(distCoeffs);
    using var matCam2 = ToMat(newCameraMatrix ?? cameraMatrix);

    using var matSrc = src.ToMat();
    using var matDst = new Mat();
    Cv2.Undistort(matSrc, matDst, matCam1, matDist, matCam2);

    return matDst.ToBitmap();
}

static Mat<T> ToMat<T>(T[] a) where T : unmanaged
 => new([1, a.Length], a);

static Mat<T> ToMat<T>(T[,] a) where T : unmanaged
 => new([a.GetLength(0), a.GetLength(1)], a);
以上のようなコードを以下のように使用する。
var cameraMatrix = new double[3, 3] {
    { 2238.89,    0.00,  962.61 },
    {    0.00, 2239.66,  610.27 },
    {    0.00,    0.00,    1.00 }
};
double[] distCoeffs = [-0.4252, 0.7230, 0.0004, -0.0000, -1.9806];
double[,]? newCameraMatrix = null;

using var bmp1 = LoadBitmap(Directory.GetFiles("imgs")[0]);
using var bmp2 = Undistort(bmp1, cameraMatrix, distCoeffs, newCameraMatrix);
この時のカメラ行列や歪み係数は先に得たものを使用する。
以下に撮影した画像と歪み補正を行った画像を示す。
歪みを補正する際に取得できない領域はトリミングされた状態になる。
隅に無効な領域を含んででも最大限広い領域を使いたい場合はGetOptimalNewCameraMatrixで新しいカメラ行列を取得する。
newCameraMatrix = Cv2.GetOptimalNewCameraMatrix(
    cameraMatrix, distCoeff, new(1920, 1080), 1, new(1920, 1080), out _);
FFmpegで使う
OpenCVで得た歪み係数をFFmpegで使う方法は以下で説明されている。
[FFmpeg-devel] ffmpeg-filter: lenscorrection parameters converted from OpenCV
FFmpegでは歪み係数の中でk1, k2しか使えないため、CameraCalibrationのオプションにCalibrationFlags.FixK3を追加することでk3を除いた歪み係数を得る。
var (w, h) = imageSize;
var f = new[] { cameraMatrix[0, 0], cameraMatrix[1, 1] }.Average();
var foo = (w * w + h * h) / (4 * f * f);

Console.WriteLine(
    "-vf lenscorrection=" +
    string.Join(':',
        $"cx={cameraMatrix[0, 2] / w,7:0.00000}",
        $"cy={cameraMatrix[1, 2] / h,7:0.00000}",
        $"k1={distCoeffs[0] * foo:0.0000e0}",
        $"k2={distCoeffs[1] * foo * foo:0.0000e0}"));
これによって-vf lenscorrection=cx=0.50358:cy=0.57031:k1=-1.0072e-1:k2=2.9979e-2のような結果が得られるので、このオプションをFFmpegに渡す。


