Xamarin.Forms 3.5 で FontImageSource が追加され、 FontAwesome や Material Design Icons などのアイコンフォントが利用しやすくなりました。
さらに、Xamarin.Forms 4.0 では、全てのシーンで FontImageSource が利用できるようになりました。
その手順を示します。尚、このコンテンツは、
- Simple way to use icon fonts in Xamarin Forms projects – Trailhead Technology Partners
- Using Font Icons in Xamarin.Forms: Goodbye Images, Hello Fonts! - James Montemagno
を参考にしています。
1. アイコンフォントをプロジェクトに追加する
アイコンフォントを利用するには、Webフォントファイル(.ttf) を入手して、 各プラットフォームのプロジェクト に追加する必要があります。
以降、Material Design Font を例に説明を進めます。
まず、
から、 materialdesignicons-webfont.ttf を入手します。
次に Android と iOS のプロジェクトにこれを追加します。
Android 側
/Assets というディレクトリに materialdesignicons-webfont.ttf を追加します。ビルドアクションは、自動で AndroidAsset になっているはずですが、一応確認しておきます。
iOS 側
任意のディレクトリ(ここではルート)に、 materialdesignicons-webfont.ttf を追加して、ビルドアクションを BundleResource に設定します。
次に info.plist を開き、 Source タブを選択して、 Fonts provided by application エントリを追加し、値の種類を Array として、その要素として materialdesignicons-webfont.ttf を設定します(下図参照)。
2. 共通プロジェクトでリソースの定義を行う
次に共通プロジェクトの App.xaml に、次のように記述します。
App.xaml
<?xml version="1.0" encoding="utf-8"?>
<Application xmlns="http://xamarin.com/schemas/2014/forms" xmlns:x="http://schemas.microsoft.com/winfx/2009/xaml" x:Class="XamMaterialTodo.App">
    <Application.Resources>

<!-- アイコンフォント設定ここから -->
        <OnPlatform x:Key="MaterialFontFamily" x:TypeArguments="x:String">
            <On Platform="Android" Value="materialdesignicons-webfont.ttf#Material Design Icons" />
            <On Platform="iOS" Value="Material Design Icons" />
        </OnPlatform>
<!-- アイコンフォント設定ここまで -->

    </Application.Resources>
</Application>
x:Key="MaterialFontFamily" は後ほど各コントロールでのフォントファミリの指定で多用します。
Android 側の <On Platform="Android" Value="materialdesignicons-webfont.ttf#Material Design Icons" /> は、Value に ttf を指定しますが、 # 以降の文字列は何でもよさそうです。
同様に iOS の Value 値もなんでも良さそうです。
3. アイコンフォントの使い方
テキストの一部として使う
Label や Entry の一部にアイコンフォントを使用する場合は、次のようにします。
<Label HorizontalOptions="FillAndExpand"
FontFamily="{DynamicResource MaterialFontFamily}"
Text="これはアイコンフォントの「 ﷺ 」です。" />
この XAML は次のような表示になります。
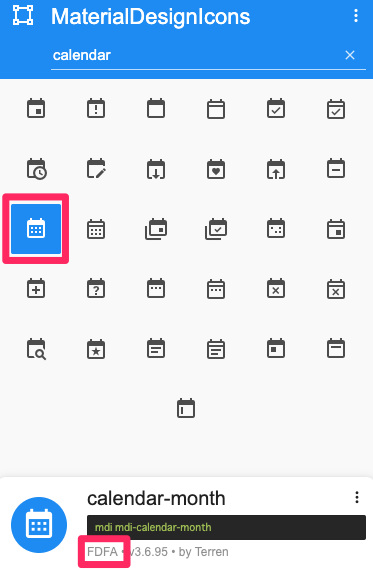
Text 中に指定した FDFA が、Material Design Icon のカレンダーを示す文字コードです。
文字コードを知るには、 MaterialDesignIcons Picker という Chrome 拡張や、IconFont2Code を使うと便利です。
画像として使う
イメージを指定するプロパティでは、以下のように使用します。
<ImageButton
BackgroundColor="Green"
WidthRequest="50" HeightRequest="50"
VerticalOptions="Center" HorizontalOptions="Center">
<ImageButton.Source>
<FontImageSource
FontFamily="{DynamicResource MaterialFontFamily}"
Glyph="" />
</ImageButton.Source>
</ImageButton>
Glyph="" でアイコンフォントの文字コードを指定します。
F12C はチェックマークを示すので、次のような表示になります。
文字コードの代わりに、分かりやすい名称で指定する
文字コードの直接指定では、その形状を推測する事も難しいので、分かりやすい名前をつけます。
App.xaml に次のように定義します。
<?xml version="1.0" encoding="utf-8"?>
<Application xmlns="http://xamarin.com/schemas/2014/forms" xmlns:x="http://schemas.microsoft.com/winfx/2009/xaml" x:Class="XamMaterialTodo.App">
<Application.Resources>
<OnPlatform x:Key="MaterialFontFamily" x:TypeArguments="x:String">
<On Platform="Android" Value="materialdesignicons-webfont.ttf#Material Design Icons" />
<On Platform="iOS" Value="Material Design Icons" />
</OnPlatform>
<!-- アイコンフォントの名称定義 ここから -->
<x:String x:Key="check"></x:String>
<x:String x:Key="calendar-month">ﷺ</x:String>
<!-- アイコンフォントの名称定義 ここまで -->
</Application.Resources>
</Application>
これで F12C の代わりに check、FDFA の代わりに calendar-month が使えるようになりました。
上記のサンプルは、次のように書き換えることができます。
<Label HorizontalOptions="FillAndExpand">
    <Label.FormattedText>
        <FormattedString>
            <Span Text="これはアイコンフォントの「 " />
            <Span FontFamily="{DynamicResource MaterialFontFamily}" Text="{StaticResource calendar-month}" />
            <Span Text=" 」です。" />
        </FormattedString>
    </Label.FormattedText>
</Label>
Text プロパティの一部に {StaticResource xxx} とは記述できないので、Span を使います。
<ImageButton
    BackgroundColor="Green"
    WidthRequest="50" HeightRequest="50"
    VerticalOptions="Center" HorizontalOptions="Center">
    <ImageButton.Source>
        <FontImageSource
            FontFamily="{DynamicResource MaterialFontFamily}"
            Glyph="{StaticResource check}" />
    </ImageButton.Source>
</ImageButton>
Glyph の指定で文字コードの代わりに、定義した StaticResource 値を使用します。
おわりに
de:code 2019 に関係するサンプルとして作成した、
で、FontImageSource を使っているので、参考にしてください。


