目標と完成形
Unityで手/指の向きを検出する。ゲームに使えるように上下左右を認識させます。
Webカメラを用いて背景を黒で認識させることを前提としています。
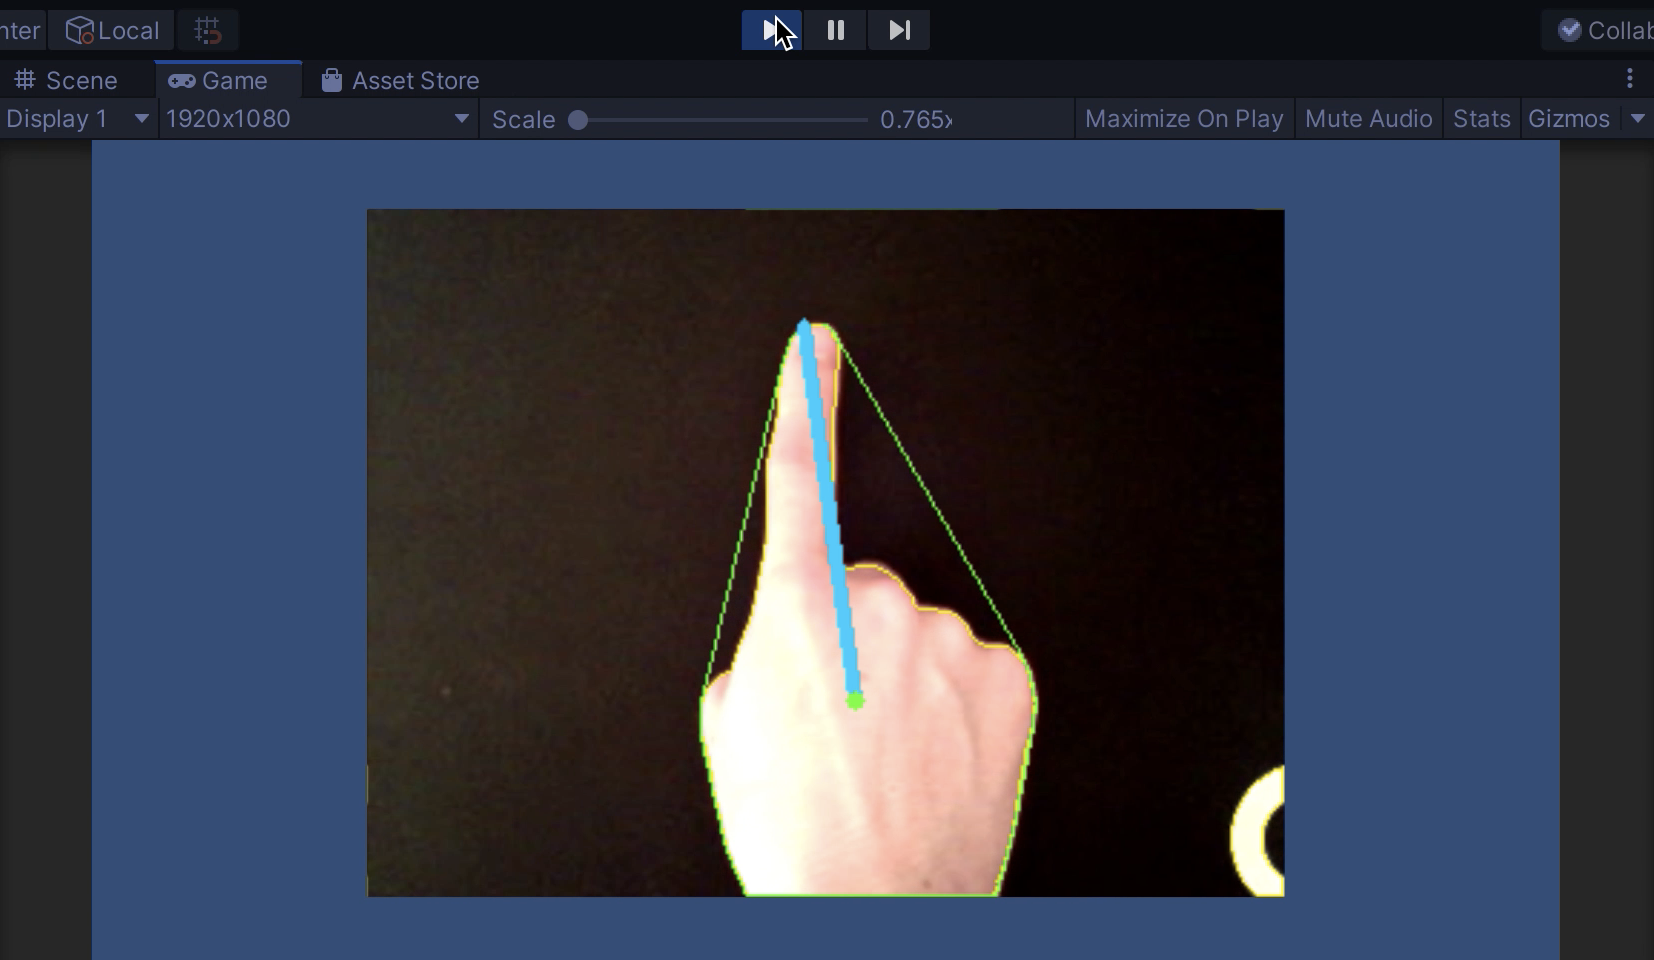
環境は以下になります。
バージョン: Unity 2019.4.29f1
OS: MacOS Big Sur 11.5.2
総コン Advent Calendar 2021 5日目の記事です。
適当なUnityプロジェクトを作成します
今回はOpenCVforUnityのimportが終わった2Dプロジェクトを前提とします。
こちらにimport方法をまとめたので参考にどうぞ
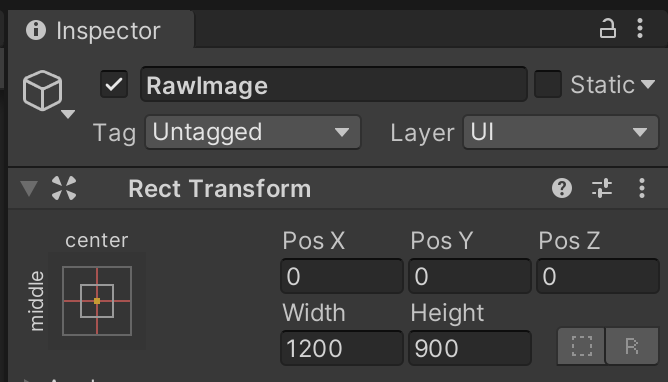
Raw Imageを設置する
HierachyViewで右クリック UI -> Raw Image を選択してRaw Imageを作ります。

Raw ImageのWidthは1200, Heightは900くらいで設定します。
手の向きを検出するコードを作成する
Asset内で Create -> C# script をします。
名前は「HandCapture」などにします。以下のコードを記載してください。
コードを書き終わったら、先程作ったRaw Imageにドラッグ&ドロップしてアタッチします。
using UnityEngine;
using UnityEngine.UI;
using System.Collections.Generic;
using OpenCVForUnity.CoreModule;
using OpenCVForUnity.UnityUtils;
using OpenCVForUnity.ImgprocModule;

public class HandCapture : MonoBehaviour
{
    //手がどの向きを向いているかを記録する変数、別のスクリプトから参照できるようにする
    //Up:1,Down:2,Left:3,Right:4
    public static int HandDirection = 0;
    //2値化をする際の閾値
    private int threshhold = 127;

    WebCamTexture webCamTexture;
    Mat srcMat;  //画面表示のためのMat
    Mat srcMat2; //2値化に用いるためのMat
    Texture2D dstTexture;
    WebCamDevice[] webCamDevice;  //カメラデバイスを取得するための配列

    // 初期化
    void Start()
    {
        //カメラの取得
        webCamDevice = WebCamTexture.devices;
        //Webカメラの開始
        this.webCamTexture = new WebCamTexture(webCamDevice[0].name, 256, 256, 30);
        this.webCamTexture.Play();
    }

    void Update()
    {
        //描画と手の方向の入力
        UpdateHandDirection();
    }

    //シーン遷移時にカメラの結合を離す(Windowsの場合に必須)
    private void OnDestroy()
    {
        this.webCamTexture.Stop();
        Destroy(this.webCamTexture);
    }

    //描画と手の方向の入力
    void UpdateHandDirection()
    {
        //Webカメラ準備前は無処理
        if (this.webCamTexture.width <= 16 || this.webCamTexture.height <= 16) return;

        //初期化
        if (this.srcMat == null)
        {
            this.srcMat = new Mat(this.webCamTexture.height, this.webCamTexture.width, CvType.CV_8UC3);
            this.dstTexture = new Texture2D(this.srcMat.cols(), this.srcMat.rows(), TextureFormat.RGBA32, false);
        }
        //初期化
        if (this.srcMat2 == null)
        {
            this.srcMat2 = new Mat(this.webCamTexture.height, this.webCamTexture.width, CvType.CV_8UC3);
            this.dstTexture = new Texture2D(this.srcMat2.cols(), this.srcMat2.rows(), TextureFormat.RGBA32, false);
        }

        //WebCamTextureからMatへの変換
        Utils.webCamTextureToMat(this.webCamTexture, this.srcMat);
        Utils.webCamTextureToMat(this.webCamTexture, this.srcMat2);

        //グレースケールへの変換
        Imgproc.cvtColor(this.srcMat2, this.srcMat2, Imgproc.COLOR_RGBA2GRAY);
        //2値化
        Imgproc.threshold(this.srcMat2, this.srcMat2, threshhold, 255, 0);

        //輪郭を求める
        List<MatOfPoint> contours = new List<MatOfPoint>();
        //輪郭抽出の処理
        Imgproc.findContours(this.srcMat2, contours, new Mat(), Imgproc.RETR_EXTERNAL, Imgproc.CHAIN_APPROX_SIMPLE);

        //マスク領域の生成
        Imgproc.drawContours(this.srcMat2, contours, -1, new Scalar(255), -1);
        Imgproc.fillPoly(this.srcMat2, contours, new Scalar(255));

        //一番面積の大きい領域を手として認識するための処理
        int index = -1;
        double area = 0;
        for (int i = 0, n = contours.Count; i < n; i++)
        {
            double tmp = Imgproc.contourArea(contours[i]);
            if (area < tmp)
            {
                area = tmp;
                index = i;
            }
        }

        //手の概形を抽出する
        MatOfInt hull = new MatOfInt();

        //重心の座標
        Vector2Int moment = new Vector2Int(0,0);

        //重心を求める
        if (index != -1)
        {
            Imgproc.convexHull(contours[index], hull);
            Moments mu = Imgproc.moments(contours[index], false);
            moment.x = (int)(mu.m10 / mu.m00);
            moment.y = (int)(mu.m01 / mu.m00);
        }

        //重心から凸包の1点への最大距離
        float maxDistance = 0;
        //最大距離の凸包座標
        Vector2Int max = new Vector2Int(0, 0);

        //描画用に凸包座標を入れるためのList
        List<int> convexHullListX = new List<int>();
        List<int> convexHullListY = new List<int>();

        //重心から最も遠い凸包座標を求める
        for (int k = 0; k < hull.size().height; k++)
        {
            int hullIndex = (int)hull.get(k, 0)[0];
            double[] m = contours[index].get(hullIndex, 0);

            //凸包図形の座標
            int convexHullX = 0;
            int convexHullY = 0;
            convexHullX = (int)m[0];
            convexHullY = (int)m[1];

            //描画用にListに追加
            convexHullListX.Add(convexHullX);
            convexHullListY.Add(convexHullY);

            //手首の誤検出を防ぐために座標が画面端の場合は無視する
            if (convexHullX <= 10 || convexHullY <= 10
                || convexHullX >= this.webCamTexture.width - 10 || convexHullY >= this.webCamTexture.height - 10)
            {
                continue;
            }

            //重心と凸包座標の距離を求める
            float distance = 0;
            float xDistance = 0;
            float yDistance = 0;
            xDistance = Mathf.Pow((moment.x - (int)m[0]), 2);
            yDistance = Mathf.Pow((moment.y - (int)m[1]), 2);
            distance = Mathf.Sqrt(xDistance + yDistance);
            if (maxDistance < distance)
            {
                maxDistance = distance;
                //最大の距離の座標を記録
                max.x = convexHullX;
                max.y = convexHullY;
            }
        }

        //重心からのベクトル
        Vector2Int vector2 = new Vector2Int(0,0);
        vector2.x = max.x - moment.x;
        vector2.y = max.x - moment.y;
        //指がどの向きを向いているかの更新処理
        if (Mathf.Abs(vector2.x) < Mathf.Abs(vector2.y))
        {
            if (vector2.y < 0)
            {
                Debug.Log("Up");
                HandDirection = 1;
            }
            else
            {
                Debug.Log("Down");
                HandDirection = 2;
            }
        }
        else
        {
            if (vector2.x < 0)
            {
                Debug.Log("Left");
                HandDirection = 3;
            }
            else
            {
                Debug.Log("Right");
                HandDirection = 4;
            }
        }

        //輪郭の描画
        Scalar color = new Scalar(255, 241, 0);
        Imgproc.drawContours(this.srcMat, contours, -1, color, 0);
        //凸包の描画
        for (int i = 0; i < convexHullListX.Count - 1; i++)
        {
            Imgproc.line(this.srcMat, new Point(convexHullListX[i], convexHullListY[i]),
            new Point(convexHullListX[i + 1], convexHullListY[i + 1]), new Scalar(90, 255, 25), 1);
        }
        //重心からのベクトルの描画
        Imgproc.line(this.srcMat, new Point(max.x, max.y), new Point(moment.x, moment.y), new Scalar(0, 204, 255), 3);
        //重心の描画
        Imgproc.line(this.srcMat, new Point(moment.x, moment.y), new Point(moment.x, moment.y), new Scalar(90, 255, 25), 5);
        //MatからTexture2Dへの変換
        Utils.matToTexture2D(this.srcMat, this.dstTexture);
        //表示
        GetComponent<RawImage>().texture = this.dstTexture;
    }
}
再生と実行
最後にUnityの再生ボタンを押して動作確認が済めば完了です。
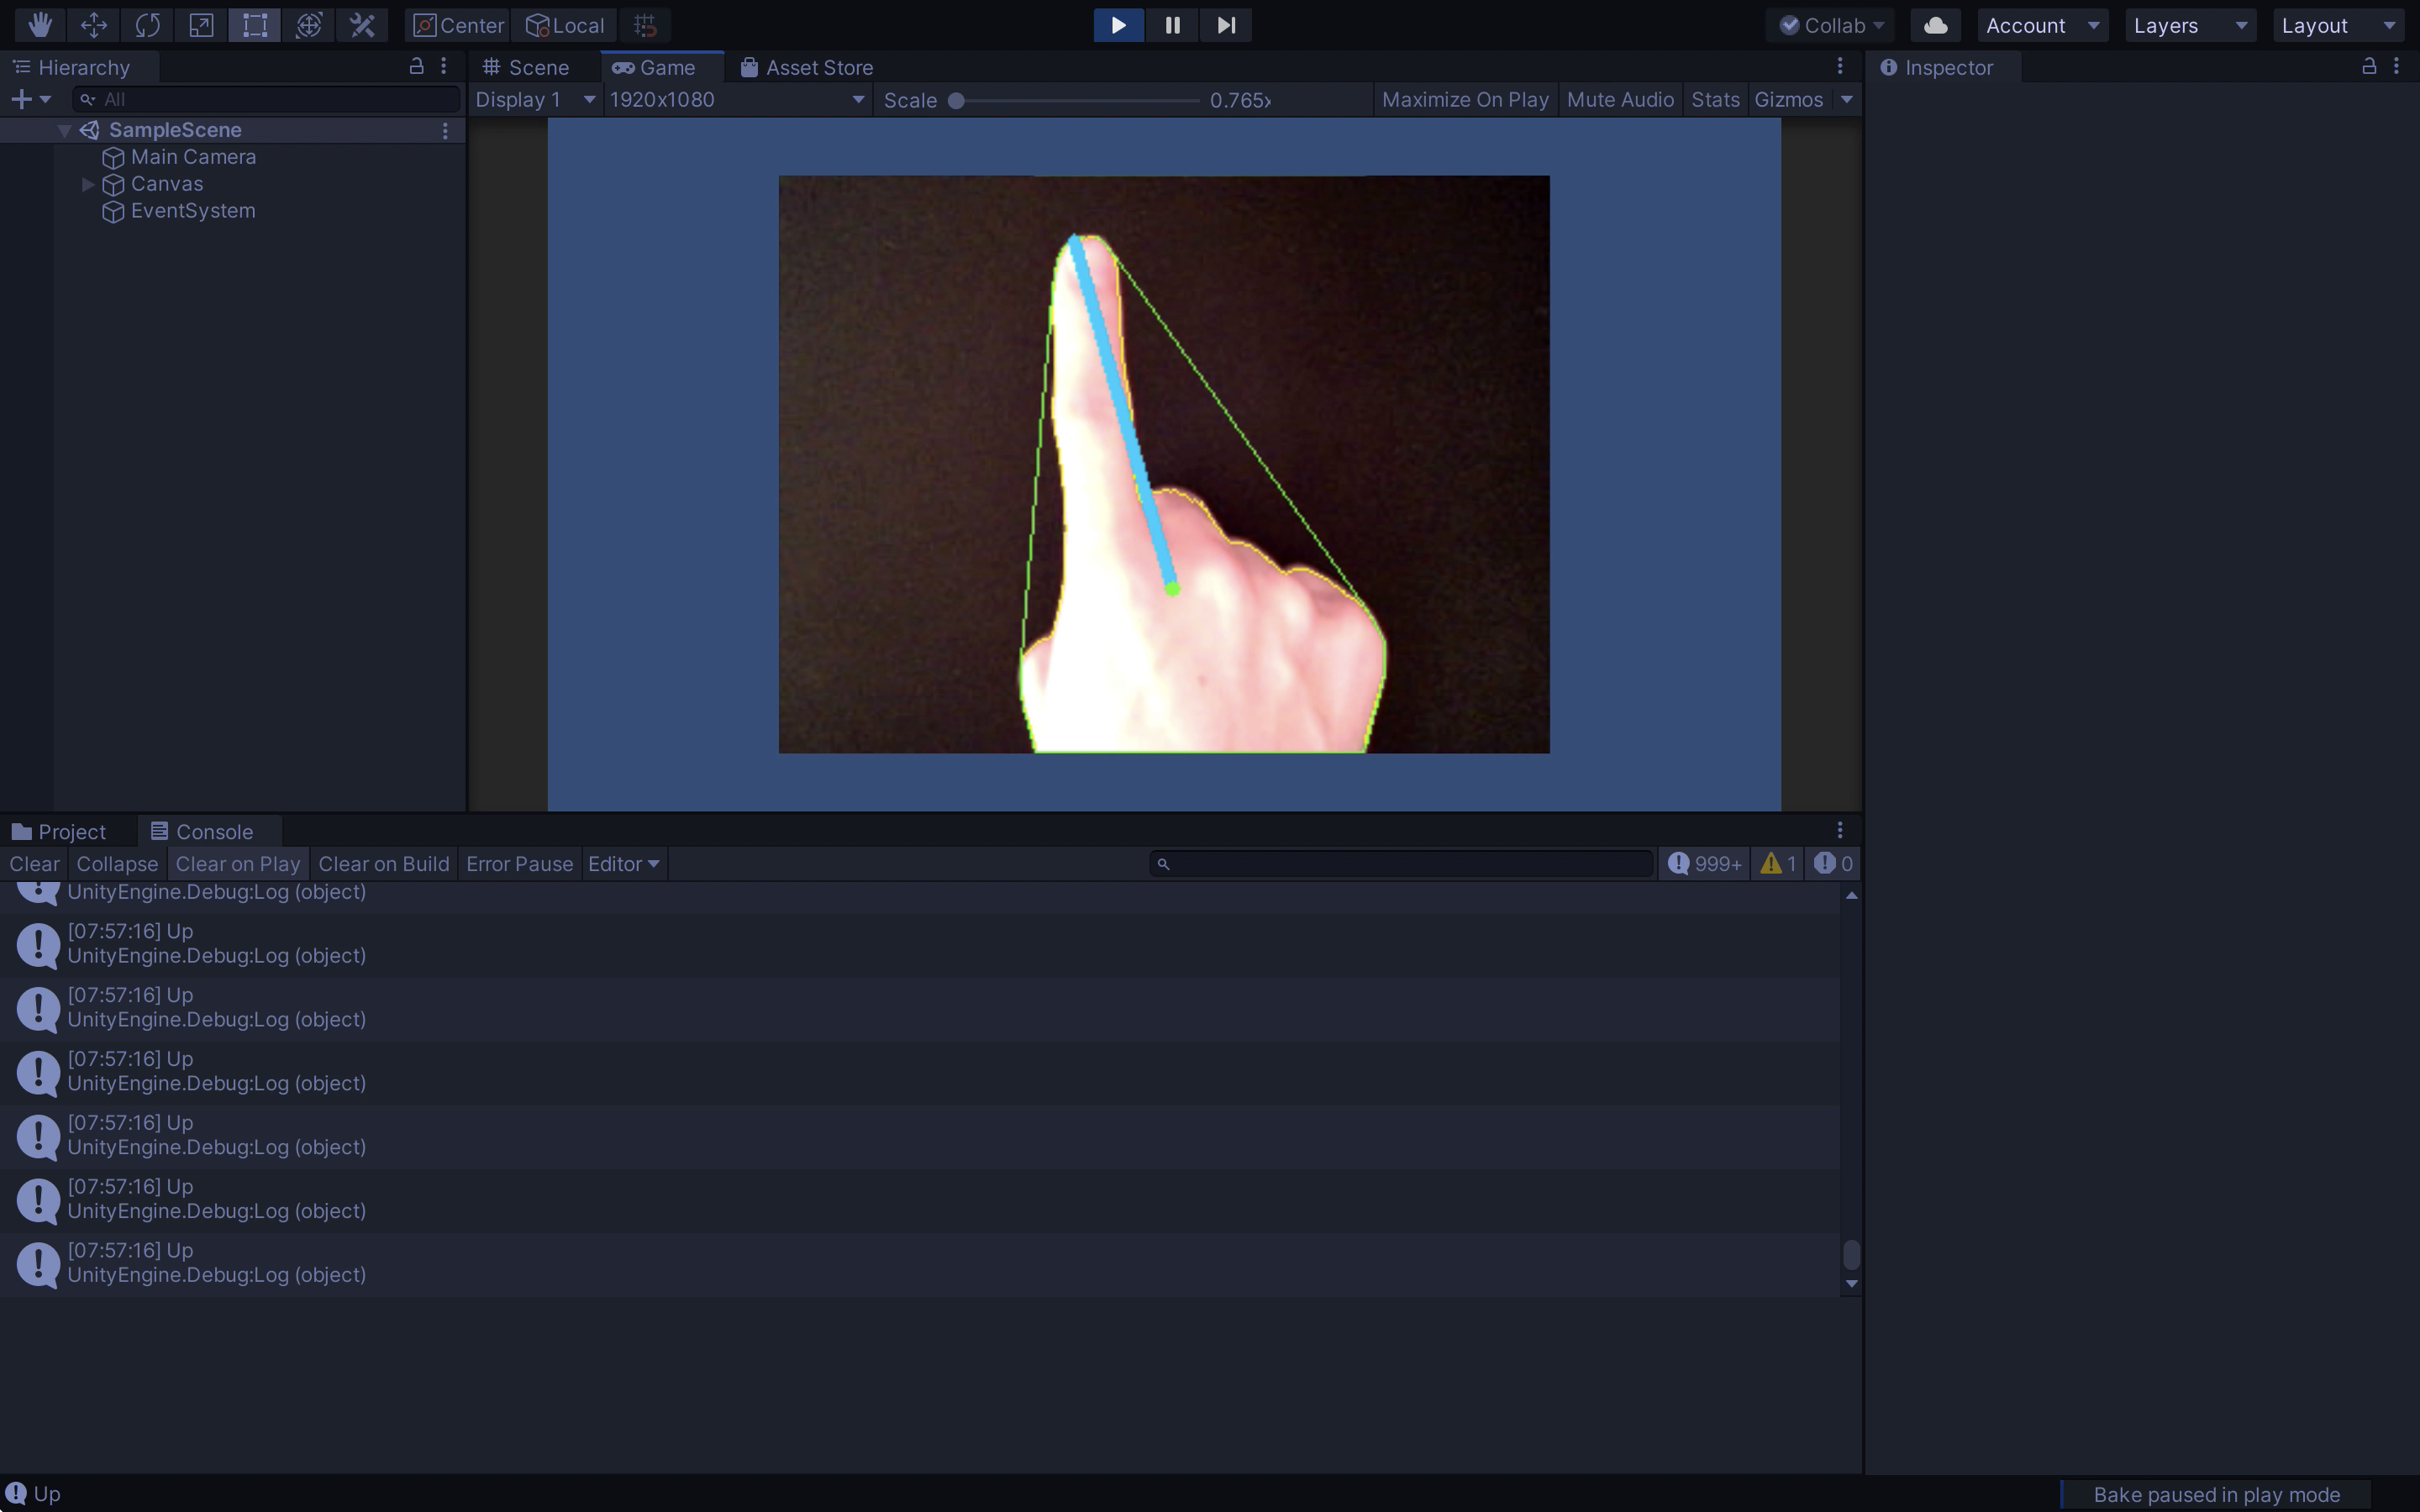
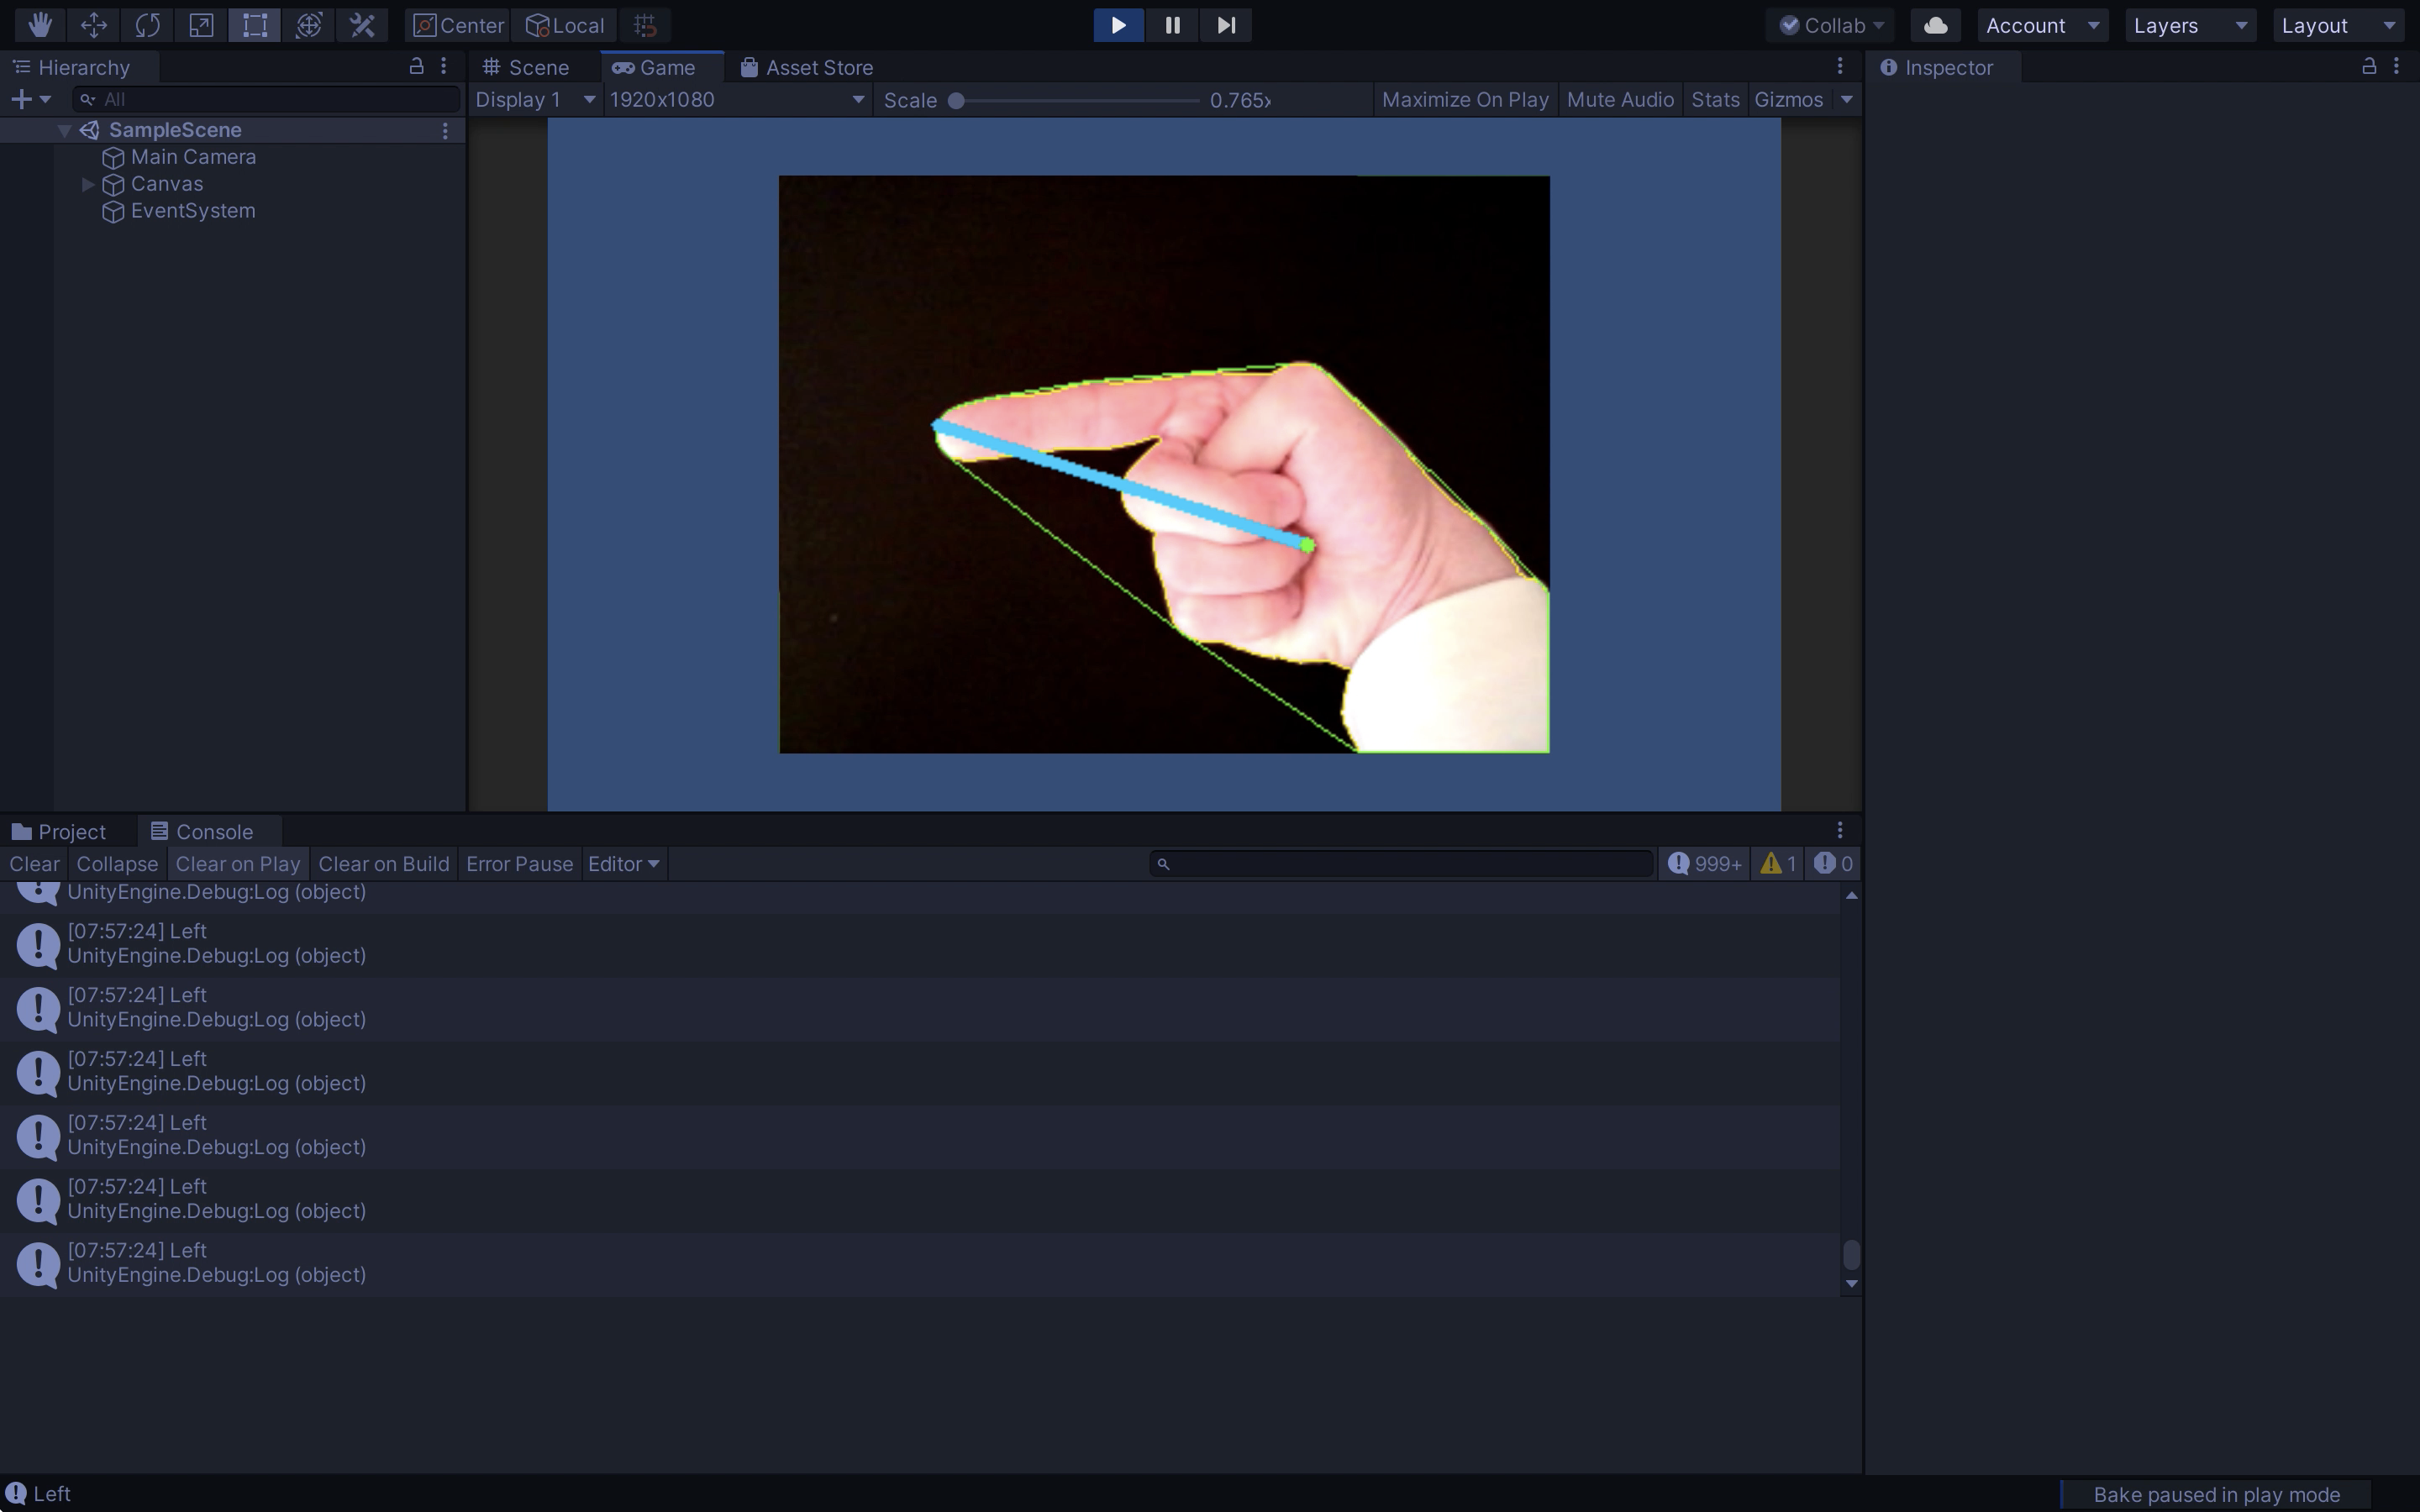
ConsoleViewに現在認識している向きが表示されると思います。
Upの場合
Leftの場合
Rightの場合
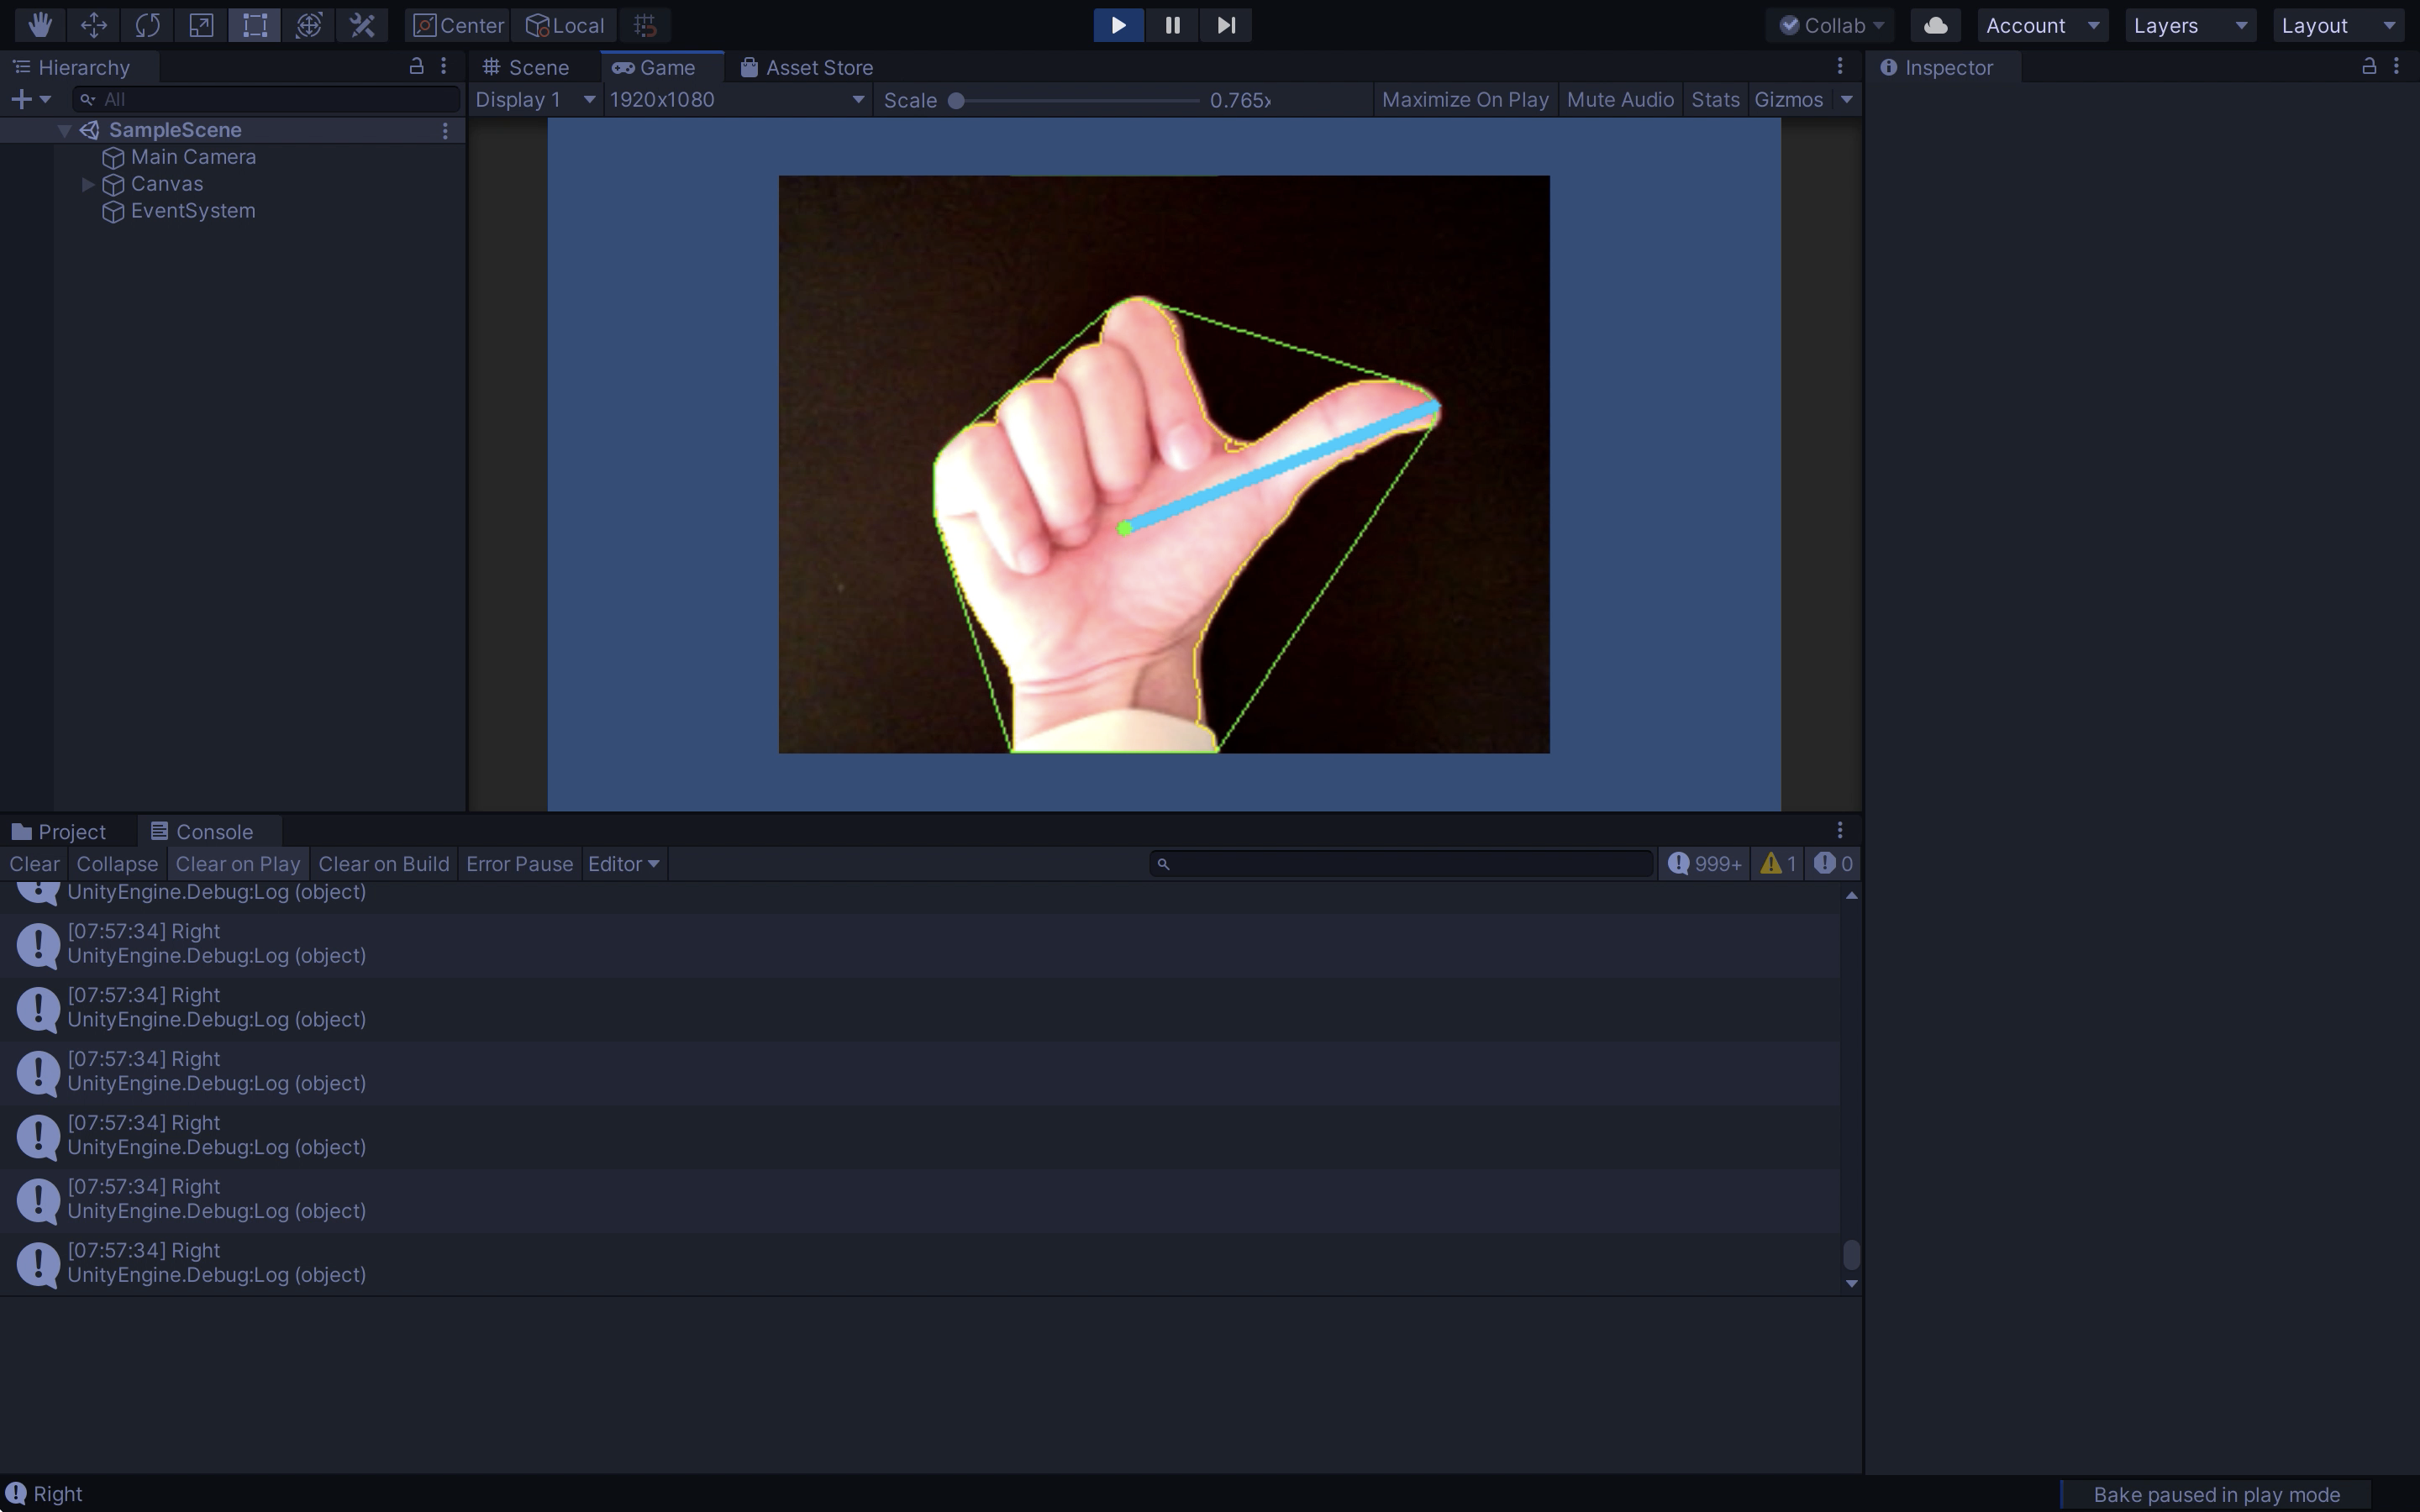
Downの場合
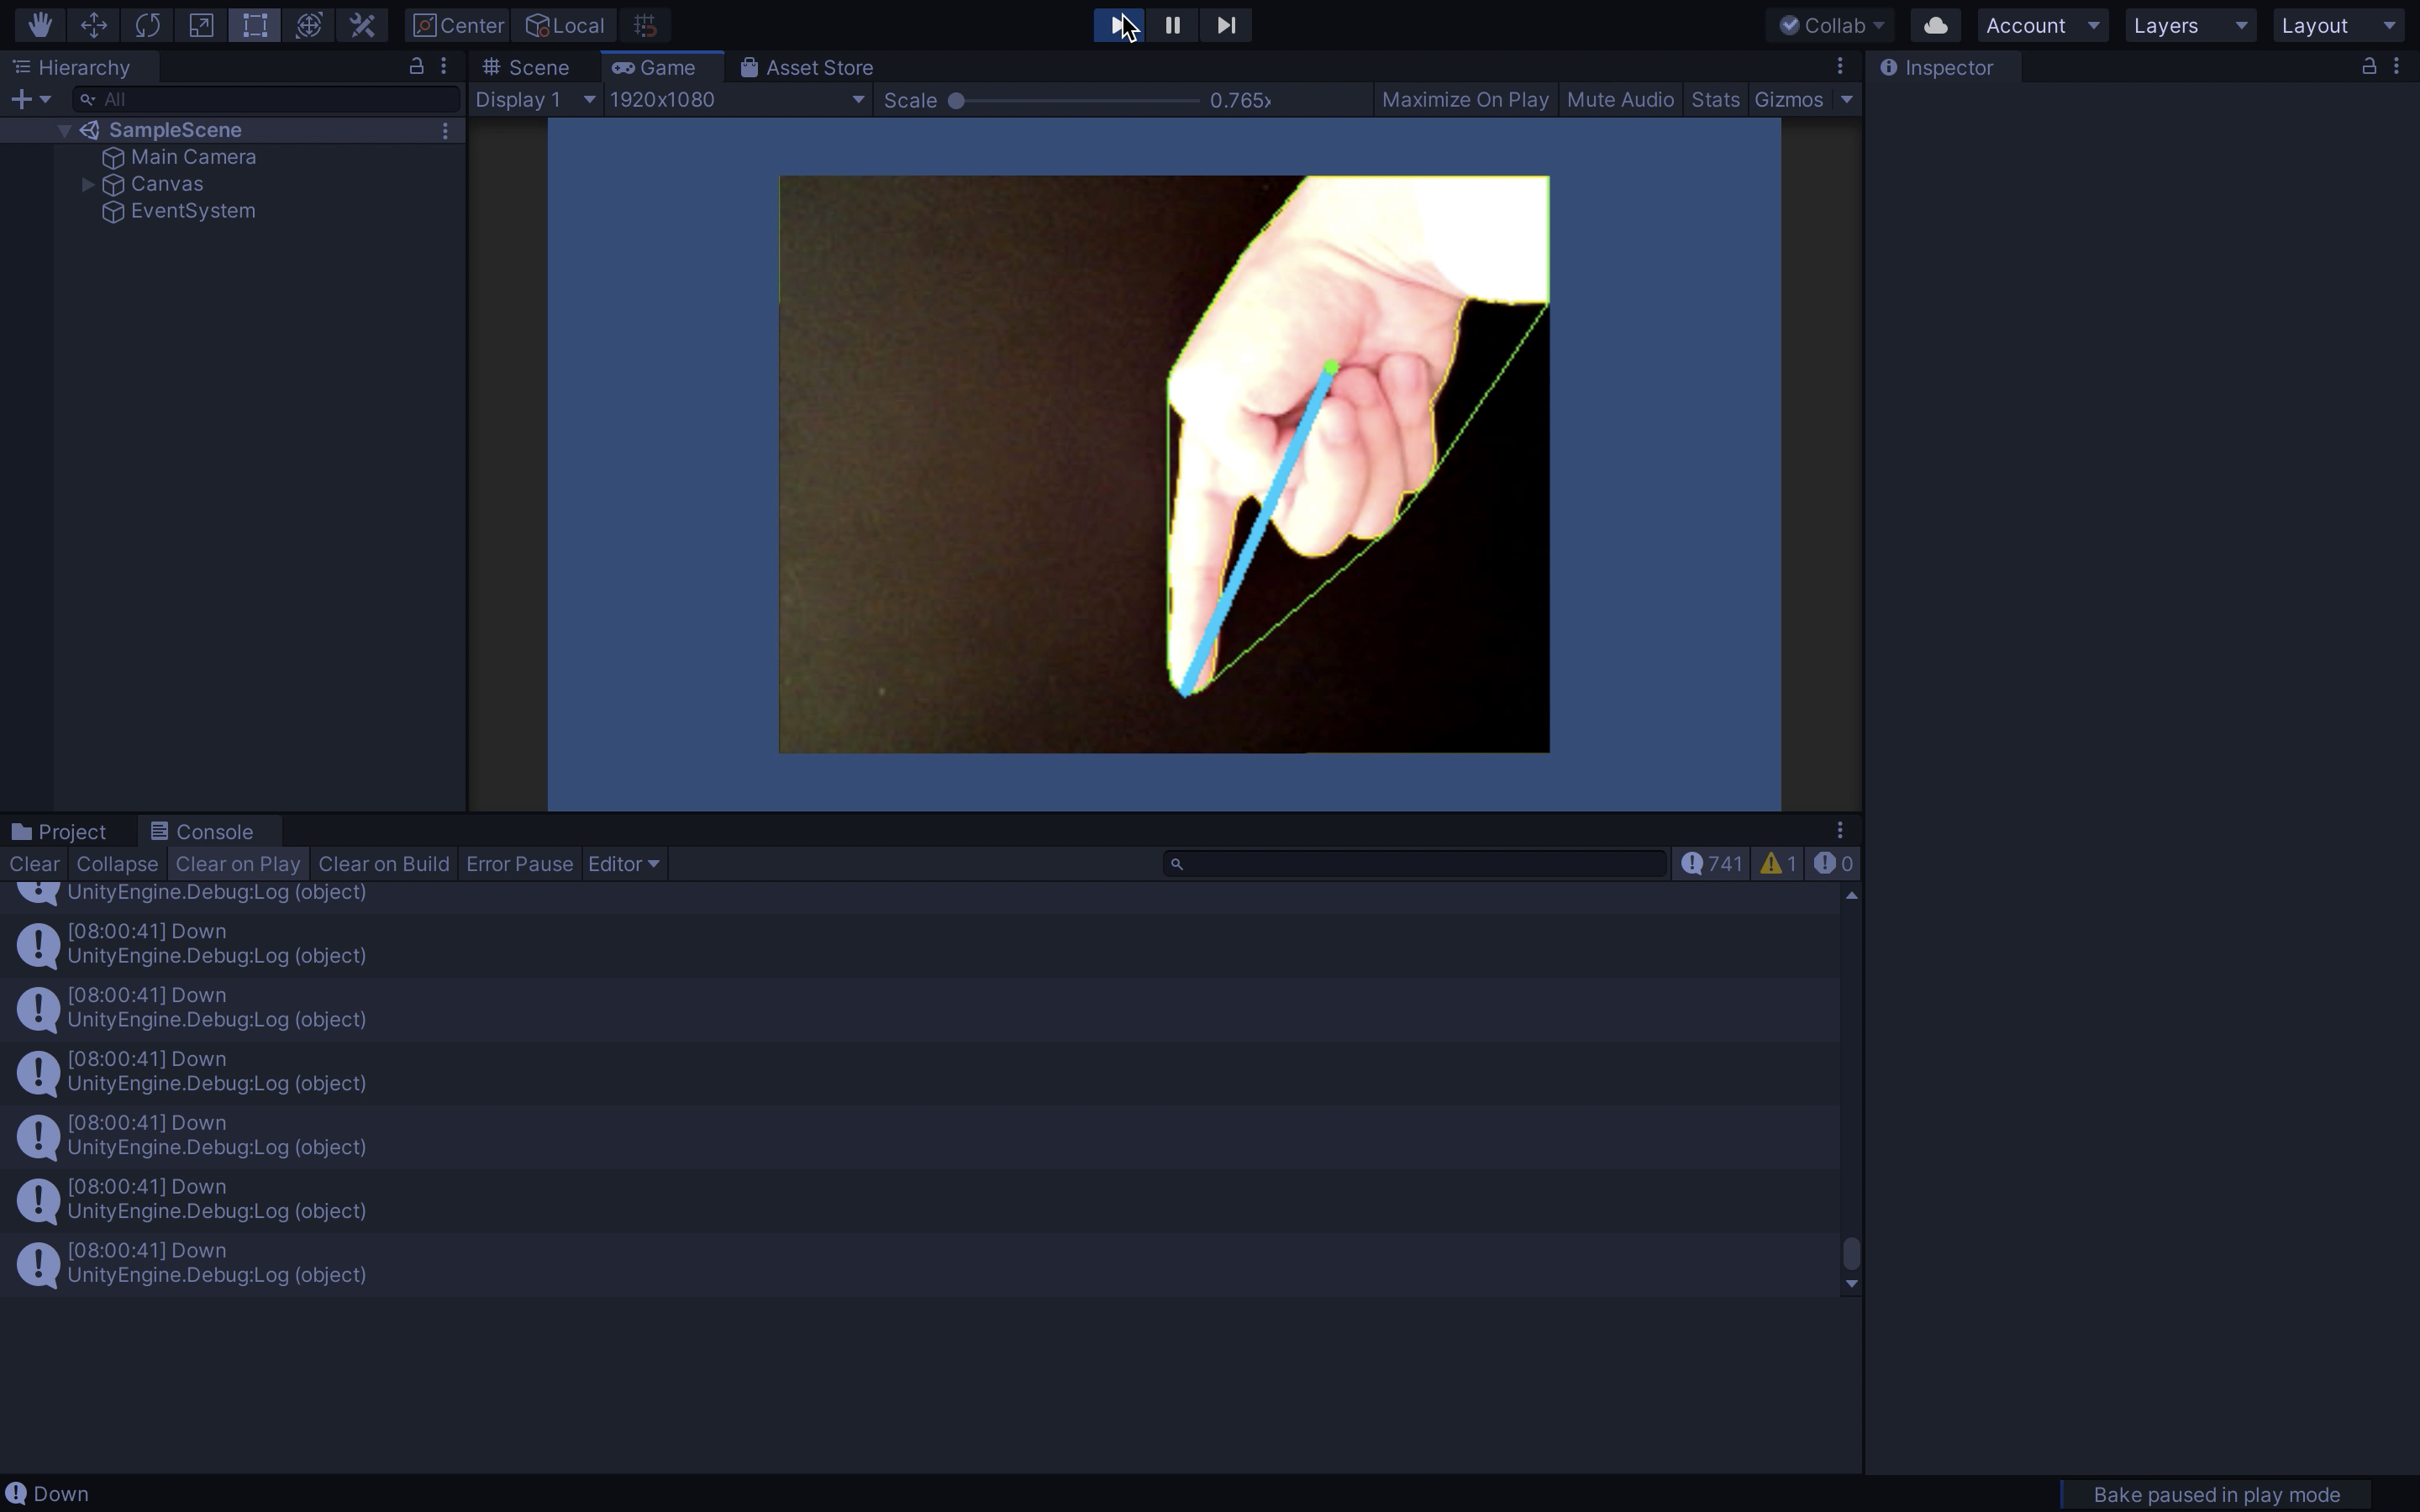
他のスクリプトからアクセスする際は、public staticで宣言しているので
HandCapture.HandDirection
でアクセスできます。
UPの場合:1, DOWNの場合:2, LEFTの場合:3, RIGHTの場合:4 が返ってきます。
照明の具合などで認識が上手くいかない場合は、
private int threshhold = 127;
の値を0~255の範囲で変えてみてください。この数値が閾値になります。
認識のアルゴリズム
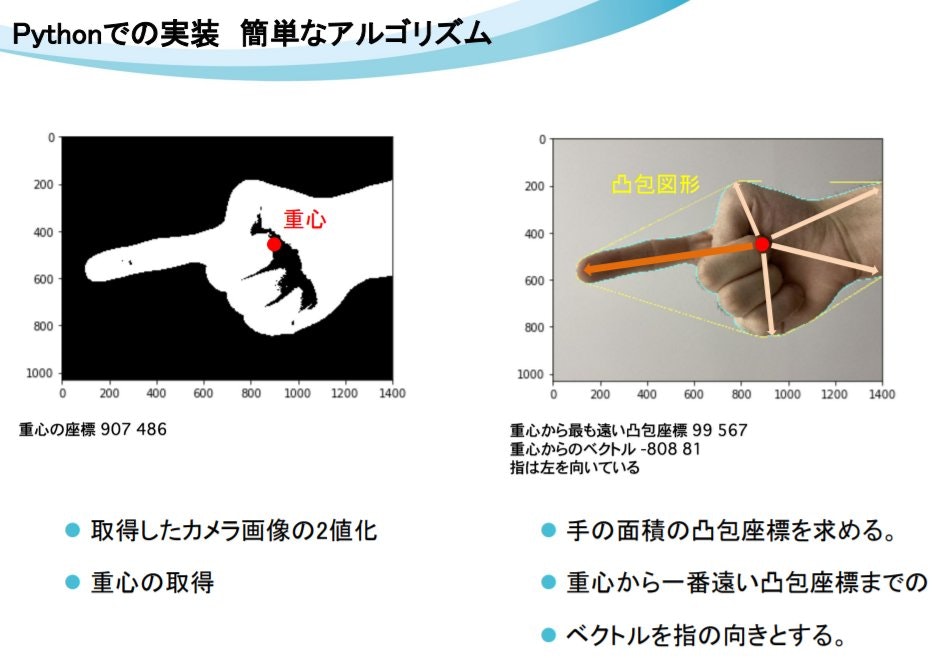
認識した手の手のシルエットの重心から、
最も遠い手の認識位置までのベクトルを指の向きにしています。
備考
この認識機能を用いたゲームが以下になります。明大祭2021で製作しました。
右下で認識させている様子が確認できると思います。
こちらのリンクから遊べるのでぜひダウンロードして、プレイしてください。
認識のアルゴリズムと閾値についての説明は以下に書いてあります。
参考記事
マスク領域の生成処理
一番面積の大きい領域を手として認識するための処理
重心を求める処理
重心から最も遠い凸包座標を求める処理
輪郭の描画