はじめに
ある日、下記のような条件によって表示する項目が変わるカスタム View を修正することになりました。(実際はもっと項目が多い)
final class PiyoView: UIStackView {

    struct Config {
        let isAlertShown: Bool
        let alert: String?
        let isInfoShown: Bool
        let info: String?
        let message: String
    }

    private var alertBackgroundView: UIView = {
        let view = UIView()
        view.backgroundColor = UIColor(named: "alert_red_bg")
        view.translatesAutoresizingMaskIntoConstraints = false
        return view
    }()

    private var alertContainerView: UIStackView = {
        let stack = UIStackView()
        stack.axis = .horizontal
        stack.spacing = 8
        stack.alignment = .center
        stack.translatesAutoresizingMaskIntoConstraints = false
        return stack
    }()

    private var alertImageView: UIImageView = {
        let image = UIImageView()
        image.tintColor = UIColor(named: "alert_red")
        if #available(iOS 13.0, *) {
            image.image = UIImage(systemName: "exclamationmark.shield.fill")
            image.translatesAutoresizingMaskIntoConstraints = false
            NSLayoutConstraint.activate([
                image.heightAnchor.constraint(equalToConstant: 25),
                image.widthAnchor.constraint(equalToConstant: 25)
            ])
        } else {
            // Fallback on earlier versions
        }
        return image
    }()

    private var alertLabel: UILabel = {
        let label = UILabel()
        label.textColor = UIColor(named: "alert_red")
        label.font = .systemFont(ofSize: 16)
        label.numberOfLines = 0
        label.translatesAutoresizingMaskIntoConstraints = false
        label.setContentHuggingPriority(.init(750), for: .vertical)
        return label
    }()

    private var infoBackgroundView: UIView = {
        let view = UIView()
        view.backgroundColor = UIColor(named: "info_blue_bg")
        view.translatesAutoresizingMaskIntoConstraints = false
        return view
    }()

    private var infoContainerView: UIStackView = {
        let stack = UIStackView()
        stack.axis = .horizontal
        stack.spacing = 8
        stack.alignment = .center
        stack.translatesAutoresizingMaskIntoConstraints = false
        return stack
    }()

    private var infoImageView: UIImageView = {
        let image = UIImageView()
        image.tintColor = UIColor(named: "info_blue")
        if #available(iOS 13.0, *) {
            image.image = UIImage(systemName: "info.circle.fill")
            image.translatesAutoresizingMaskIntoConstraints = false
            NSLayoutConstraint.activate([
                image.heightAnchor.constraint(equalToConstant: 25),
                image.widthAnchor.constraint(equalToConstant: 25)
            ])
        } else {
            // Fallback on earlier versions
        }
        return image
    }()

    private var infoLabel: UILabel = {
        let label = UILabel()
        label.textColor = UIColor(named: "info_blue")
        label.font = .systemFont(ofSize: 16)
        label.numberOfLines = 0
        label.translatesAutoresizingMaskIntoConstraints = false
        label.setContentHuggingPriority(.init(750), for: .vertical)
        return label
    }()

    private var messageBackgroundView: UIView = {
        let view = UIView()
        view.backgroundColor = .white
        view.translatesAutoresizingMaskIntoConstraints = false
        return view
    }()

    private var messageContainerView: UIStackView = {
        let stack = UIStackView()
        stack.axis = .horizontal
        stack.spacing = 8
        stack.alignment = .center
        stack.translatesAutoresizingMaskIntoConstraints = false
        return stack
    }()

    private var messageLabel: UILabel = {
        let label = UILabel()
        label.font = .systemFont(ofSize: 12)
        label.numberOfLines = 0
        label.translatesAutoresizingMaskIntoConstraints = false
        return label
    }()

    override init(frame: CGRect) {
        super.init(frame: .zero)
        commonInit()
    }

    required init(coder: NSCoder) {
        super.init(coder: coder)
        commonInit()
    }

    private func commonInit() {
        axis = .vertical
        spacing = 0

        alertContainerView.addArrangedSubview(alertImageView)
        alertContainerView.addArrangedSubview(alertLabel)
        alertBackgroundView.addSubview(alertContainerView)
        addArrangedSubview(alertBackgroundView)
        NSLayoutConstraint.activate([
            alertContainerView.topAnchor.constraint(equalTo: alertBackgroundView.topAnchor, constant: 8),
            alertContainerView.bottomAnchor.constraint(equalTo: alertBackgroundView.bottomAnchor, constant: -8),
            alertContainerView.leadingAnchor.constraint(equalTo: alertBackgroundView.leadingAnchor, constant: 16),
            alertContainerView.trailingAnchor.constraint(equalTo: alertBackgroundView.trailingAnchor, constant: -16)
        ])

        infoContainerView.addArrangedSubview(infoImageView)
        infoContainerView.addArrangedSubview(infoLabel)
        infoBackgroundView.addSubview(infoContainerView)
        addArrangedSubview(infoBackgroundView)
        NSLayoutConstraint.activate([
            infoContainerView.topAnchor.constraint(equalTo: infoBackgroundView.topAnchor, constant: 8),
            infoContainerView.bottomAnchor.constraint(equalTo: infoBackgroundView.bottomAnchor, constant: -8),
            infoContainerView.leadingAnchor.constraint(equalTo: infoBackgroundView.leadingAnchor, constant: 16),
            infoContainerView.trailingAnchor.constraint(equalTo: infoBackgroundView.trailingAnchor, constant: -16)
        ])

        messageContainerView.addArrangedSubview(messageLabel)
        messageBackgroundView.addSubview(messageContainerView)
        addArrangedSubview(messageBackgroundView)
        NSLayoutConstraint.activate([
            messageContainerView.topAnchor.constraint(equalTo: messageBackgroundView.topAnchor, constant: 8),
            messageContainerView.bottomAnchor.constraint(equalTo: messageBackgroundView.bottomAnchor, constant: -8),
            messageContainerView.leadingAnchor.constraint(equalTo: messageBackgroundView.leadingAnchor, constant: 16),
            messageContainerView.trailingAnchor.constraint(equalTo: messageBackgroundView.trailingAnchor, constant: -16)
        ])
    }

    func configure(_ config: Config) {
        alertBackgroundView.isHidden = !config.isAlertShown
        alertLabel.text = config.alert
        infoBackgroundView.isHidden = !config.isInfoShown
        infoLabel.text = config.info
        messageLabel.text = config.message
    }
}
いや!xib ねーし表示パターン多過ぎてわかんねぇーよ!!ってなりました![]()
チェックめんどくさいなぁと思ってたらそういえば以前レイアウトチェックに Xcode Previews 使ってるっていうのを聞いたので今回導入してみました。
問題
Xcode Previews を導入するには import SwiftUI する必要があるのですが該当プロジェクトの Deployment Target が iOS 12 。。。
解決策
こちら Xcode Previewsを用いたUIKitベースのプロジェクトの開発効率化 を参考に Preview 用ターゲットを追加することで実現できました![]()
導入方法
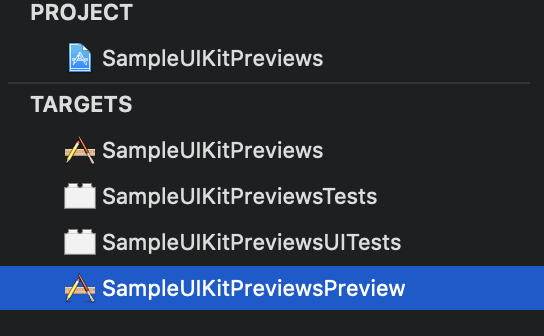
- Duplicate でターゲットを複製
- ターゲット名を変更(ex. ~Preview とか)
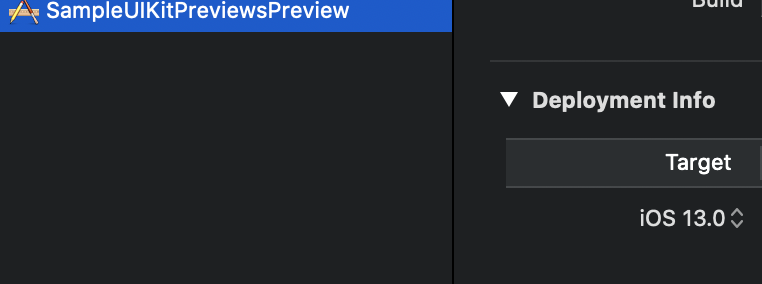
 3. Deployment Target を iOS 13.0 にする
 4. Preview 用ディレクトリ作成
5. 上記ディレクトリに Info.plist 移動
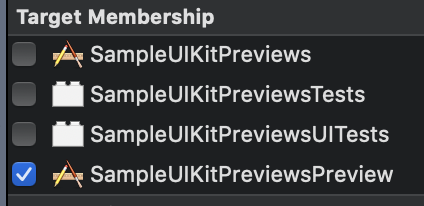
6. 上記ディレクトリに PiyoViewPreviews.swift 追加(Target Membership は Preview 用のみにする)


PiyoViewPreviews.swift はこんな感じ。
import SwiftUI

struct PiyoViewWrapper: UIViewRepresentable {

    let config: PiyoView.Config
    init(config: PiyoView.Config) {
        self.config = config
    }
    func makeUIView(context: UIViewRepresentableContext<PiyoViewWrapper>) -> PiyoView {
        return PiyoView()
    }
    func updateUIView(_ uiView: PiyoView, context: UIViewRepresentableContext<PiyoViewWrapper>) {
        uiView.configure(config)
    }
}

struct PiyoViewWrapper_Previews: PreviewProvider {
    static var previews: some View {
        Group {
            PiyoViewWrapper(config: .init(isAlertShown: true, alert: "アラート", isInfoShown: true, info: "インフォメーション", message: "メッセージ")).previewDisplayName("全表示")

            PiyoViewWrapper(config: .init(isAlertShown: false, alert: nil, isInfoShown: true, info: "インフォメーション", message: "メッセージ")).previewDisplayName("アラート非表示")

            PiyoViewWrapper(config: .init(isAlertShown: true, alert: "アラート", isInfoShown: false, info: nil, message: "メッセージ")).previewDisplayName("インフォ非表示")

            PiyoViewWrapper(config: .init(isAlertShown: false, alert: nil, isInfoShown: false, info: nil, message: "メッセージ")).previewDisplayName("メッセージのみ表示")

            PiyoViewWrapper(config: .init(isAlertShown: true, alert: "アラート\nアラート", isInfoShown: true, info: "インフォメーション\nインフォメーション", message: "メッセージ\nメッセージ")).previewDisplayName("複数行表示")

        }.previewLayout(.fixed(width: 375, height: 160))
    }
}
これで Previews を起動するとこんな感じ

パラメータを変更すればすぐに反映されるしサイズを変えたりして (.previewLayout(.fixed(width: 375, height: 160)) <- ここ)すぐに SE 用とかも確認できる![]()
元のソースはいじらなくていいしすばらしい![]()
その他Tips(2020/07/02追記)
ダークモード表示
struct PiyoViewWrapper_Previews: PreviewProvider {
    static var previews: some View {
        Group {
            PiyoViewWrapper(config: .init(isAlertShown: true, alert: "アラート", isInfoShown: true, info: "インフォーメーション", message: "メッセージ"))
                .environment(\.colorScheme, .dark)
                .previewDisplayName("全表示・ダークモード")

            PiyoViewWrapper(config: .init(isAlertShown: true, alert: "アラート", isInfoShown: true, info: "インフォーメーション", message: "メッセージ"))
                .environment(\.colorScheme, .light)
                .previewDisplayName("全表示・ライトモード")
        }.previewLayout(.fixed(width: 375, height: 160))
    }
}
上記のように .environment(\.colorScheme, .dark) でダークモード表示もできる。
こんな感じ

ローカライズ表示
残念ながらローカライズは LocalizedStringKey を使わないといけないみたいなのであきらめました![]()
こんなんやってみたけど無理だった...
extension String {
    func localized() -> String {
        return NSLocalizedString(self, comment: "")
    }
}

struct PiyoViewWrapper_Previews: PreviewProvider {
    static var previews: some View {
        Group {
            PiyoViewWrapper(config: .init(isAlertShown: true, alert: "alert".localized(), isInfoShown: true, info: "info".localized(), message: "message".localized()))
                .environment(\.locale, .init(identifier: "ja"))
                .previewDisplayName("全表示")
        }.previewLayout(.fixed(width: 375, height: 160))
    }
}
どうしても Previews でみたければ Edit Scheme... -> Run -> Options -> Application Language を変えてみるしかないと思います。

Segmentation fault 11
Segmentation fault 11...ビルドはできるけど Xcode Previews はこんなエラーでむり...っていうことがありました。きっと運がよければ Derived Data 削除とかクリーンでいけるかもしれませんが私はむりだったので Compile Sources からファイルを全部削除して Previews に必要なものだけ追加するようにするととりあえず動きました。(Segmentation fault 11 <- こいつはほんとにわからない。。。)

Xcode Previewsが消えた場合
Xcode Previews が消えた場合は右上の Adjust Editor Options -> Canvas で表示できます。

ターゲットを追加しない方法(2020/07/07追記)
ターゲットを追加しない方法を教わったので追記します。
PiyoView.swift とかに下記のように書くとターゲットを追加しなくても Deployment Target が iOS 12 でも Xcode Previews が使えます![]()
# if canImport(SwiftUI)
import SwiftUI

@available(iOS 13.0, *)
struct PiyoViewWrapper: UIViewRepresentable {

    let config: PiyoView.Config
    init(config: PiyoView.Config) {
        self.config = config
    }
    func makeUIView(context: UIViewRepresentableContext<PiyoViewWrapper>) -> PiyoView {
        return PiyoView(frame: .zero)
    }
    func updateUIView(_ uiView: PiyoView, context: UIViewRepresentableContext<PiyoViewWrapper>) {
        uiView.configure(config)
    }
}

@available(iOS 13.0, *)
struct PiyoViewWrapper_Previews: PreviewProvider {
    static var previews: some View {
        Group {
            PiyoViewWrapper(config: .init(isAlertShown: true, alert: "アラート", isInfoShown: true, info: "インフォーメーション", message: "メッセージ")).environment(\.colorScheme, .dark).previewDisplayName("全表示・ダークモード")

            PiyoViewWrapper(config: .init(isAlertShown: true, alert: "アラート", isInfoShown: true, info: "インフォーメーション", message: "メッセージ")).environment(\.colorScheme, .light).previewDisplayName("全表示・ライトモード")

            PiyoViewWrapper(config: .init(isAlertShown: false, alert: nil, isInfoShown: true, info: "インフォーメーション", message: "メッセージ")).previewDisplayName("アラート非表示")

            PiyoViewWrapper(config: .init(isAlertShown: true, alert: "アラート", isInfoShown: false, info: nil, message: "メッセージ")).previewDisplayName("インフォ非表示")

            PiyoViewWrapper(config: .init(isAlertShown: false, alert: nil, isInfoShown: false, info: nil, message: "メッセージ")).previewDisplayName("メッセージのみ表示")

            PiyoViewWrapper(config: .init(isAlertShown: true, alert: "アラート\nアラート", isInfoShown: true, info: "インフォメーション\nインフォメーション", message: "メッセージ\nメッセージ")).previewDisplayName("複数行表示")

        }.previewLayout(.fixed(width: 375, height: 160))
    }
}
# endif
#if canImport とかあったんだ。。。![]() と思ったら元記事にも書いてました
と思ったら元記事にも書いてました![]()
iOS 12 の実機で確認したところ下記のエラーがでてクラッシュしました。。。
dyld: Library not loaded: /System/Library/Frameworks/SwiftUI.framework/SwiftUI
  Referenced from: /var/containers/Bundle/Application/F419CA23-0C94-49EB-B457-AE53F8788672/SampleUIKitPreviews.app/SampleUIKitPreviews
  Reason: image not found
Other Linker Flags に -weak_framework SwiftUI を設定すると回避できるようです。あまりやりたくない場合はやっぱりターゲット追加のがよさそうです。
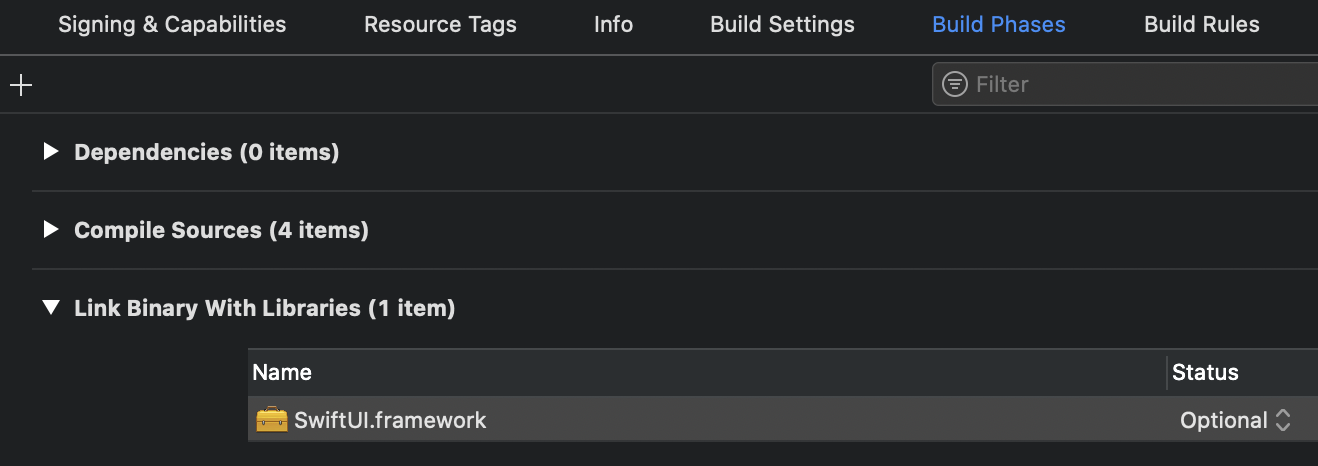
別の回避策として SwiftUI.framework を Optional にする方法で回避できました![]()

おわりに
いちいちシミュレータ起動しなくていいし快適!今まで SwiftUI じゃねぇし Previews とかしらねぇわと思ってましたがわりといいんじゃないかと思います![]()