概要
Androiderのみなさま、Jetpack Composeはもう使いましたか?
今年(2021年)の7月末にようやく安定版(1.0)が出て、界隈でいっそう盛り上がりを増していますね。
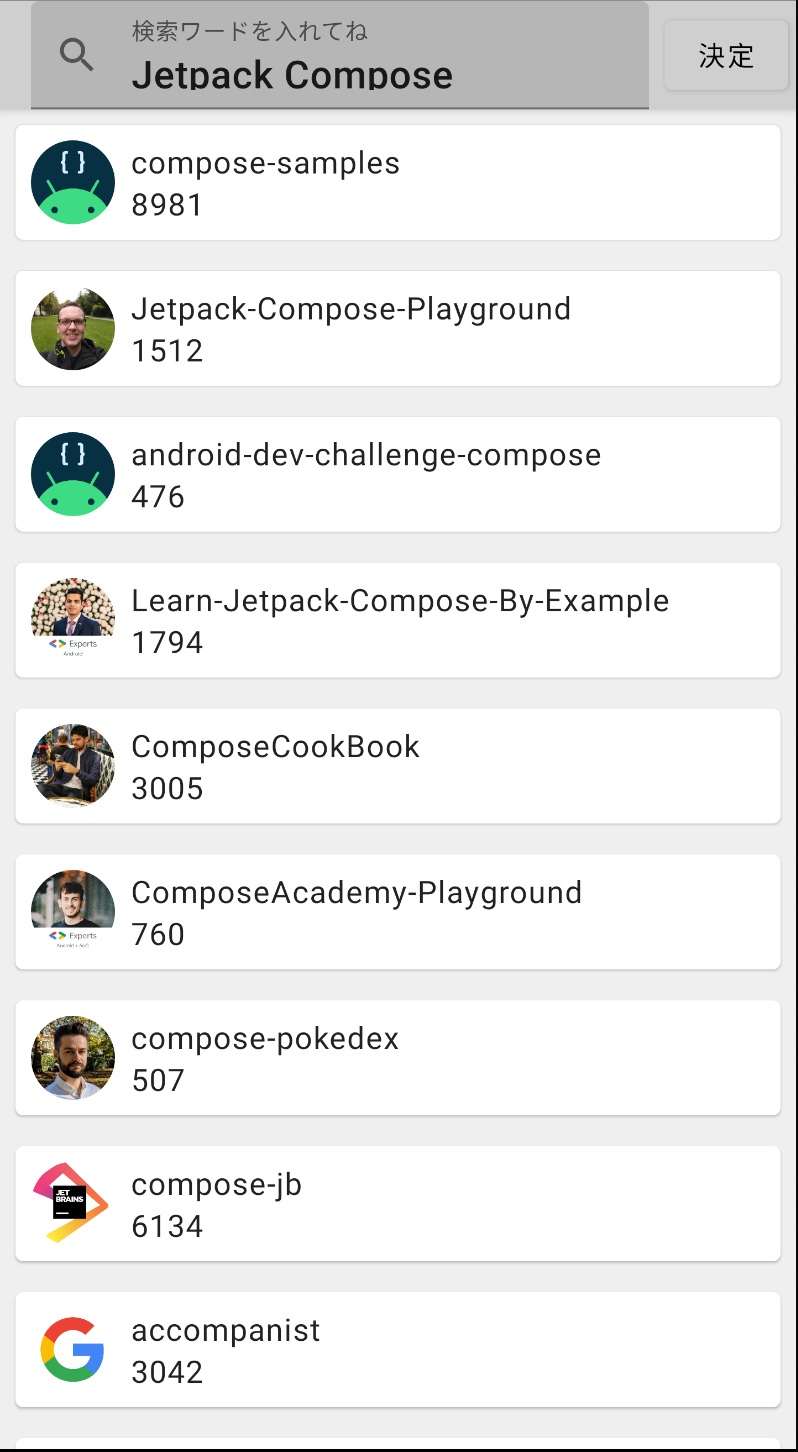
今回はComposeを使ってGithubリポジトリを検索するアプリを作成してみました。
できたもの
アプリを開くと検索画面を表示し、最初は「Jetpack Compose」で検索します。
リポジトリをタップするとWebViewで該当リポジトリを表示します。
デザインはMaterial Designからグレー色を適当に散りばめてますが、少し配色ミスったかも😓

構成
- Clean Architecture
- DIにHiltを使用
- View側はComposeとNavigationを使用
- 画像ライブラリにCoilを使用
- Coroutineをベースにしているため動作が軽いです
- Composeにも対応しています!
ポイント
ここでは特徴的な実装について紹介します。
Composeの個々のコンポーネントの説明は省きますが、後追いで追加するかも。
ViewModelのデータを用いてComposeを更新する
ComposeではState<T>オブジェクトを用いて再描画を行います。
Coroutine Flow用の拡張関数であるcollectAsStateを使うと、ViewModelが公開したデータをそのままStateオブジェクトに変換することができるため、これをCompose側で使うことで、ViewModel側でデータを更新する度に再描画をしてくれます。
また拡張関数は以下のものが用意されています。
- StateFlow用の拡張関数である
collectAsState - LiveData用の
observeAsState(runtime-livedataのライブラリが必要) - Rx用の
subscribeAsState(runtime-rxjava2のライブラリが必要)
val uiState by viewModel.uiState.collectAsState()

    HomeScreen(
        uiState = uiState,
        ~略~
    )
Bundleみたいに次のScreenにdata classを渡す
Bundleで次のActivityに値を渡すように、data classを渡す方法ですが、
- Action側でdata classをMoshiなどを使ってjson化し、Stringとして渡す
- NavHost側で受け取ったStringを元に戻してからScreenに渡す
で実現できます。なお、URLなどが含まれる場合のために、クエリパラメータ方式でStringを受け取っています。
class MainActions(navController: NavHostController) {
    val navigateToRepositoryDetail: (RepositoryEntity) -> Unit = { entity ->
        val repositoryJson = Moshi.Builder().add(KotlinJsonAdapterFactory()).build().adapter(RepositoryEntity::class.java).toJson(entity)
        navController.navigate(MainDestinations.REPOSITORY_DETAIL_ROUTE + "/?repository=" + repositoryJson)
    }
}

~~略~~

NavHost(
        navController = navController,
        startDestination = startDestination
    ) {
        composable(
            route = "${MainDestinations.REPOSITORY_DETAIL_ROUTE}/?repository={repository}",
            arguments = listOf(navArgument("repository") { type = NavType.StringType })
        ) { backStackEntry ->
            backStackEntry.arguments?.getString("repository")?.let { repositoryJson ->
                Moshi.Builder().add(KotlinJsonAdapterFactory()).build().adapter(RepositoryEntity::class.java).fromJson(repositoryJson)?.let {
                    RepositoryDetailScreen(repository = it, onBackPress = actions.upPress)
                }
            }
        }
    }
SearchBarの実装について
SearchBarはTopAppBarのtitle部分にTextFieldを突っ込むだけで実装可能です。
内部のtextはrememberで保持することができます。
    TopAppBar(
        title = {
            // SearchBar
            Row(
                verticalAlignment = Alignment.CenterVertically,
            ) {
                TextField(
                    modifier = Modifier.weight(weight = 1f),
                    leadingIcon = {
                        Icon(
                            imageVector = Icons.Filled.Search,
                            contentDescription = "Search Icon"
                        )
                    },
                    value = text,
                    onValueChange = {
                        text = it
                    },
                    maxLines = 1,
                    singleLine = true,
                )
                Button(onClick = { onSearch(text) }) {
                    Text(text = "決定")
                }
            }
        },
    )
もっと綺麗なSearchBarの実装が見たい方は、airbnbのShowkaseライブラリにいい感じの実装が置いてあります。
ページング処理について
GoogleとしてはPagingライブラリを使うのを理想形にしてそうな予感がしますが、執筆時点でpaging-composeライブラリがalpha版ということでしたので、今回は海外兄貴のListStateを使った実装を参考にしました。
実際のコードを見ていただくとわかる通り、RecyclerViewのScrollListenerを使った方法と同じ手法です。実際にやっていることは以下の通りです。
-
rememberとderivedStateOfで、LazyListStateからLoadMoreの判定Stateを作成する -
LaunchedEffectはLoadMoreの判定Stateの変化を検知して新しいコルーチンを作成する -
snapshotFlowでStateをFlowに変換して、onLoadMoreを発火させる
@Composable
fun LazyListState.OnBottomReached(
    onLoadMore : () -> Unit
) {
    val shouldLoadMore = remember {
        derivedStateOf {
            val lastVisibleItem = layoutInfo.visibleItemsInfo.lastOrNull()
                ?:
                return@derivedStateOf true

            lastVisibleItem.index >=  layoutInfo.totalItemsCount - 3
        }
    }

    LaunchedEffect(shouldLoadMore){
        snapshotFlow { shouldLoadMore.value }
            .collect { if (it) onLoadMore() }
    }
}
所感
※わたしはFlutter民でもあるので、Flutterと比べた感想多めです😓
一連の実装を見てみると、Presentation層はFlutterに近い印象を受けました。ViewModelからStateFlowで公開→collectAsStateで更新検知する部分なんかは、Flutterのriverpod + state_notifierを使用した構成とかなり似ていますね。
また、今回実装していく中で、もう少しプレビュー表示が早くなってくれるといいなと感じました。
FlutterはHot Reloadを採用していることもあり、実データ+実機で素早く動作確認ができるという点が非常に安心感があるのですが、Composeは従来のxml表示と同様、プレビュー設定をした上でビルドしないとレイアウトが表示されません。ビルドがもたつくと確認まで時間がかかります。
この辺は技術的な課題もあるとは思いますが、テキパキ修正できるようにしてくれると助かるな〜という気持ちがありました。
とはいえ、Googleは今後Jetpack Composeに力を入れていきそうなので、その辺りの改善も含め注目していきたいですね。